Kick Off the Data Journey
Learning Objectives
After completing this unit, you’ll be able to:
- Explain what a dataset is and the advantages it brings to data exploration.
- Describe the high-level process of creating a dataset.
- Identify your data requirements and plan your data integration.
Becoming a CRM Analytics Data Expert
You’re the Salesforce admin at DTC Electronics, and the VP of Sales just phoned you with an urgent request. The sales leadership team needs information, and they need it fast: The new CEO of DTC has called a meeting for next week to review sales performance. The VP of Sales wants a set of dashboards showing performance by rep and region that she can use to run the meeting.
At a high level, your job is to take the data that the VP of Sales needs from wherever it is and put it in a dataset.
Usually, data integration like this is an onerous task, requiring the skills of a data engineer. CRM Analytics, formerly named Tableau CRM, makes the work much easier, giving Salesforce admins a powerful way to bring data in.
This module explains the main tools for bringing data into CRM Analytics and preparing it for use. You walk through the process of bringing external and Salesforce data into CRM Analytics. You also learn how to prepare the data so you can build those dashboards that sales leadership needs—and so they can later explore the data on their own.
First, let’s cover some key concepts you need to understand to become a CRM Analytics data expert.
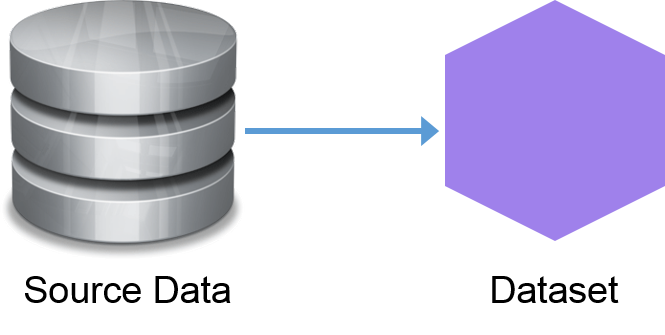
What Is a Dataset?
Think of a dataset as a box of data. Here at Salesforce, we see it as a hexagonal purple box, but hey, that’s just us. Anyone with access to this box can open it and explore the data.
A dataset can contain data from a Salesforce object, such as opportunities. Or it can contain data combined from different objects, such as opportunities, accounts, and users, and data from external sources, such as financial data. You can also create a dataset by combining data from other datasets, each, in turn containing data from multiple sources and datasets. Wow!
If you’ve used Salesforce before, you know you can go to the report builder, build a report, and view it right away. No dataset required. So why do you need a dataset in CRM Analytics? There are several great reasons.
Datasets Are Faster
Data geeks would say that Salesforce data is normalized, meaning related data in different objects is “joined” together. When you run a Salesforce report, the report engine has to pull in data from these objects as it assembles the report. Joining data is OK for a few thousand rows, but if you’re dealing with millions of rows, this process can take a while.
CRM Analytics datasets pull all the data together first, so it’s almost instantaneously available when you open a CRM Analytics dashboard. Those same data geeks would say that CRM Analytics data is denormalized, meaning that some of the preprocessing work is already done.
Datasets Make Queries Faster
Datasets compress and index their contents, so querying is super fast.
Datasets Combine Salesforce Data and External Data
Datasets let you combine such things as your Salesforce opportunity data with financial, quota, or demographic data from another system or source. This type of data combination is only possible with a Salesforce report by doing a ton of work with custom objects.
How Do You Create a Dataset?
There are two main stages in creating a dataset: extraction and preparation. Extraction, as painful as it can sound, is simply the process of bringing data into CRM Analytics. Preparation involves getting that data into a form that’s meaningful to the people exploring it. Comparing the process to cooking: extraction is taking the ingredients from your cupboards, and preparation is putting them together to make, say, a stew.
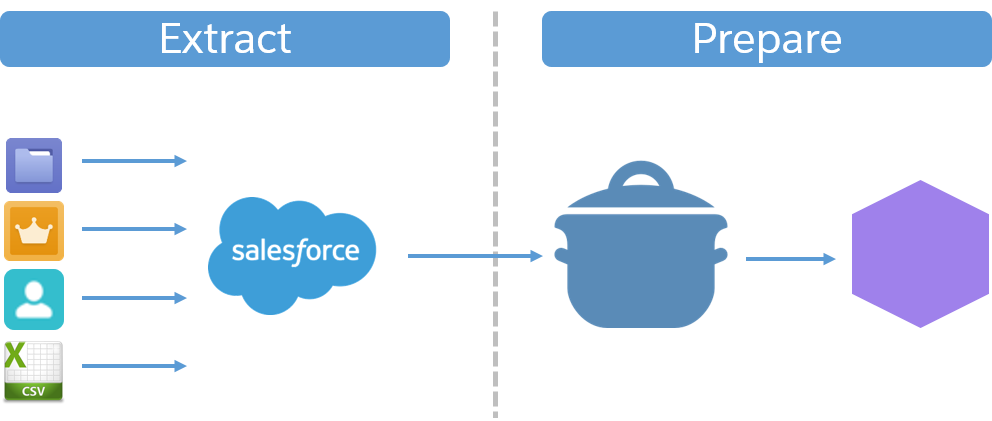
There are various ways you can extract data into CRM Analytics. You can bring in external data through a CSV file, using the CSV uploader, connectors, or the CRM Analytics API. For Salesforce data, you use a powerful tool called data sync. For preparation, use a recipe in the Data Prep visual interface.
You extract and prepare data later in this module, where we tell you more about these tools.
Plan the Data Journey
Now that you’re familiar with the key concepts, let’s talk about the planning you do before you bring data into CRM Analytics. There are two steps to planning: identifying your data requirements and mapping the data’s journey through CRM Analytics.
Step 1: Identify Your Data Requirements
To identify your data requirements, think about what data you need, where it’s located, and if it needs to be combined with other data. Fortunately, your VP of Sales has provided a list of fields that the sales leaders want to see when they explore opportunities in CRM Analytics.
- Opportunity Name
- Account Name
- Industry
- Created Date
- Billing City
- Opportunity Owner Name
- Close Date
- Billing Country
- Opportunity Owner Title
- Amount
- SIC Code
- Stage
- SIC Description
Diligent admin that you are, you spend some time poking around in Salesforce. You soon realize that these fields don’t all come from an object. There are opportunity fields, yes, but you also need to pull in fields from the Account and User objects. And SIC Description? That data isn’t in Salesforce. Looks like you have to get it from somewhere else. When you check, the VP of Sales recommends that you reach out to the Sales Operations team. As luck would have it, they can give you a CSV file of SIC code descriptions.
Your poking around has paid off. You’ve identified the fields you need and where they come from.
Opportunity |
Account |
User |
CSV File |
|---|---|---|---|
|
|
|
|
Name |
Name |
Full Name |
SIC Description |
Created Date |
Industry |
Title |
|
Close Date |
SIC Description |
||
Amount |
Billing City |
||
Stage |
Billing Country |


Step 2: Map the Data Journey
After you’ve identified each data source, you can start thinking about the journey: What route will the data take and when will it start? Timing is important here, as you have data arriving from various sources that you must combine. If data isn’t available at the right time, you can’t combine it. To help you, CRM Analytics lets you schedule your extracts and preparations so you get the data when it’s freshest and have it when you need it for preparation. The act of mapping the data journey also breaks down the process into a series of steps for you to follow.
As we haven’t yet covered the extract and prepare tools, we’ve mapped the data journey for you for this example. The map shows the steps you take as you go through this module.
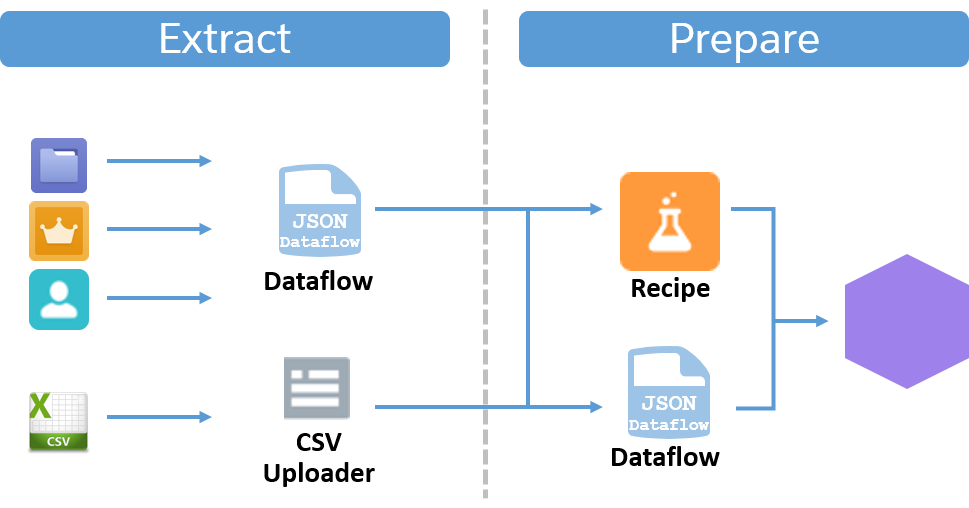
Because the SIC descriptions are in a CSV file, you use the CSV uploader to extract them. The remaining data is all in Salesforce. For that data, use data sync. You can extract your data in any order, as long as all the data is pulled from their respective sources before you get to the prepare stage.
After you extract all of your data, you use a recipe to join the three Salesforce objects and the SIC descriptions.
Let’s get started. First up, we get you set up with an org so that you can follow along, and then you run through the process of extracting external data.
Try CRM Analytics with a Developer Edition Org
A free Developer Edition org is a safe environment where you can practice the skills you’re learning. You definitely need one as you work through the challenges here on Trailhead.

Let’s get you set up so you can log in and start working with CRM Analytics.
- Go to developer.salesforce.com/promotions/orgs/analytics-de.
- Fill out the form using an active email address. Your username must also look like an email address and be unique, but it doesn’t need to be a valid email account. For example, your username can be yourname@waverocks.de, or you can use your company email domain.
- After you fill out the form, click Sign me up. A confirmation message appears.
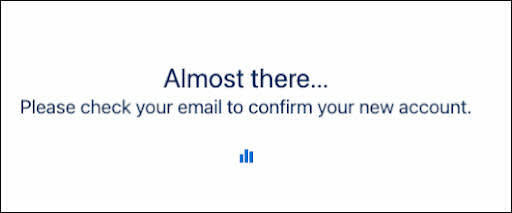
- When you receive the activation email, open it and click Verify Account.
- Complete your registration, and set your password and challenge question.
- Write down or remember your credentials. To log in and play, go to login.salesforce.com.
- You’re logged in to your CRM Analytics Developer Edition org. If you see the Welcome to Lightning Experience window, close it.
Way to go! You now have a Salesforce org with DTC Electronics sales data.
Resources