Get Started with Validation Rules
Learning Objectives
After completing this unit, you’ll be able to:
- Describe validation rules and use cases.
- Create a simple validation rule.
What Are Validation Rules?
You rely on data to run your business, and Salesforce stores a lot of that data. When that data is wrong, it’s harder to make good decisions and deliver value to your customers. That’s where validation rules come in.
Validation Rules are powerful tools on the Salesforce Platform that are used to enforce data quality and ensure that the data entered into your Salesforce org meets your requirements. They act as a safeguard, preventing users from saving records that do not follow your predefined business rules. When a user attempts to save a record, Salesforce evaluates the defined criteria in the validation rule. If the criteria are met, the record is blocked from being saved, and an error message is displayed to the user, prompting them to correct the data before proceeding.
Use Cases for Validation Rules
Validation rules are flexible by design, which means there’s no shortage on how they can be used. Here are some examples of how validation rules can help your business.
Data Format
Does your data have length, range, or format requirements? Validation rules help you keep your data clean.
Business Process Enforcement
Records in Salesforce often go through a lifecycle. For example, a Case might start out as new, get assigned to a support agent, and get resolved. At each stage of this process, certain fields might be required or only certain values should be used.
Compliance and Regulation
For organizations in regulated industries, such as healthcare or financial services, validation rules help ensure compliance with industry standards and regulations. These rules can be set up to verify data against specific criteria, helping organizations meet their legal and regulatory obligations.
Mechanics of Validation Rules
Formulas evaluate the criteria for a validation rule. If the formula results in TRUE, the error message will tell the user to correct their data. So, instead of telling the user what good data looks like directly, these rules cleverly describe the situations you definitely want to avoid.

Validation rules execute after your automation runs triggers and flows. This is important to remember because you could build automation that updates records with values that conflict with your validation rules. Doing so prevents your users from saving even when they aren’t making direct changes that violate your validation rules.
Create a Validation Rule
Ready to Get Hands-on with Validation Rules?
Launch your Trailhead Playground now to follow along and try out the steps in this module. To open your Trailhead Playground, scroll down to the hands-on challenge and click Launch. You also use the playground when it's time to complete the hands-on challenges.
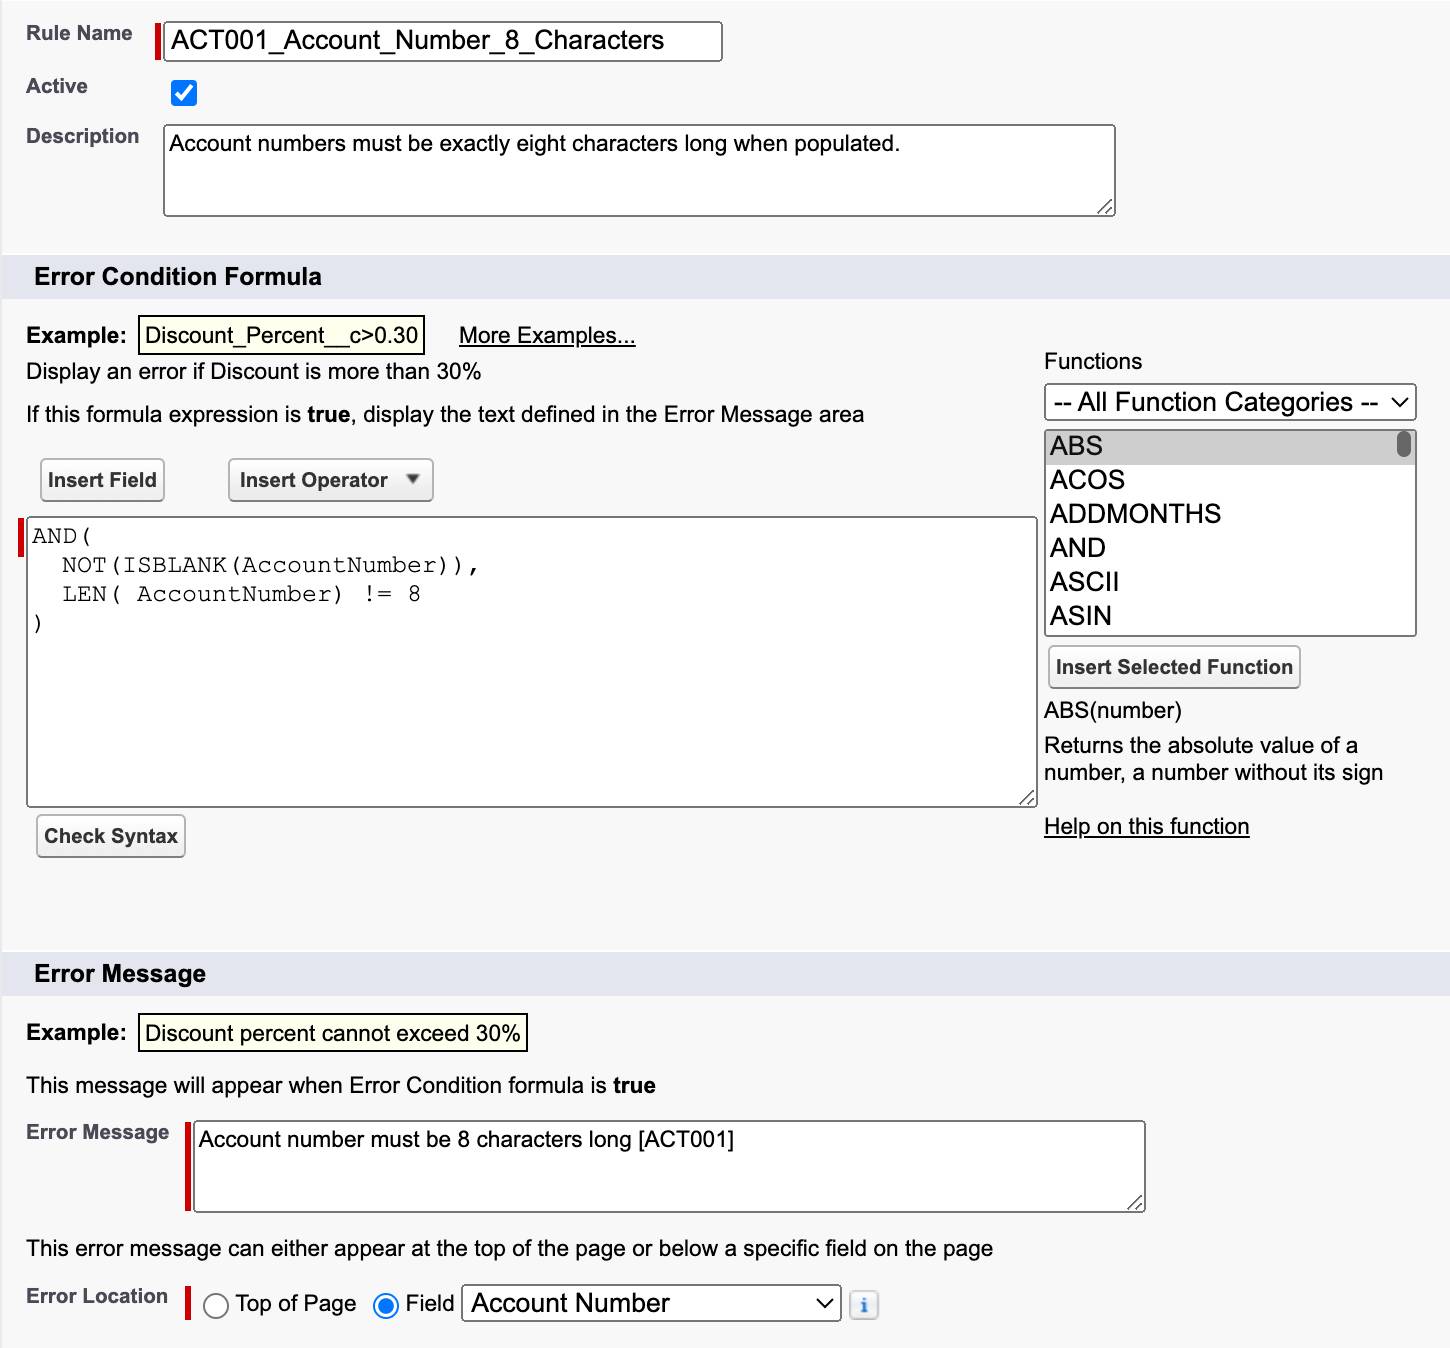
Now that you know a little more about why validation rules are used, let’s create one. In this example, you create a new validation rule that requires the account number to be exactly eight characters if it’s populated. If it isn’t populated or if the length is eight characters, then we allow the record to be saved.
- From Setup, click Object Manager.
- Click Account.
- In the left sidebar, click Validation Rules.
- Click New.
- Enter the following properties for your validation rule:
- Rule Name:
ACT001_Account_Number_8_Characters - Description:
Account numbers must be exactly eight characters long when populated. - Error Condition Formula:
AND(
  NOT(ISBLANK(AccountNumber)),
  LEN(AccountNumber) != 8
)
- Error Message:
Account number must be 8 characters long [ACT001] - Error Location: Field, Account Number
- To check your formula for errors, click Check Syntax.
- Click Save.
When complete, your validation rule should look like this.
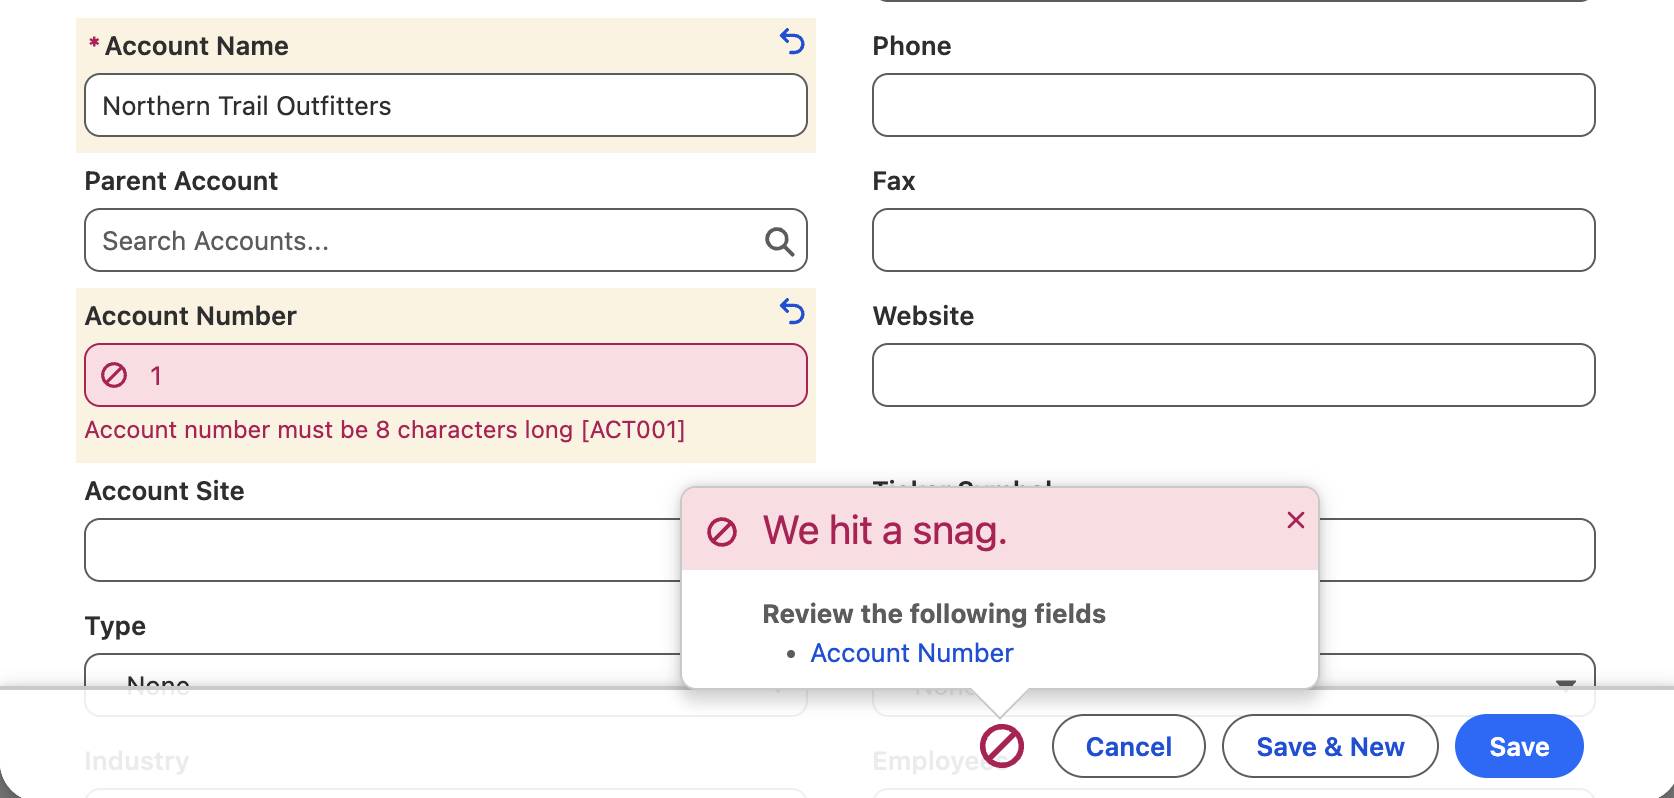
Now let’s see that validation rule in action.
- Navigate to the Sales app.
- Click the Accounts tab.
- Click New.
- Fill in the following fields:
- Account Name:
Northern Trail Outfitters - Account Number:
1
- Click Save.
The validation rule error message displays underneath the Account Number field. You can try changing the account number field to test different situations, such as no account number or an account number longer than eight characters.
Next, let’s look at some best practices to follow when building validation rules.
Resources
- Salesforce Help: Validation Rules
- Salesforce Help: Managing Validation Rules
- Salesforce Developers: Triggers and Order of Execution