Migrate Users with User Access Policies
Learning Objectives
After completing this unit, you’ll be able to:
- Create manual user access policies.
- Configure user access policies for migrating access and permissions.
Example Scenarios
As we mentioned in unit 1, user access policies can come in handy when you’re making large-scale user access changes, like migrating users from one setup to another. Some examples of this include:
- Assigning permissions using permission sets and permission set groups, instead of profiles
- Restructuring group and queue membership based on annual realignment
- Rolling out new features and granting users access via permissions and licenses
- Removing access and permissions for obsolete processes and features
For these types of changes, you create manual user access policies. You apply the policies directly to the users meeting the criteria, giving you more control over when the changes are applied. But the same benefits of user access apply. You can aggregate access and apply these changes to users in a single operation, saving you time, clicks, and effort. Plus, as always, you can easily track which users were affected.
For Ursa Major Solar, Maria Jimenez wants to migrate some of the company’s existing profiles to have a permission set- and permission set group-led access configuration. She knows that this is a user management best practice. She’s starting this work with the Support team, and wants to set up a user access policy instead of manually updating access for each member of this team.

Set Up the User Access Policy
Maria’s ready to create another user access policy, this time a manual one. The initial creation and configuration steps are the same.
- From Setup, in the Quick Find box, enter
User Access Policies, and then select User Access Policies.
- Click New User Access Policy.
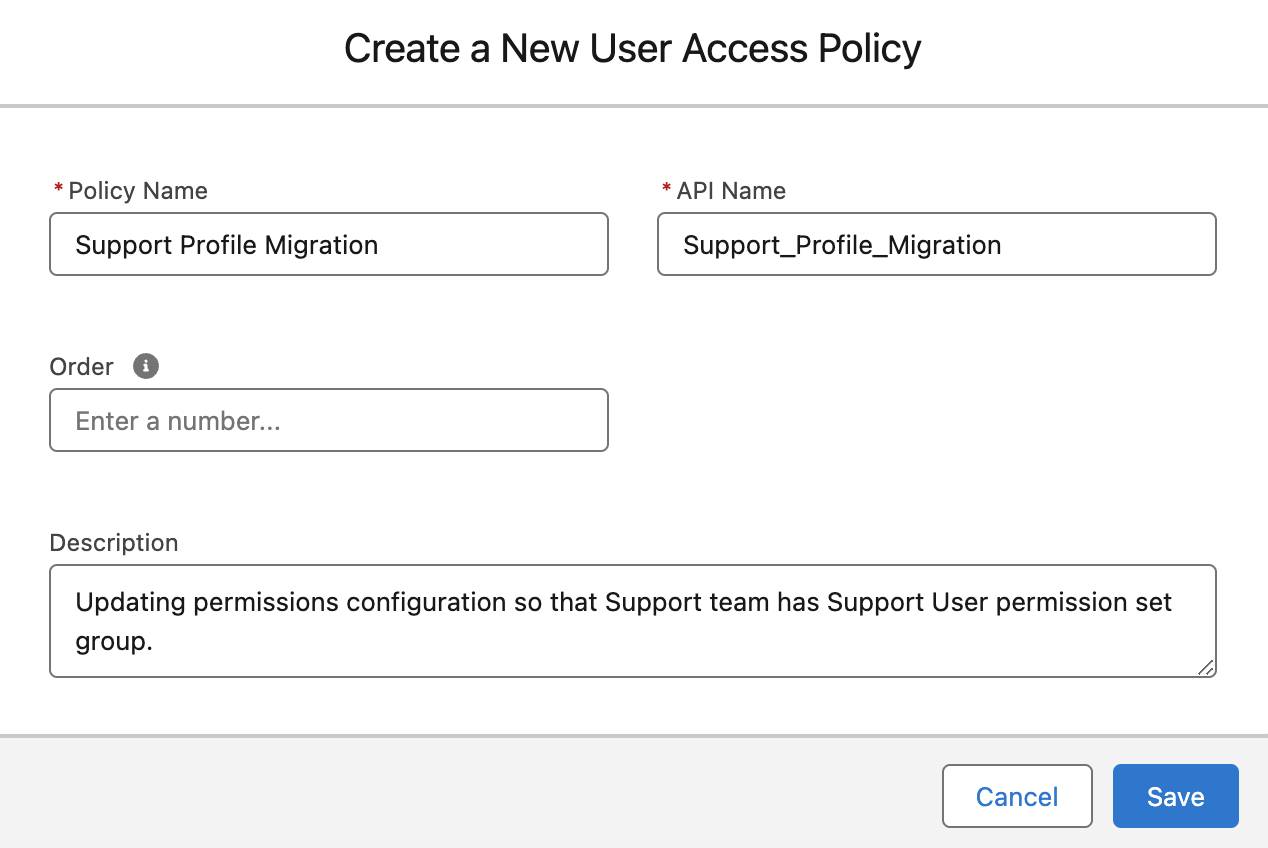
- Enter a value for the Policy Name. Maria enters
Support Profile Migration. The API Name auto-populates.
- Because this policy is manual, not active, she skips adding a value for Order.
- She enters a Description.
- Then click Save.
Like before, Maria sets up the user criteria to target the Support Team and then configures the actions.
- On the user access policy’s detail page, click Edit Criteria to configure the policy’s user criteria filters and actions.
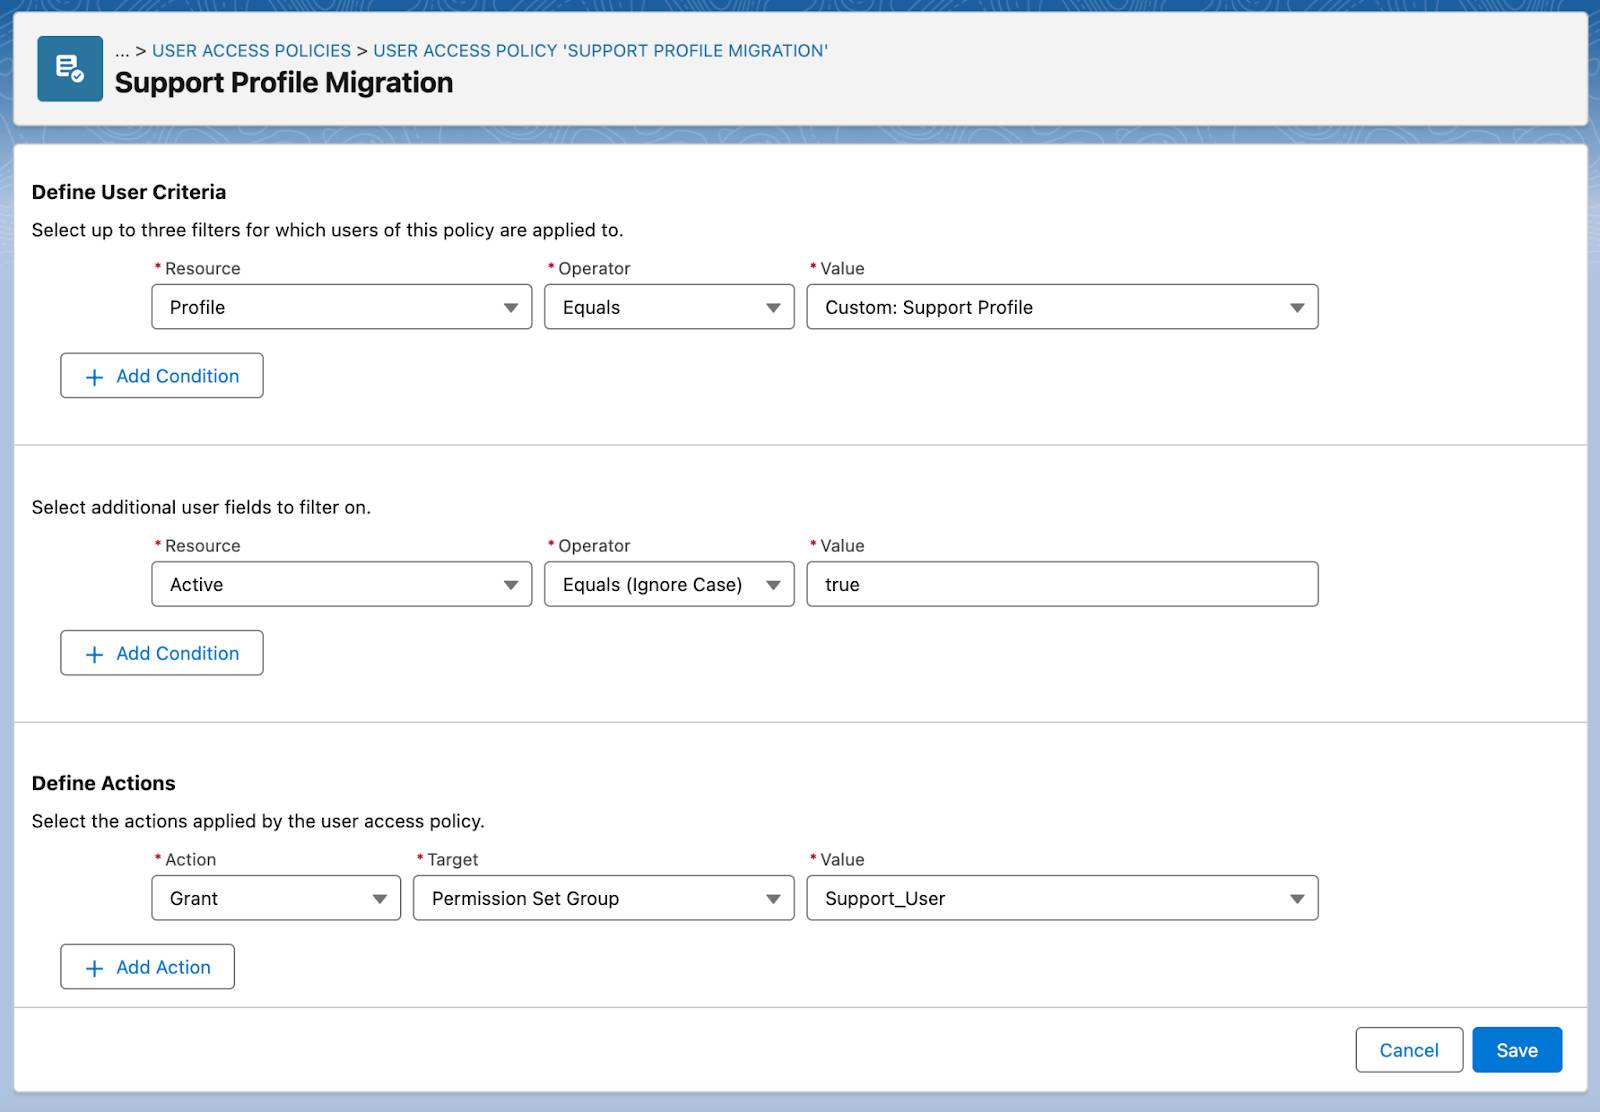
- Under Define User Criteria, set up the filter:
- Resource: Profile
- Operator: Equals
- Value: Custom: Support Profile
- Resource: Profile
- In the “Select additional user fields to filter on” section, set up the filter:
- Resource: Active
- Operator: Equals (Ignore Case)
- Value: True
- Resource: Active
- Under Define Actions, grant the Support User permission set group:
- Action: Grant
- Target: Permission Set Group
- Value: Support_User
- Action: Grant
- Click Save.

Did that process seem familiar? You’ll soon be a pro at creating user access profiles. Pay attention to the next steps, though, because applying the policy is a bit different for manual user access policies.
Apply the User Access Policy
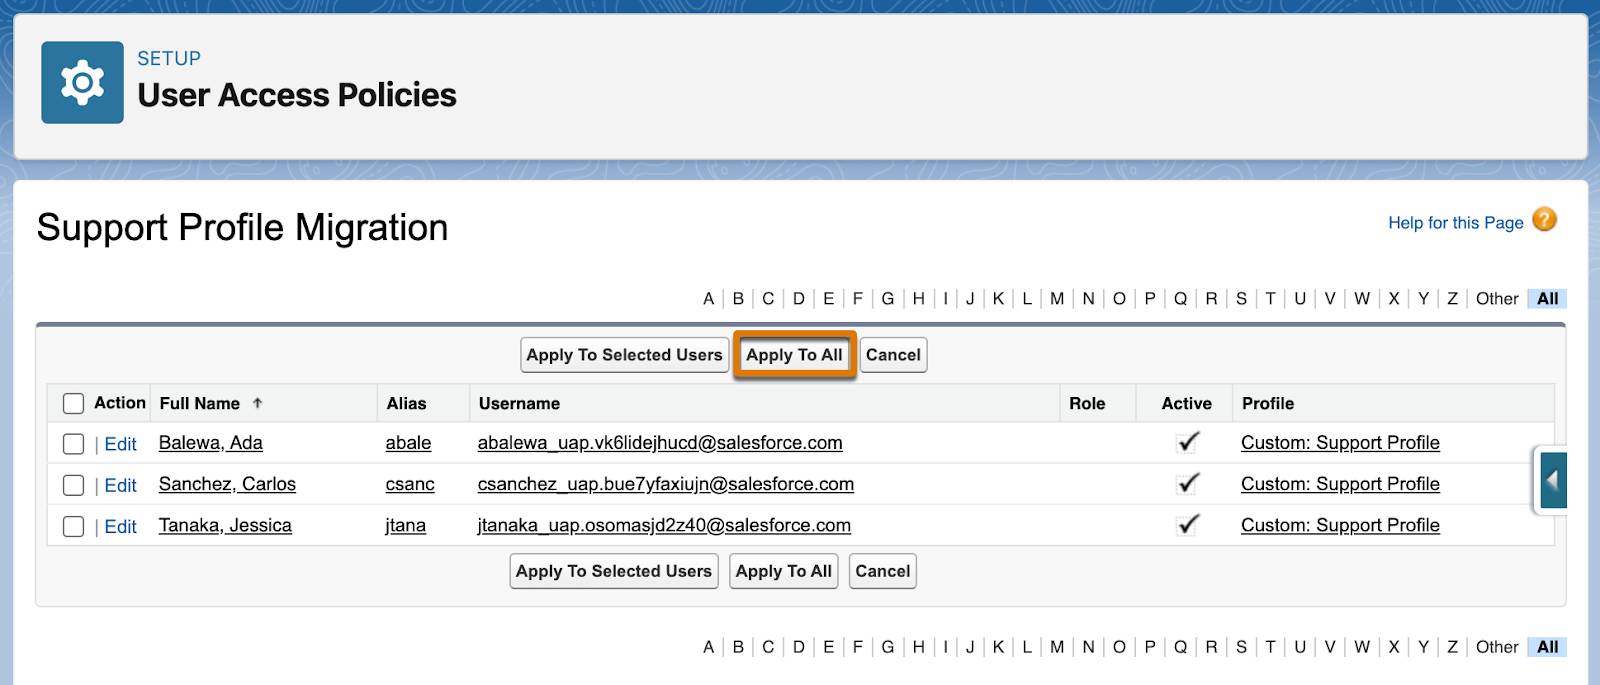
- Back on the policy’s detail page, Maria clicks Apply Policy. She sees a list view with all the users that meet the policy’s criteria.
- You can select a subset of users to apply the policy to, or click Apply to All. In this case, Maria clicks Apply to All to update all three members of the Support team in one click.
On the new Support Profile Migration policy’s detail page, under Recent User Access Changes, Maria can see when this policy was applied and the affected users. She also reviews the user records to confirm that the users were granted access correctly.
Well done! In this badge, you learned all about user access policies and practiced creating multiple policies. We hope that user access policies become a trusty tool in your tool belt of user management features.