Output and Share Your Data
Learning Objectives
After completing this unit, you’ll be able to:
- Add an output step.
- Run a flow to create an output data file.
- Use a Tableau Prep output file as a data source in Tableau Desktop.
- Publish a flow to Tableau Server.
Get Your Flow Out There
Now that you’ve created a flow and prepared your data in Tableau Prep Builder, save your flow file using Save on the File menu. This preserves all the changes you made so that you can continue editing, share the flow, or create an output of the prepared data to use or share with others.
When you save a flow, you generate a flow file (.tfl file). A flow file stores the information about the flow itself, including its data connections and the changes made to prepare the data. For flat files, you can also save a packaged flow file (.tflx file), which contains an extract of the original data set. However, note that neither of these flow files is the prepared data.
To actually generate a cleaned data set, you must create an output step and run the flow. This generates the prepared data output.
The data output incorporates the data preparation operations you’ve applied, up to and including the step in the flow where you added the output step, allowing you to save and share prepared data.
You have a number of options to output your cleaned and prepared data. You may want to output your prepared data to a local .hyper extract file, which you can then connect to and analyze in Tableau Desktop. Or, maybe you want to output your flow as a published data source on Tableau Cloud or Tableau Server. When you publish your outputs, you provide centralized access to the data as you’ve prepared it.
You can generate outputs at different points within the same flow so the data meets your end users’ needs. For example, you can generate outputs before and after performing cleaning operations in order to determine whether additional cleaning is necessary. Or let’s say you’re working with sales data for both the finance and marketing departments. One needs cost information and the other needs survey information. With Tableau Prep, you can leverage the data preparation you’ve done on the sales data for both outputs, and then output a unique data source for each audience.
These are the different types of outputs you can generate with Tableau Prep Builder.
|
File |
Output your cleaned data to the following file types. Tableau Data Extract (.hyper): An extract file that’s optimized for Tableau’s in-memory processing data engine technology, and is useful for analysis in other Tableau products, such as Tableau Desktop. Comma Separated Values (.csv): Useful when sharing your data with third parties. Microsoft Excel (.xlsx): Output flow data to a Microsoft Excel spreadsheet. |
|
Published data source |
Publish an output data source to Tableau Server or Tableau Cloud. You and others can then connect to a published data source from other Tableau products, ensuring that everyone accesses the data as you’ve prepared it. |
|
Database table |
You can output your prepared data to a database table, and then update it each time the flow is run using an incremental or a full refresh. Choose from several relational databases including SQL Server, PostgreSQL, Amazon Redshift, and more. |
Generate Output
In the following example, we create a .hyper extract file to use as the prepared data source and then connect to the data in Tableau Desktop.
The steps for generating the output of your flow are:
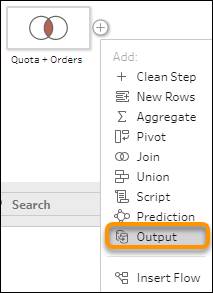
- To add an output step, select a step in the Flow pane, click the plus icon, and select Output. Output files preserve the data preparation operations you’ve applied, up to and including the step in the flow where you add the output step.
- In the Output pane, save the output as follows.
- Save output to: File
- Name: Provide a name for the output file.
- Specify a location.
Note: Flow input and output connections may need to connect to databases or files in the directories on your network. You must safelist the directories you want to allow access to. - Select the output type (Tableau Data Extract, Microsoft Excel file, or CSV file). Note that Tableau Data Extract .hyper files, which are the default output type, are optimized for performance in Tableau Desktop.
- Choose whether to create a new output table or update an existing table.
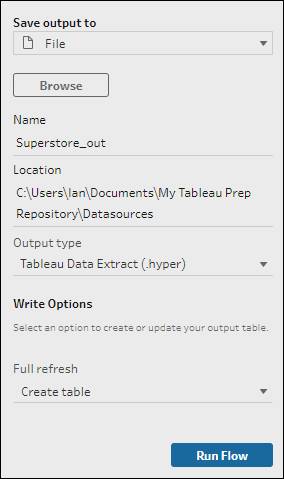
- Select Run Flow.
When you run your flow, your changes are applied to your entire data set. Running the flow results in a Tableau Data Source (.tds) and a file in the output type you selected.
When you connect to the output file from Tableau Desktop, you see the cleaned and prepared data in the metadata grid and data grid on the Data Source page, or in the Data pane of a worksheet.
Analyze Data
When you open the .hyper file in Desktop, you see the cleaned and prepared data on the Data Source page. 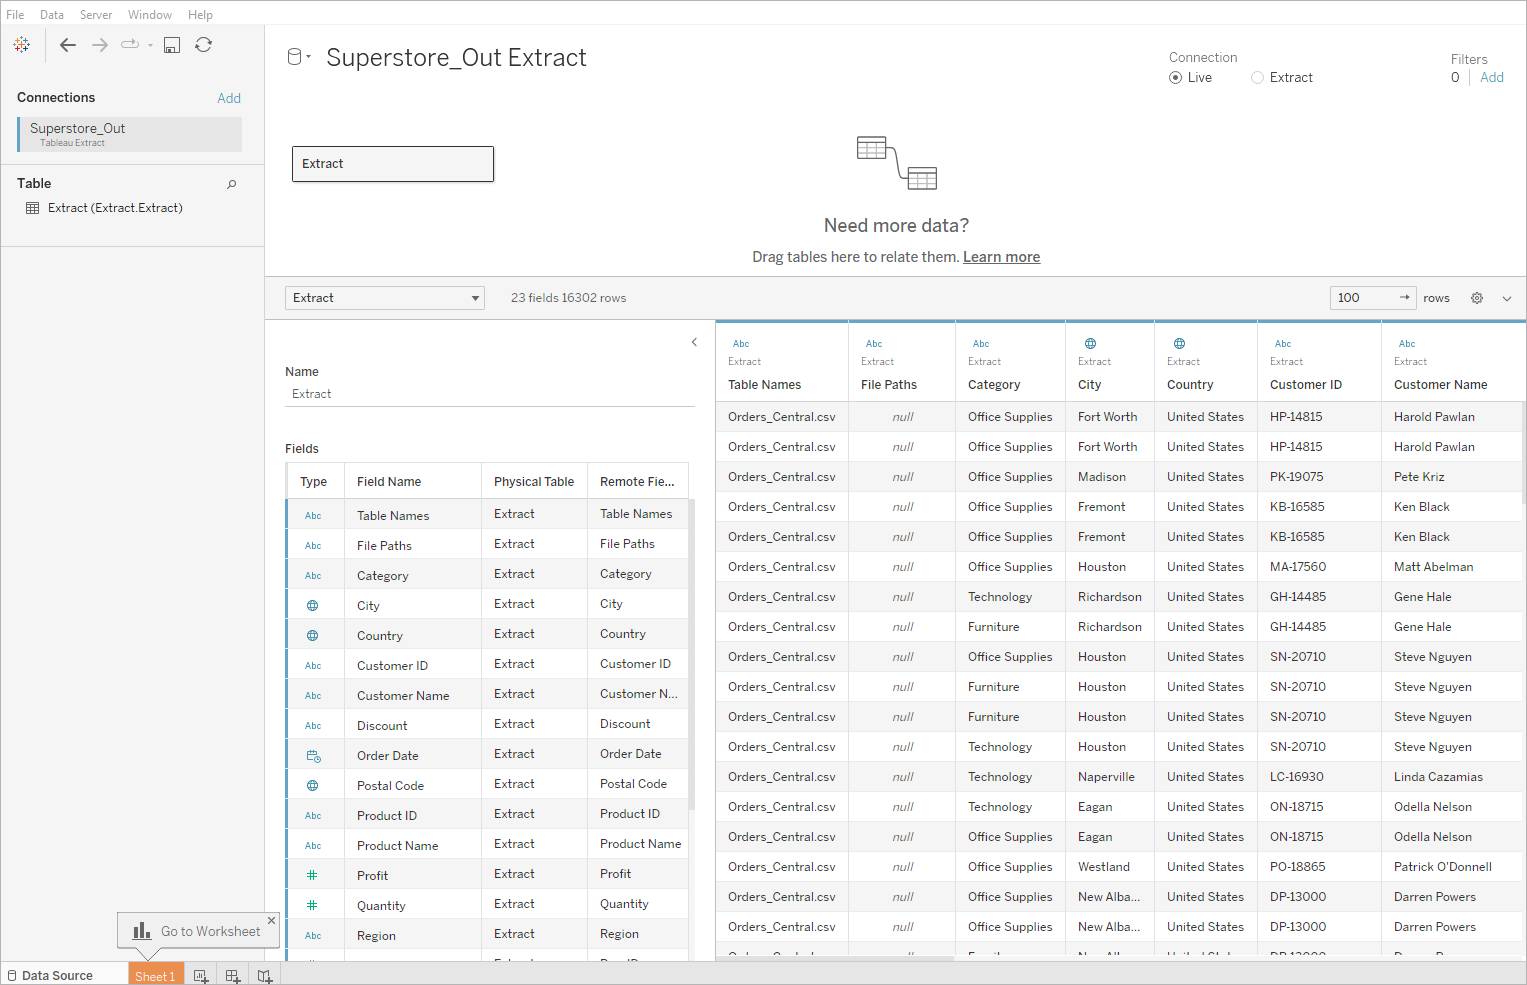
To analyze the data in visualizations, open a new worksheet. The result of the data preparation tasks you completed are visible in the fields in the Data pane. For example, in the previous unit, we corrected the values in the Sales field and changed the data type to a number. 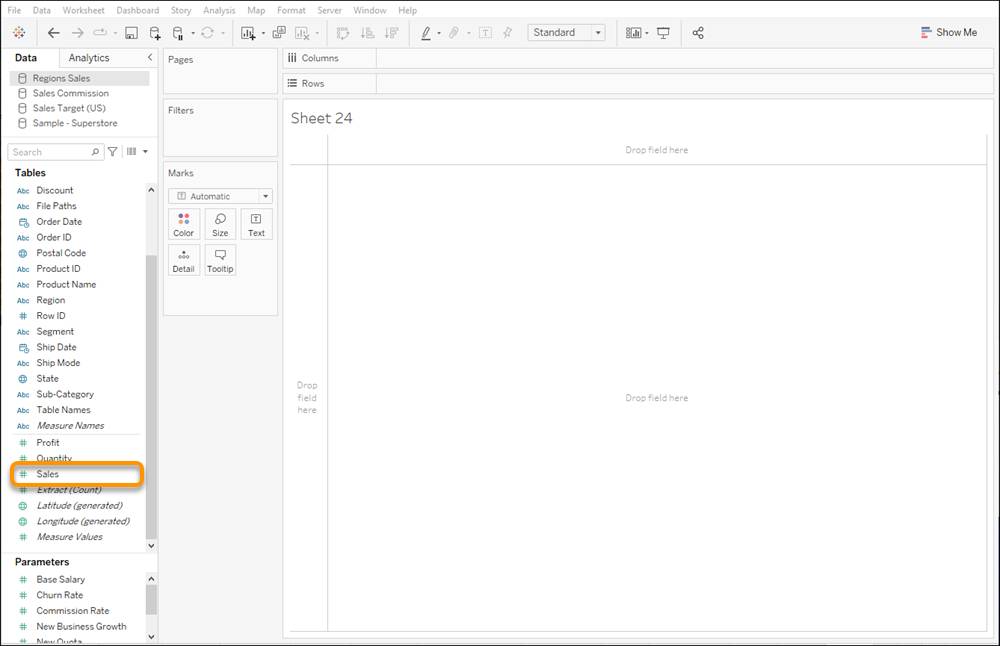
The changes were saved in our output data and are now visible in the Data pane in Tableau Desktop. Sales is now correctly listed as a continuous field Measures area under Tables.
As you drag your fields onto the rows and columns of a worksheet, you begin building views to use in a dashboard. In this example, you see the monthly sales by region and year. We can see sales data for all regions in one view because we used unions in Tableau Prep Builder to combine the regional data.
Publish Your Flow to Keep Data Fresh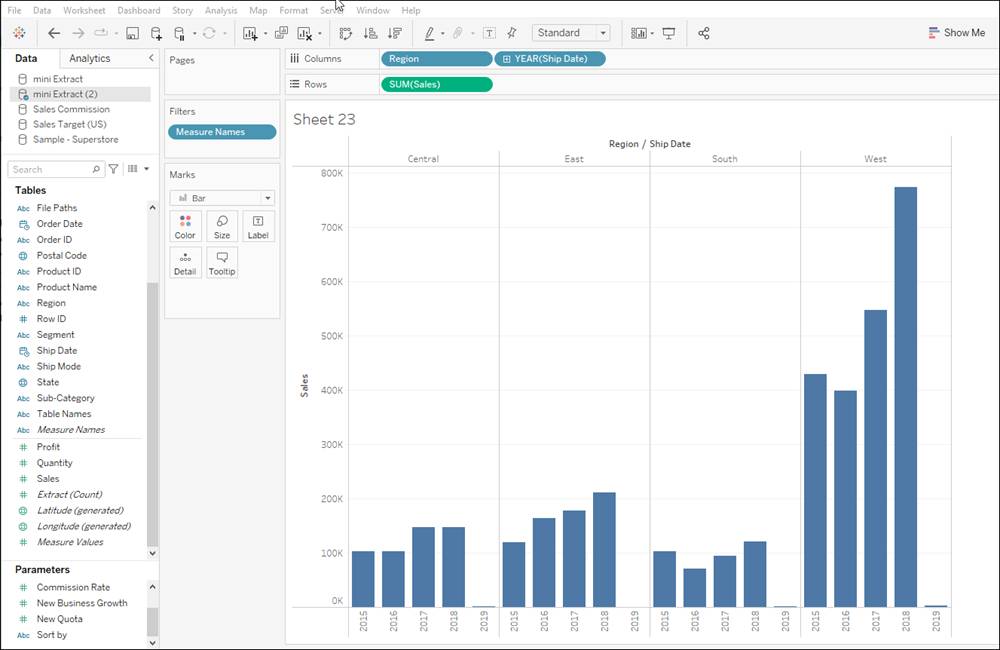
In addition to saving a flow output as a local file, you can publish your flow output as a data source to a site on Tableau Server or Tableau Cloud where you have publishing permissions.
Simply sign in to your Tableau site from the Server menu in Tableau Prep builder, and then specify the output file’s name and project location on the Output pane of the output step.
Your published output is a Tableau Data Extract (.hyper) that site users with appropriate permissions can use to build views to answer questions of the data.
Once you publish your flow output as a data source, you need to keep it fresh. You can do this manually by republishing your flow output from Tableau Prep Builder every time your flow changes or by publishing your flow to Tableau Cloud or Tableau Server and manually running the flow from there.
Alternatively, after you publish a flow to Tableau Cloud or Tableau Server, you can run it on a schedule to refresh the flow output. To run flows on a schedule, you must have Tableau Prep Conductor, a component of the Data Management Add-on for Tableau Cloud and Tableau Server, enabled.
Tableau Prep Conductor, a separately licensed feature for Tableau Server or Tableau Cloud, gives additional capabilities to users with appropriate permissions. With Tableau Prep Conductor enabled, you can publish the flow file (.tfl) itself, rather than the output file, to Tableau Server or Tableau Cloud to automatically run the flow on a schedule and to refresh the output so you and your end-users always have access to the most current data source files.
Tableau Prep Conductor
In addition to running flows on a schedule, with Prep Conductor, you can set up notifications and alerts for failures and successes for the scheduled flow runs to monitor the status of your flows.
To schedule a flow in Tableau Cloud or Tableau Server:
- Sign into the server and click Connect.

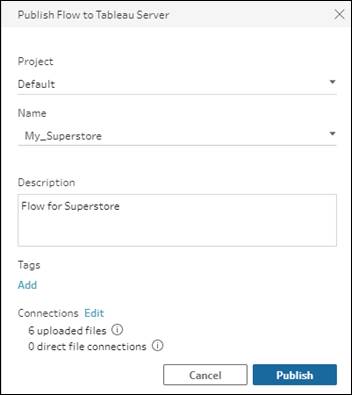
- On the Server menu, select Publish Flow.
- Provide the server project name and the flow name, then click Publish.
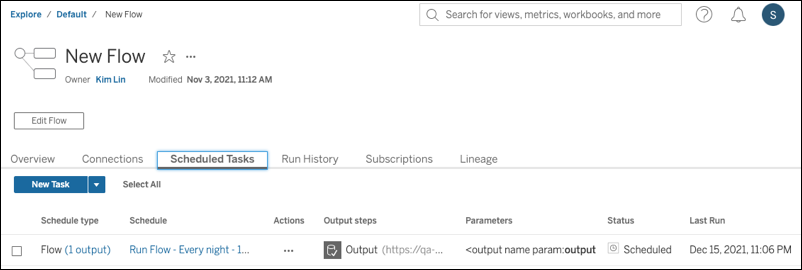
- Once you are in the Tableau Server or Tableau Cloud environment, go to Explore | All Flows.
- Select your flow and click the Scheduled Tasks tab, then click New Task.
- Select either Single Task or Linked Tasks.
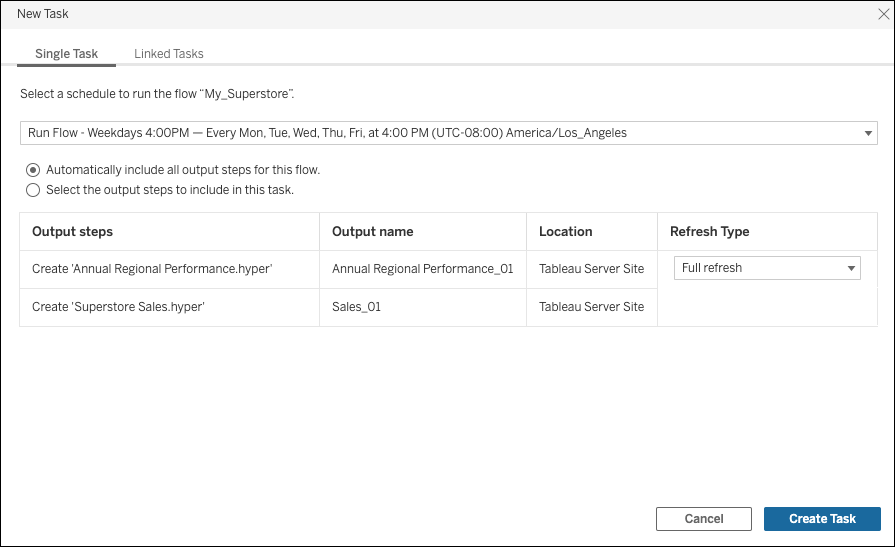
- Choose a schedule and click Create Task.

When scheduling a task, such as running a flow on a schedule, choose from a list of preconfigured times. Once you select the schedule, Tableau Prep Conductor executes your data flows accordingly. From the Scheduled Tasks tab on the flow’s page Tableau Cloud or Tableau Server, you can see whether the flow run succeeded and the date/times of the last and next scheduled runs.
As a flow owner, you can also subscribe yourself and other individual users and groups to receive email notifications about scheduled tasks for successful flow runs. The email includes links to data within the Tableau environment, or you can choose to include the details of the flow run in attached Excel and CSV files.
In this module, you learned how to use Tableau Prep Builder to connect to and prepare data, how to output your prepared data, and how to keep your data fresh.