Design and Test a Flow
Learning Objectives
After completing this unit, you’ll be able to:
- Design a flow to automatically sync data from Salesforce to Tableau.
- Test your flow to ensure it syncs data as expected.
In this unit, you first learn how to use MuleSoft Composer to create a flow that automatically syncs leads in Salesforce with an existing leads data source in Tableau. Then, you test your flow to ensure it syncs data as expected.
By default, MuleSoft Composer validates your work and provides contextual in-app help every step of the way. For example, when you add a connection to a system, MuleSoft Composer tests the connection to make sure it works before you can proceed to the next step. Also, to simplify building your flows, MuleSoft Composer prompts you to complete required fields within each step.
As a best practice, when building a flow, add a few steps and test iteratively until you complete the flow.

Take a look at this video demonstration showing how to connect Salesforce to Tableau using MuleSoft Composer.
Design a Flow
Now you're ready to design an integration flow that automatically syncs leads in Salesforce with an existing leads data source in Tableau.
Follow these steps to design a flow.
Launch MuleSoft Composer from the NTO org.
- Log in to your NTO org using your username and password.
- From the App Launcher, enter
Composerand select MuleSoft Composer.
Create a new flow.
- Click Create New Flow.
- Click the pencil icon next to the default flow name.
- Name the flow
Sync NTO Lead Data with Tableauand click Save.
Create the trigger for the flow using the NTO org.
- Click Salesforce.
- Click Add new Salesforce connection to create a connection to the NTO sandbox org.
- Name the connection
NTO sandbox org.
- Select the checkbox This is a sandbox organization and click Create.
- Enter your NTO sandbox org’s username and password and click Log In.
- Click Allow to grant MuleSoft Composer the permissions to access your basic information, access and manage your data, and perform requests on your behalf at any time. MuleSoft Composer automatically tests the connection. If no error message appears, you have a successful connection, and the first step (trigger) of the flow appears.
- Click the pencil icon next to the default step name.
- Name the step
Get lead dataand click Save.
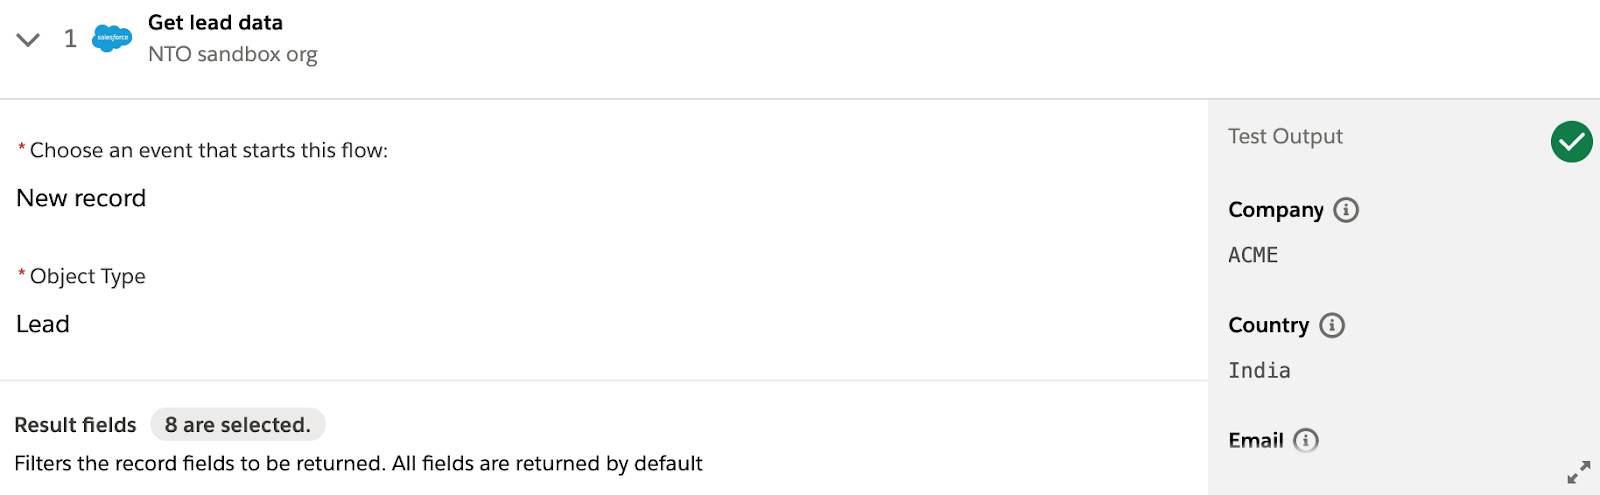
Configure the trigger to start the flow every time a new lead is added to the NTO org.
- Click in the Choose an event that starts this flow field and select New record.
- In the Object Type field, enter
Lead.
- Click Select Fields, select First Name, Last Name, Email, Phone, Company, Country, Industry, and Lead Source, and then click Add. You use these fields to perform integration in the next step of the flow.
- Look at the Sample Output section, which shows each selected field and its sample value from a lead in the NTO org. This confirms that you’re connected to the correct org and lets you know the structure of the data that is available in later steps of your flow.
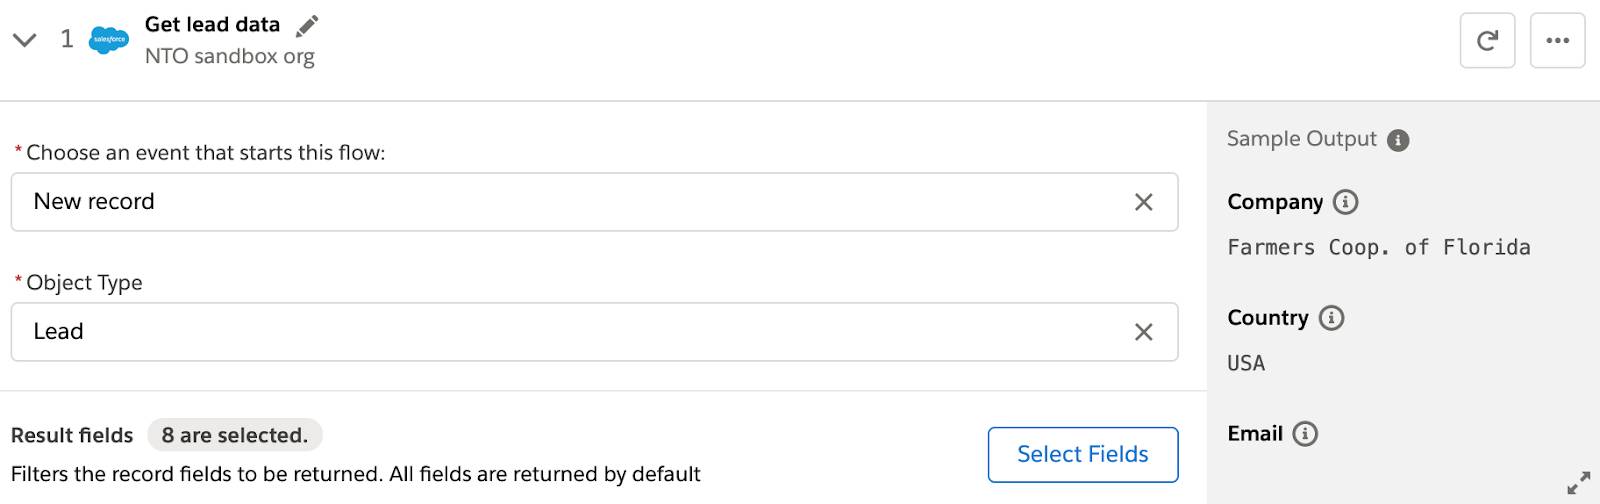
- Click Save to save the flow.
Create the second step for the flow to sync Salesforce leads with the Tableau leads data source.
- Click the plus icon to add a step.
- Click Tableau.
- Create a connection to Tableau using the following parameter values and click Create.
- Connection Display Name:
Tableau data sources - Server URL: your server URL (for example,
https://online.tableau.com.)
- Personal Access Token:
My-MuleSoft-Composer-token - Personal Access Token Secret: Paste the token secret from your text file.
- Site: your data source site (for example,
nto).
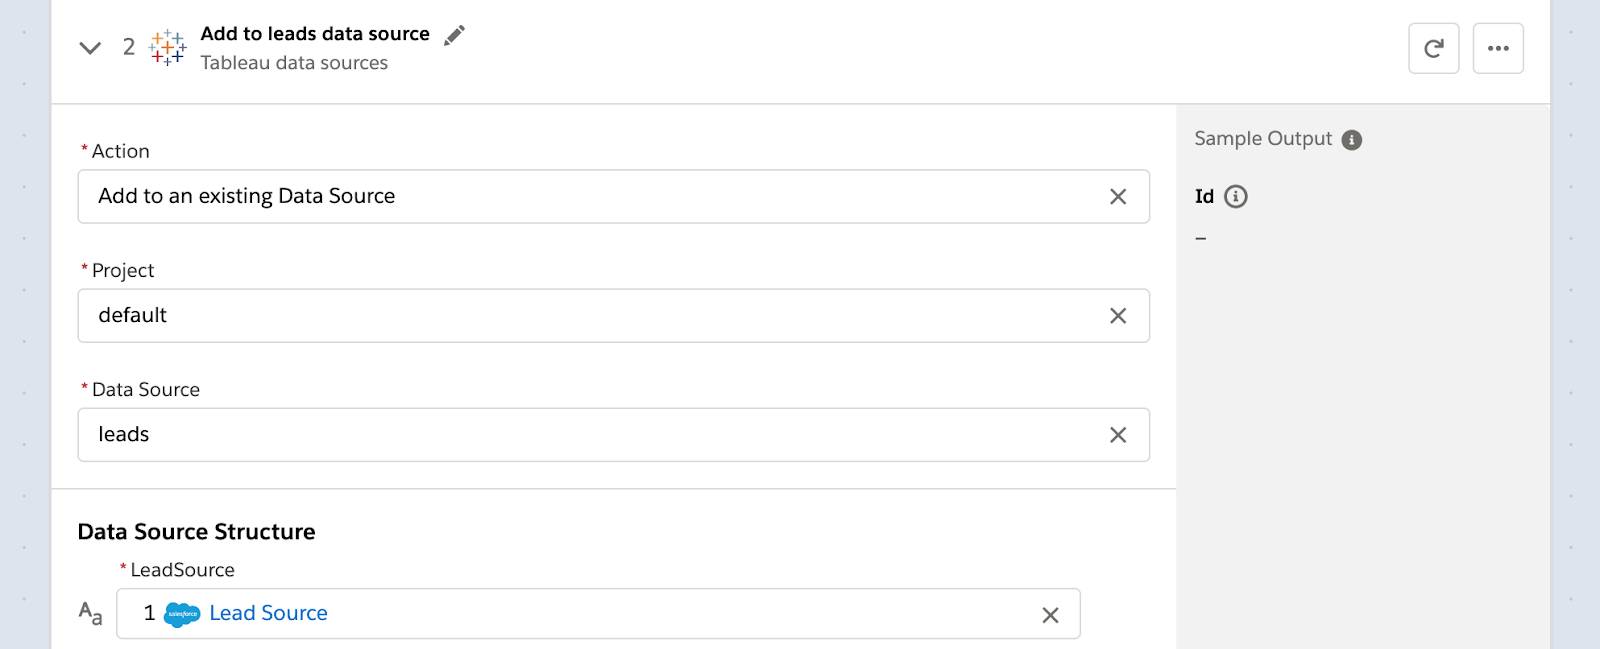
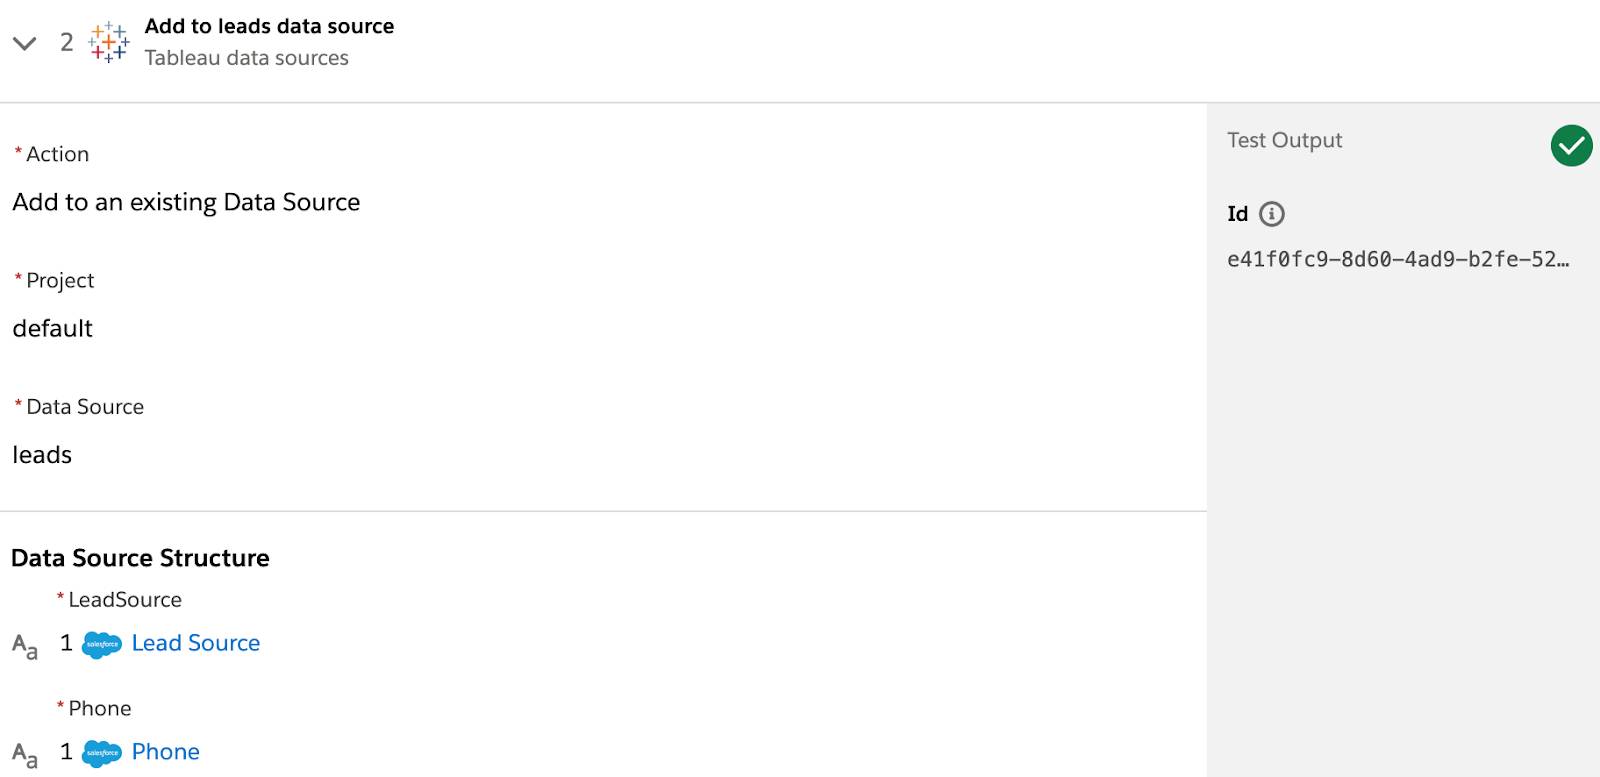
Configure the second step to add leads to the leads data source.
- Name the step
Add to leads data sourceand click Save.
- Click in the Action field and select Add to an existing Data Source.
- In the Project field, select default.
- In the Data Source field, select leads.
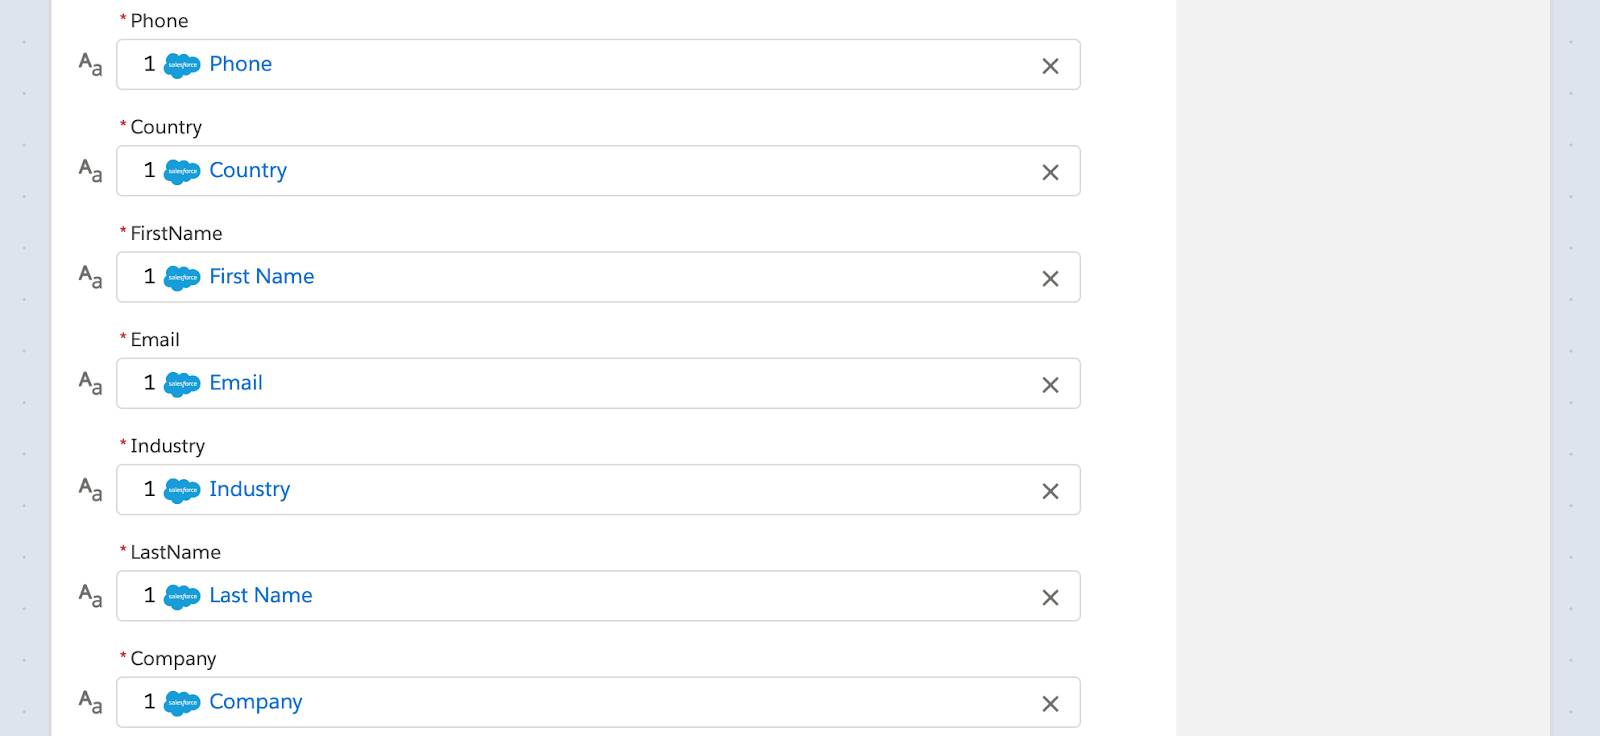
- In the Data Source Structure section, map the leads data source fields to the NTO org’s Lead fields captured in step 1 of the flow as follows.
Hint: After selecting a field, click outside the box to close it.
- FirstName = FirstName from step 1
- LastName = LastName from step 1
- Email = Email from step 1
- Phone = Phone from step 1
- Company = Company from step 1
- Country = Country from step 1
- Industry = Industry from step 1
- LeadSource = LeadSource from step 1
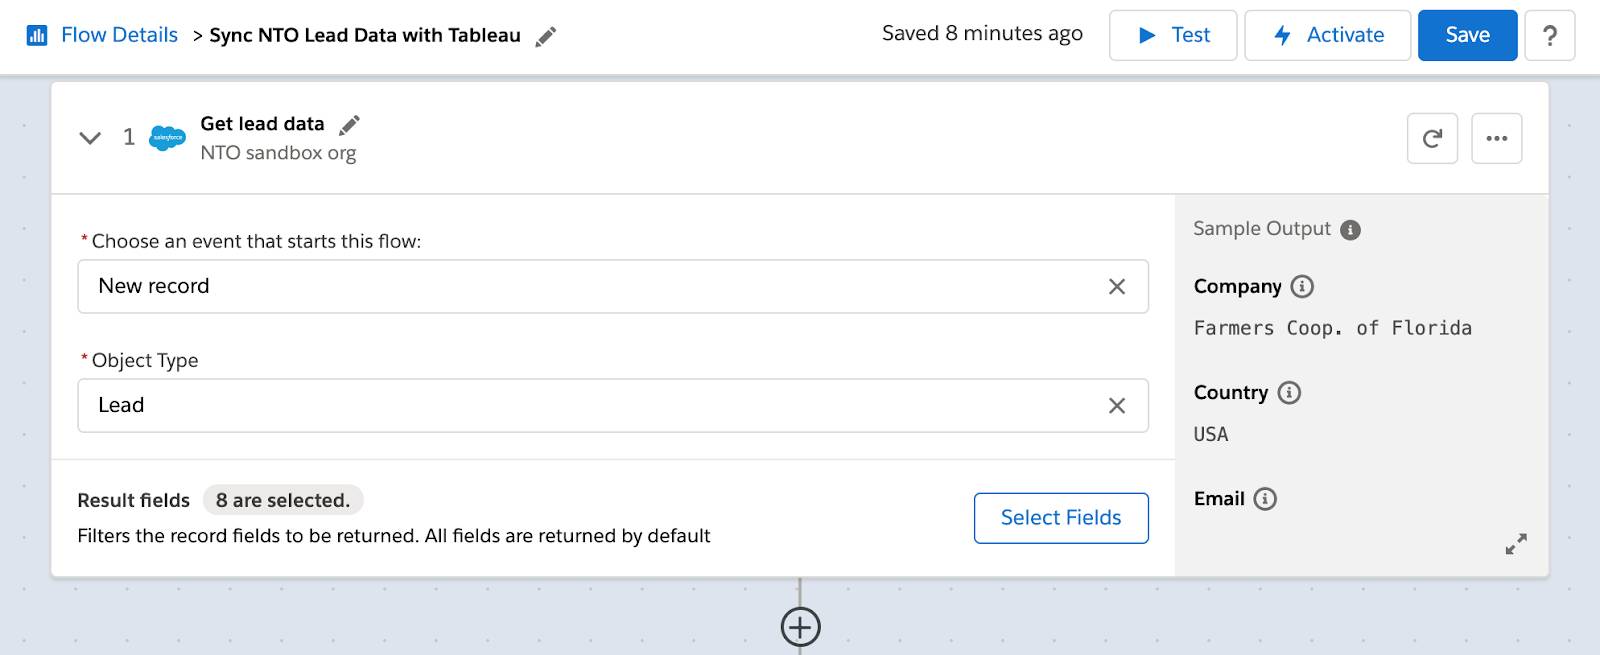
- Save the flow. Your entire flow should look like this.
Next, you learn how to test your flow.
Test a Flow
After you’ve designed your flow, you need to test it from end to end to ensure it syncs data as expected. In general, you have up to 10 minutes to complete a test. When the test completes or 10 minutes have passed, the test stops. As a best practice, you should get all required applications and data ready for the test before starting it.
In this use case, when a new lead is created in the NTO org’s Sales Cloud, it triggers the flow. So, be prepared to enter a new lead in Sales Cloud. If the flow works as expected, that lead appears in the leads data source in Tableau Cloud. So, get ready to access a Tableau workbook using the leads data source and verify the data has been successfully added.
Follow these steps to test a flow.
- In the Sync NTO Lead Data with Tableau flow, click Test. The flow goes into a read-only mode.
Note: While the test is running, if for some reason you want to stop it, click Stop Test.
- Log into the NTO org’s Sales Cloud and navigate to the Leads tab.
- Create a new lead using the following values and click Save.
- First name:
Saanvi - Last name:
Acharya - Email:
saanvi.acharya@acme.com - Phone:
91 2345-123456 - Company:
ACME - Country:
India - Industry:
Telecommunications - Lead Source:
Web
- Go back to your flow and wait for the test to complete. If both steps of the flow show a green check mark, this indicates the flow ran successfully. Take a look at the Test Output section and see the record values you entered for the test.
- Log in to your Tableau Cloud and open the workbook that uses the leads data source.
- Verify that the lead has been added to the leads data source.

- Repeat steps 1 through 6 to test another lead of your choice. Your flow should work as expected.
Nice job! In the next unit, you learn how to activate, monitor, and troubleshoot your flow in the production environment.