Configure Slack Sales Elevate
Learning Objectives
After completing this unit, you’ll be able to:
- Configure Salesforce lists.
- Configure the Notifications tab.
Configure Slack Settings
Once you connect Salesforce and Slack and map the opportunity fields, you can configure the other sales settings required to administer Slack Sales Elevate. This is the final step in configuring Slack Sales Elevate for your organization.
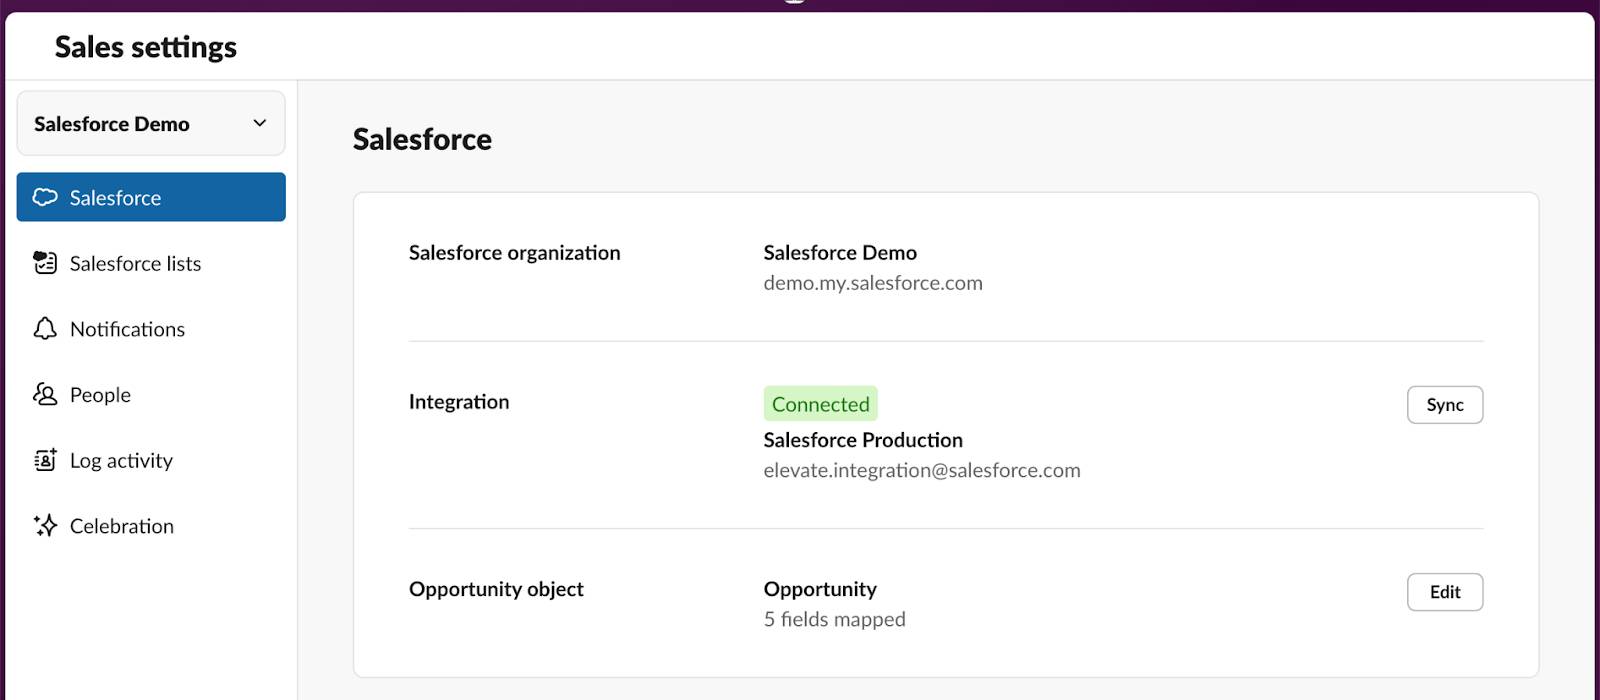
In this step, we look at the rest of the tabs available under Sales settings.
- Salesforce lists
- Notifications
Configure Salesforce Lists
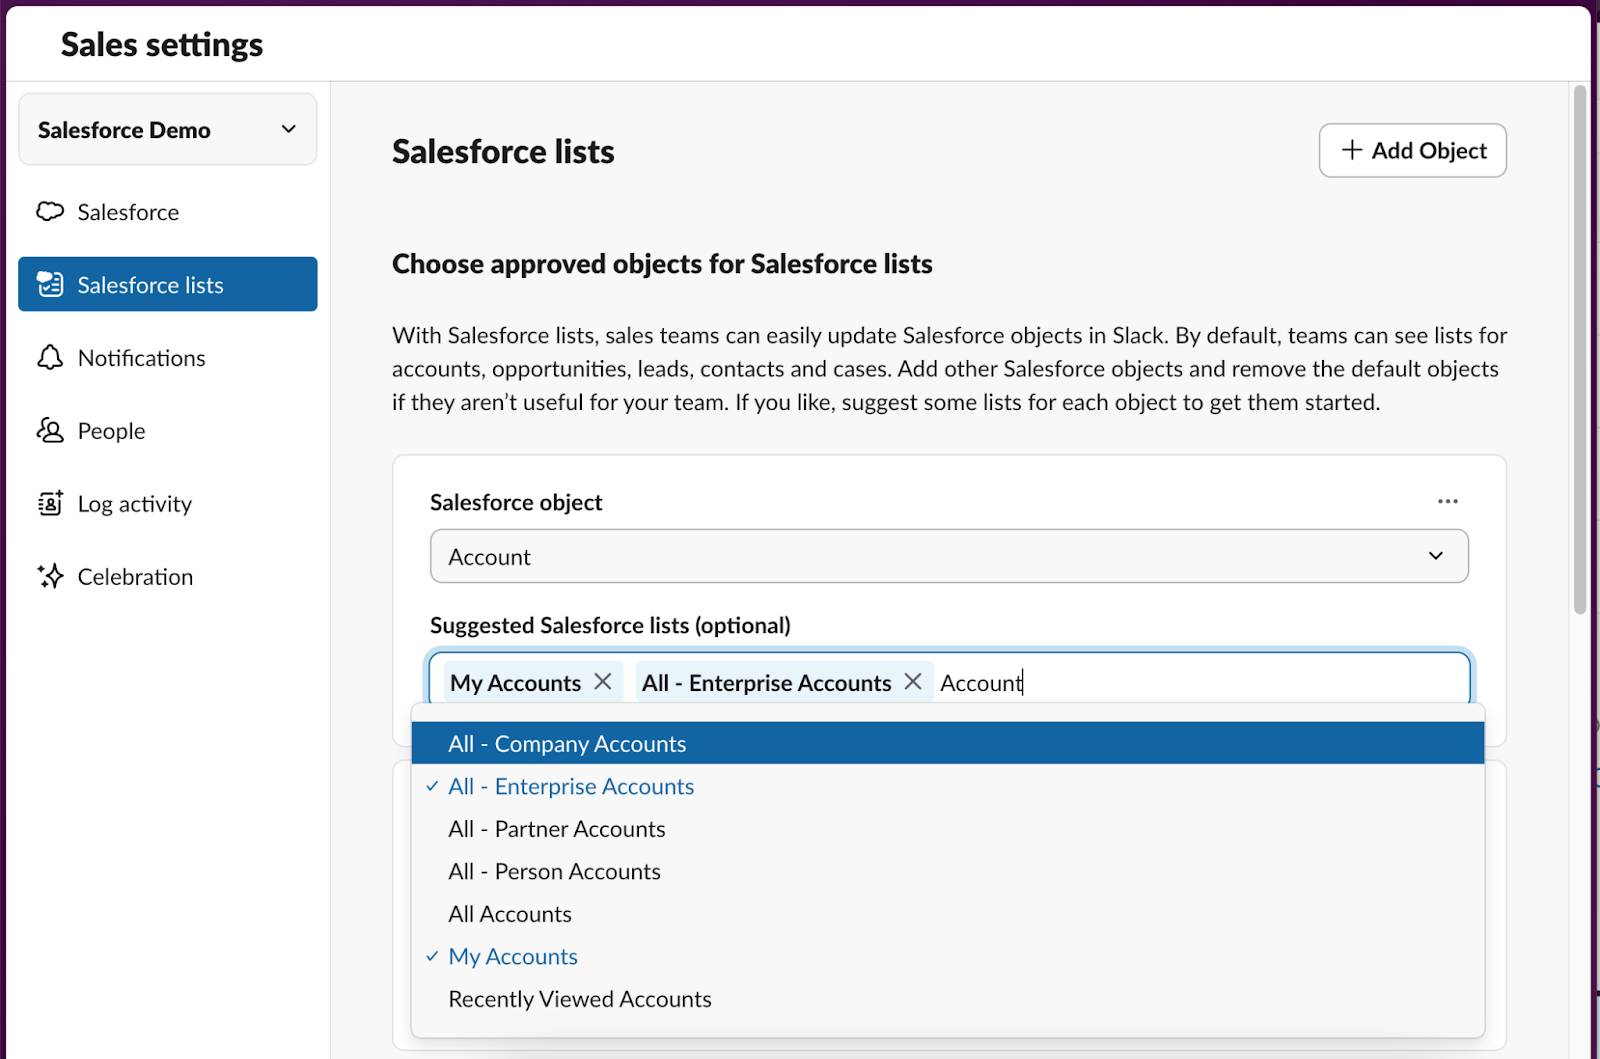
On the Salesforce lists tab, you can configure the Salesforce objects, such as Opportunities, Accounts, custom objects, and the associated list views you want to be available to the sales team by default. These correspond to the list views that are already set up in Salesforce.
- Click the Salesforce lists tab.
- Select the object name in the dropdown for each desired Salesforce object you want to grant your users access to.
- For each object, select the suggested list view. This will appear in the sidebar of users’ Sales Home in Slack.
- Click Save.
Enable Notifications
On the Notifications tab, we recommend reviewing your notification settings to select where notifications can or can't be sent, including the Sales Home tab, channels, and workspaces.
By default, all workspaces are enabled for notifications. By default, Slack Connect channels are disabled. This means Slack Sales Elevate notifications are not sent to channels that are shared with external people.
- Click the Notifications tab.
- Edit workspaces if applicable.
- Select your setting for external channels (Slack Connect).
Before launching Slack Sales Elevate to users, we recommend that Slack admins create a few relevant notifications that appear in the user’s dashboard when they visit the Sales Home tab for the first time. This gives users a head start with Slack Sales Elevate.
Create Custom Notifications
Sales Admins can create notifications in Sales Elevate to help their team stay informed about new opportunities, celebrate important deals, and more.
- Click
 in the sidebar.
- Select Edit sales settings in the top right.
- Click
 .
.
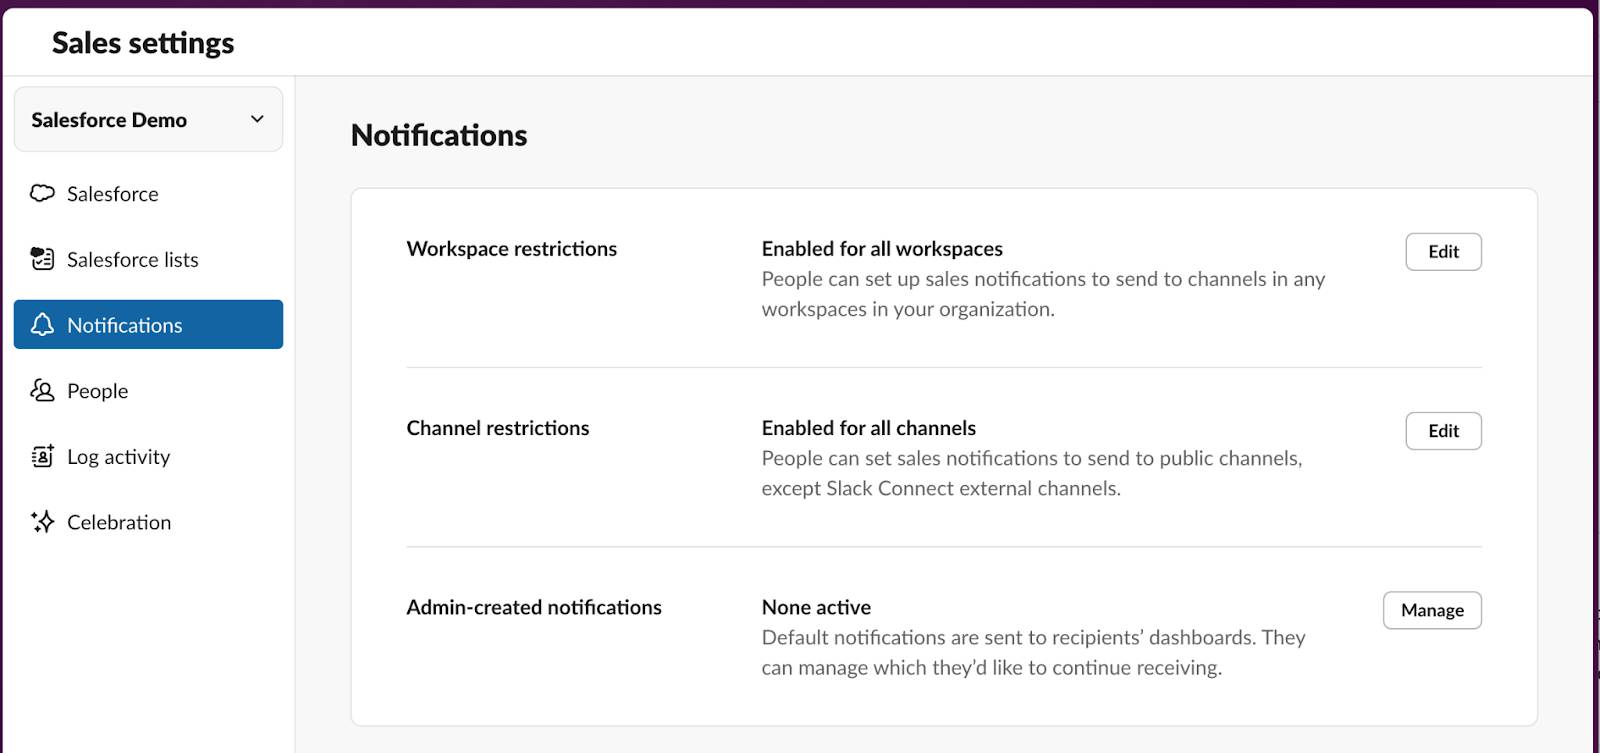
- Next to Admin-created notifications, click Manage.
- Click Create notification.
- Choose a template, then select from the options to customize it.
- Click Save notification.
Manage Deal Celebrations
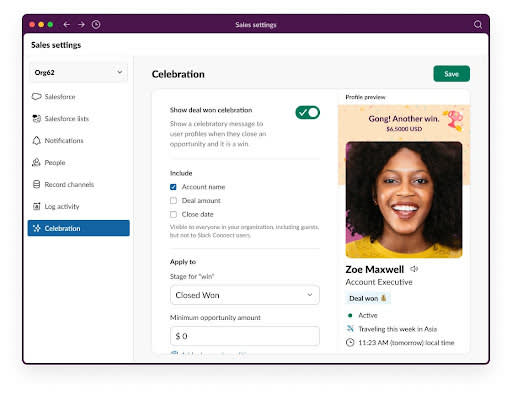
Deal celebrations on member profiles help recognize personal achievements and foster team excitement. Deal celebration banners appear in member profiles for 3 days after winning a deal and can be shared to any conversation in Slack to spread the word. Deal celebrations are turned on by default when enabling Elevate. If you want to include information such as the Account Name, Amount, and Close date, you need to enable these within your Slack Sales Elevate Admin panel.
- Click
 in the sidebar.
- Select the
 .
.
- Click
 in the settings window.
- Click the toggle next to Show deal won celebration.
- Choose options for what to display and how your celebration will be applied.
- Click Save.
Set Up Deal Insights and Proactive Alerts
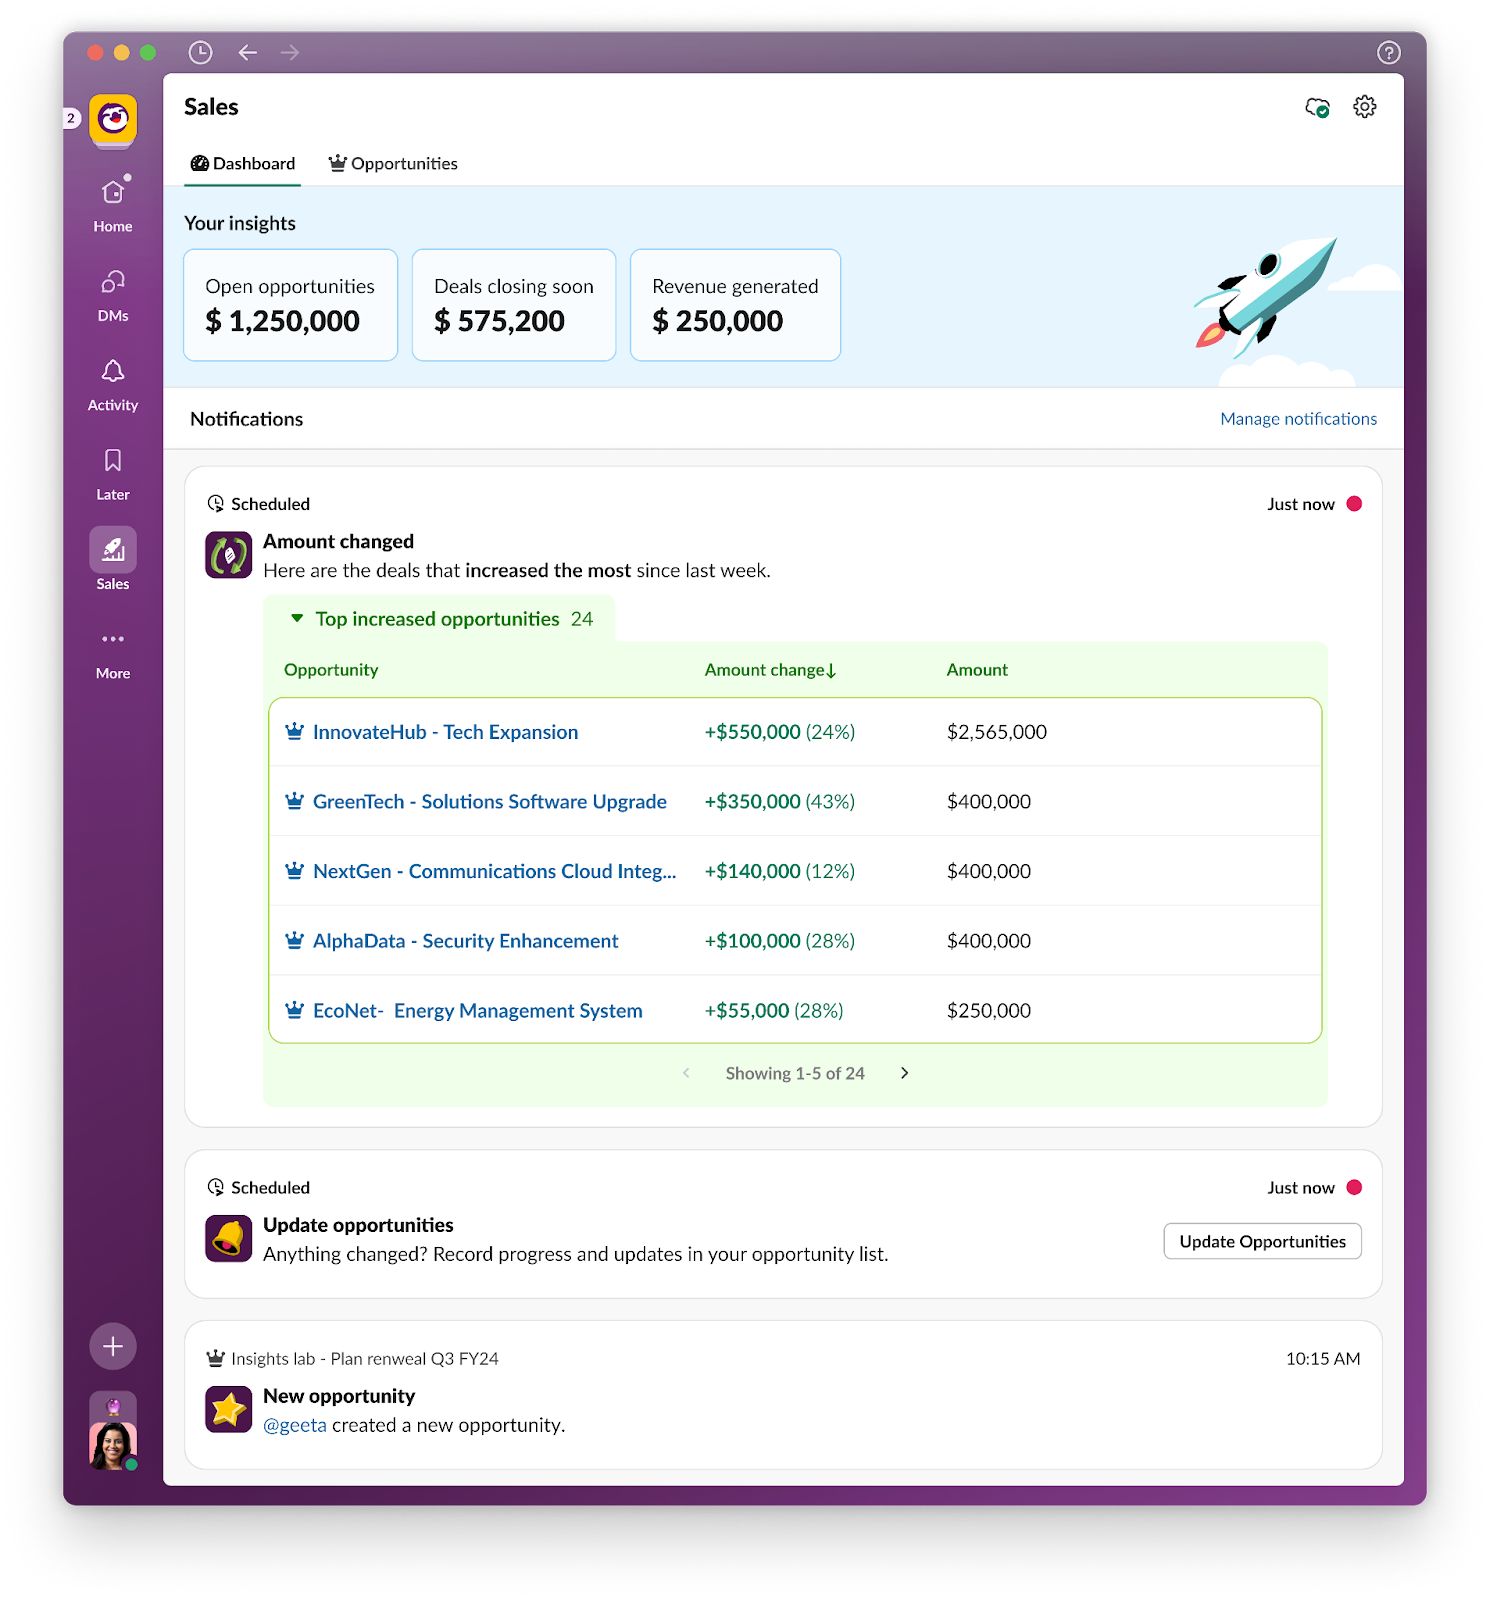
Sales Elevate Deal Insights and Proactive Alerts have been extended into Slack Workflow Builder. Now, configure notifications for any Salesforce object and send a summary to Sales Home.
Deal Insights Notifications
Admins can configure notifications that alert leaders of changes within their reporting line at a predetermined time, delivered as a summary.
These notifications include:
- Amount change
- Stage change
- Close date change
Proactive Alert Notifications
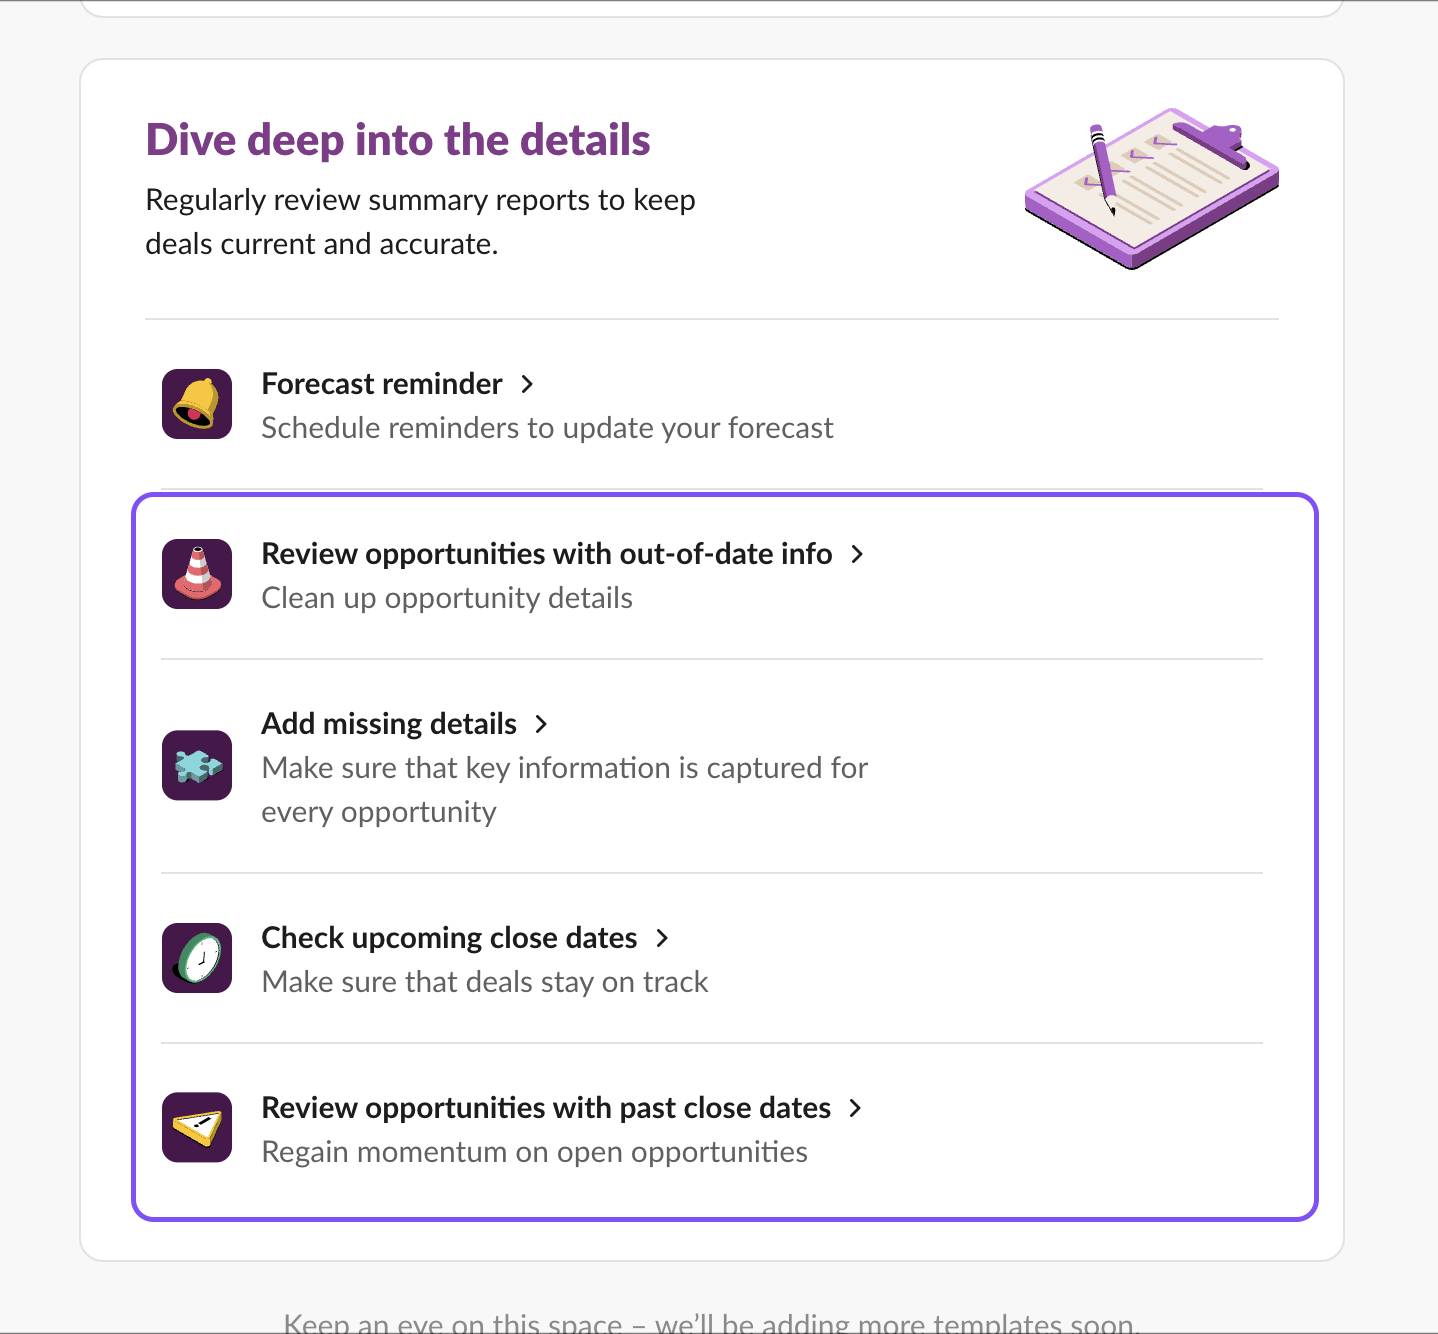
Admins can configure Elevate Notifications that prompt their team members to take action on tasks that require the occasional reminder.
These notifications include:
- Upcoming close dates
- Opportunities with past closed dates
- Missing fields
- Out-of-date fields
After Slack Sales Elevate is launched and users have gotten comfortable with the tool, test new or complex notifications with smaller subsets of users before pushing to a larger group.
- For a new or complex alert, subscribe a few highly engaged users to the notification.
- Monitor how many users mute the notification. If you’re seeing lots of muting, it could be an indicator that your alert is too noisy or not as valuable as other notifications. Make adjustments based on your findings.
- Once you’re confident the notification is ready for a larger audience, subscribe additional team members based on their role.
Now that we’ve learned about configuration, in the next unit, we test the Elevate user experience.