Create Templates for Routes and Tours
Learning Objectives
After completing this unit, you’ll be able to:
- Create a tour template.
- Create a route template.
Set Up a Tour Template
In the previous unit, Fatima configured a warehouse and added a user, vehicle, and product. Next, she prepares templates for creating routes and tours.
Fatima creates the tour template and uses it to configure the tour settings. This way, when she creates tours and routes, the settings in the templates automatically apply to relevant tours and routes. Before Fatima creates a tour template, she learns about the key fields. To discover more about the fields, see Set Up a Tour Template.
Time to follow along with Fatima. This tour template is already created for you in your Developer Edition org, so just read along with the steps. You need to take similar steps to complete the hands-on challenge at the end of the unit.
- From the App Launcher, find and select Tour Templates.
- Click New.
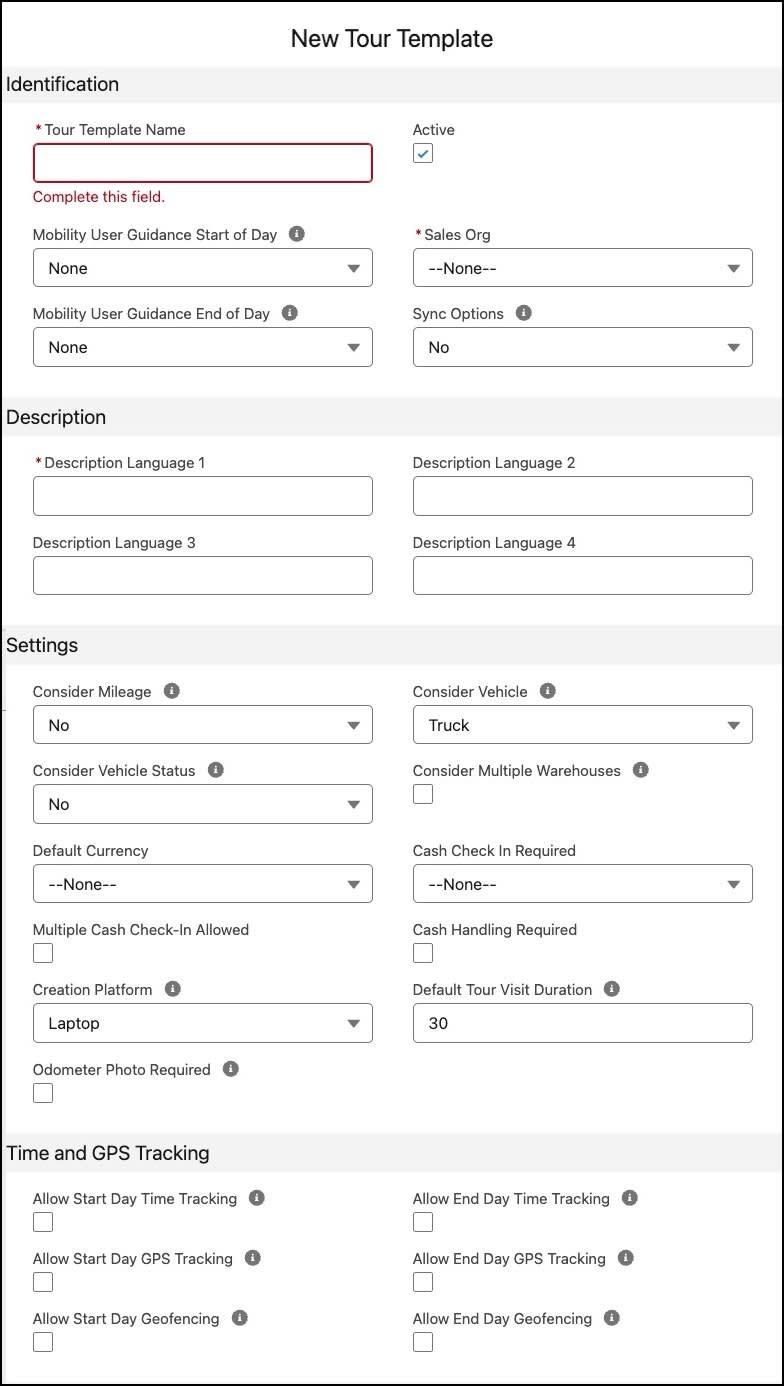
- Specify these details:
- Tour Template Name:
Downtown Tour - Sales Org: 0001
- Description Language 1:
Downtown Tour
- Tour Template Name:
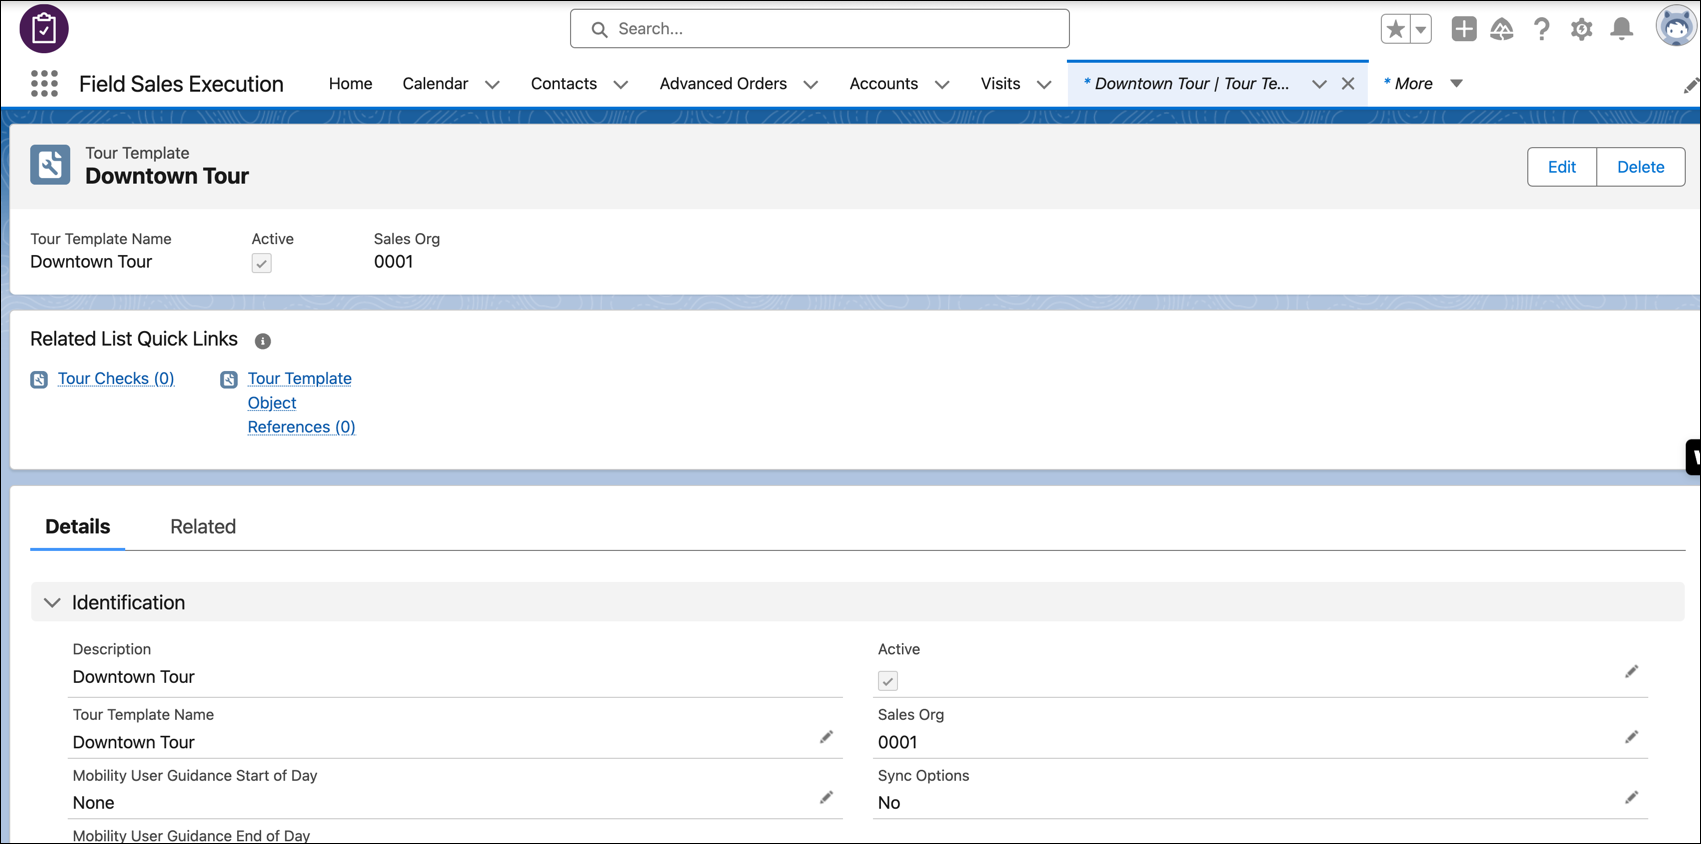
- Save your changes. A tab opens in the Field Sales Execution app showing the tour template that you just created.
With tour templates, you can configure tours using the advanced capabilities of Agentforce Consumer Goods.
Advanced Time, GPS, and Vehicle Settings
Several advanced features are planned for Direct Store Delivery in a future release of Agentforce Consumer Goods. These features lets drivers track their time and location.

-
Time and GPS tracking: Businesses can track tour execution using GPS data. Supervisors can monitor driver activities by tracking the time and place of their visits and tours. Automatic capture of this data helps prevent malpractice. The data can also be helpful for evaluating the efficiency of drivers and van sales reps.
-
Sync Options: This field indicates the point in time when the tour-related data gets automatically uploaded to the Salesforce Platform. For example, if the On Tour End option is enabled, the data syncs after the driver completes a tour.
-
Odometer reading: To capture the distance covered by the driver during a tour, this field indicates whether the user (driver or hybrid user) is required to capture an image of the odometer reading at the start and end of a tour. This feature supports fuel cost reimbursement and route administration. Retail stores can also use this data for regional regulatory compliance.
-
Vehicle status: This option indicates whether the driver must check the vehicle (truck or trailer or both) for damages at the beginning and end of the tour. It shows if a status check is required. These checks refrain drivers from executing tours if the vehicle's status isn’t compliant.
In this module, Fatima doesn’t use the advanced settings. Instead, she creates a tour template with just the basic information.
Set Up an Object Reference for a Tour Template
Warehouse admins can control driver and van sales rep activities and documents, including ad-hoc visits, allowed order types, and inventory document types.
Fatima has to define the tour-related activities that David, the truck driver can perform. She uses object references to define the allowed visits, signatures, and document types for a tour.
Here are the types of object references available for a tour template.
-
Visit template: Assigns a visit type to the tour. For example, selecting Van Sales lets users create ad-hoc Van Sales visits. If left blank, users can only do preplanned visits.
-
Order template: Assigns an order type to the tour. For instance, selecting Van Sales or Return allows users to create those orders during the tour. If left blank, users can only execute delivery documents.
-
Signature template: Assigns a signature form to the tour, used for confirmations between manufacturer and retailer. These signatures sync and appear on invoices.
-
Tour template: Links the tour to a required tour template. This field must be filled.
Fatima assigns the following object reference to the tour template she created earlier. This object reference is already assigned to the tour template in your Developer Edition org.
- From the App Launcher, find and select Tour Templates.
- Find and select Downtown Tour.
- In the Related List Quick Links section, select Tour Template Object Reference.
- Click New.
- Enter the tour template object reference name.
- Specify these details:
- Usage: Delivery Visit
- Signature Template: Release (without signature)
- Tour Template: Downtown Tour
- Save your work.
When you select the Usage field as Delivery visit while selecting an object reference for the tour template, there’s no signature-taking capability available. And hence, you have to select the Release (without signature) option from the list.
Once the object references are assigned to a tour template, you’re ready to set up a route template.
Set Up a Route Template
You can set up route types for various markets, and assign them to tour templates or tours. You can also create reusable routes by using route templates and in turn, create van sales tours from the routes for warehouse drivers.
Follow Fatima as she creates a route template in Agentforce Consumer Goods. This route template is already created for you in your org.
- From the App Launcher, find and select Route Templates.
- Click New.
- Specify the following details:
- Route Template Name:
NTO Downtown Route Temp - Tour Template: Downtown Tour
- Select Active.
- Sales Org: 0001
- Visit Template: Van Sales
- Description Language 1:
NTO Downtown Route Temp
- Save your changes.
In this unit, you followed along as Fatima created templates to configure the basic settings for creating tours and routes. She is now all set to create routes and tours for David, the delivery driver for the Alpine Group.