Explore Service Components
Learning Objectives
After completing this unit, you’ll be able to:
- List the high-level steps to set up record alerts.
- List the high-level steps to set up Knowledge.
- List the high-level steps to set up an action deployment.
- Describe how Audit Trail works.
Notify with Record Alerts
When a caller calls into the contact center at Rayler Parts, service agents are expected to answer the queries and take actions on pending items. But they are also expected to offer proactive service with relevant information for the partner or distributor. For example, the agent can inform a caller about the upcoming agreement renewals or warranty expirations so that they can take prompt action.
Rayler Parts can also integrate external systems with the Salesforce org to display data, such as asset malfunctions, in real time. The FlexCard component in the console shows record alerts to help agents provide a seamless engagement interaction.
Here are the high-level steps involved in setting up record alerts.
- Assign users permissions to create and manage FlexCards and Integration Procedures. Cindy has already assigned the OmniStudio Admin permission set to Najma so that she can use the Omnistudio tools to design record alerts.
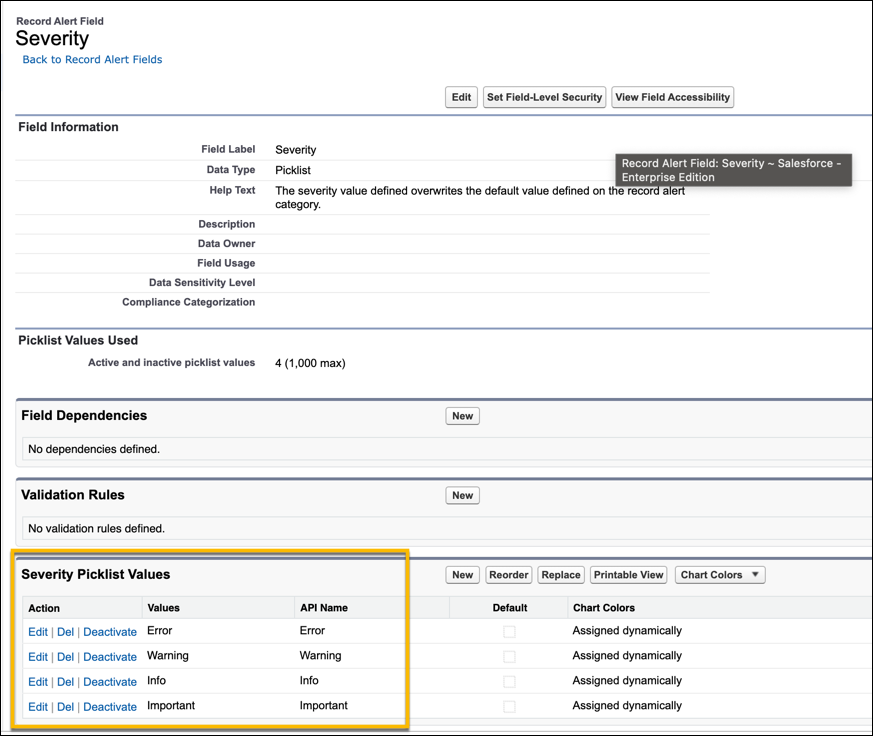
- Add or edit picklist values for Severity. The default values are Info, Error, and Warning. Cindy has added a new Severity type called Important.
- Categorize record alerts based on required criteria. Cindy has created two alert categories called Informational Alerts (for Info alerts), and Urgent Alerts (for Error alerts).

- Configure alerts from an external data source. Cindy has configured an Apex Class that brings in telematics data from an external source for all installed assets at partner locations.
- Customize record alert cards with Integration Procedures. Integration procedures can read and write data from Salesforce and from external systems (using REST calls) and can call Apex code. Cindy has customized the recordAlerts/get procedure to define a logic for which alerts are retrieved for the alert card and how to display them.
- Customize record alert cards with FlexCard Designer. Cindy used the ServiceExcellenceGenericAlertCard component to display and organize the information in a meaningful way.
- Add the Record Alerts component to page layouts. Cindy added the FlexCard component to the Contact page layout that’s used for the console. She also limited the number of record alerts that can display to 5.

Here’s a sample record alert that gives agents key details about an upcoming asset servicing and maintenance.
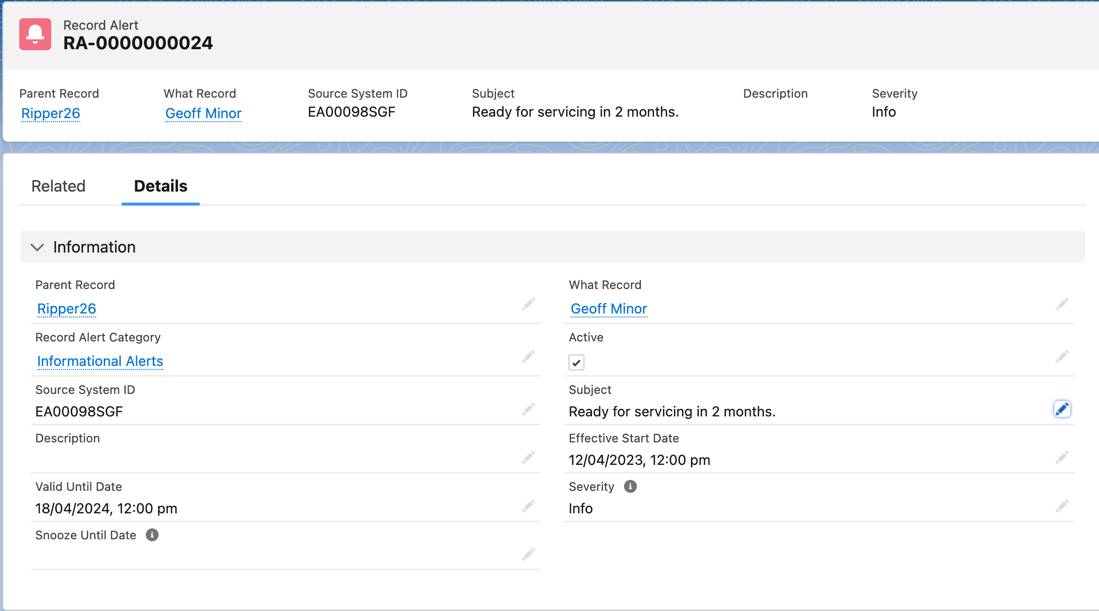
Field |
Value |
|---|---|
Subject |
Ready for servicing in 2 months |
Parent Record |
An Asset record |
Record Alert Category |
Informational Alerts |
Severity |
Info
|
What Record |
Contact record of the partner calling in |
Service agents can snooze or dismiss the alerts as required. In fact, agents can also manually create record alerts during an interaction so that the next time a different agent interacts with the same caller, they see that information. For example, if a caller says that they plan to buy a subscription in 6 months, the agent can create a record alert so that agents know to upsell a subscription to the partner at that time.
Knowledge Is Power
Cindy now explores Knowledge. Najma is keen on building a repository of knowledge articles, documents that include information on processes, product queries, storage enquiries, or frequently asked questions. Experienced service agents and internal specialists write the articles. The articles are then published and can be used by multiple people. Cindy can configure Lightning Knowledge to control where and what information is published or shared.
In unit 1, Cindy enabled Lightning Knowledge and assigned the Service Lightning Knowledge Manager permission set to herself and the required users.
Here are the next high-level steps to take to set up Knowledge.
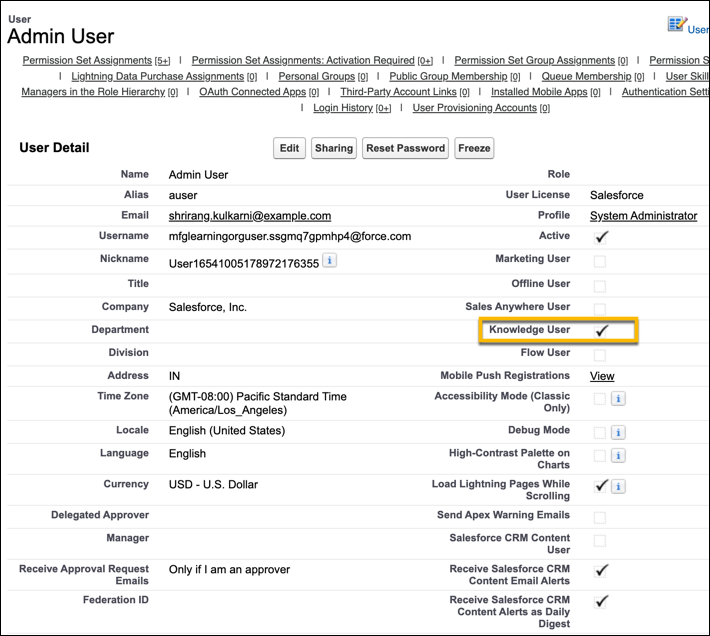
- Select Knowledge User on a user record to identify people who can use this feature.
- Assign user permissions such as Allow View Knowledge, Manage Articles, Archive Articles, and Manage Knowledge Article Import/Export to user profiles. By default, all internal users can read published articles, but these additional permissions help control which users have access to create, edit, delete, archive, translate, import, and manage articles.
- Create Data Categories to classify articles and make them easier to find. Cindy skips this step because it’s optional.
- Add the Knowledge component to the required record pages. Service Console for Manufacturing comes with this component by default.

The Knowledge component on the console helps agents quickly search for articles, create their own articles, and vote for articles to indicate how helpful they are. Now when callers want information about a product, agents don’t need to put them on hold, reach out to product specialists in the company and check on the information. They can easily read the product specification articles and quickly resolve queries.
An Action Deployment
Service Console for Manufacturing comes with an Actions & Recommendations component. This component shows screen flow actions, autolaunched actions, quick actions, and next best actions that a service agent can trigger during an interaction.
Each item listed in the Actions & Recommendations component is a RecordAction junction object. A RecordAction associates a flow with a record. For example an action Create a Case associates a screen flow with the parent Case record. A RecordAction is also created when a user accepts a recommendation from the component. For example, a recommendation Upgrade Product associates the recommendation strategy flow with the Product record.

Cindy can create an action deployment that determines what actions are displayed on the Actions & Recommendations component, and helps the admin map specific actions to specific communication channels such as voice call, video call, or chat. Before Cindy configures a deployment, she must set up the flows and quick actions that she wants to show in the component. She also wants to include recommendations from Next Best Action strategies. The component also comes with a History tab that shows the list of actions taken in the past for a specific contact.
Here are the high-level steps involved in creating an action deployment.
- Create screen flows, quick actions, and autolaunched flows as required for common actions such as Request Service Appointment, Create a Case, Take Notes, Calculate Rebate Payout, Add a Warranty, and more.
- Configure Next Best Action strategies if you want to show intelligent recommendations in the console, such as Upgrade a Product, Upsell Asset Warranty, or Upsell Monthly Subscription.
- Create an action deployment on the Actions & Recommendations page in Setup.
- Select one or more action types. Cindy selects both Flows and Quick Actions.
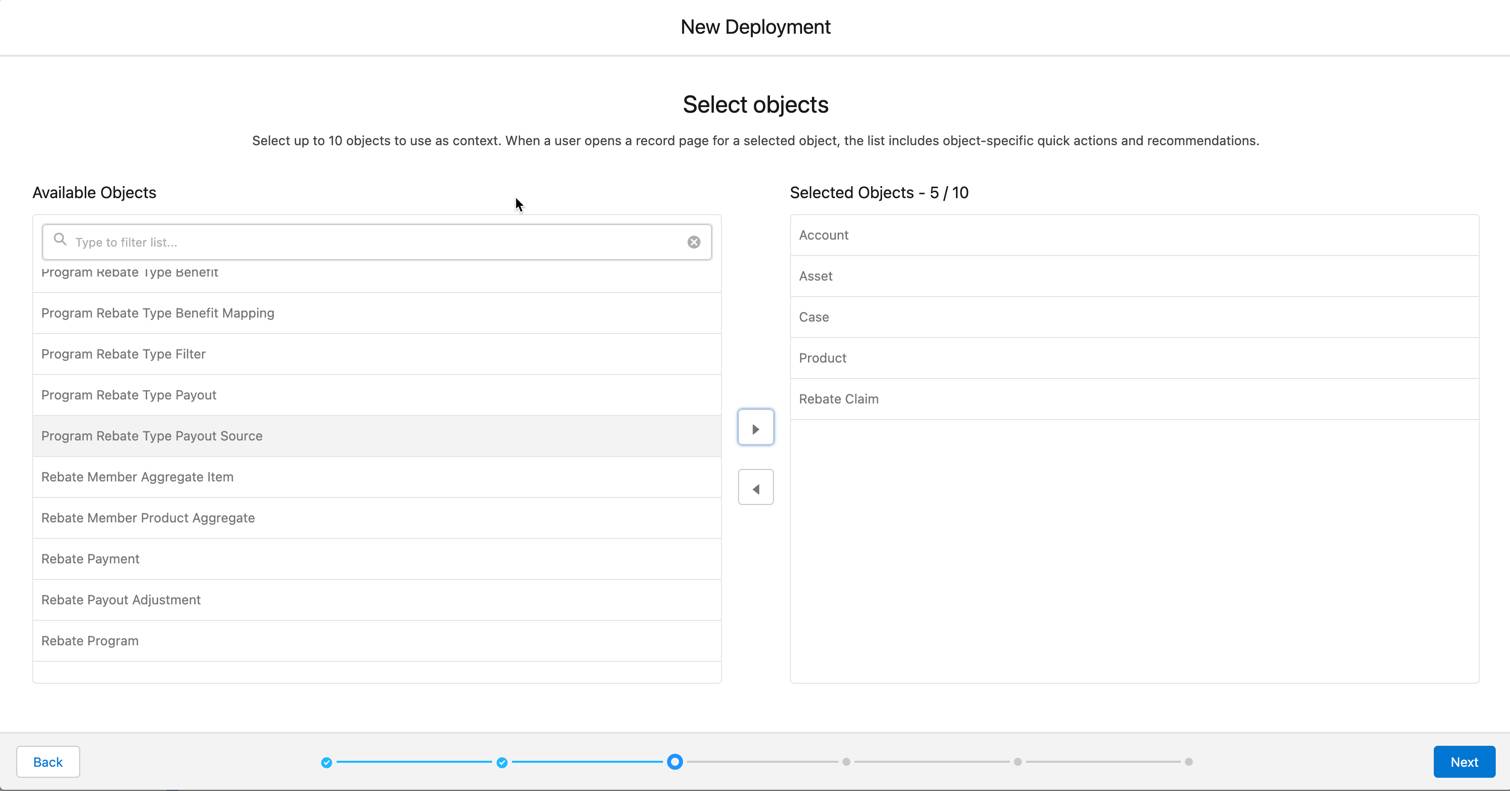
- Select up to 10 objects that are used as context for the quick actions. Cindy selects Case, Product, Asset, Account, and Rebate Claim.
- Select the list of actions to show based on the communication channel. For example, Cindy adds all flows and actions to the default list, but creates a more restrictive list for Chat and Phone, with different actions in each channel list. She adds the flow Reset Password only to the Phone list because that’s typically not done over chat interactions due to security concerns.

- Mark certain actions as mandatory if a process must be completed by the agent during an interaction. Cindy marks the flow Verify Caller Identity as mandatory.

- Unmark certain records as removable if you don’t want users to remove them from the component at runtime. By default, all actions are removable.
- Select the list of actions that a user can launch at runtime when they click Add on the component. Cindy adds a screen flow Calculate Rebate Claim to this list because during a call agents are often required to let the caller know the status of their rebate payments and for this they need to trigger the calculations.
- Configure settings to show actions and offers, to apply an Einstein Next Best Action strategy to your recommendations. Cindy selects an Upgrade Product strategy to the Product object and an Upsell Warranty strategy to the Warranty object. Agents can view these recommendations and discuss these with the callers.

- Add the Actions & Recommendations component to the Contact page layout and select the action deployment you created. Cindy doesn’t need to do this because the console comes with this component.
Cindy notices that the Industry Service Excellence license comes with another similar component, Action Launcher. While this component doesn’t show recommendations, it supports Omniscript actions in addition to flows and quick actions. The steps are similar to the ones listed above. Cindy can create a similar action deployment and add the Action Launcher component to the console page.

Cindy has set up all required components. She now wants to understand how Najma and her team can use the Audit Trail to analyze the identity verification records.
Find the Relevant Records
When the Verify Caller Identity flow is run, the Save Member Verification invocable action saves the customer identity verification data for auditing purposes. Records are created when a verification passes or fails. The following information is readily available for monitoring purposes.
- Engagement interaction record name
- Engagement interaction record ID
- Initiating attendee ID
- Verification status
- Verification details
- Initiating attendee type—who the call is about
- Engagement topic
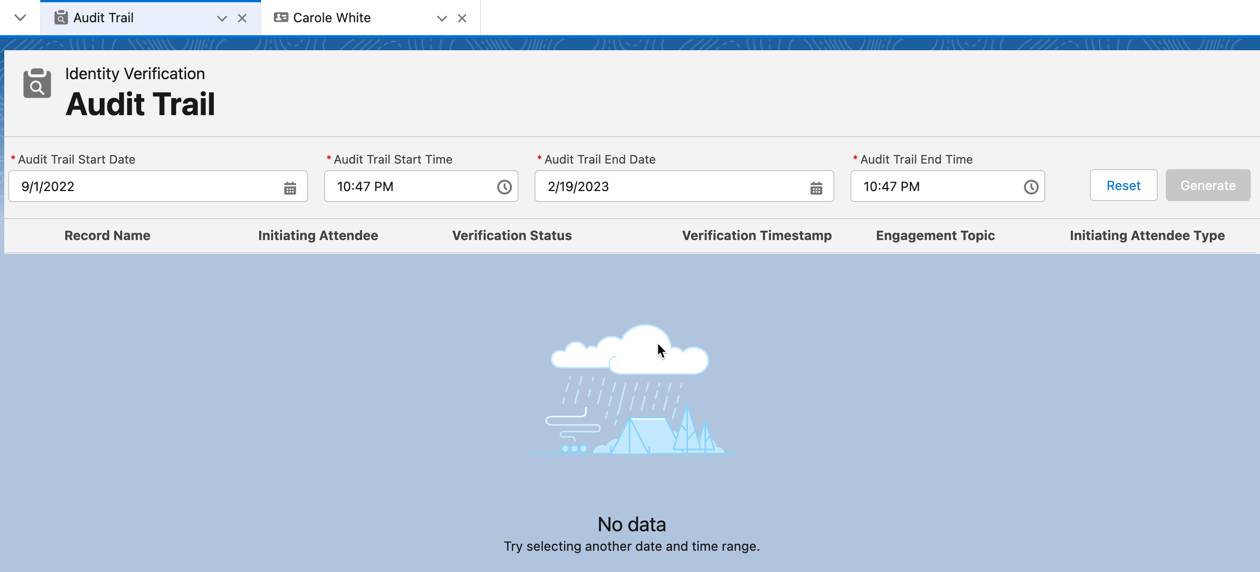
Cindy enables the Audit Trail tab in the tab settings of the user profile that’s assigned to Najma. This enables Najma to find Audit Trail from the App Launcher and search for records based on date and time filters. Cindy can also add the Audit Trail tab to the navigation menu in the Manufacturing app or the Service Console for Manufacturing app.
Cindy is happy with the progress she’s made. In the next unit, she turns her focus on the custom requirements that came from Najma’s team. For now, she schedules a call with Najma to demonstrate the capabilities of the components she configured.
Resources
- Salesforce Help: Record Alerts
- Salesforce Help: Create a Knowledge Base with Salesforce Knowledge
- Salesforce Help: Audit Trail