Create and Manage Cases
Learning Objectives
After completing this unit, you’ll be able to:
- Find, update, and create case records.
- Sort and filter cases using standard and custom list views.
As a service rep focused on service delivery, customer cases are where you live. Most service processes or workflows include some sort of open status, closed status, and perhaps half a dozen other stages in between, which are tracked in cases.
Like other companies, Ursa Major Solar has multiple channels for engaging new and existing customers—in person at the office or out in the field, email, voice calls, chatbots, web chat, social media, online communities, SMS messaging, and more. To meet the diverse needs of customers and the service team, Maria used her admin skills to customize the case creation process so that the team can open, edit, and manage cases regardless of channel. We can’t cover all of the possibilities here, but we can show you what the typical process looks like.
Create a Case
Ada has been working with Ursa Major Solar customer Samantha Austin to repair a damaged solar panel on the roof of her home. Ada wants to open a new case to start the repair process.
To access a new case, you need a Service Cloud implementation. If you have a sandbox instance of Service Cloud, you can try out these steps there. If you don’t have a sandbox and you’re a customer or partner developer, contact your manager to request one.
- Log in to Salesforce and open your console app. Remember that there’s more than one way to get there. Ursa Major Solar customized the console, so Ada first logs in to Salesforce, clicks the App Launcher (
 ), and uses quick find to open the Solar Console app. If your app hasn’t been customized, click the App Launcher, click Service Console, and select it.
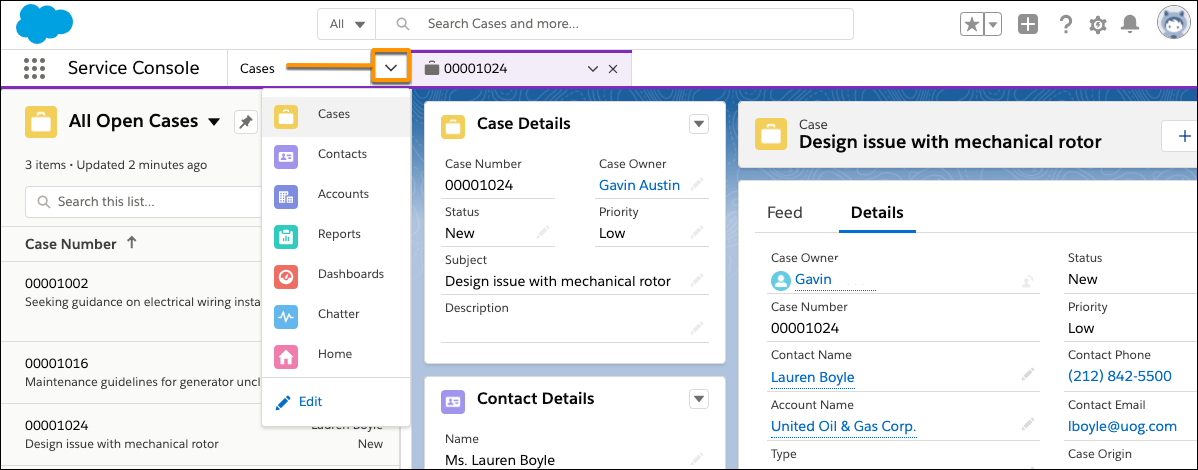
- Click the Cases tab or use the dropdown menu in the navigation bar to find Cases.
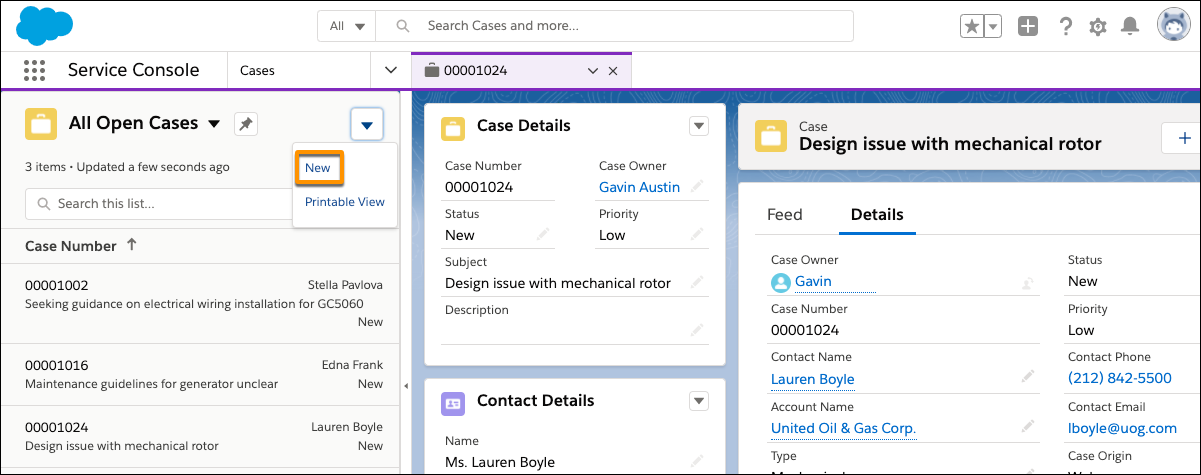
- Click New to open the New Case page. If your org uses record types, you might be prompted to choose a record type when creating a case. Choose a record type to continue.
- In the Contact Name field, create a case for Samantha Austin. You can also create a case for a new customer from this menu—just follow the prompts to create the contact record and go back through the step of creating a case. Be aware that when you select a contact for the Contact Name field, the Account Name field defaults to the contact’s account when you save the case. You can change the account in the Account Name field by editing the case after it’s saved.
- Click Status and select New.
- Click Case Origin. This should be the engagement point with the customer—in person, phone, web, and so on.
- (Optional) Select a Type, Priority, and Case Reason.
- Enter a summary in the Subject field.
- Enter customer issue information in the Description box. Your org might have a standard format for this section, so follow your best practices and be specific, so when you or your teammate come back to this case, the situation is clear.
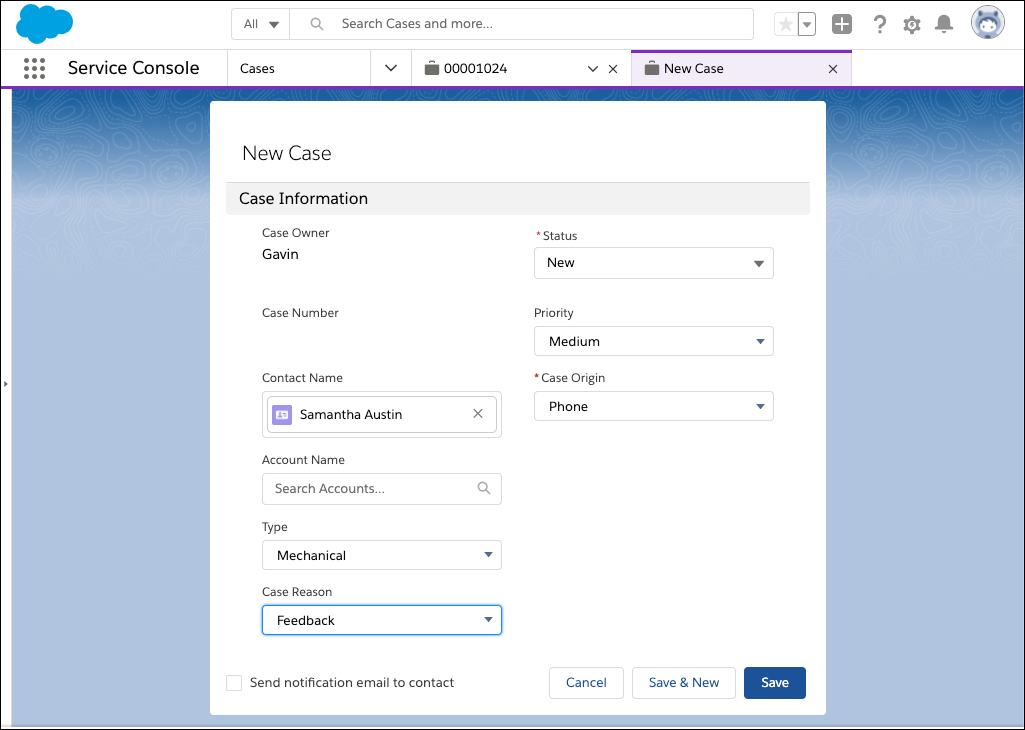
- If set up by your admin, select Assign using active assignment rule to have the case routed automatically to the user or queue your admin has designated.
- Click Save.
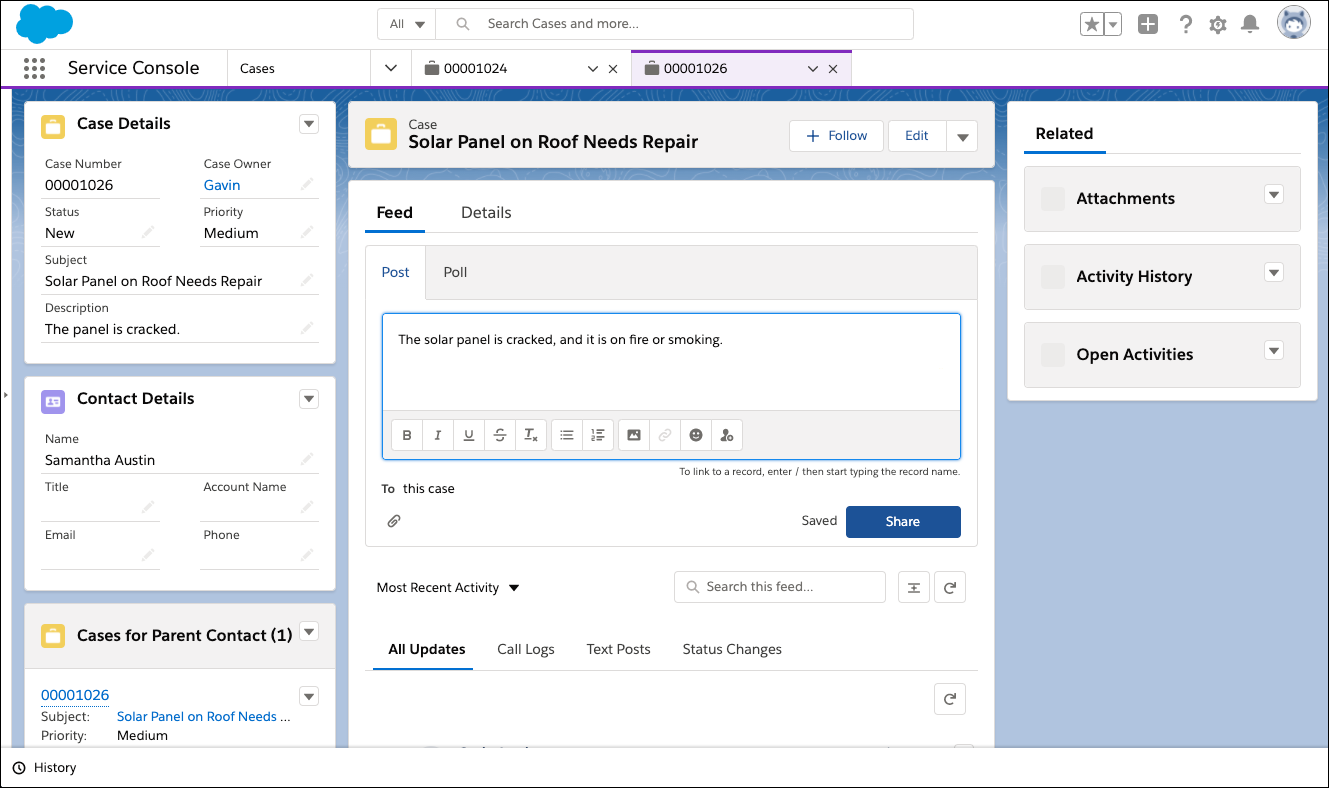
And here it is: the new case for Samantha, getting the solar panel on her roof repaired. This should look familiar to you—the major console areas identified in the previous unit are all here. Now you or anyone on your team can work together to resolve the case quickly.
There are a few ways to set who picks up the case and how. We already mentioned assignment rules, which automatically assign incoming cases to specific reps or queues (differentiated by case type, services required, or other criteria). You can manually change case ownership and optionally send an email notification to the new owner. If your admin has enabled Omni-Channel, you can pick up cases from the widget in the utility bar.
Change a Case Status
Now that the case exists, Ada and team can edit and add details as needed, including changing the status to reflect Samantha’s progress through the solar panel repair stages. All they need to do is open the case, click Edit, and change the value of the Status field. Click Save, and that’s it! Case managed.
List views, scheduled reports, and escalation rules help you keep up to date on your cases. Keeping the Status field current helps everyone on your team know where a case is in the workflow. Your admin can customize the status options, but common ones are New, In Progress, On Hold, Escalated, and Closed. If your customer has an email address saved in Salesforce, the client themselves is notified that their case has been closed if you select the Notify contact box on the case record.
View Case Lists
After you create a case, you automatically see it open within the console. But what if you need to navigate to another case? Or what if you want to see a list of cases?
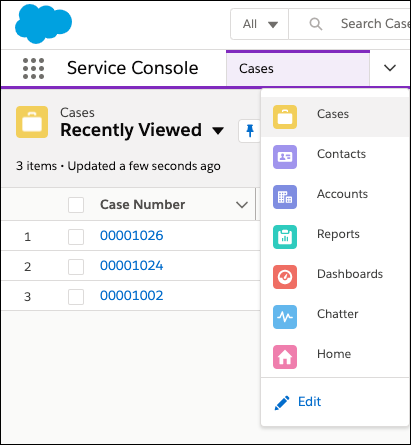
Easy—all you need to do is click the Cases object tab from the navigation bar or select Cases from the object menu.
The cases list view is just like other lists views, except it is only for cases. Use the list view dropdown menu (1) to select different lists or click New to create your own. You can also click the pin icon (2) to pin (or unpin) your favorite list view so that it’s the one you always see when you open the cases tab.
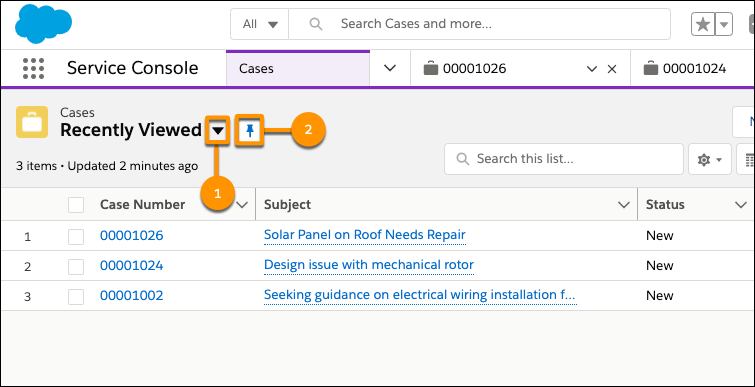
Select the box next to one or more cases and use List View menu options and the dropdown on each case to Edit, Close, Change Owner, and Change Status (your options may be different depending on how your admin has configured this).
Like so many things in life, there’s more than one way to manage cases. Review this information and the links in the Resources as much as you need to. As you become accustomed to working with cases and the console, you’ll discover what works best for you and your team to craft the best service rep experience with Service Cloud.
Resources