Get Started with Data Filters
Learning Objectives
After completing this unit, you’ll be able to:
- Explain how data filters work in Salesforce Spiff.
- Access and organize data filters in Spiff Designer.
- Describe how data filters are named.
- Create a filter.
Meet Data Filters in Salesforce Spiff
Salesforce Spiff is a leading sales compensation software that automates and simplifies the process of calculating and managing sales commissions. By using Salesforce Spiff, organizations ensure accurate, timely, and transparent commission payments, motivating sales teams and driving performance.
Salesforce Spiff creates a rep statement or sales commission page that is individualized for each sales representative (rep). This page updates daily for each rep—a custom, dynamic insight into their earnings.
Data filters support the dynamic and custom nature of rep statements. They take the data flowing through Salesforce and display records that match defined criteria. For example, a simple data filter might show all of the deals closed and won during the month for a specific rep.
In this module, you learn how to organize, create, and use data filters. Let’s get started!
Navigate to Data Filters
To find data filters in Spiff, start by clicking the Designer tab in the top-right corner. On the Designer page, the window on the left will have the Plans tab highlighted. Click Data to access the data tab. The data tab defaults to the Fields view, so click Filters to access the data filters menu.
Organize Data Filters
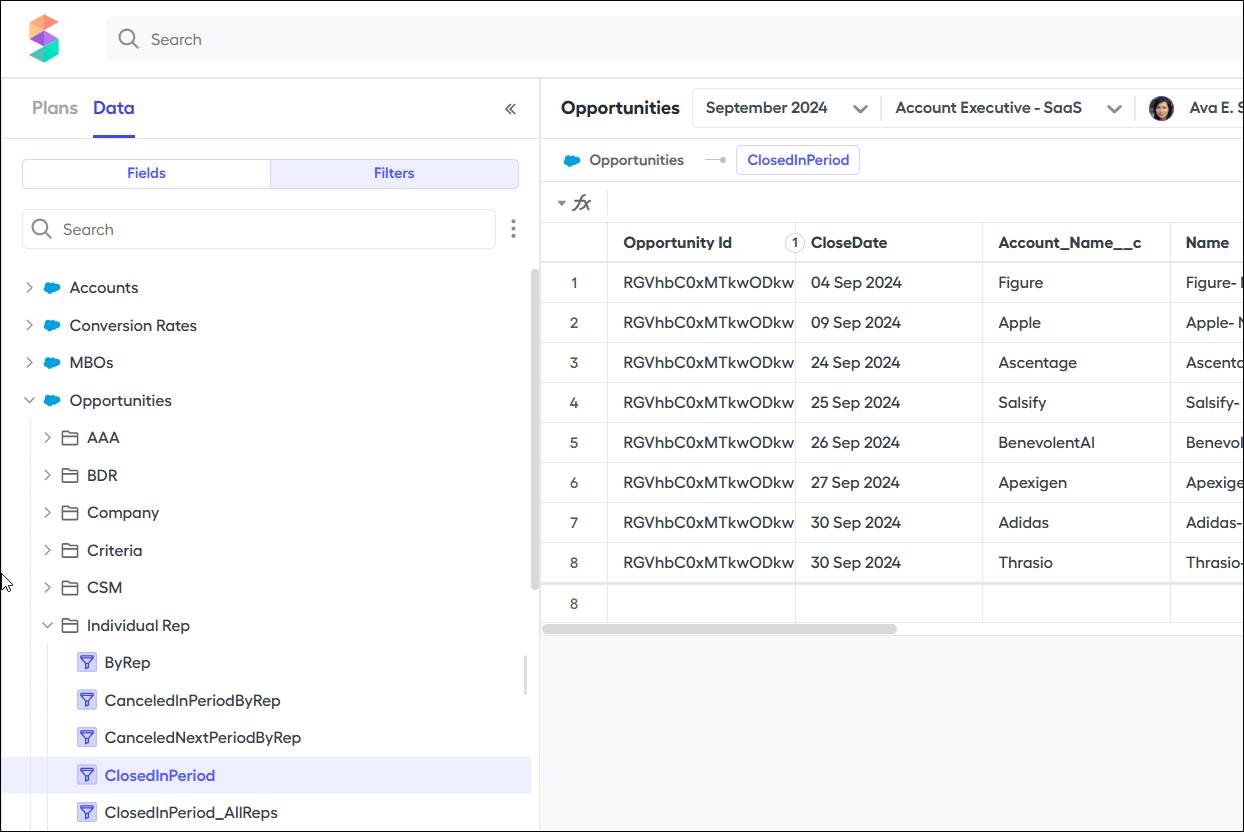
The left panel lists your connected objects from Salesforce and other CRMs. Click an object to expand a list of filters that have already been created. If you’re using an Opportunities object, Spiff Designer comes with some data filters already configured. You can update the syntax in each of these filters to reflect your fields or you can create a new one from scratch.
Clicking on a filter displays the filtered data in the center of the screen, and opens a new settings menu on the right specific to the selected filter.
If your data filter menu starts to get cluttered, hover over the object name and create folders to group your filters by category or plan. Filters can be dragged and dropped in and out of folders as needed for organization.
If you have objects with no associated data, you can also hover over it in the list and select the option to hide it from this view.
To delete an unused data filter, hover over it or right-click it and then select Delete Filter. Note that you can’t undo this. Don't delete a filter unless you are sure it's not being used by any commission rules.
Find a Suitable Name
A simple and thoughtful name makes it easier to read, understand, and debug your filters.
Choose a name that:
- Makes sense in the context of your commission plans.
- Is descriptive and unambiguous.
- Has a distinct meaning.
- Is searchable.
Think about this: If someone else at your company were to start using Spiff, would they understand what your filter is doing by its name? If they wouldn’t, consider another name.
Create a Data Filter
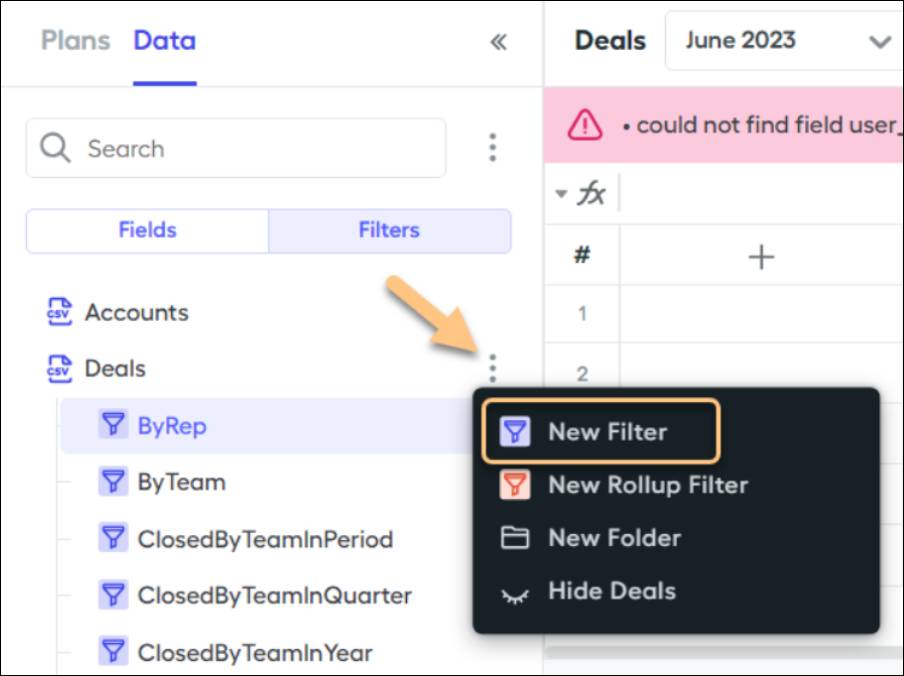
To create a new data filter, hover over the name of the object that contains the data you want to filter, then click the three dots that appear. And then select New Filter.
A panel opens on the right with a default name for your filter. Follow the guidelines you learned earlier to choose a name. For example, ByRep is a great name because the filter is pulling deals by the rep that closed them. If you are filtering by period, you can name it InPeriod. If you are filtering by the type of deal, you can name it IsRenewal or IsNewBusiness.
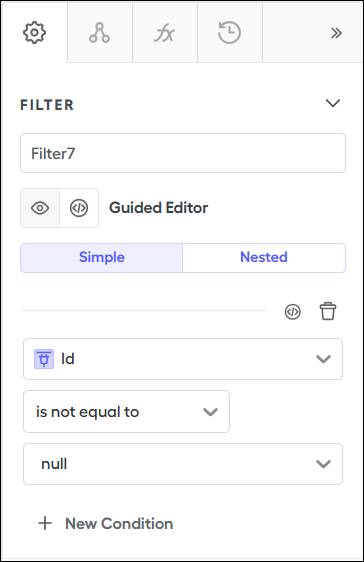
Name your data filter and set its parameters in the right-side panel. You can always update or edit a data filter in the right panel any time the filter is visible.
In the middle of the screen, all of the fields from that table or object appear, along with records from that object.
Choose the Objects for Your Data Filters
Data filters help you build payout rules. A datasheet is a plan component that you build and set to a specific object and data filter, so you can create a payout rule that commissions every record in the filter. These are called line-by-line rules.
How do you know which object to use? There are a few things to consider when deciding which object to use.
Every line-by-line payout rule requires at least three components.
- A field designating when a commission is to be paid, such as CloseDate and PaidDate
- A field designating who is to be paid, such as OwnerId
- A field designating how much is to be paid, such as Annual Recurring Revenue [ARR].
Starting with a field like CloseDate narrows your search the most. This optimizes your data filters to run efficiently.
Here are a few more things to keep in mind.
- If your object has thousands of records for a single rep in a period, consider switching your commission to an object that can aggregate this data.
- Decide what details you want to display to your reps, and use the corresponding object.
- Consider your future reporting needs and plan accordingly.
Now that you know the basics of data filters, let’s create some commonly used filters in the next unit.