Test a Flow
Learning Objectives
After completing this unit, you’ll be able to:
- Prepare to test a flow.
- Test your flow to ensure it syncs handwritten leads in Gmail with leads in Salesforce and notifications in Slack as expected.
Prepare to Test a Flow
After you’ve designed your flow, you must test it from end to end to ensure it syncs data as expected.
As a best practice, test your flow using your test systems and data. After you complete testing, run the flow using your production systems and data. For Salesforce, this means using a sandbox org to test your flow and a production org to run your flow.
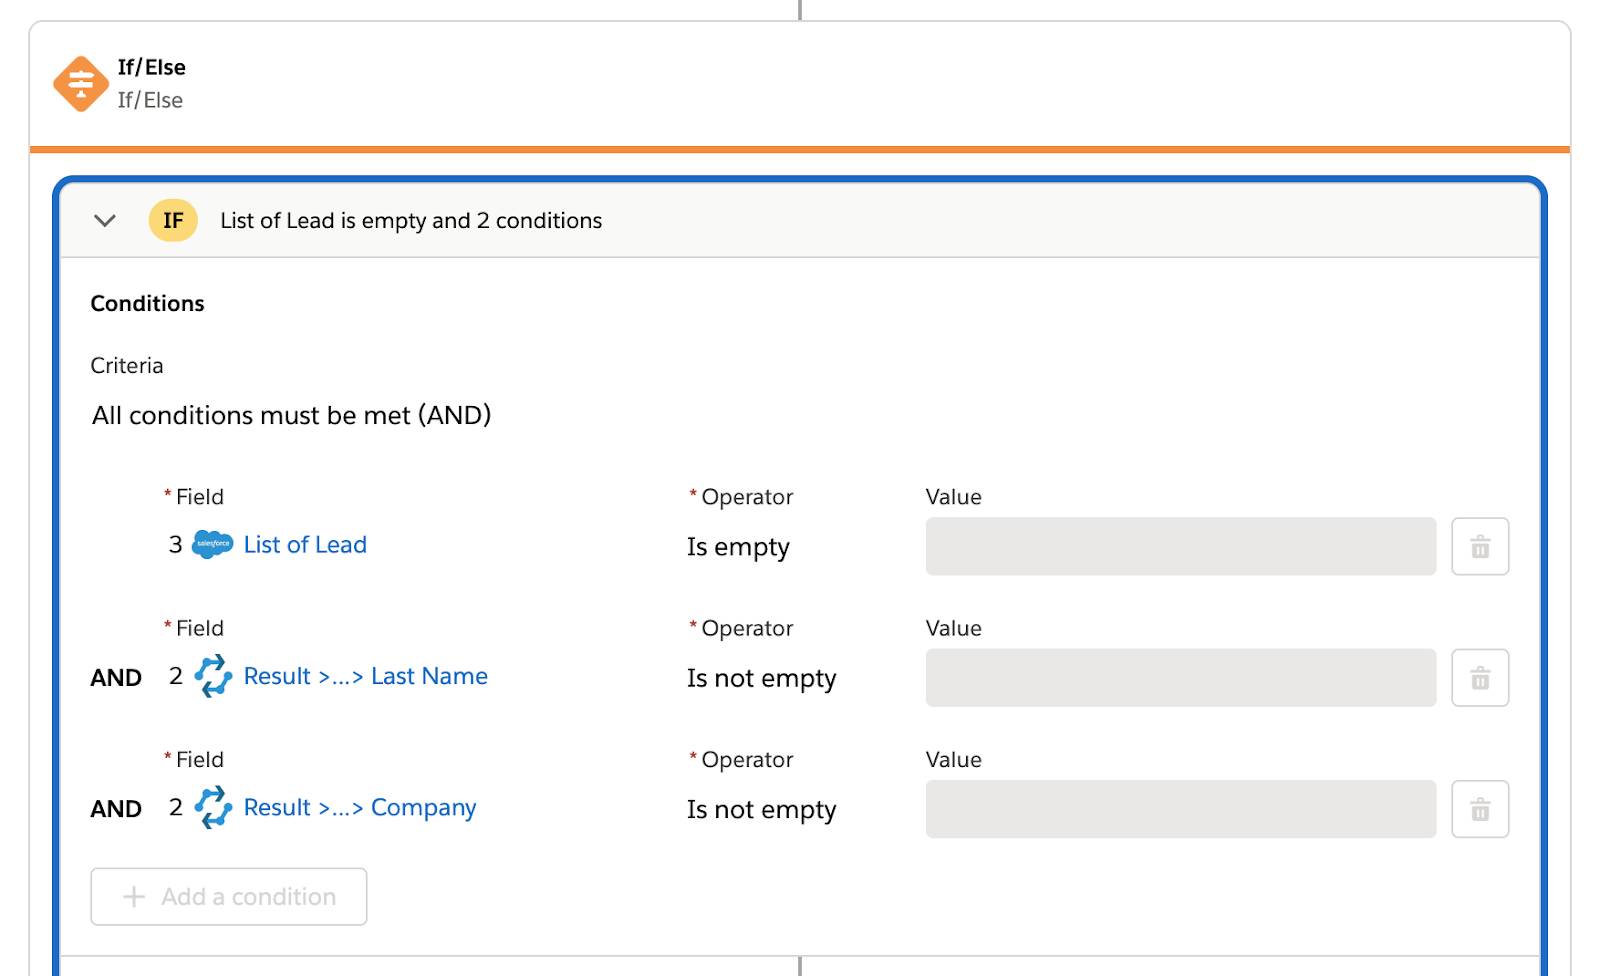
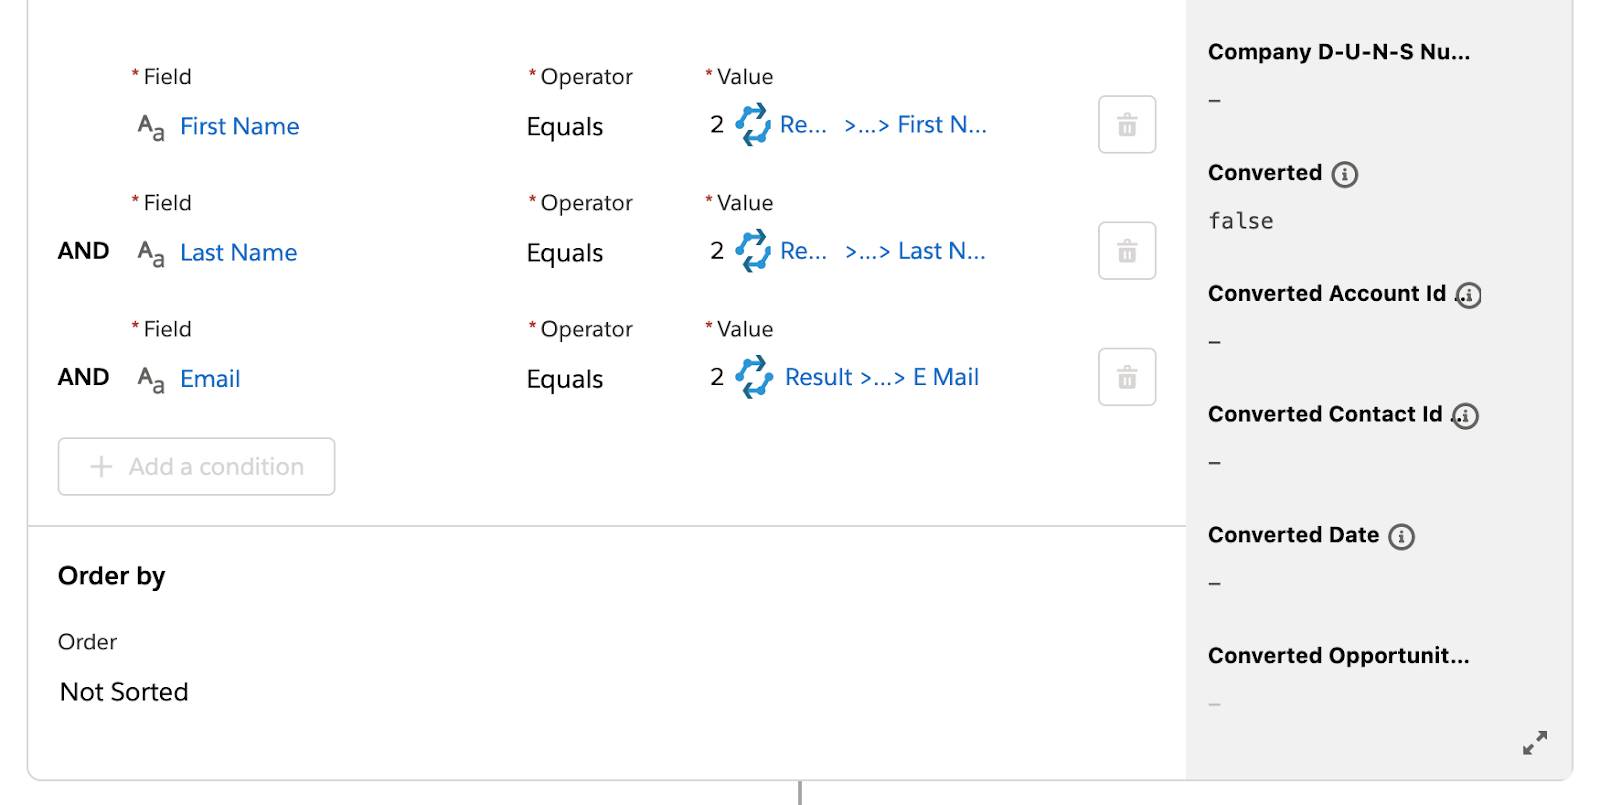
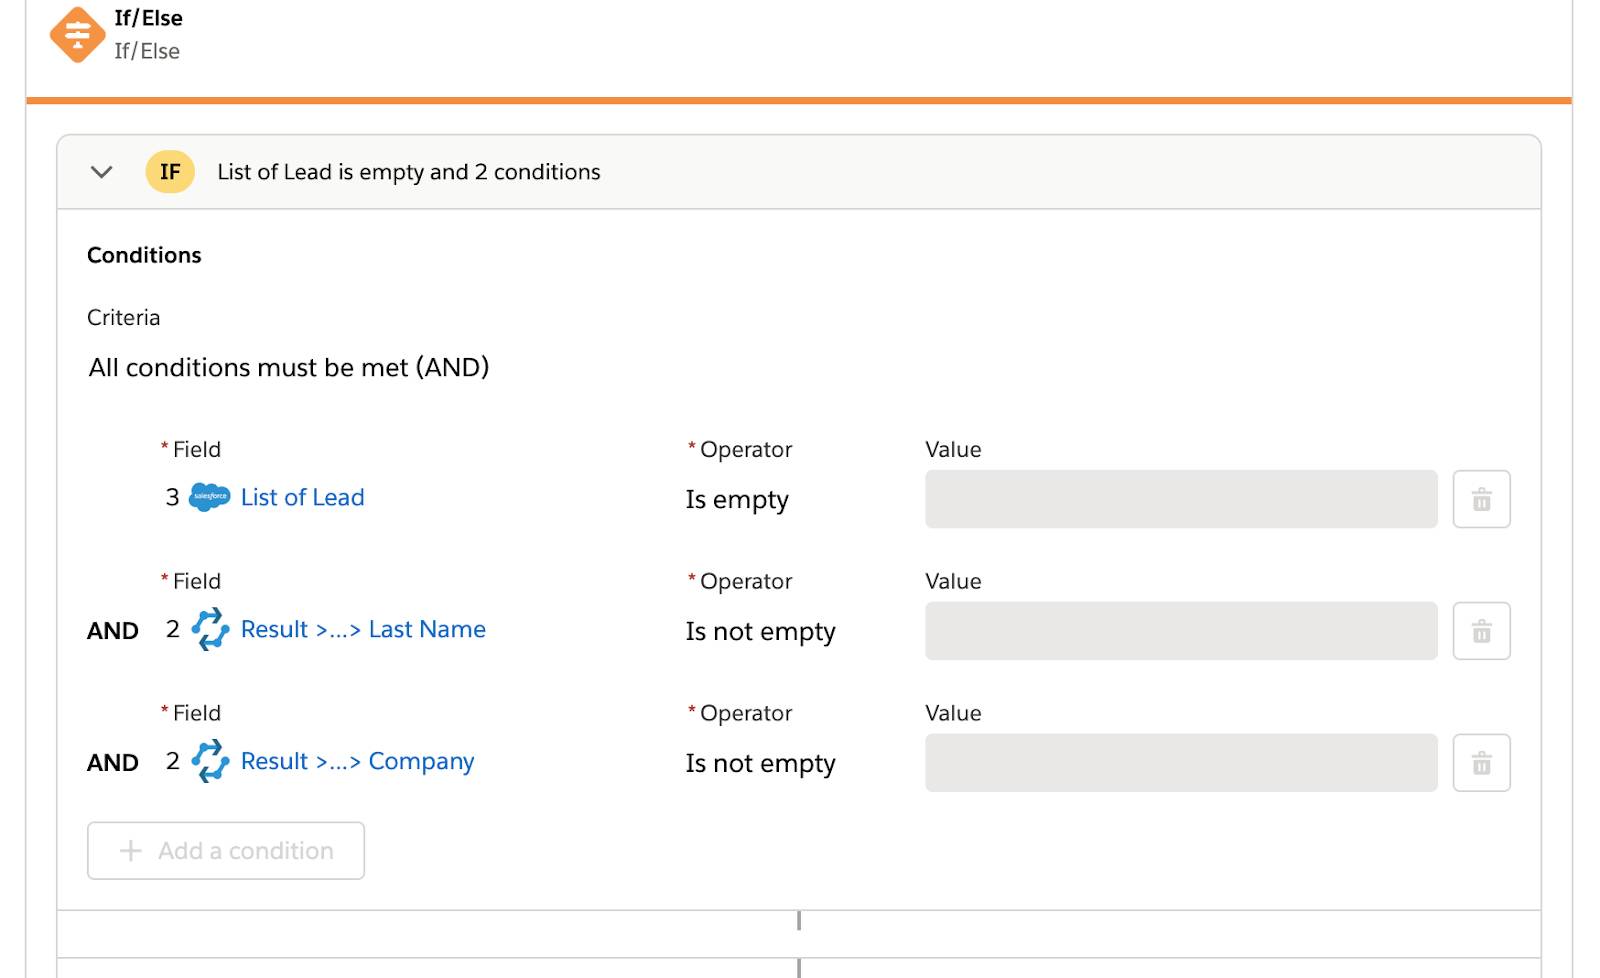
Also, as a best practice, test every possible path of your flow. For example, if your flow has an If branch and an Else branch in an If/Else block, ensure to test both branches.
In general, you have up to 10 minutes to complete a test. When the test completes or 10 minutes have passed, the test stops. As a best practice, you should get all required applications and data ready for the test before starting it.
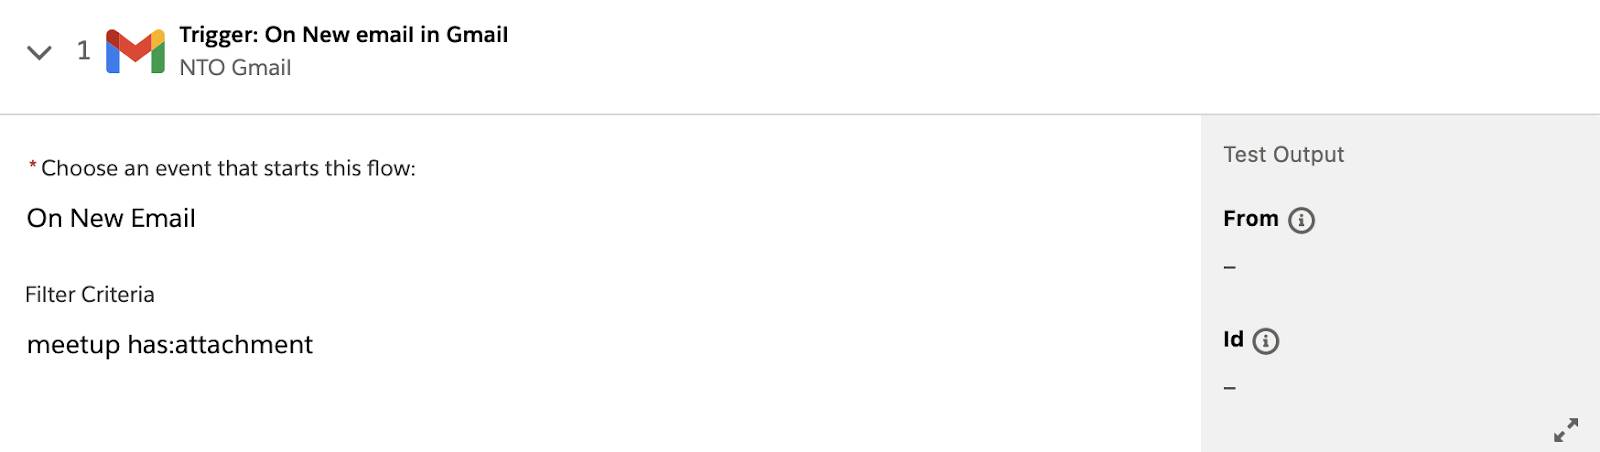
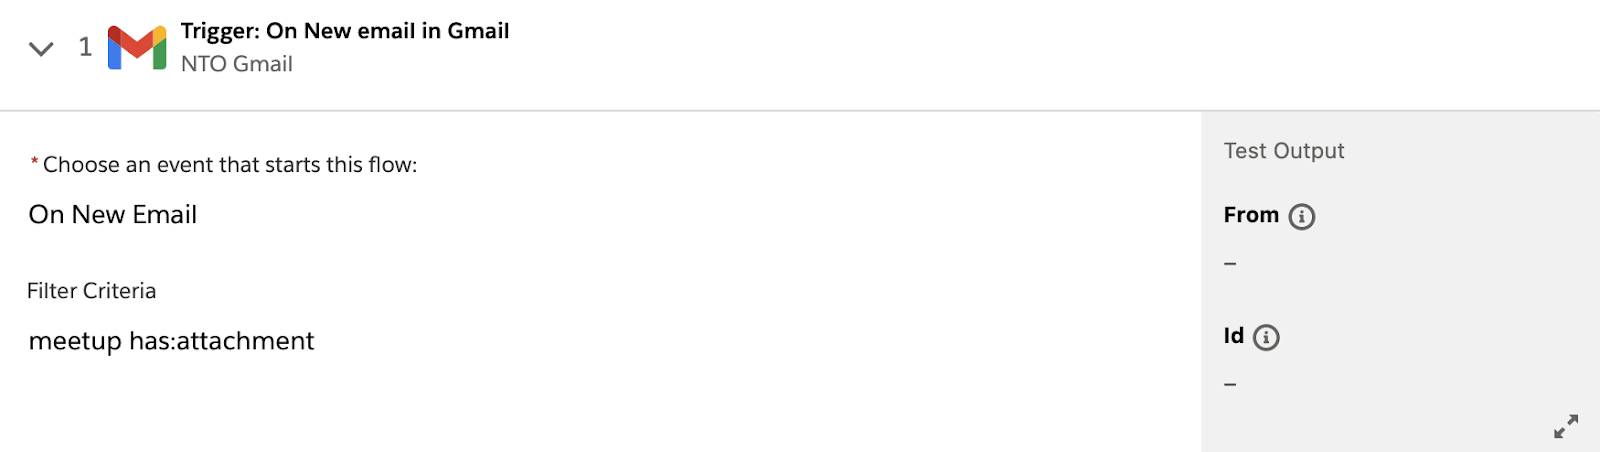
In this use case, when an email with meetup in the subject and an attachment is sent to a Gmail account, it triggers the flow. First, be prepared to log in to an email account of your choice and then create and send an email with meetup in the subject and an attachment to the specified Gmail account.
Next, prepare to verify the following.
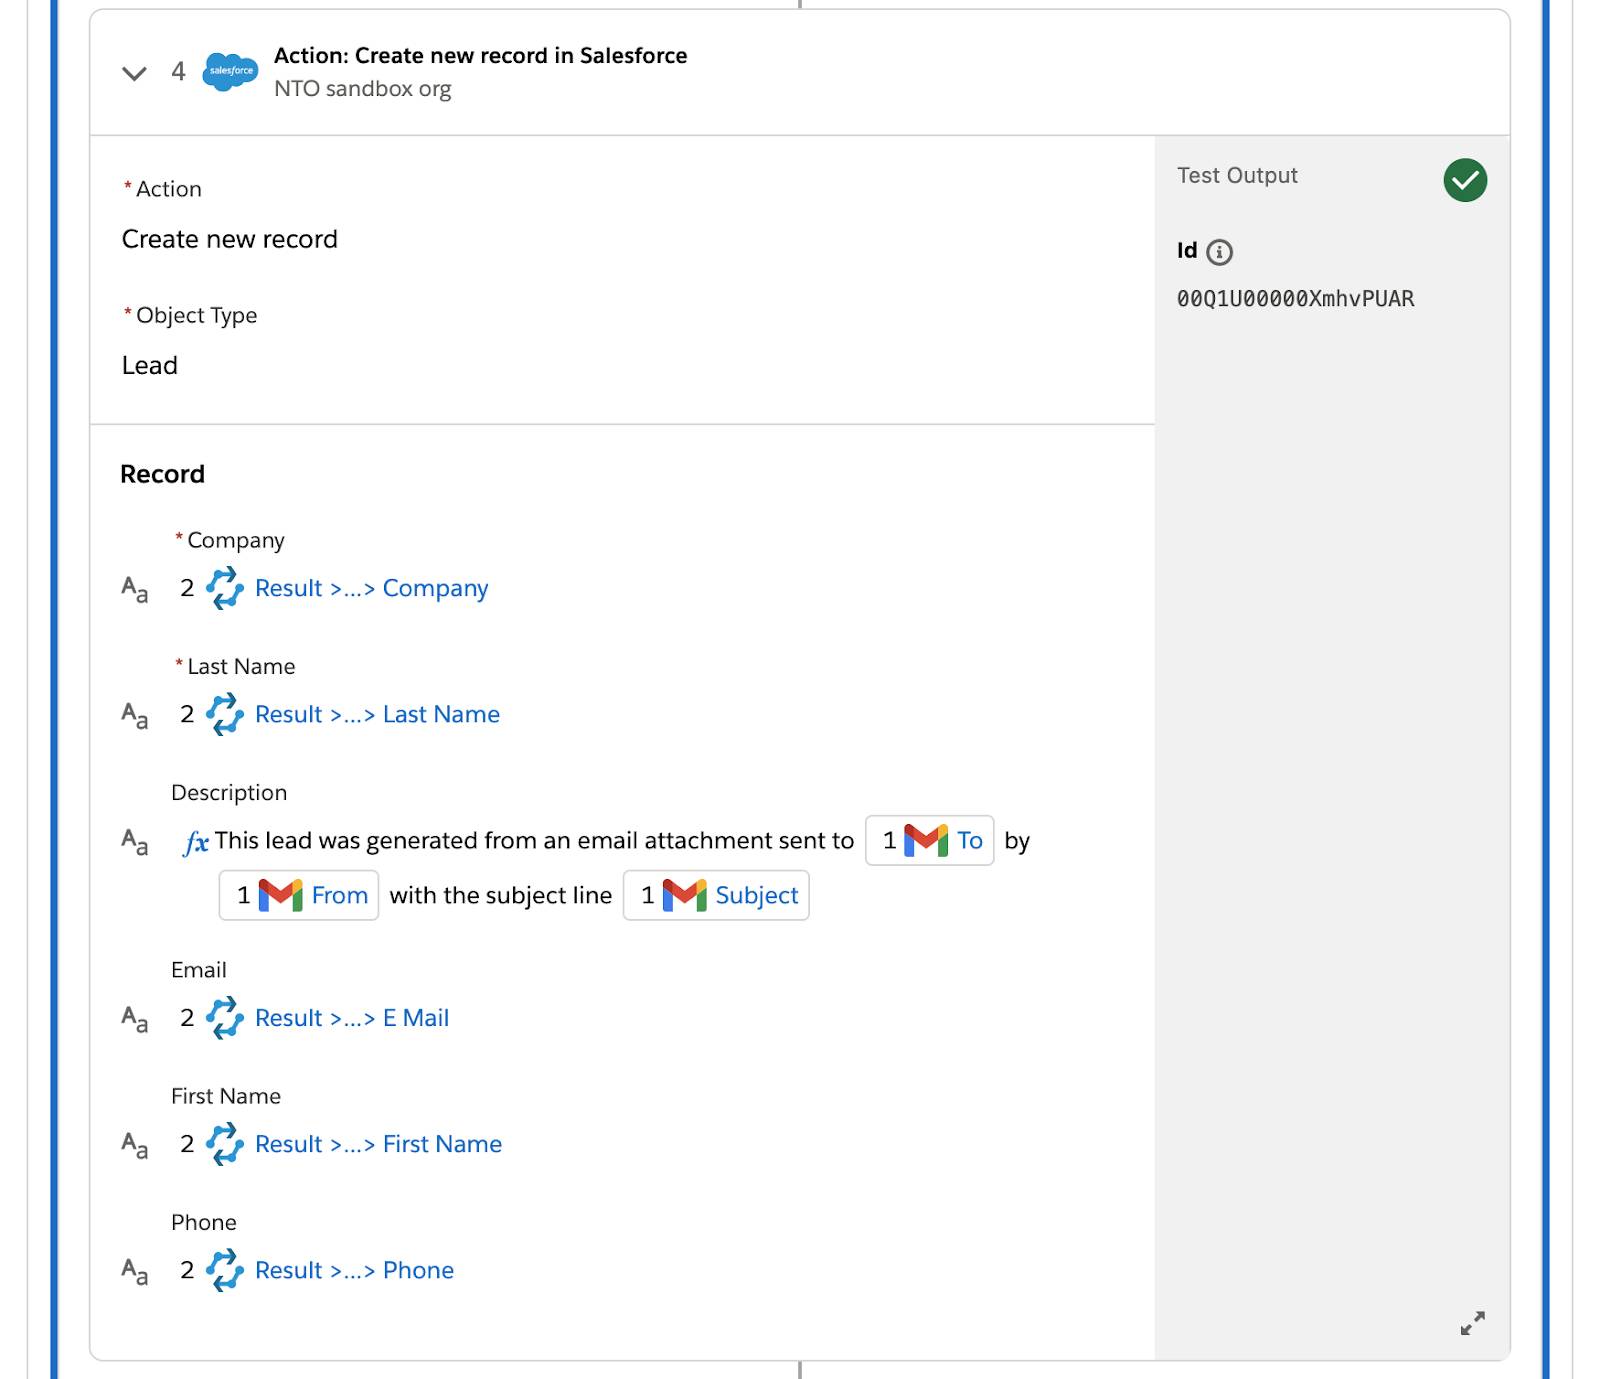
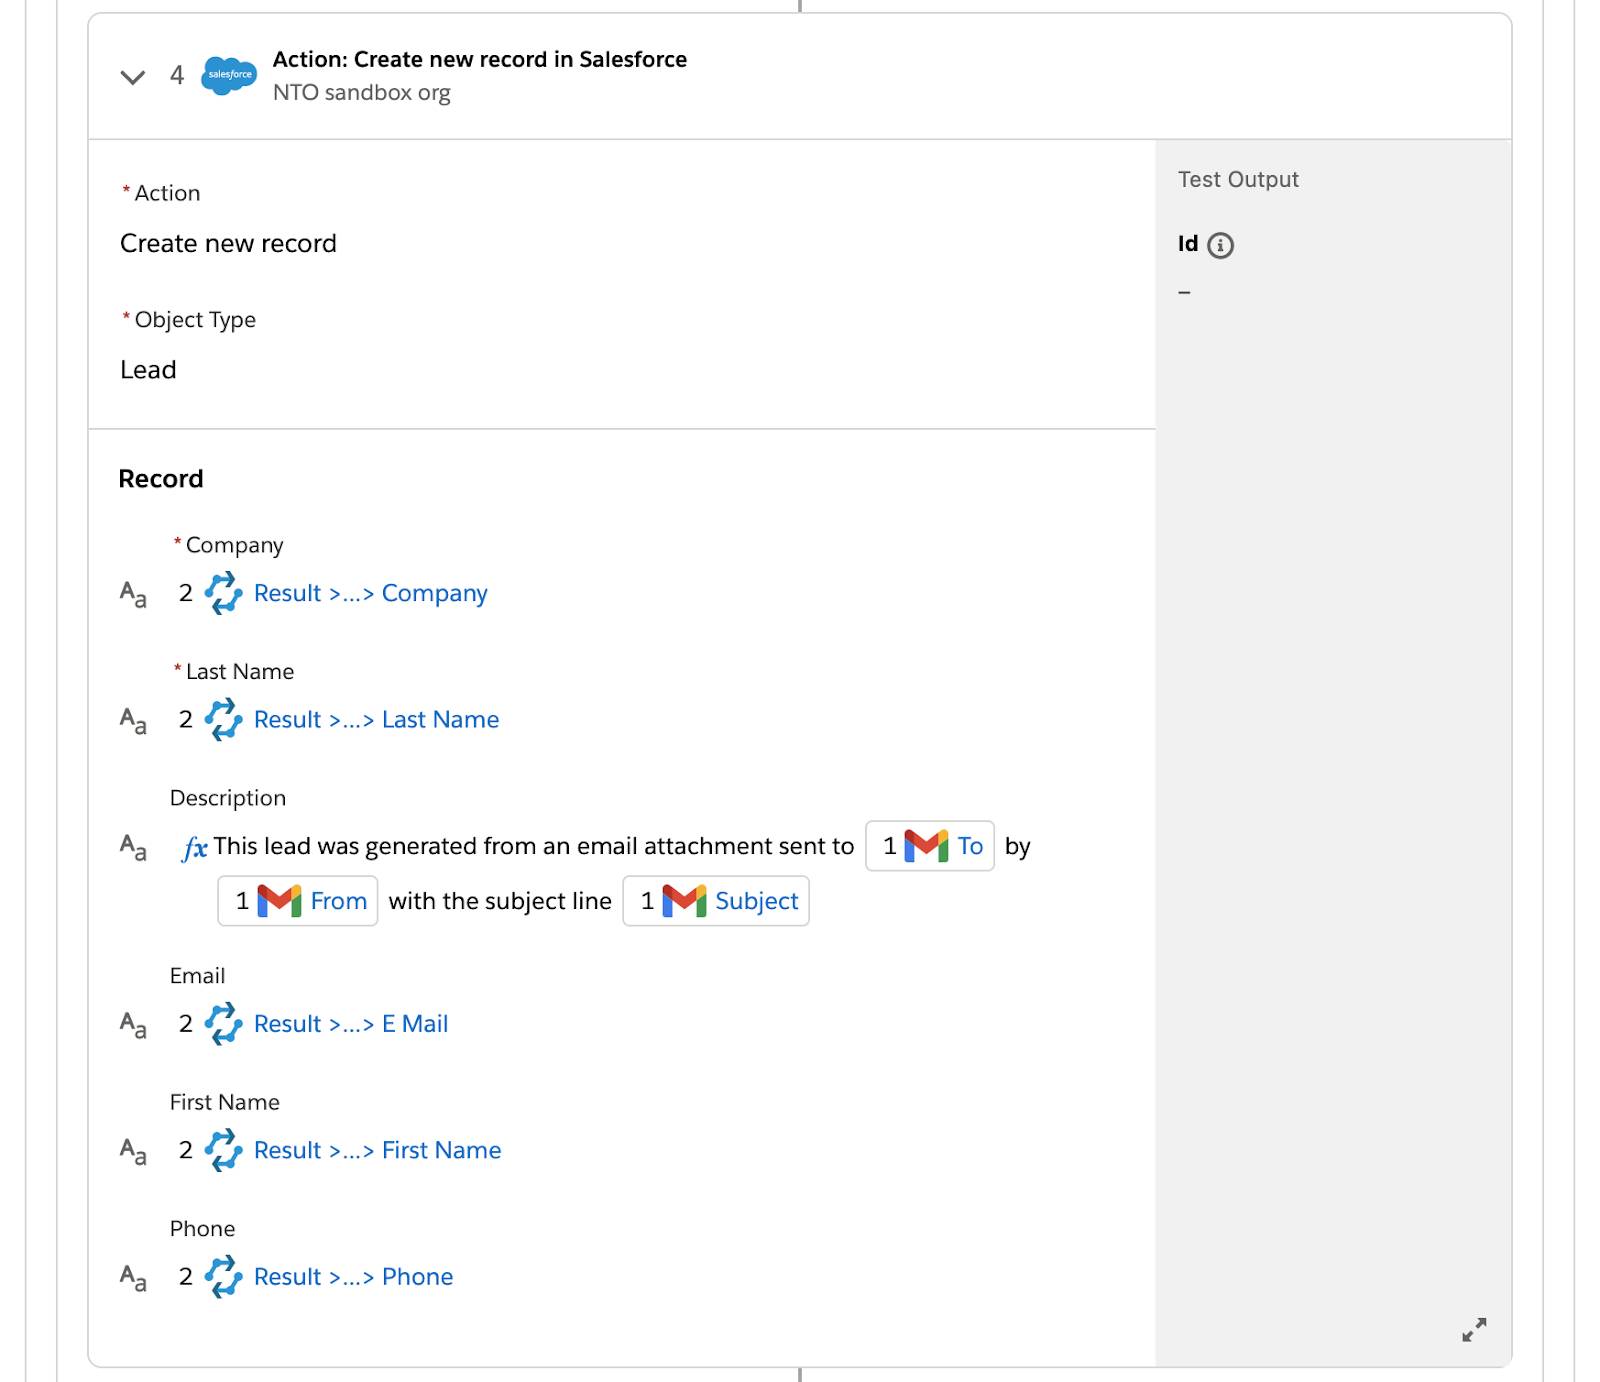
- All extracted leads that don’t have a corresponding lead in the NTO org are created in Sales Cloud.
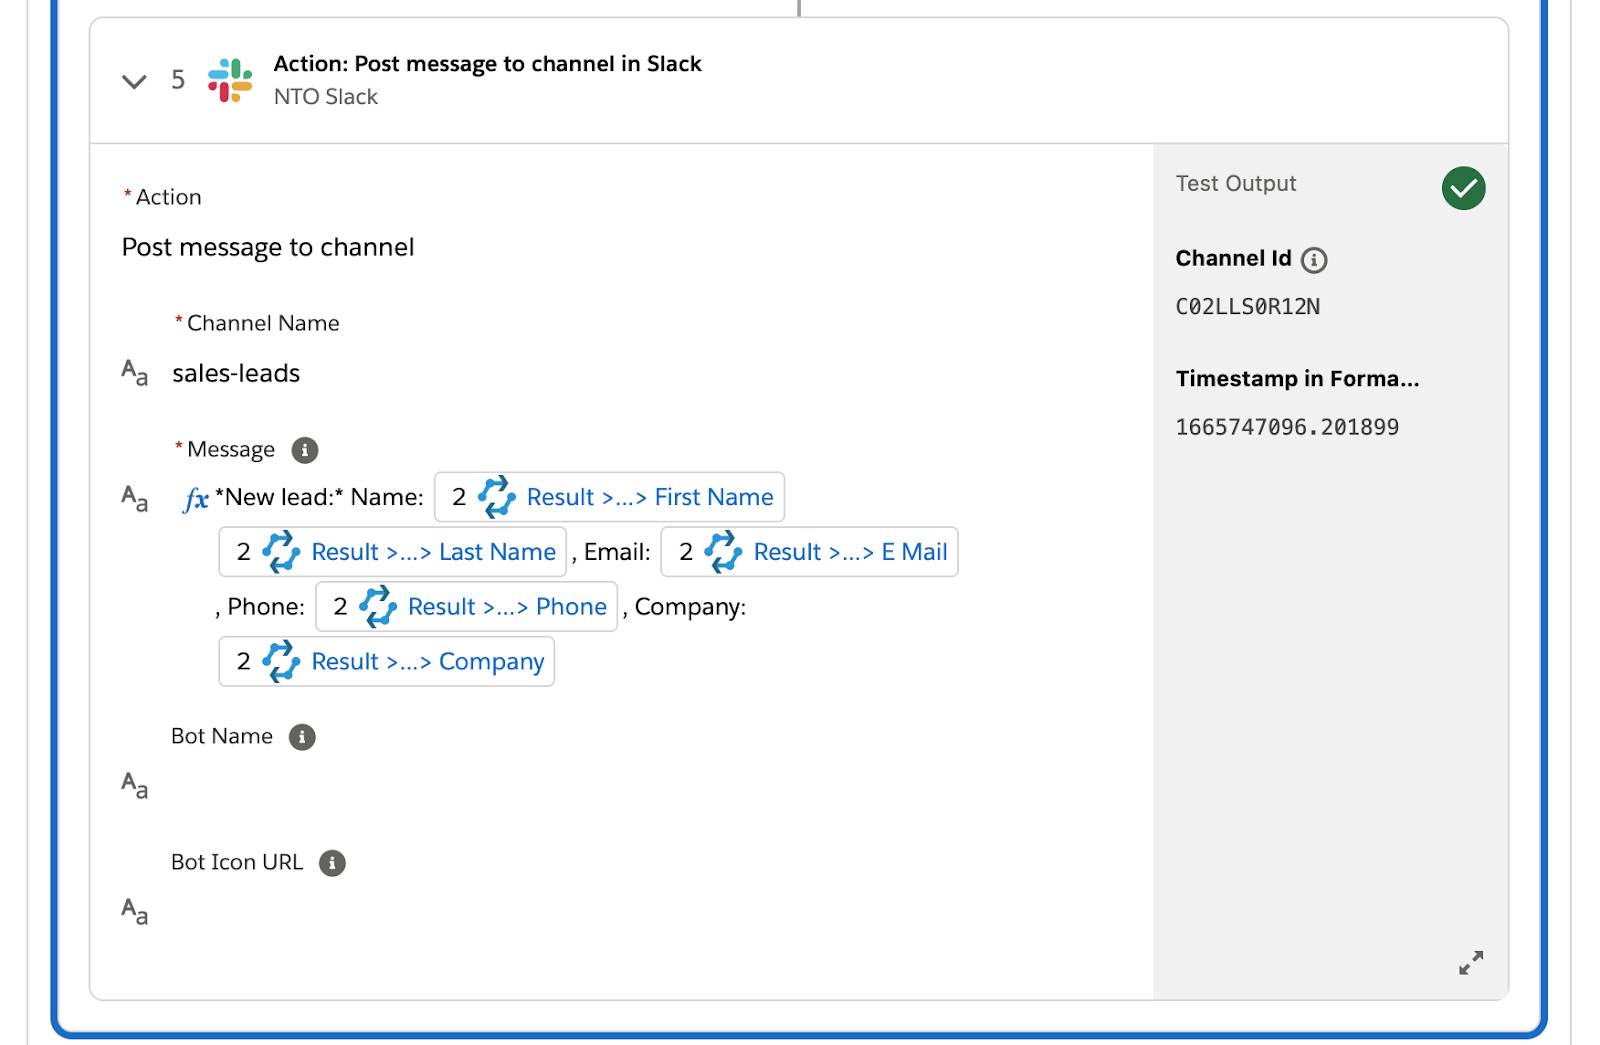
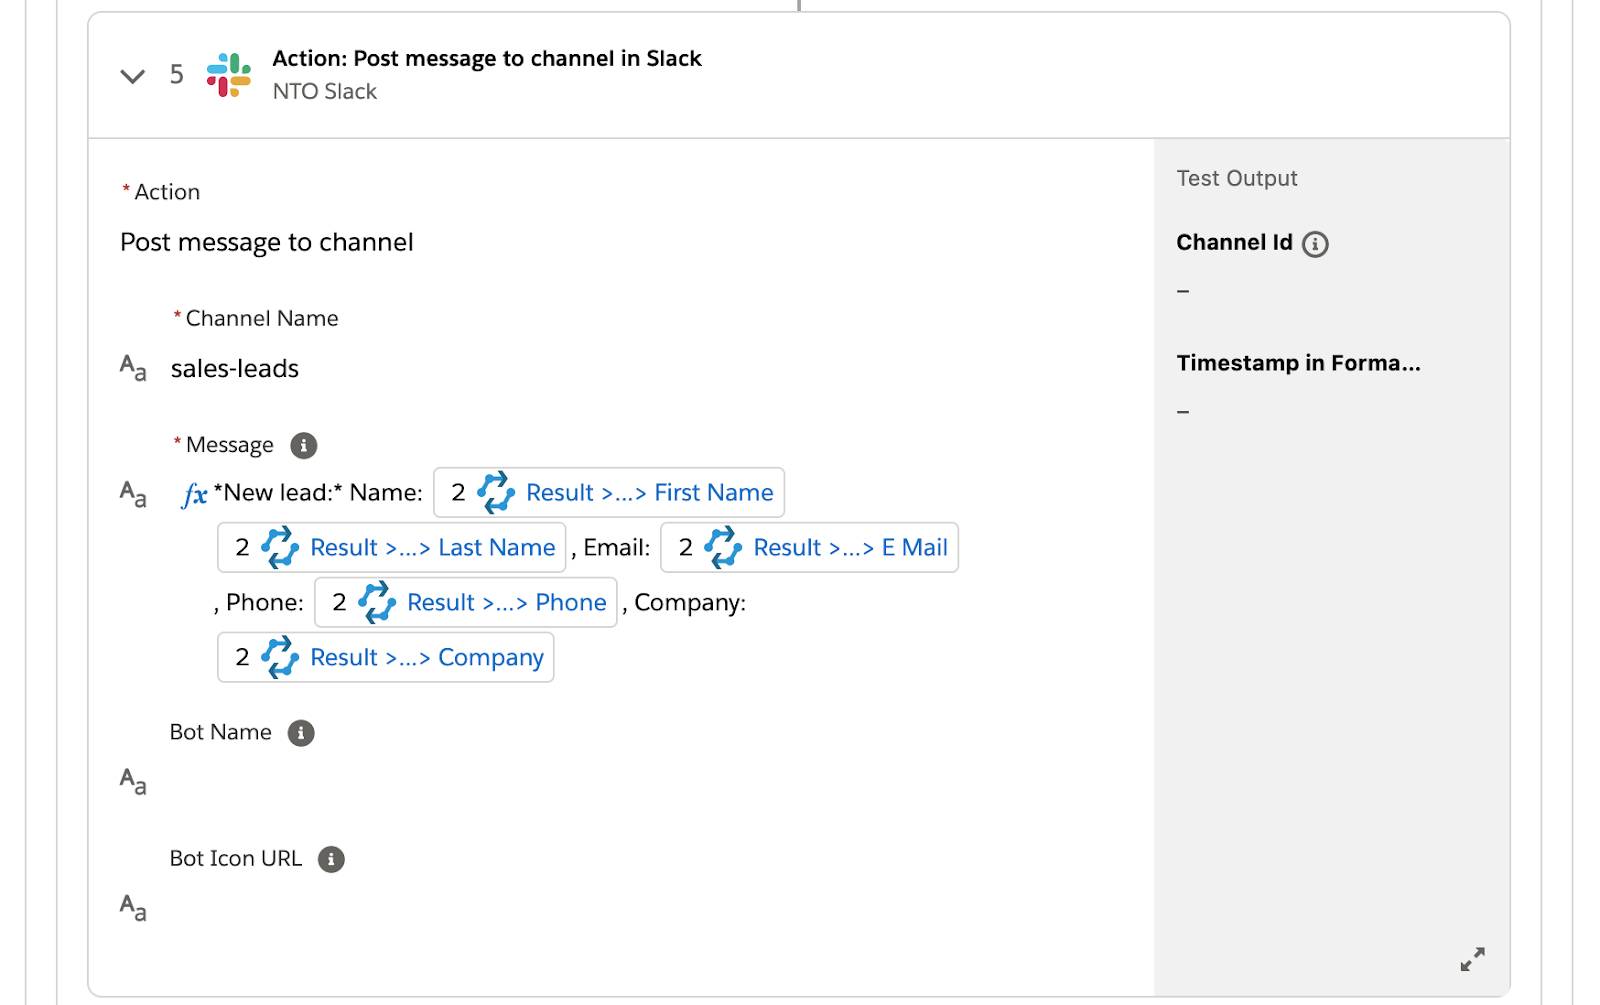
- Messages containing relevant lead details appear in the sales-leads Slack channel.
Finally, if the leads exist in Sales Cloud, get ready to verify that no corresponding leads are created in Sales Cloud and no notifications appear in Slack.
Test a Flow
Follow these steps to test a flow.
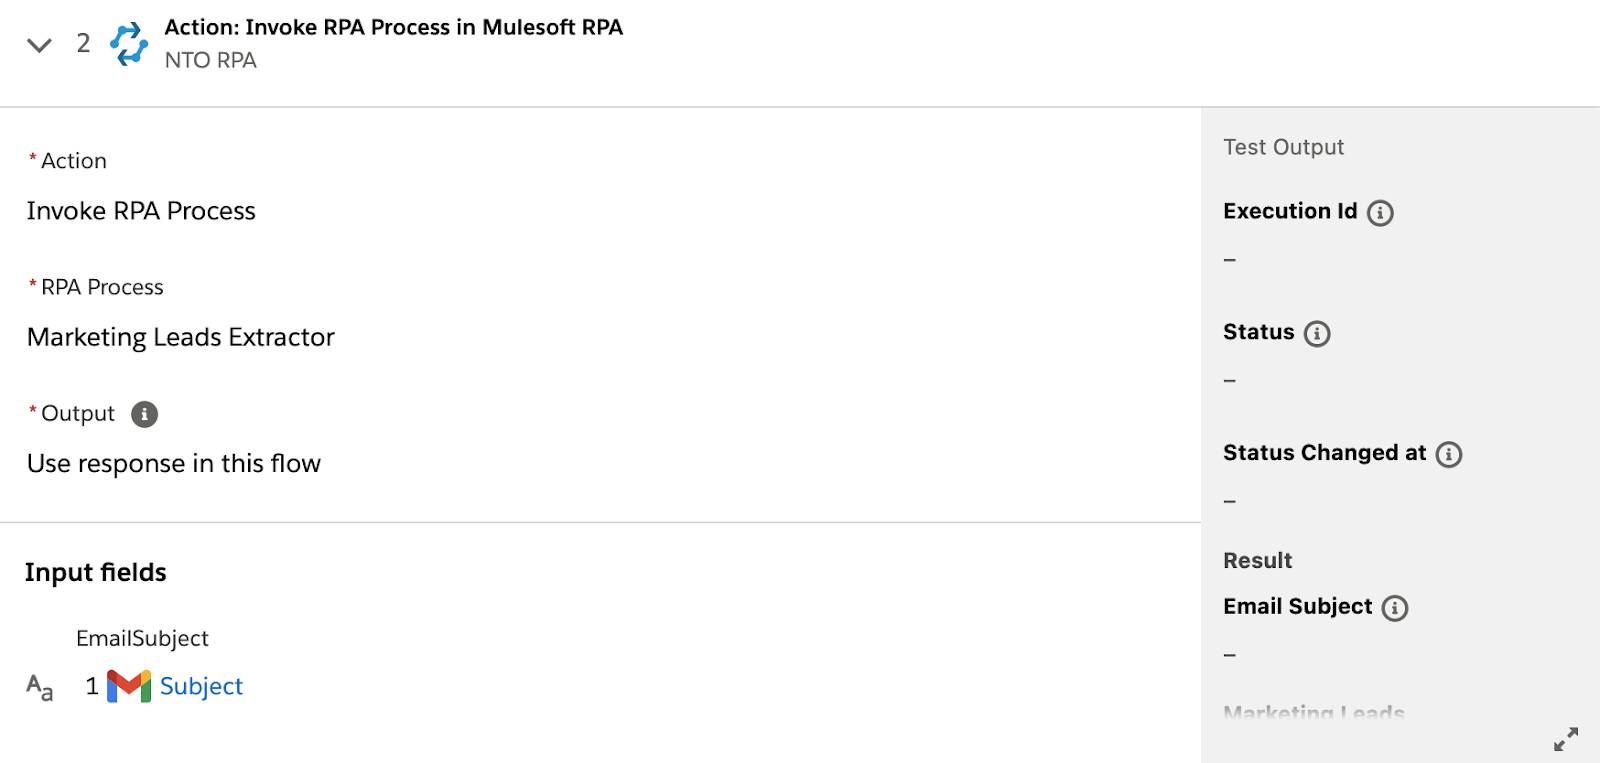
- In the Sync Leads using MuleSoft RPA - Gmail to Salesforce to Slack flow, click Test. The flow goes into a read-only mode.
Note: While the test is running, if you want to stop it, click Stop Test.
- Log in to an email account of your choice using your username and password.
- Compose an email with the following information.
- To: Designated Gmail account that leads are sent
- Subject:
Automation meetup leads
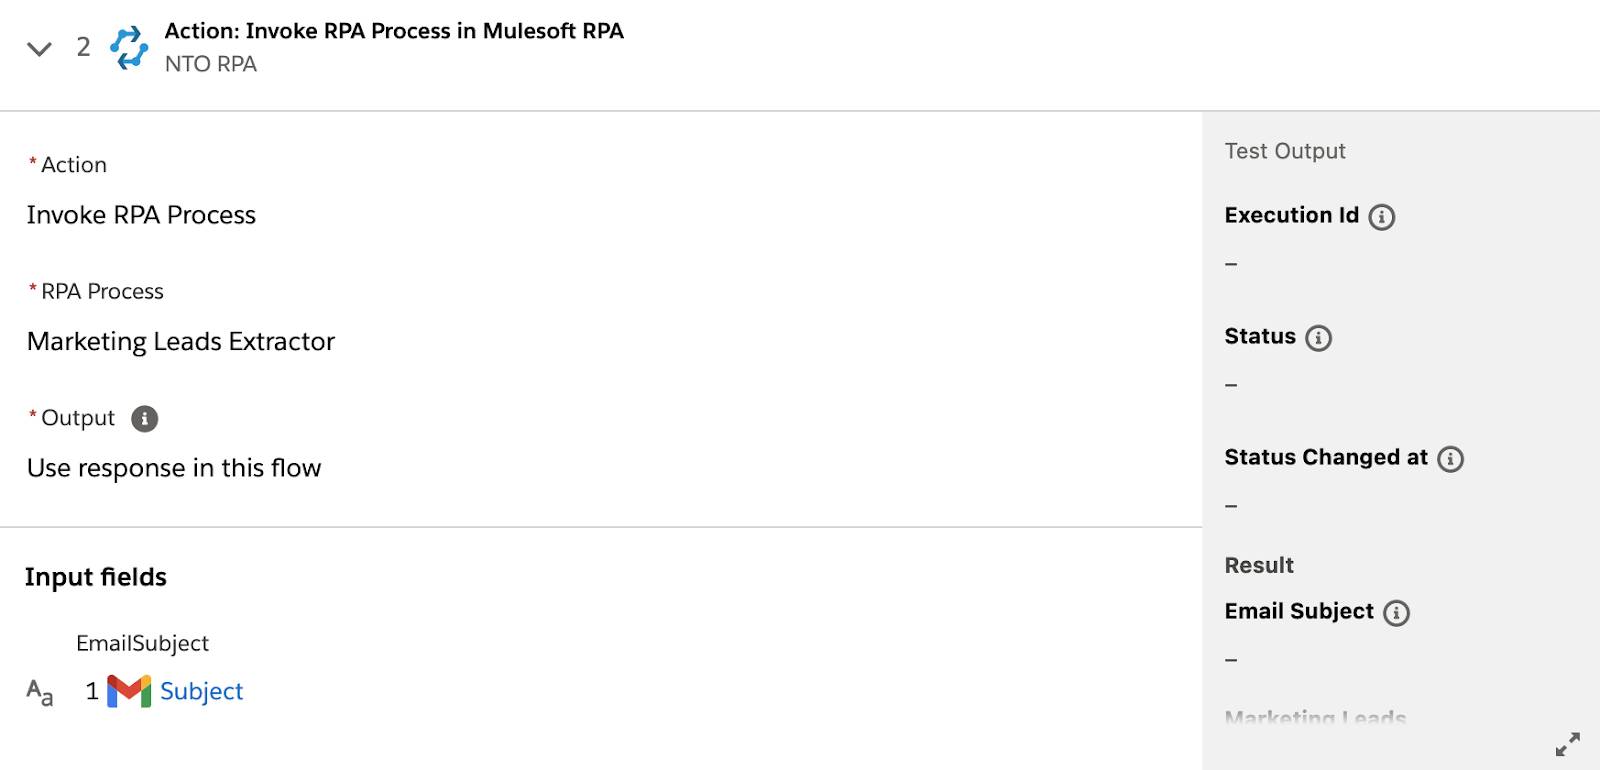
- Attach a leads file to the email. In this example, we use the attachment shown in unit 1.
- Click Send.
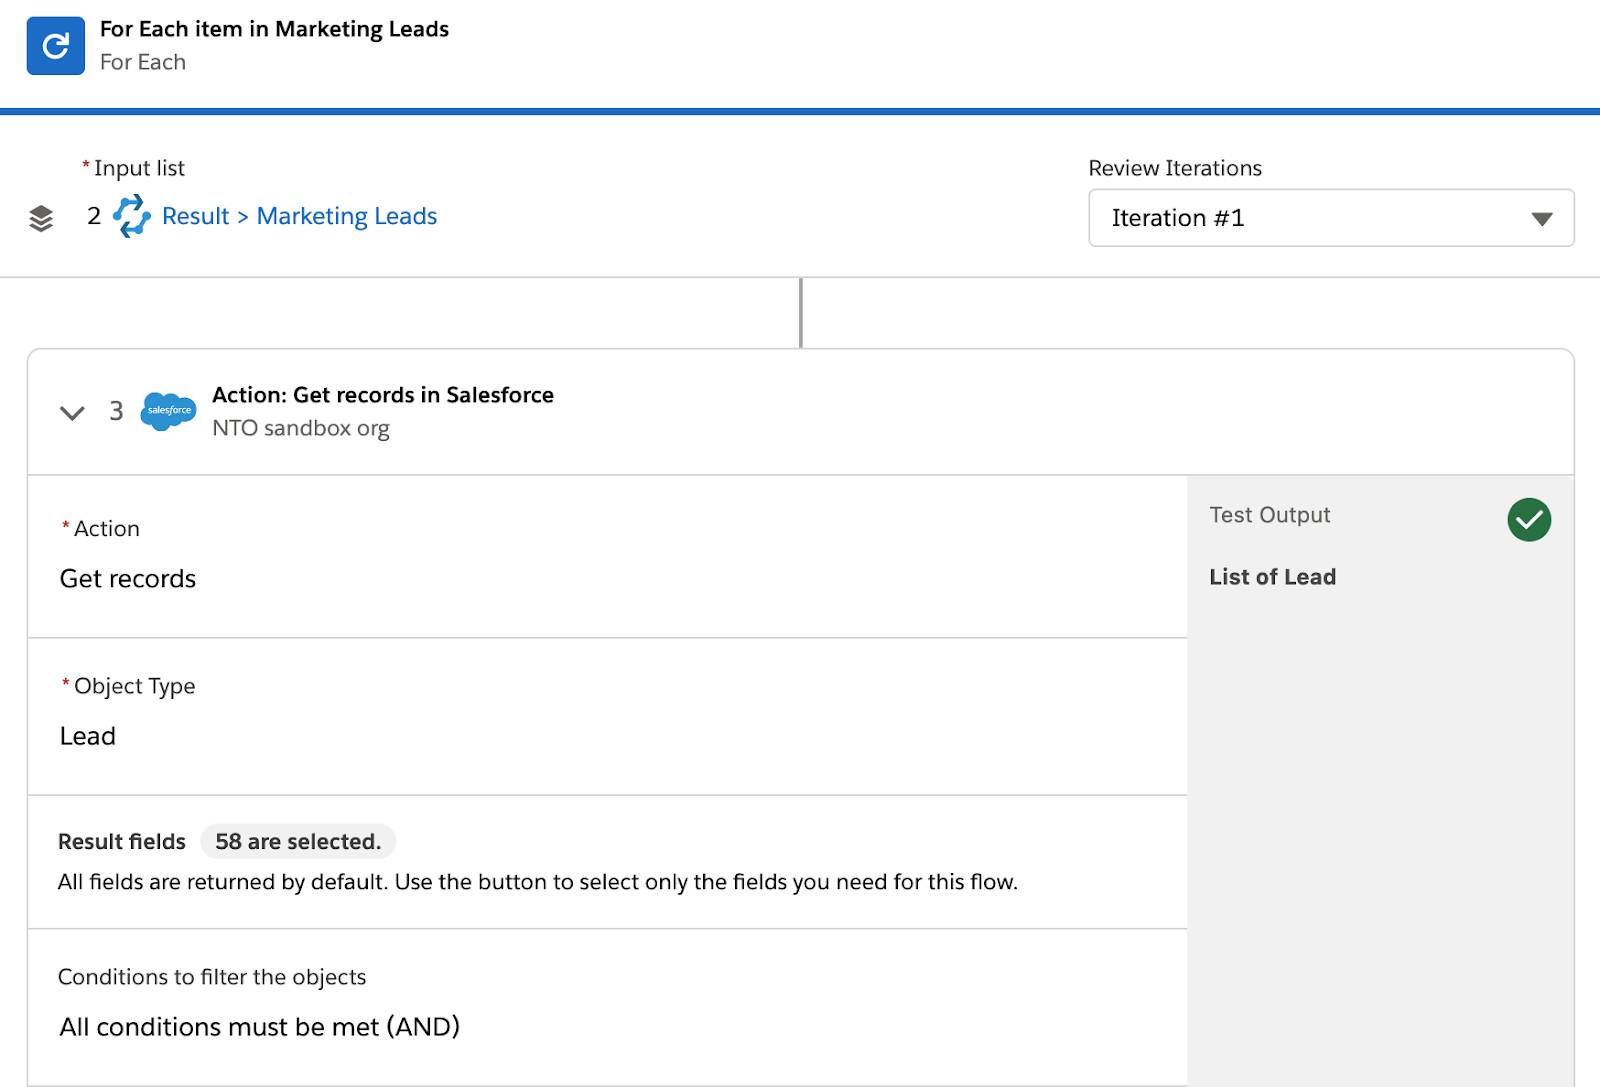
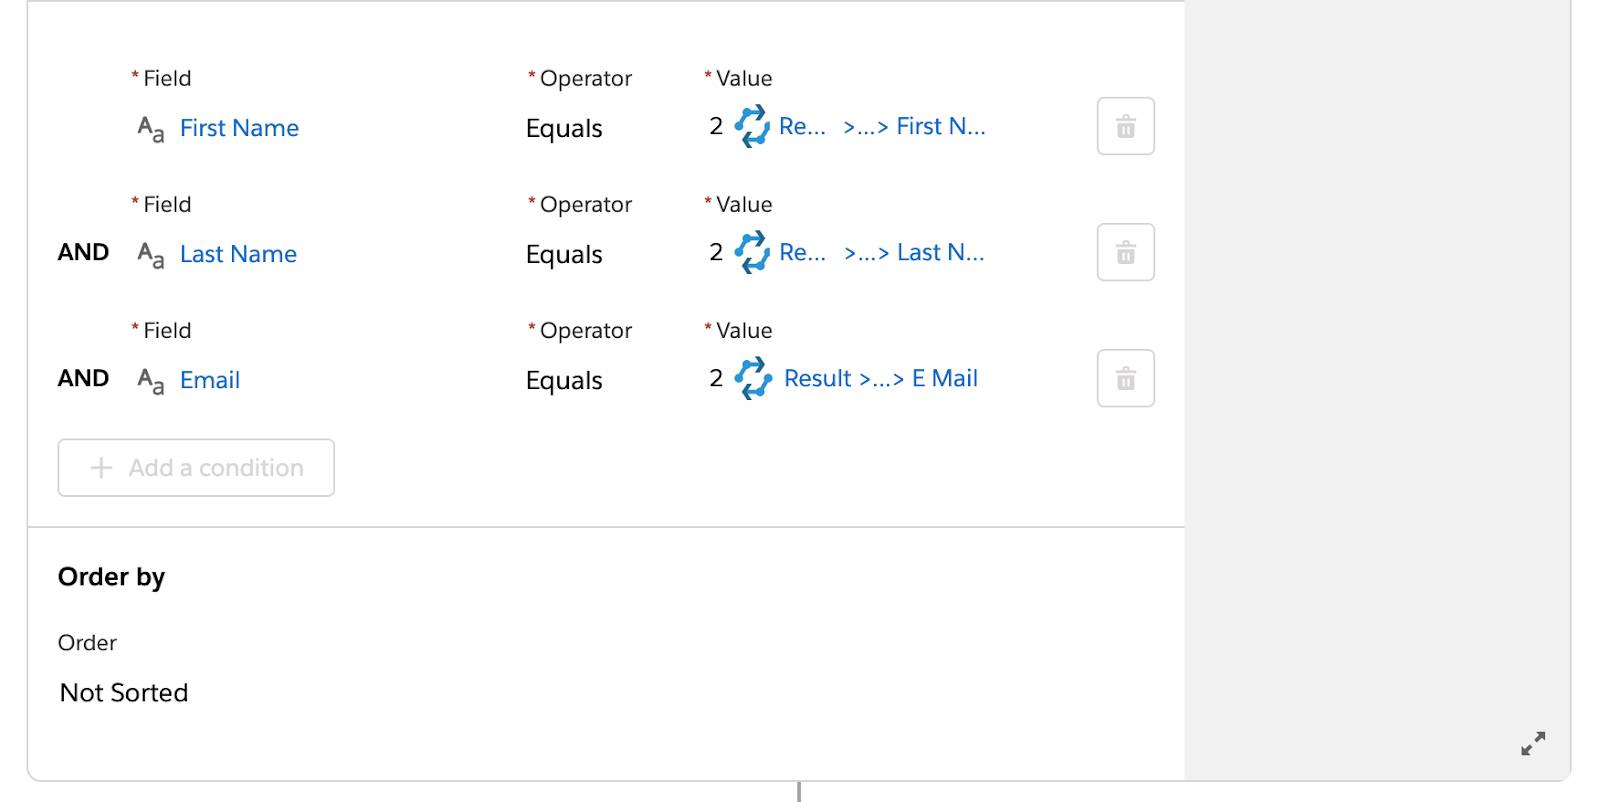
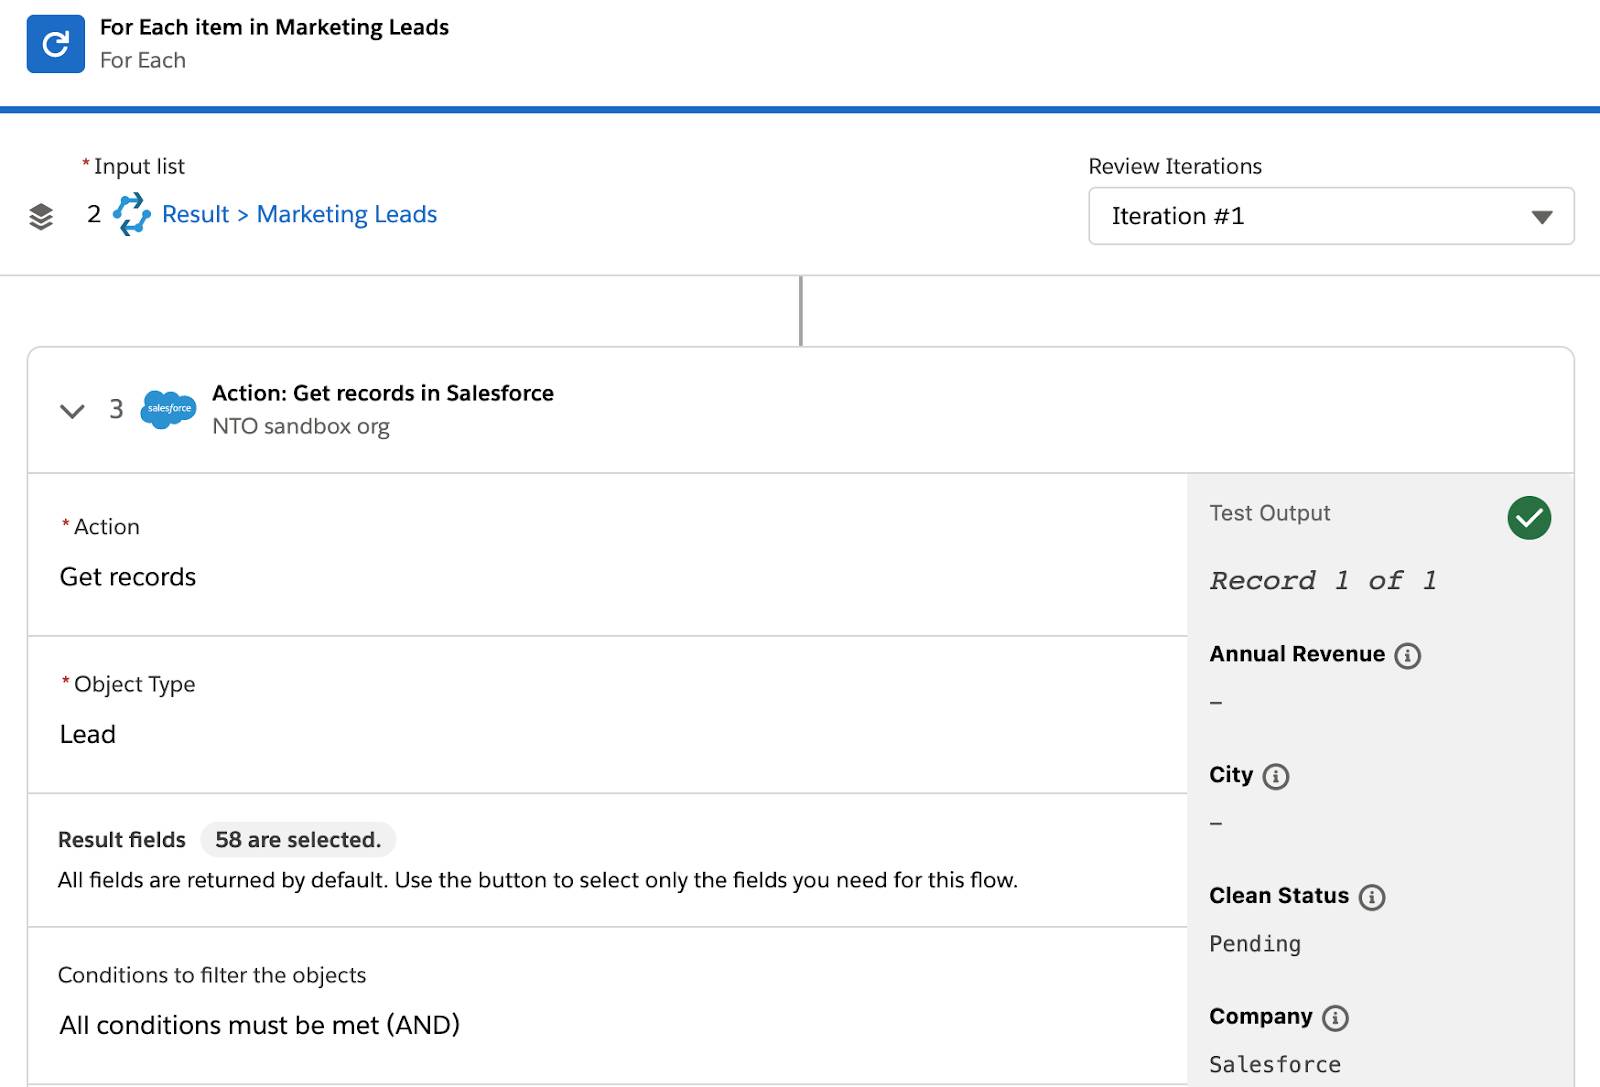
- Go back to your flow and wait for the test to complete. If steps 3, 4, and 5 in the For Each block of the flow show a green check mark, this indicates the flow ran successfully.
- Log in to the NTO org using your username and password.
- In the App Launcher, enter
Sales, and then select Sales to launch Sales Cloud.
- Click the Leads tab, select All Open Leads, and verify six new leads are created in Sales Cloud.

- Open a lead of your choice and verify its description is exactly as specified in your flow.
- Open your NTO Slack workspace and verify the lead notifications appear in the sales-leads channel. Notice that because you used *New lead:* in your flow, it appears as New lead: in Slack.

- In the Sync Leads using MuleSoft RPA - Gmail to Salesforce to Slack flow, click Test again.
- Return to Gmail and repeat steps 3 through 5 of this procedure to compose another email with the same attachment.
- Go back to your flow and wait for the test to complete. If only step 3 in the For Each block of the flow shows a green check mark, this indicates the flow ran successfully. Because the leads exist in Sales Cloud, the If branch of the If/Else block evaluated to false and its two associated steps, steps 4 and 5, weren’t executed.
- In the NTO org’s Sales Cloud, verify no new leads are created.

- In your NTO Slack workspace, verify no new notifications appear in the sales-leads channel.

- Repeat steps 1 through 16 to test another email with an attachment of your choice. Your flow should work as expected.

Good job! In the next unit, you learn how to activate, monitor, and troubleshoot your flow in the production environment.