Set Up Revenue Insights
Learning Objectives
After completing this unit, you’ll be able to:
- Understand how to set up Revenue Insights.
- Schedule recipes to run.
- Run a data sync.
Revenue Insights is the part of Revenue Intelligence that delivers templated analytics and AI models to help managers track their team’s performance. It gives sales reps easier ways to find new opportunities or identify accounts that need attention.
Laura appreciates that Revenue Insights makes it easy to see her team’s performance and trends. She’s excited to discover how much easier it will be to make quick decisions to fuel sales growth.
Revenue Intelligence includes a powerful analytics engine that is a part of the Salesforce cloud, called CRM Analytics. It allows you to build visual analytics or predictions based on data from anywhere, including data external to Salesforce. Revenue Insights is a template that automates much of the work to deliver the analytics you want to support sales use cases. You set up this analytics app template in Setup.
Set Up Historical Trending and Turn On Revenue Insights
Your first setup step is to start trending the Forecast Item object, so Laura can see changes in forecasts.
Go to Setup | Revenue Insights Setup, and notice that most of the setup page shows green checks because you’ve completed the prerequisites. Pat yourself on the back for all your hard work.
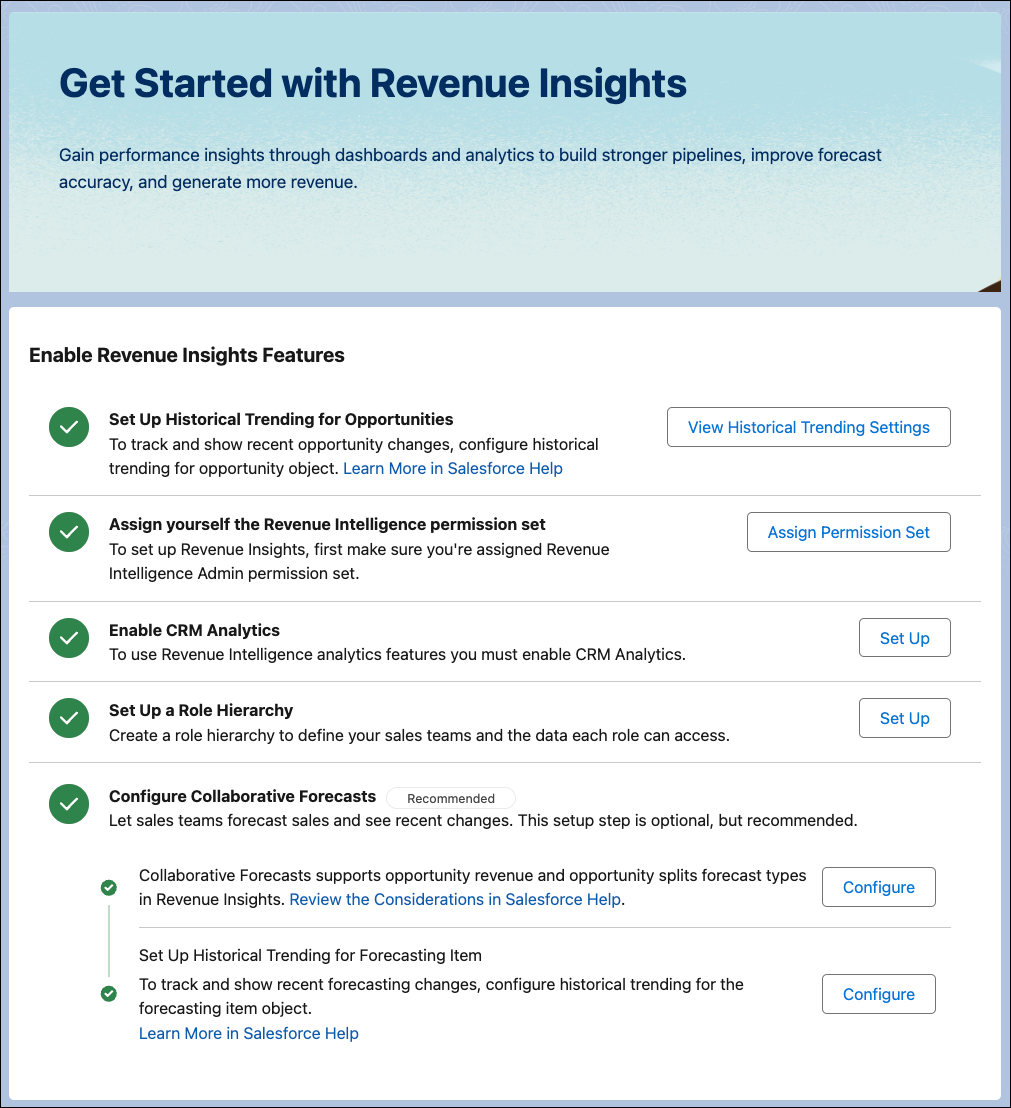
- Scroll to the Configure Pipeline Forecasts section.
- In the Set Up Historical Trending for Forecasting Item subsection, click Configure. Historical trending is set up for the opportunity object, but you must set up trending for the Forecast Item object.
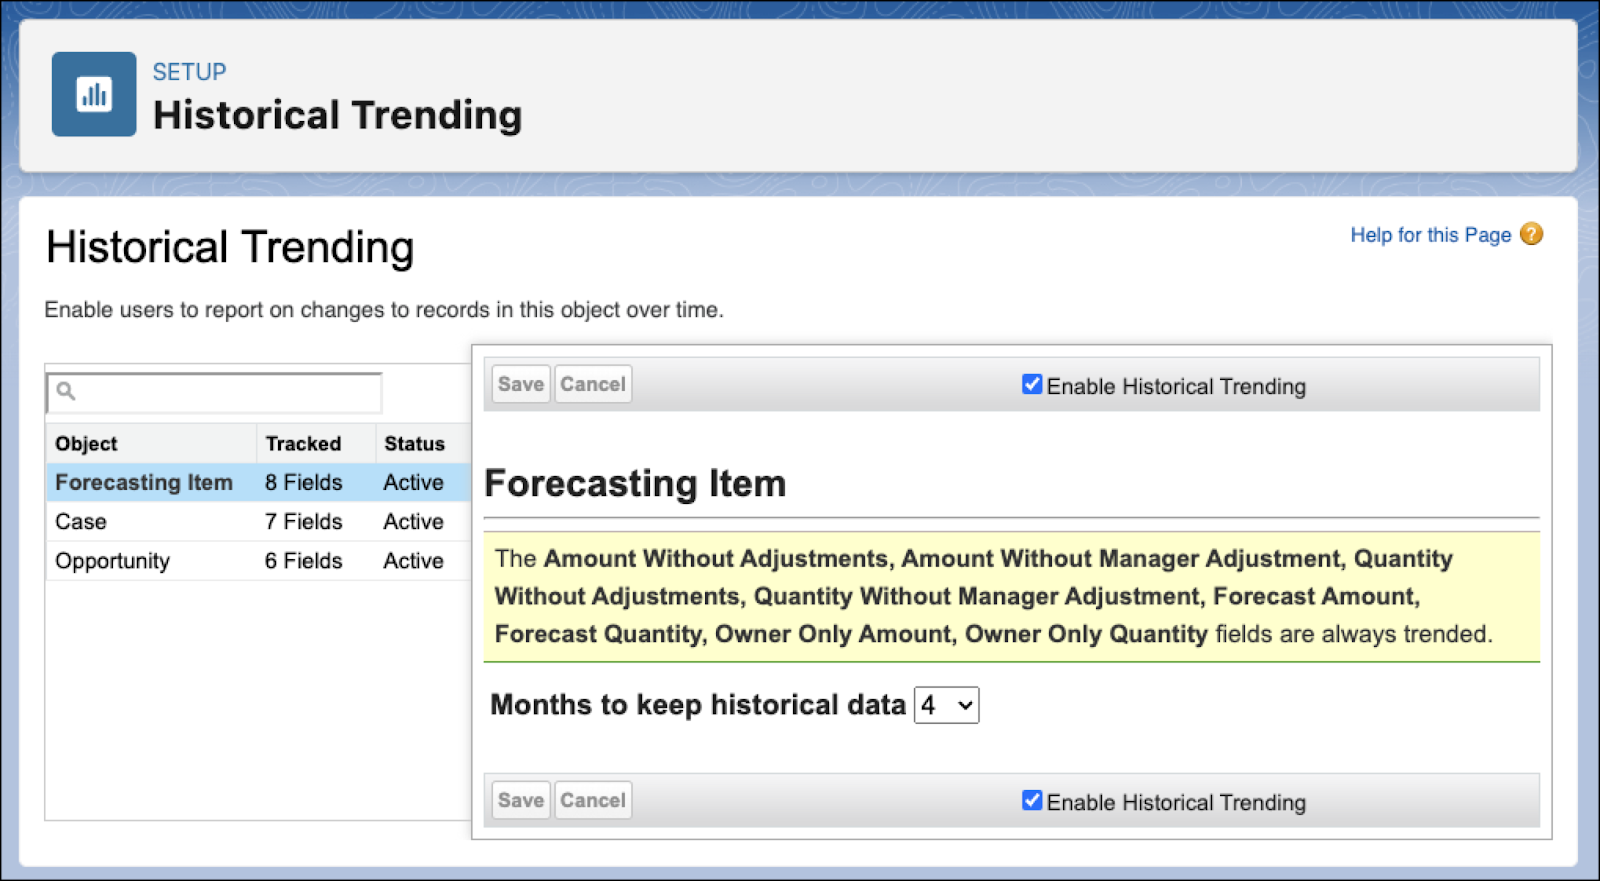
- From the list on the left, select Forecast Item.
- Click Enable Historical Trending and save your changes.
Now that trending is happening on the right objects, you’re ready to turn on Revenue Insights.
Enable Revenue Insights
- Navigate to the Revenue Insights Setup page.
- Refresh the page to see the green Configure Pipeline Forecasts checkboxes.
- In the Install Revenue Insights with Wizard section, click Install.
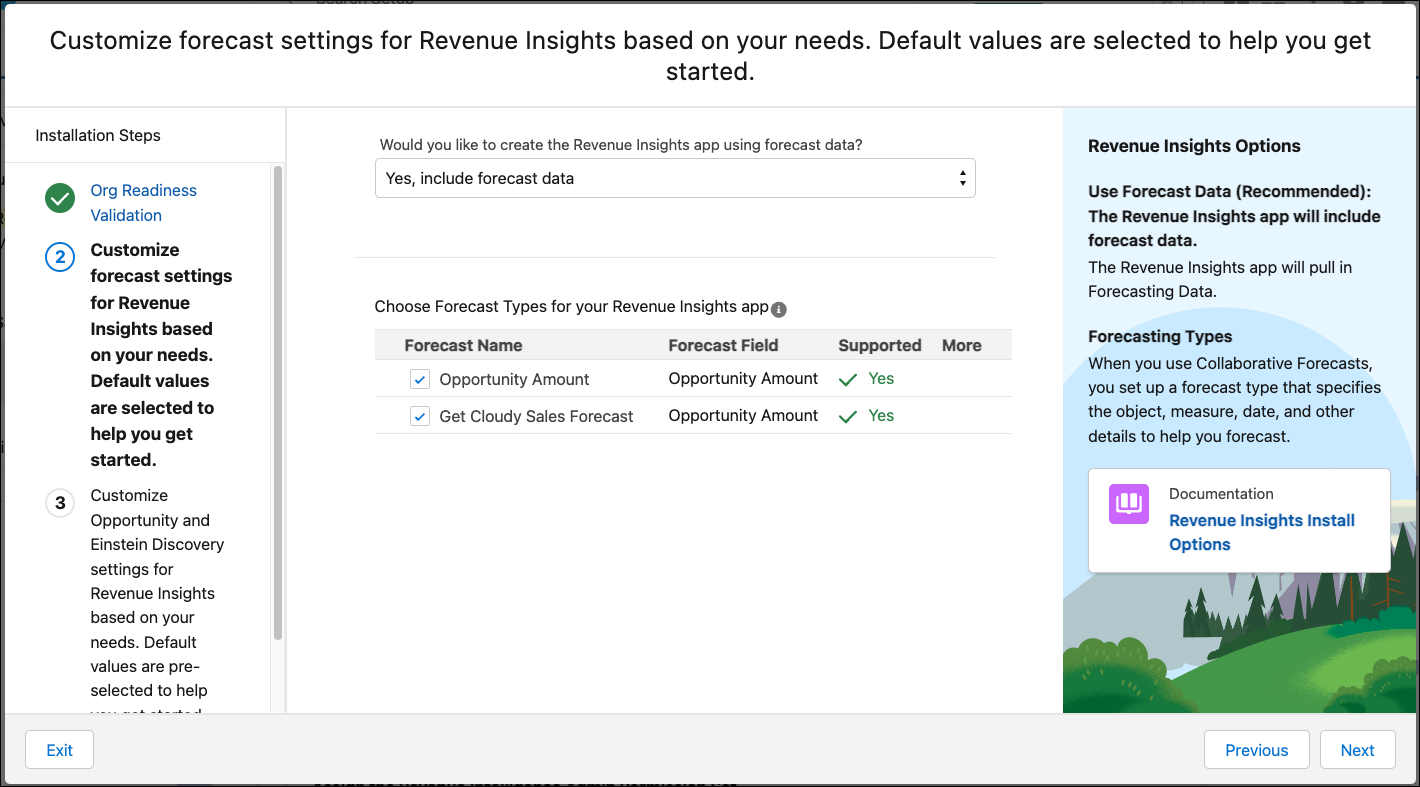
- The wizard first checks that your org has the required settings enabled. If the test passes, click Next. Otherwise, check the feedback and adjust your org as necessary.
- The wizard now provides a list of the forecast types supported by Revenue Insights. Ensure that the Get Cloudy Sales Forecast forecast type you created earlier is selected.
- Accept the dashboard settings.

- Give your app an appropriate name. For a production setup, turn on Schedule App Refresh. This sets up the data sync for you automatically; the steps detailed in Schedule Data Sync.

- Click OK.
- A tab for the app opens.
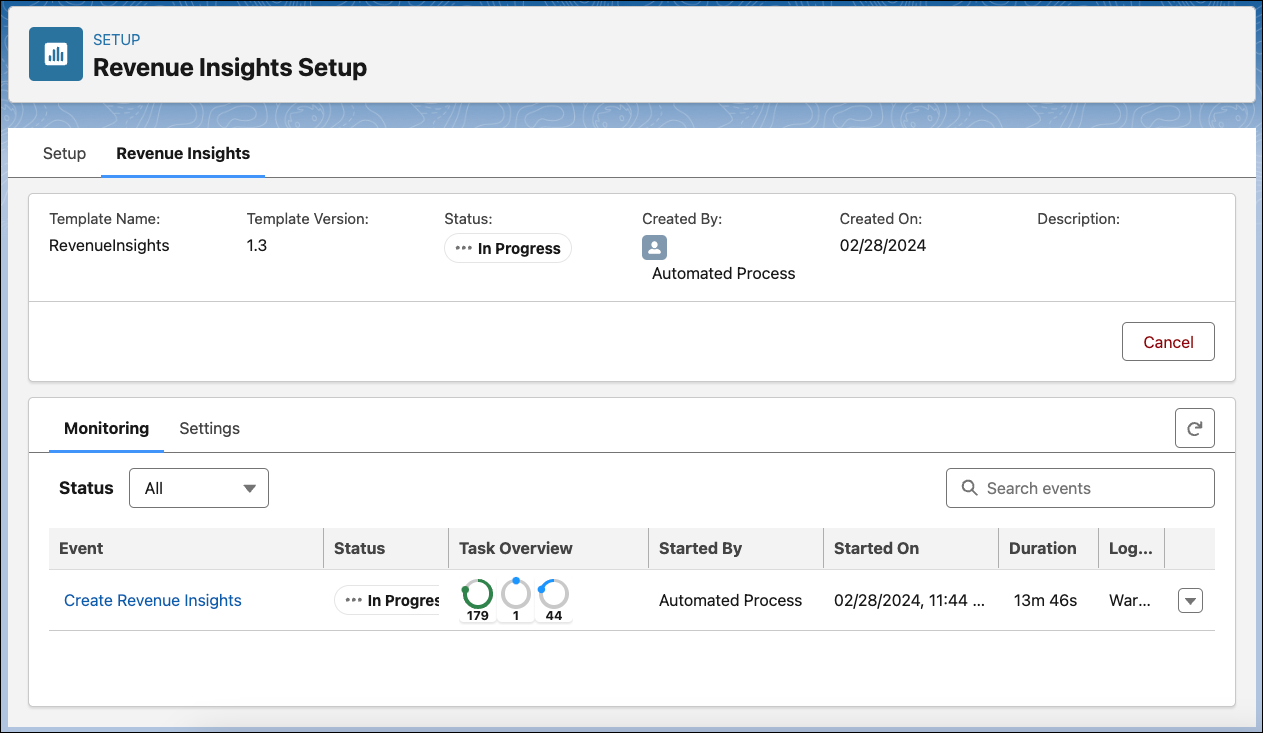
Creation of the app can take a few hours. During that time, Revenue Insights connects to the right Salesforce data for your analytics, does calculations, and builds dashboards and predictions.
To see the installation progress, click the refresh icon ( ) in the Monitoring tab.
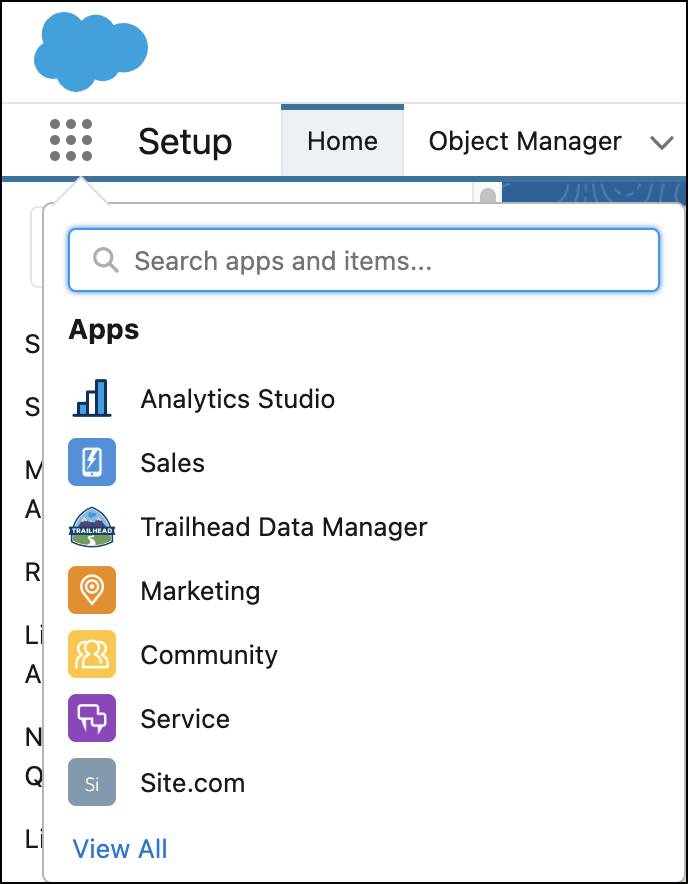
When the installation is complete, click Open in Analytics Studio. Analytics Studio manages your Revenue Insights dashboards and is also where you build analytics and insights into Salesforce. You can also reach Analytics Studio from the App Launcher.
Schedule Data Sync
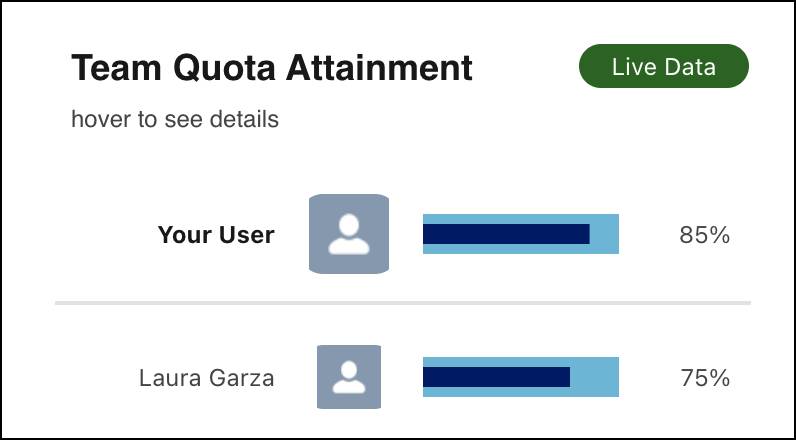
Revenue Insights delivers some numbers in real time, meaning they’re up to date from the moment you load your page. These real-time numbers are flagged with a Live Data tag.
However, some things you want to see in Revenue Insights require more intense calculations or more historical data than you get from field history tracking.
Revenue Intelligence uses CRM Analytics to capture this historical Salesforce data, transform it, and deliver dashboards. Revenue Insights is a templated analytics app that automates many of these steps. It connected to Salesforce objects, synced data, and ran Recipes to prepare this data for analytics.
If you selected Schedule App Refresh when you turn on Revenue Insights, the following steps have been completed for you. Otherwise, the data is only refreshed once and to refresh it regularly, you must set a schedule.
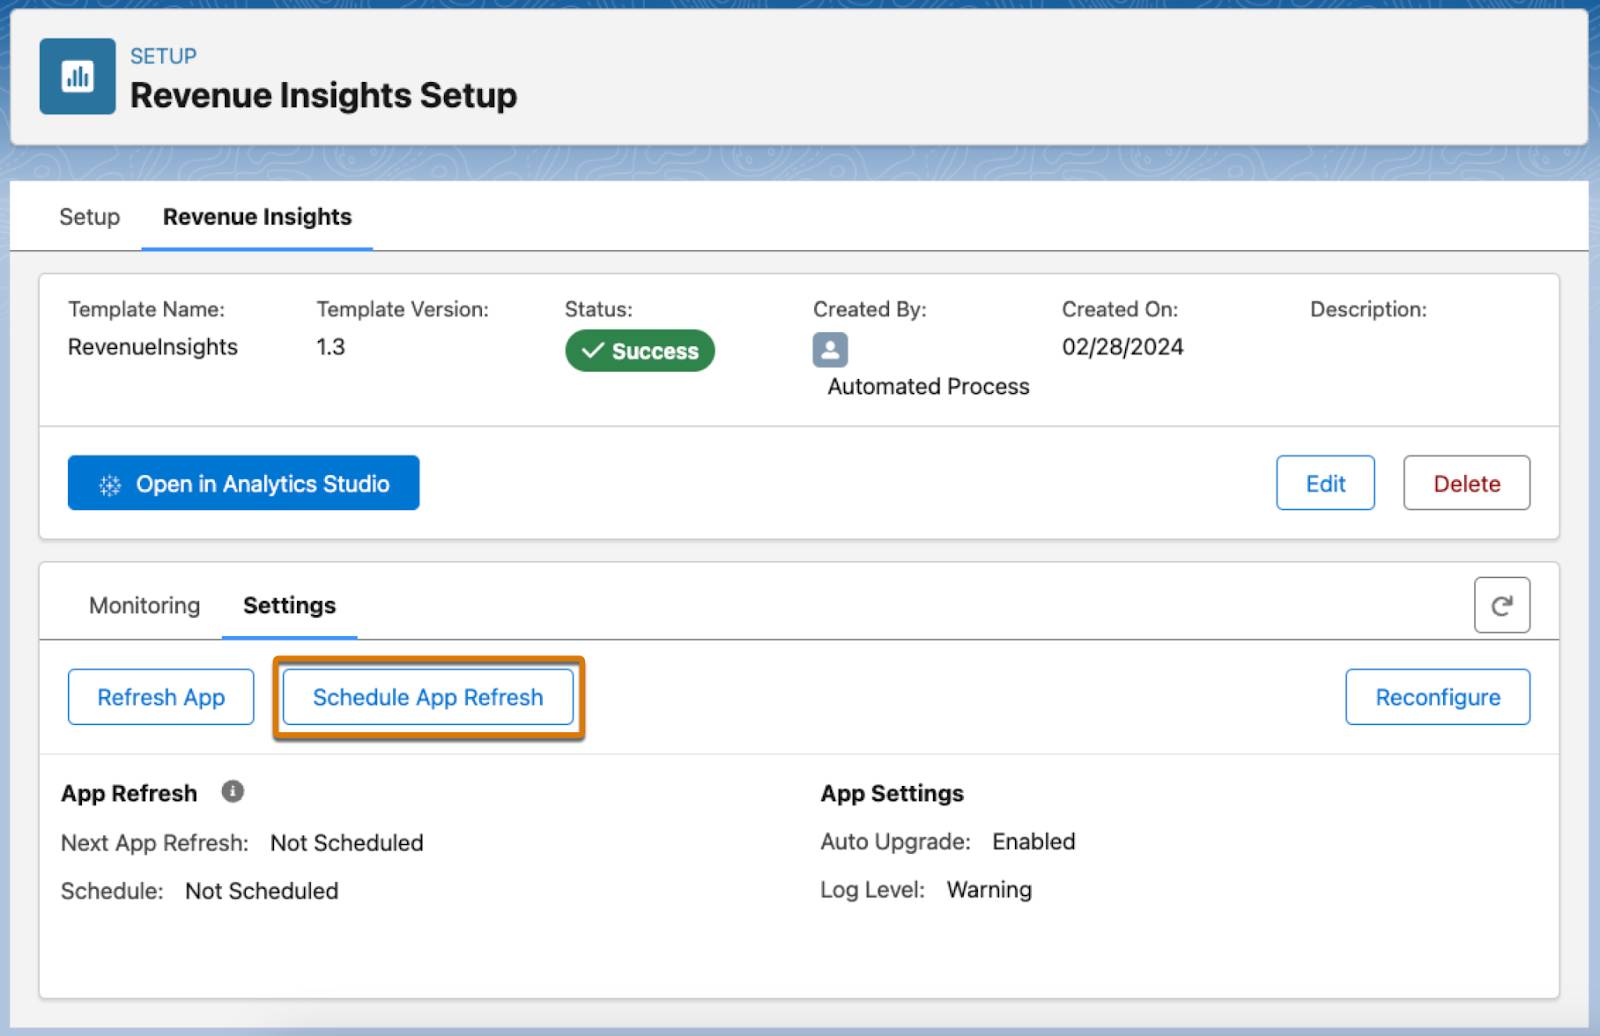
- From the Revenue Insights Setup page open the Revenue Insights app tab.
- Open the Settings sub-tab and click Schedule App Refresh.
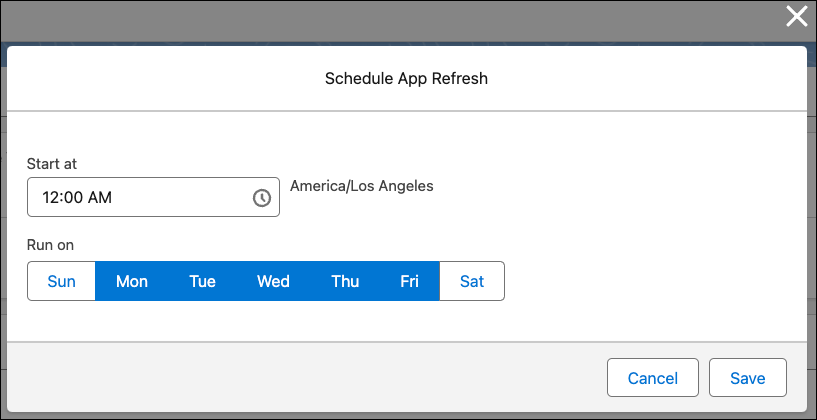
- In the Schedule App Refresh dialog, set the app to run at 12 AM on weekdays as traffic is low at that time.
Schedule Recipes
The Recipes Revenue Insights created takes your Salesforce data and transforms it into datasets that Revenue Insights can show in its dashboards.
To use this feature, your recipes must start after Data Sync is done. Then, you schedule the recipes for the app you created to run sequentially in this order.
- Revenue Insights Territory Recipe
- Revenue Insights User Recipe
- Revenue Insights Opportunity Recipe
- Revenue Insights Activity Recipe
- Revenue Insights Main Recipe
- Revenue Insights ED Recipe
Depending on your setup, Revenue Insights Territory Recipe and Revenue Insights ED Recipe may not have been created.
You must schedule recipes in this order to get your dashboard data refreshed at your preferred intervals. Luckily, you only have to schedule recipes once, and CRM Analytics automates data updates from now on. To set up the schedule, follow these steps.
- Select the Recipes tab.
- Schedule the Revenue Insights Territory Recipe:
- For the Revenue Insights Territory Recipe, click the down arrow.
- Select Schedule, then click Event-based.
- Select the Salesforce local connection syncs.
- Save your settings.
- For the Revenue Insights Territory Recipe, click the down arrow.
- Schedule the Revenue Insights User Recipe:
- Click the down arrow next to Revenue Insights Opportunity Recipe.
- Select Schedule, then click Event-based.
- Select The Salesforce local connection syncs and the selected recipes or dataflows runs.
- Select the Revenue Insights Territory Recipe.
- Save your settings.
- Click the down arrow next to Revenue Insights Opportunity Recipe.
Now, repeat Step 4 for your remaining recipes as follows.
Name of Recipe Being Scheduled |
Run After |
|---|---|
Revenue Insights Territory Recipe |
Local Sync |
Revenue Insights User Recipe |
Revenue Insights Territory Recipe |
Revenue Insights Opportunity Recipe |
Revenue Insights User Recipe |
Revenue Insights Activity Recipe |
Revenue Insights Opportunity Recipe |
Revenue Insights Main Recipe |
Revenue Insights Activity Recipe |
Revenue Insights ED Recipe |
Revenue Insights Main Recipe |
The Revenue Insights dashboards now have up-to-date data. Next, you make the new dashboards available to your users.
Add the Revenue Insights Tab to the Sales App
It’s easier for Laura and her team to use Revenue Insights in a Lightning tab, so add one for easy access. This dashboard could also be put in other Lightning pages as a Lightning web component.
- Go to Setup | Apps | App Manager.
- Select the down arrow to the right of the Sales app with the developer name LightningSales. Click Edit.
- In the App Settings navigation window on the left side of the screen, go to Navigation Items.
- From Available Items, select Revenue Insights.
- Use the right arrow to add it to Selected Items.
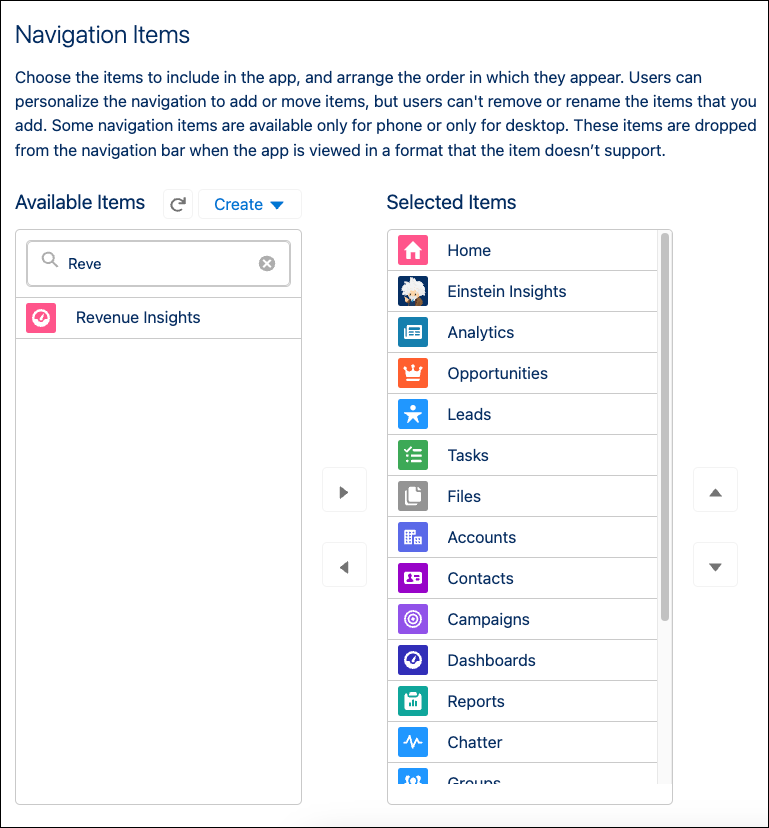
- Click Save.
Celebrate the Start of Better Forecasting
You meet up with Laura to show her how easy it is now to run her business with added insights using Revenue Intelligence.
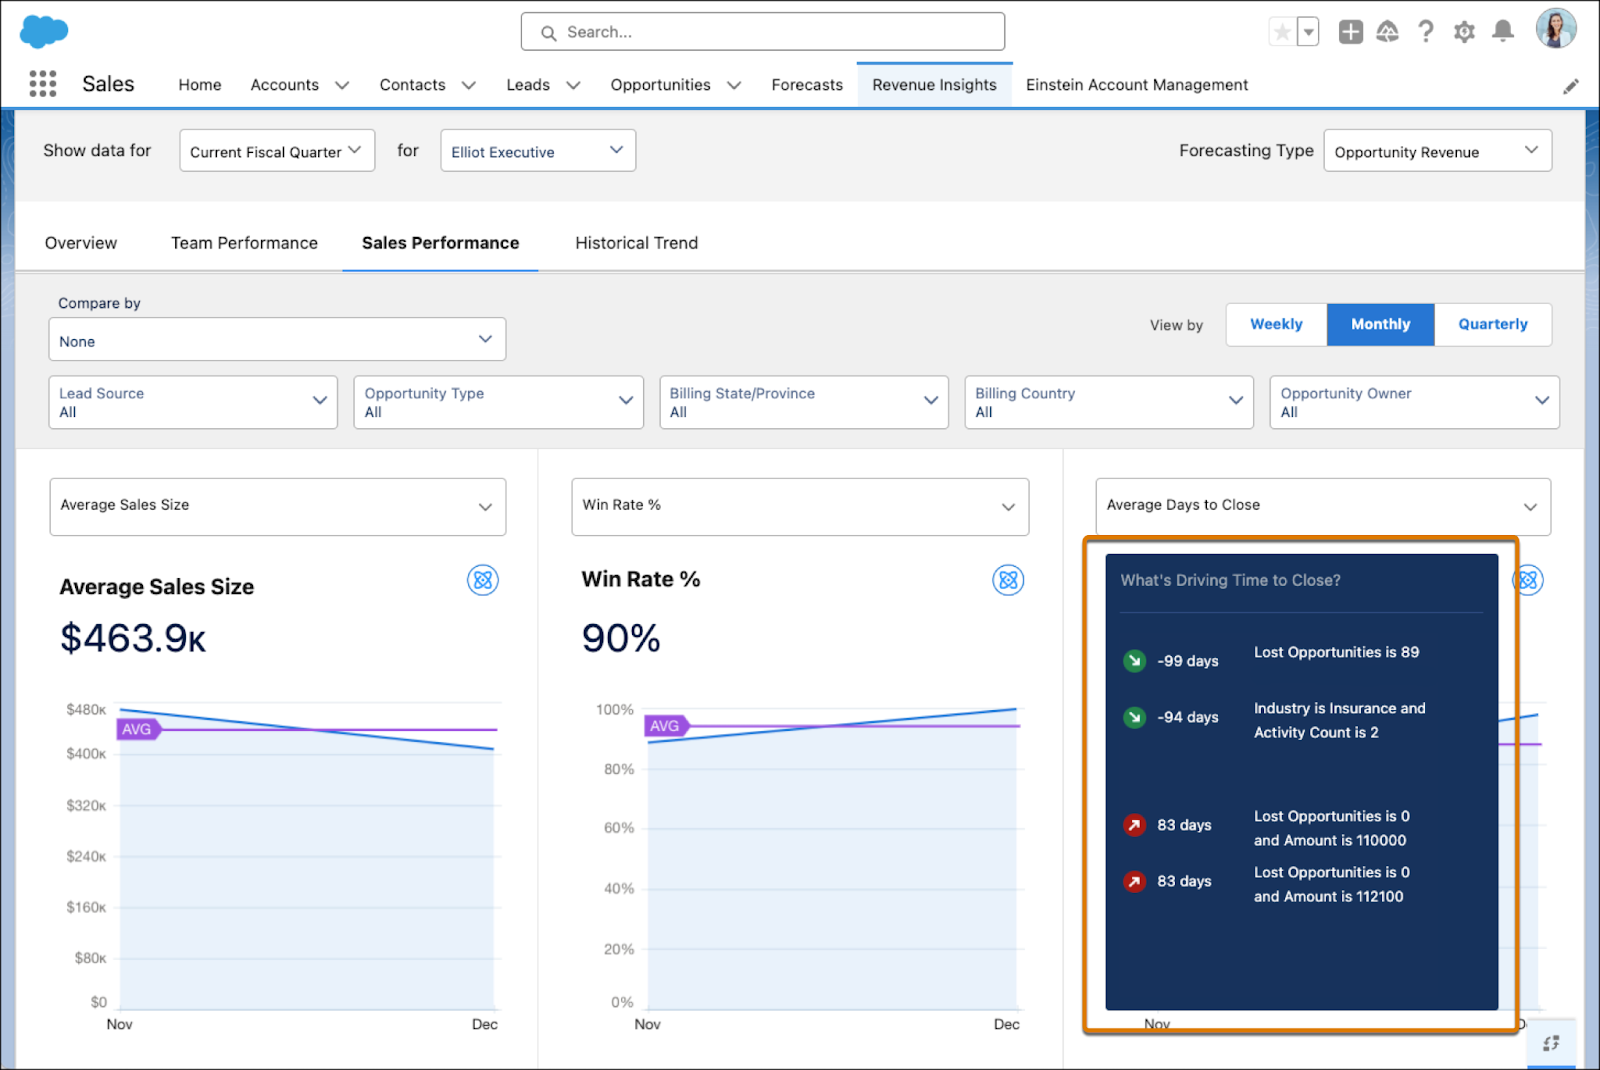
From her Revenue Insights tab, after selecting the Revenue Insights dashboard as her default, Laura sees how to navigate to her Sales Performance tab. Here, an AI model helps her understand the top factors impacting important KPIs, such as Win Rate and Time to Close.
From the top of her Revenue Insights tab, Laura clicks the dropdown arrow to explore other useful dashboards.

You show Laura how to use the Commit Calculator to do the math as she prepares for her forecast calls. No more tracking changes in her head; this view walks her through step by step to get to her number.
Another view Laura will appreciate is Sales Stage Analysis. Here, she sees how her opportunities are moving through different stages and where they tend to get stuck.
Laura also asks her managers to ensure their sales reps regularly check in on the Sales Rep Command Center. This process helps the sales reps identify risks in their pipeline early, and keep on top of their quota attainment and other key metrics.
Laura is amazed by the progress you made so quickly. Now she can get to work inspiring customers to Get Cloudy.