Set Up the Customer Journey
Learning Objectives
After completing this unit, you’ll be able to:
- Add the Real-Time Location component to an Experience Builder Site.
- Select the information customers see about mobile workers.
- Determine when to send messages to customers about incoming mobile workers.
- View and change geolocation settings.
- Give customers access to an Experience Builder site.
Add the Real-Time Location Component
Ursa Major already has an Experience Builder site for customers called Ursa Major Sunshine Club. Customers use the site to find information about their installations and communicate with the Ursa Major support team. When Maria adds Appointment Assistant Real-Time Location there, customers can find out more about their own appointments and see the location of their en route mobile worker on a map.
Maria adds the Real-Time Location component to her Experience Builder site.
- From Setup
 , in the Quick Find box, enter
 digital experiences, and then select All Sites.
- In the row for your site, click Builder.
Maria clicks Builder next to Ursa Major Sunshine Club.
- From the Experience Builder, click Components
 .
.
- From Custom Components, locate the Real-Time Location Component.
- Drag the component onto the site.
Maria sees the map right away. If you can't see the map, add the URL to the Content Security Policy (CSP) trusted sites by following the steps in this help article.
Decide What the Customer Sees
As part of Ursa Major’s privacy practices, Sita created a list of necessary information to share. She decided that customers need to see the following when a worker is on the way to their appointment.
- Mobile worker’s first name, the first initial of their last name, and their job title
- Mobile worker’s picture from Ursa Major’s company org
- The worker’s location on a map relative to the customer’s job site
- Time estimates, including the estimated time until arrival and the appointment’s start and end time
This information helps customers know who’s coming to visit them, when, and how long they’re staying. Ursa Major doesn’t share information that the customer doesn’t really need, like a mobile worker’s full last name or their location at other times of day.
Maria uses Experience Builder to determine what information to share.
- To open the settings panel in Experience Builder, click anywhere in the Real-Time Location component.
- Select the information to share with customers. Maria selects items to show the time estimate, the map, team member info, and team member image.
Customers can see the information they need, and everyone’s privacy is protected. That’s how Ursa Major likes to do business.
Create a New Status
First, she creates the En Route status for service appointments. That’s the status that workers select on their mobile devices when they start off for a new appointment. It sends that first message.
- From Setup
 , go to the Object Manager tab.
- Click Service Appointment.
- Click Fields & Relationships.
- In the Fields & Relationships list, click Status.
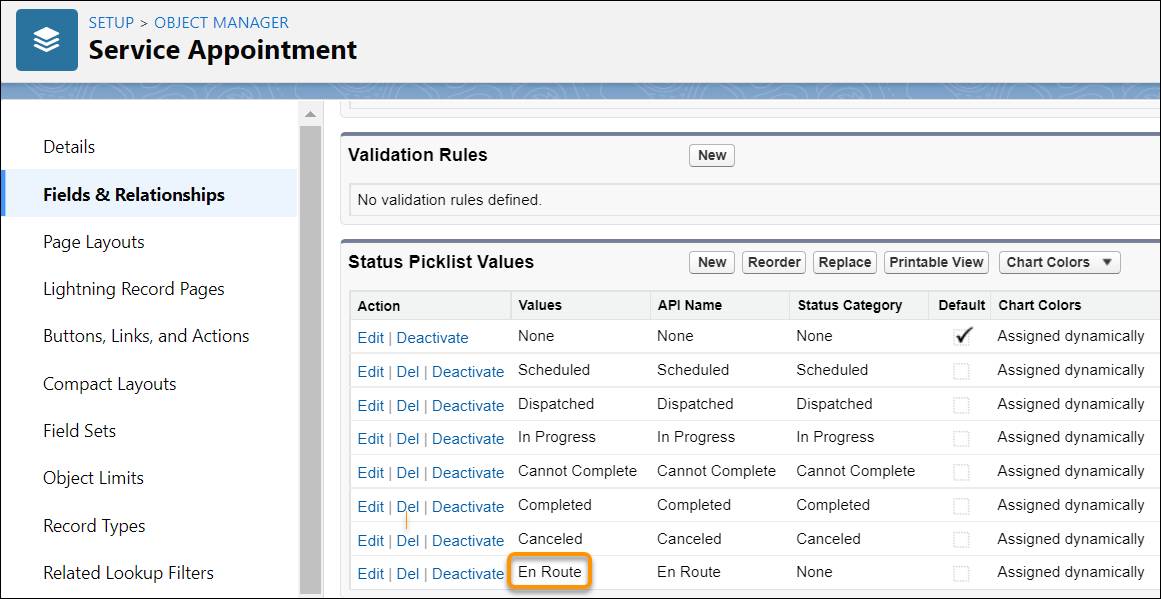
- Scroll down to Status Picklist Values and click New.
- Enter the following values.
- Label:
En Route - API Name:
En_Route - Status Category: None

- Save your changes.
Maria checks that the new status shows up on the Service Appointment object for the Status picklist.
The next step is to create a Change Status quick action on the service appointment that updates the appointment status to En Route. For Real-Time Location to work, the change of status must occur on the worker’s mobile device and not the server side. Maria created this quick action when she was customizing settings in the Field Service Mobile Trailhead module so it’s ready to use.
Configure Settings
With the En Route status created and added as a quick action, Maria finishes setting up when and where messages are sent.
- From Setup
 , in the Quick Find box, enter
field service, and then select Field Service Settings.
- Scroll to the Appointment Assistant section.
- In the Status field, select the service appointment status change that generates the first message to customers.
Maria chooses En Route.
- In the Site URL field, enter the URL of the customer’s Experience Builder site.
Maria entershttps://ursamajorsolar.my.site.com/sunshineclub - Enter a value for the Appointment Assistant Radius. This value generates the second message to customers.
Maria enters1and chooses Miles.
- Enter a value for the Appointment Assistant Expiration. This value determines when the customer stops seeing the mobile worker’s location and information.
For Minutes, Maria selects 30.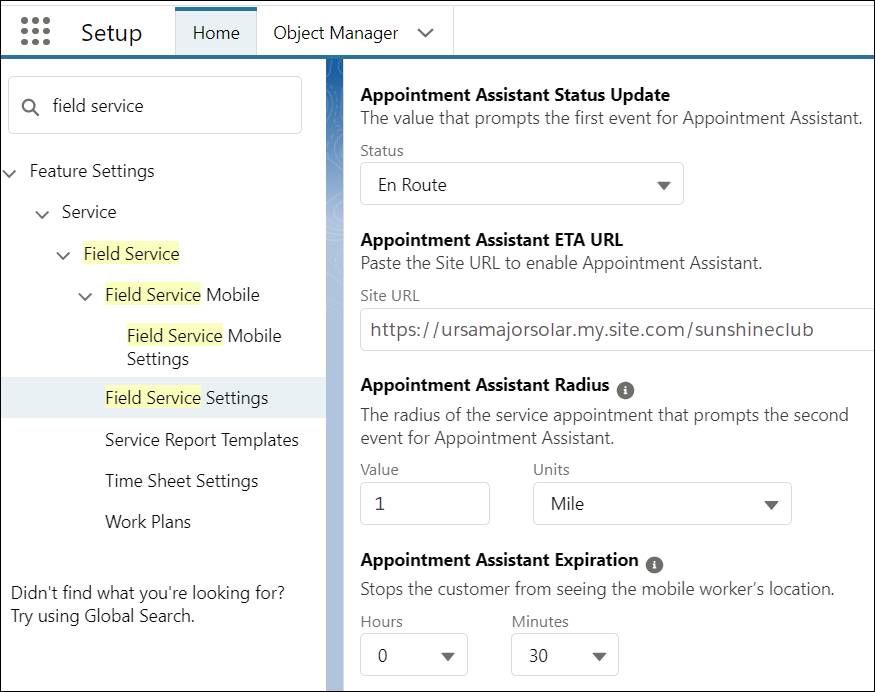
- Save your changes
Check Geolocation Tracking via the Mobile App
Real-Time Location isn’t the only use for temporarily tracking the location of mobile workers. Ursa Major has already set up geolocation tracking on the mobile devices that its workers carry when they started using the Salesforce Field Service mobile app. Knowing where its mobile workers are improves service. For example, it makes it easier to assign last-minute high-priority tasks to the closest qualified worker or to react to emergencies.
Maria double checks that her existing geolocation settings are correct.
- From Setup
 , in the Quick Find box, enter
 field service, and then click Field Service Mobile Settings.
- Click Field Service Mobile Settings.
- Click Edit.
- Select Collect service resource geolocation history.
- Enter the value for Geolocation Update Frequency in Minutes.
Maria enters10.
- Enter the value for Geolocation Update Frequency in Minutes (Background Mode).
Maria enters60.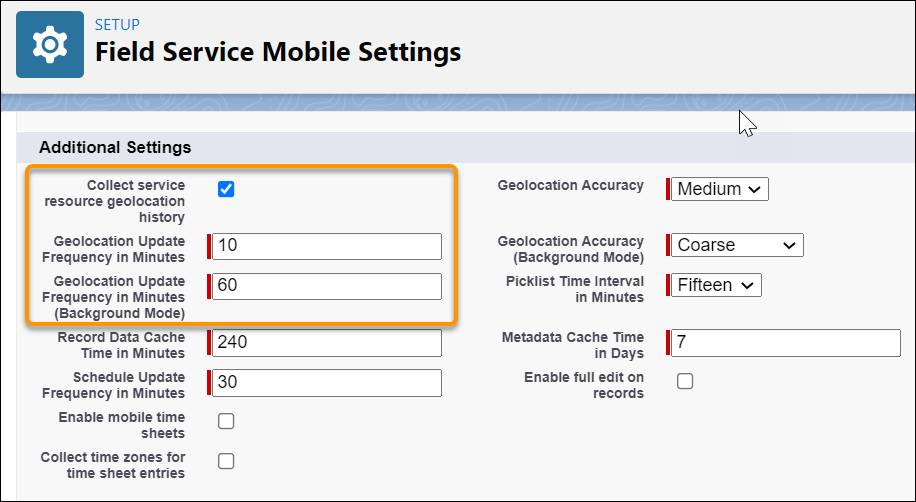
- Save your changes.
These settings are used by Ursa Major for other purposes, but the settings are overridden when mobile workers mark themselves as En Route. The location shared with the customer while the worker is en route to their appointment is updated every 60 seconds.
Set Up Site Access
Sunshine Club customers, like all guest visitors to a public Experience Builder site, can view the site without logging in. Customers who visit the public site share the same guest user record and have the same access level. For Ursa Major, they see information about its products, guest posts, and information about the mobile worker coming to their home or business.
Maria sets up the guest user record to give her customers the proper access to Appointment Assistant in the Sunshine Club.
- From Setup
 , in the Quick Find box, enter
 digital experiences, and then select All Sites.
- In the row for your site, click Builder.
Maria clicks Builder next to Ursa Sunshine Club.
- In Experience Builder, click Settings
 .
.
- In Guest User Profile, click <Your Site Name> Profile.
Maria clicks Ursa Major Sunshine Club Profile.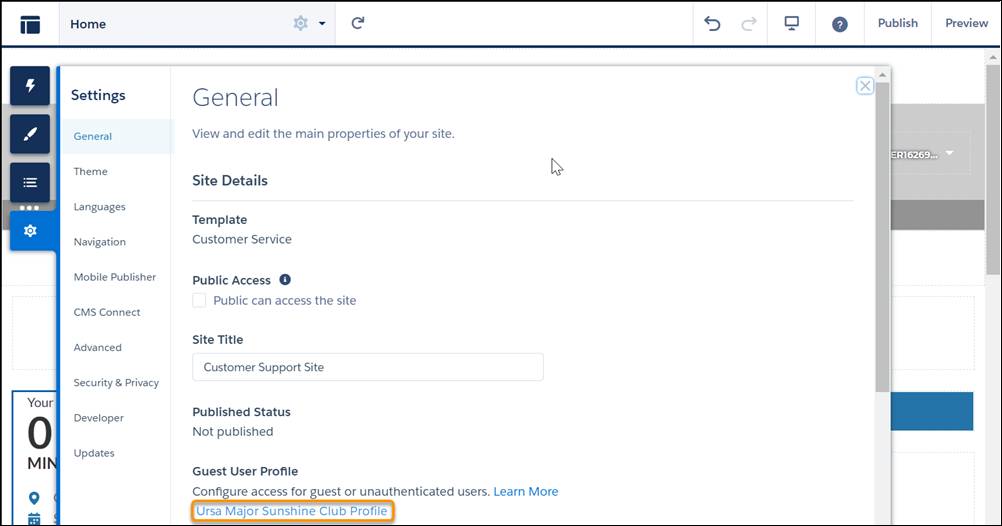
- In the Profiles pane, click View Users.
- Click the user’s name.
Maria clicks Site Guest User.
- Hover over Permission Set Assignments and click Edit Assignments.
- Add Appointment Assistant Guest Permissions to the list of Enabled Permission Sets.
- Save your changes.
- Return to Experience Builder and select Public can access the site.
- Click Publish.
In this unit, you learned how to add the Real-Time Location component to Experience Builder. Then you followed along as Maria used Experience Builder. She determined what information customers see, when they get messages, and granted them access. Next you learn how to create the templates and flows for the en route messages to customers.
Resources
- Salesforce Help: Create an Experience Builder Site
- Salesforce Help: Add Appointment Assistant to Your Experience Builder Site
- Salesforce Help: Manage What Customers See
- Trailhead: Field Service Mobile
- Salesforce Help: Track Service Resource Geolocation with the Field Service Mobile App
- Salesforce Help: Give Guest Users Site Access