Install Appointment Assistant and Set Up Permissions
Learning Objectives
After completing this unit, you’ll be able to:
- Install the Appointment Assistant managed package.
- Create a permission set for Appointment Assistant.
- Enable the permission set.
- Assign the permission set to users.
In this module, we assume you’re a Salesforce Field Service administrator with the proper permissions to install and set up Appointment Assistant. If you’re not an administrator, that’s OK. Read along to learn how your administrator would take the steps in a production org. Don't try to follow these steps in your Trailhead Playground. Appointment Assistant isn't available with sample data in the Trailhead Playground.
Install the Managed Package
Sita contacts her trusty Salesforce admin, Maria Jimenez. Sita asks her to install and set up Appointment Assistant Real-Time Location to get the team started right away. Maria is happy to see that all that goodness is available in a single managed package. She gets ready to install the managed package in her org.
Here’s what she does.
- In an incognito window, paste the download link.
- Scroll to Appointment Assistant and click Install in Production or Install in Sandbox.
Maria always tests packages in her sandbox before moving them to production.
- On the Salesforce login screen, enter the username and password for the org where you want to install the package, then click Log In.
- Select Install for Admins Only, then click Install.
- To grant access to third-party websites for geolocation and optimization services, approve the request.
- Wait for a message telling you that the package is installed, and click Done.
Maria browses through the help article while she waits for the installation to complete.
Create an Appointment Assistant Permission Set
Now that Maria has installed Appointment Assistant, her next step is to set up permissions so that her team can access everything they need. She must create a permission set for Appointment Assistant, enable that permission set, and assign it to her mobile workers.
First, Maria creates a permission set for Appointment Assistant.
- From Setup
 , in the Quick Find box, enter
 Users.
- Click Permission Sets.
- Click New.
- In the Label field, enter the name of the permission set.
Maria entersUrsa Appointment Assistant.
- Click the API Name field to populate it.
- In the License dropdown, select Field Service Appointment Assistant.
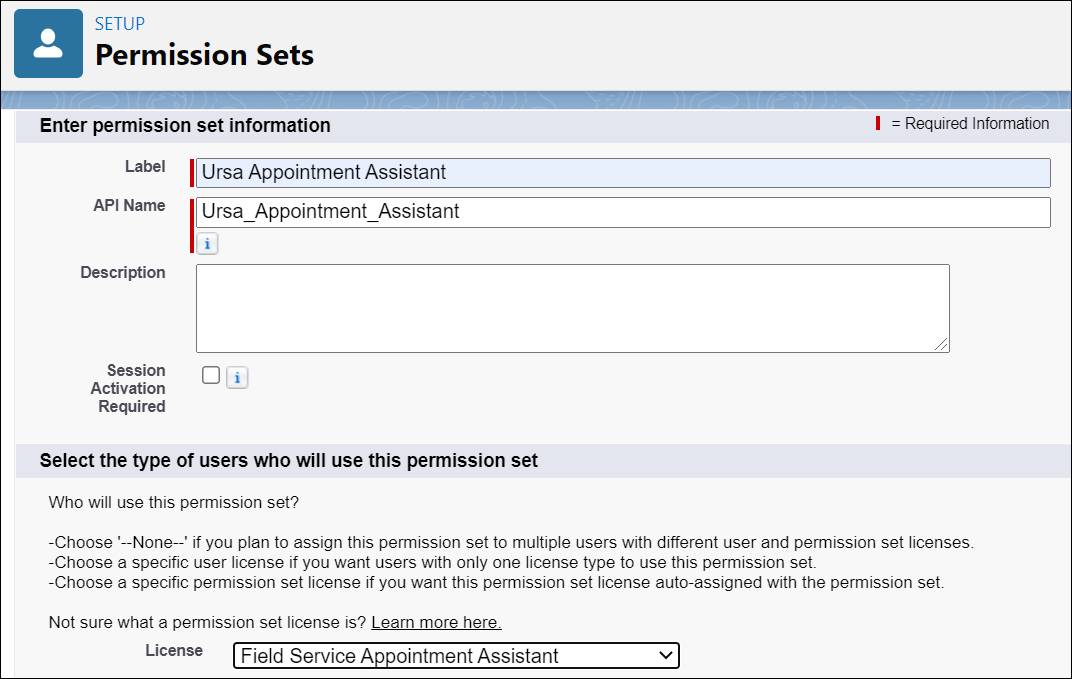
- Save your changes.
Enable the Permission Set
Maria has a shiny new Appointment Assistant permission set. Her next step is enabling it so it’s ready to use.
- From Setup
 , in the Quick Find box, enter
 users.
- Click Permission Sets.
- Scroll to the System section and click the Appointment Assistant permission set you created.
Maria clicks Ursa Appointment Assistant.
- In the System section, click System Permissions.
- Click Edit.
- Click Enabled next to Field Service Appointment Assistant.
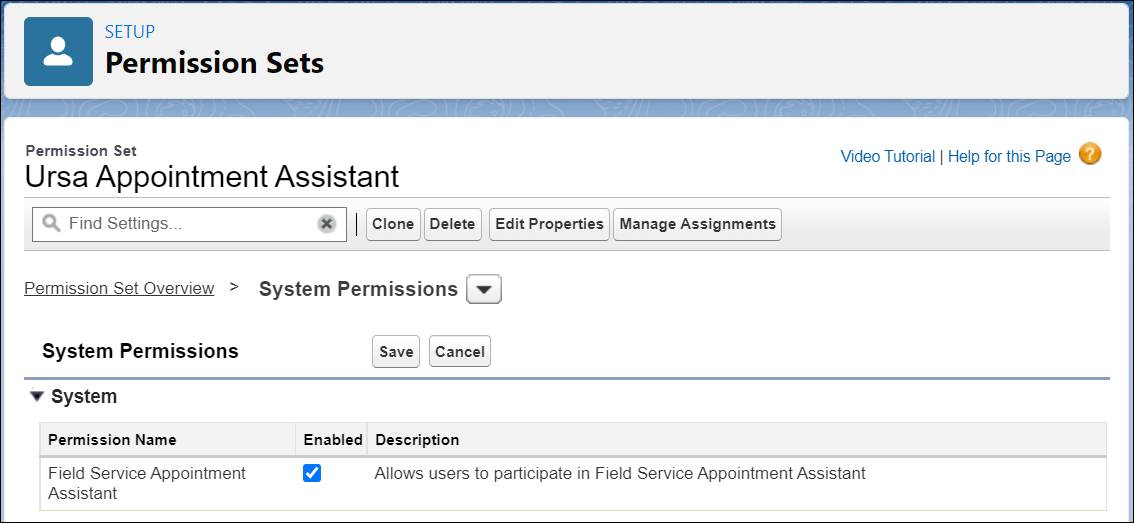
- Save and confirm your changes.
Assign the Permission Set to Mobile Workers
The permission set is ready to go, but it must be assigned to each mobile worker so they can use it. Maria starts by assigning the permission set to James Clifton, one of her mobile workers.
- From Setup
 , in the Quick Find box, enter
 users.
- Click Users.
- Click the mobile worker’s username.
Maria clicks Clifton, James.
- Hover over Permission Set Assignments and click Edit Assignments.
- Scroll down and move the permission set to Enabled Permission Sets.
Maria enables Ursa Appointment Assistant.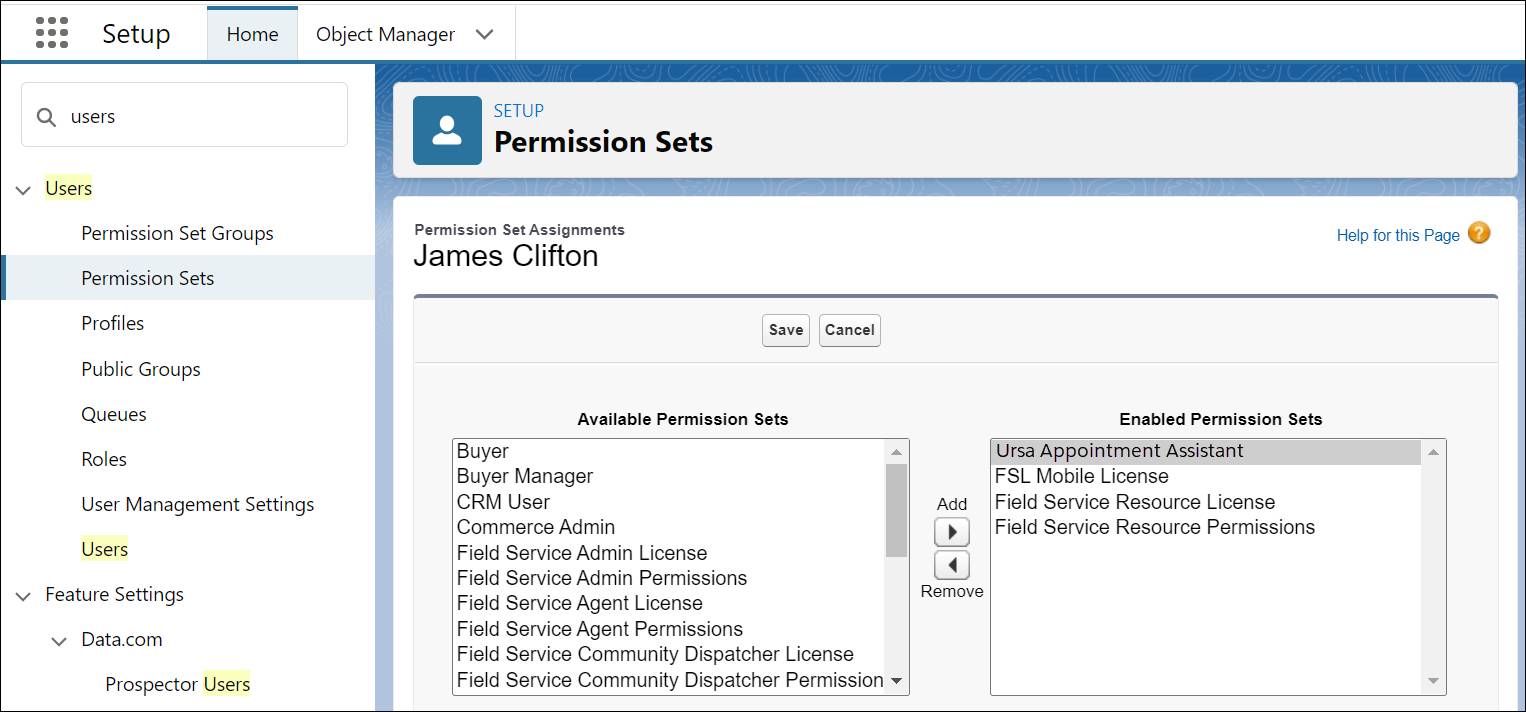
- Save your changes.
After she finishes, Maria hovers over James’s Permission Set License Assignment and verifies that the permission set has been properly assigned to him. She repeats these steps for all her mobile workers to give everyone on her team the right permissions.
In this unit you followed along as Maria installed the Appointment Assistant managed package and set up permissions for her team. Next, you learn how to add the Real-Time Location component.
Resources
- Salesforce Help: Appointment Assistant for Field Service Mobile
- Salesforce Help: Create a Permission Set for Appointment Assistant
- Salesforce Help: Enable the Field Service Appointment Assistant Permission
- Salesforce Help: Assign Users