Track Prospects with Salesforce Leads
Learning Objectives
After completing this unit, you’ll be able to:
- Describe the benefits of using leads.
- Create leads.
- Manage lead records.
- Convert leads to opportunities.
The Leads Advantage
Every company is unique, but all companies want to find, sell to, and keep customers. Salesforce provides the tools you need to grow your pipeline and make more sales. A lead is one such tool. Leads help you track the people and companies that you define as prospective customers.
With leads, you can better track, report on, and target marketing campaigns to prospects. Store your prospects as leads, and then once a lead becomes qualified, you can convert it to an account, contact, and, optionally, an opportunity.
Leads are especially useful if your company has two separate teams—one that handles lead generation and mass marketing and one that handles sales. The lead generation team can concentrate their work on the Leads tab, and the opportunity team can use the Account, Contact, and Opportunity tabs.
Ready to take advantage of the leads tool? Let’s walk through the steps for creating, managing, and converting leads into opportunities.
Create a Lead
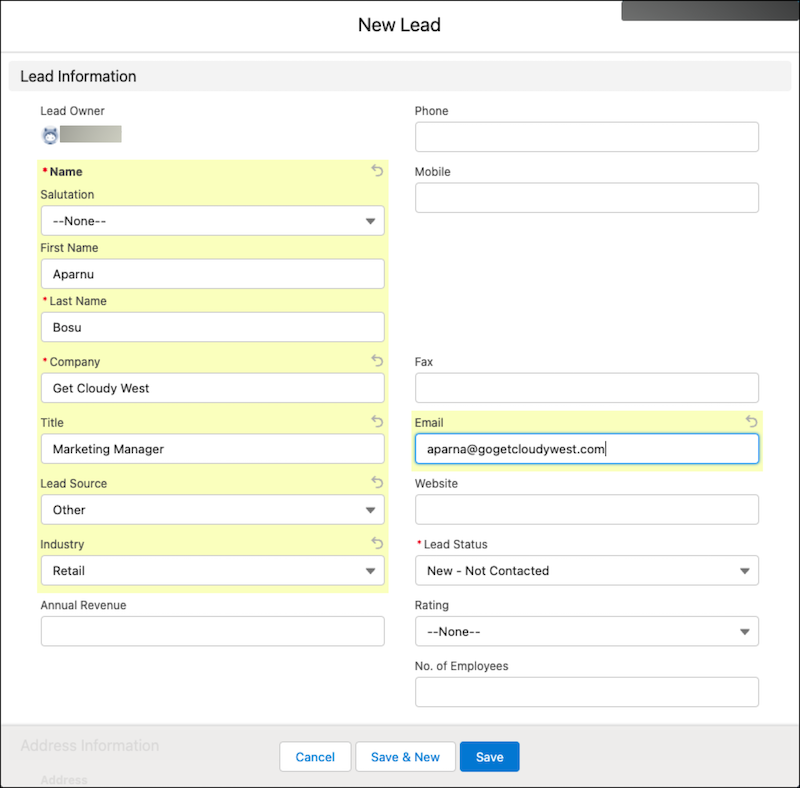
The first step in selling is to find customers. Here’s how to create a lead to help you do just that.
- Click the Lead tab.
- Click New.
- Create a lead record for your potential customer by entering the lead's name, company, contact information, associated status, and other relevant information.
Note: Wondering how to determine lead assignments? Some companies assign leads automatically, such as by assigning leads to owners based on the lead’s geographical location. Other companies initially assign all new leads to a queue. Your Salesforce administrator will set up a lead assignment process that works for your company.
- Click Save.
You can also add leads by importing a file into Salesforce or through an automatic process, such as a Web-to-Lead form that collects leads from your business website.
Manage Lead Records
As you work to qualify your leads—or turn them into opportunities—the lead’s record serves as your workspace. Use the workspace to track interactions with leads, check campaign history, and plan future activities.
- The lead’s status is an important indicator that helps you track where each lead is in your sales process. The traditional way to update a lead’s status is to click Edit while viewing the lead’s record, change the Lead Status, and click Save. If the lead is involved in any marketing campaigns, they are listed in the Campaign History for the lead.
- Review the lead’s Details tab to find and update information about the lead.
- Use the lead’s Activity tab to log your calls and emails to help you remember what you talked about and how the lead responded. Plan for the future by creating Tasks or Events.
- Connect with your coworkers to ask questions, seek advice, or provide information on the lead’s Chatter tab. The Chatter feed for the record also shows when you create activities.
Convert Leads to Opportunities
Qualifying a lead indicates that you believe the lead has a use for and interest in your products, and that a sale is a definite possibility. The exact criteria for qualifying and converting leads is part of your company’s unique business process.
When you qualify a lead, you can convert the lead record into an opportunity. You then work your opportunity until you close the deal.
Here’s how you convert your lead record into an opportunity.
- On the Leads tab, open your lead record.
- Click Convert.
- In the Account section, create an account from the Company name entered for the lead. If you’re converting a lead who works for an existing account, select the existing account instead.
- In the Contact section, create a contact from the name entered for the lead. If the contact exists, select the existing contact instead.
- In the Opportunity section, enter a descriptive name for the new opportunity so it’s easy to identify the potential deal.
- Check that the Record Owner and Converted Status are correct.
- Click Convert.
Look at that! You’ve created a lead and qualified it as an opportunity. You’re on your way to closing more deals.
Resources
- Trailhead: Create and Convert Leads as Potential Customers
- Salesforce Blog: Lead Generation: A Complete Guide