Examine an Integration Use Case
Learning Objectives
After completing this unit, you’ll be able to:
- Describe the challenge of keeping new or updated products in Salesforce in sync with inventory and assembly items in NetSuite.
- Explain how to use MuleSoft Composer to sync new or updated products in Salesforce with inventory and assembly items in NetSuite.
- Prepare to create a flow.
Before You Start
This module builds on MuleSoft Composer Installation and Configuration, so make sure you've completed it before you continue. Recall from that module, you need to have the MuleSoft Composer User permission set if you want to build and run integration flows.
In this module, we assume you’re an authorized MuleSoft Composer user. If you’re not a MuleSoft Composer user, that’s OK. Read along to learn how they perform the steps. Don’t try to follow the steps in a Trailhead Playground, because MuleSoft Composer isn't available in the Trailhead Playground.

In this unit, you step into the role of admin for Northern Trail Outfitters (NTO), an outdoor and recreational gear retailer. First, you examine an integration challenge faced by NTO, and then you learn about a MuleSoft Composer integration solution. Finally, you learn how to prepare to create your flow.
Integration Challenge
Let’s take a look at an integration challenge NTO is facing. Your sales team at NTO uses Sales Cloud to manage and maintain products they’re selling to customers. The team also uses NetSuite to manage and maintain inventory and assembly items.
Recall that in NetSuite, inventory items are physical goods that can be bought and sold. Assembly items are made up of other component items such as inventory items, non-inventory items, service items, charges, as well as other assembly items. Assembly items are built from the stocks of associated component items.
Currently, the sales team is performing the integration tasks manually. Every time there’s a new or updated product, a sales rep first creates or updates the product with relevant details in Sales Cloud. Next, the rep determines if a corresponding inventory item exists in NetSuite.
- If the inventory item doesn’t exist, the rep creates a new inventory item with relevant product details, including its associated product ID, in NetSuite. Then the rep updates the product with its associated inventory item’s internal ID in Sales Cloud.
- If the inventory item exists, the rep updates the inventory item with relevant product details in NetSuite.
Finally, the rep creates a new assembly item containing the associated inventory item with relevant product and inventory item details in NetSuite.
This process is time-consuming and highly error-prone, so the team wants to automate it.
Integration Solution
As a solution, you need to automate the integration between Sales Cloud and NetSuite to achieve near real-time integration. To do this, you use MuleSoft Composer to create an integration flow that automatically syncs new or updated products in Salesforce with inventory and assembly items in NetSuite. Specifically, the flow must perform the following tasks.
- Find any new or updated product in Sales Cloud.
- Determine if a corresponding inventory item exists in NetSuite.
- If the inventory item doesn’t exist:
- Create a new inventory item with relevant product details, including its associated product ID, in NetSuite.
- Update the product with its associated inventory item’s internal ID in Sales Cloud.
- If the inventory item exists, update the inventory item with relevant product details in NetSuite.
- Create a new assembly item containing its associated inventory item with relevant product and inventory item details in NetSuite.
To implement the solution using MuleSoft Composer, you perform these flow creation tasks.
- Prepare to create a flow.
- Design and test a flow.
- Activate a flow.
- Monitor and troubleshoot a flow.
You learn how to perform these tasks in the rest of this module.
Prepare to Create a Flow
Ready to get started?
First, gather all required information about the systems and assets your flow is going to use. The following table describes the systems the flow needs to connect to and the information you need for those systems.
System |
Required Information |
|---|---|
NTO’s Sales Cloud |
|
NetSuite |
|
As a best practice, use a test environment for these systems and data when you design and test your flows. After you’re done with testing, run the flows using your production systems and data.
Next, you learn about the prerequisites for your Salesforce and NetSuite environments.
Prerequisites for the Salesforce Environment
First, it’s assumed that you have a sandbox org and a production org to build and run flows that sync with Salesforce.
Note: If you don’t have a sandbox org to design and test your flows, you can use a developer org.
Follow these steps to sign up for a free developer org.
- Go to https://developer.salesforce.com/signup.
- Enter your contact information.
- Enter a unique username.
- Click Sign me up, and wait for your welcome email.
- In the welcome email, click the link to set your password.
Next, when you create a connection to Salesforce using MuleSoft Composer, you’re prompted to grant MuleSoft Composer permissions. Ensure your Salesforce accounts for both your sandbox and production orgs are ready to grant MuleSoft Composer the following permissions.
- Access the identity URL service.
- Manage user data via APIs.
- Perform requests at any time.
Next, to capture a new inventory item’s internal ID in a Salesforce product, ensure a text custom field called NetSuite Item ID is created for the Product object in the NTO org. Here’s an example of NetSuite Item ID for Product in the NTO org.

To learn how to create custom fields, see Customize a Salesforce Object.
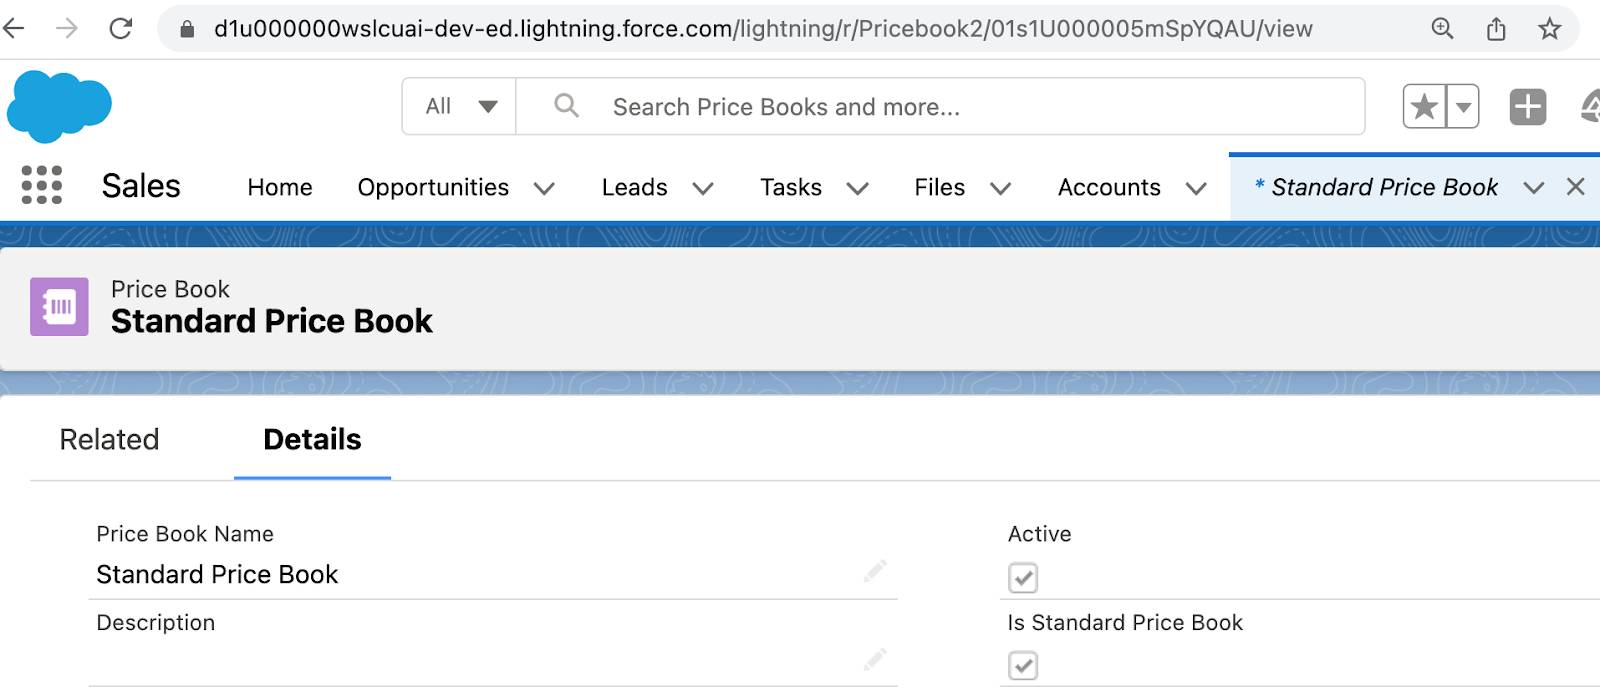
Finally, recall that in Sales Cloud every product has a standard price and is associated with the standard price book. Your flow must access the standard price book in your org to get the prices of the products you’re going to create or update. So you look up the ID of the standard price book. Follow these steps.
- Log in to your NTO org using your username and password.
- From the App Launcher, enter
price booksand select Price Books.
- Click Standard Price Book. The Standard Price Book appears. Make a note of the ID near the end of the URL. In this example, it’s 01s1U000005mSpYQAU. You use this ID in your flow.
Prerequisites for the NetSuite Environment
MuleSoft Composer’s NetSuite connector enables NetSuite users with the administrator role to perform integration tasks between NetSuite and other MuleSoft Composer–supported systems. Before you use MuleSoft Composer to create a connection to NetSuite, ensure your NetSuite user has been assigned the NetSuite administrator role.
First, to capture its associated product ID for each new inventory item, you must create a free-form text custom field called Salesforce Product ID for the Inventory Item form in NetSuite. Follow these steps.
- Log in to NetSuite using your username and password.
- Click Lists | Accounting | Items | New. The New Item page appears.
- Click Inventory Item. The Inventory Item form appears. In this example, the name in the Custom Form field is Custom Inventory Part Form.

- Click Customization | Lists, Records, & Field | Item Field | New.
- Populate the field with the following values.
- Label:
Salesforce Product ID - Type: Free-Form Text
- In the Applies To tab, select INVENTORY ITEM.
- Click the Display tab, select Main from the SUBTAB picklist, and then click Save.
- Click Customization | Forms | Entry Forms. The Custom Entry Forms page appears.
- Click Edit next to the Custom Inventory Part Form.

- Click the Fields tab.
- Scroll down to Salesforce Product ID and select Primary Information in the Field Group field.

- Click Save.
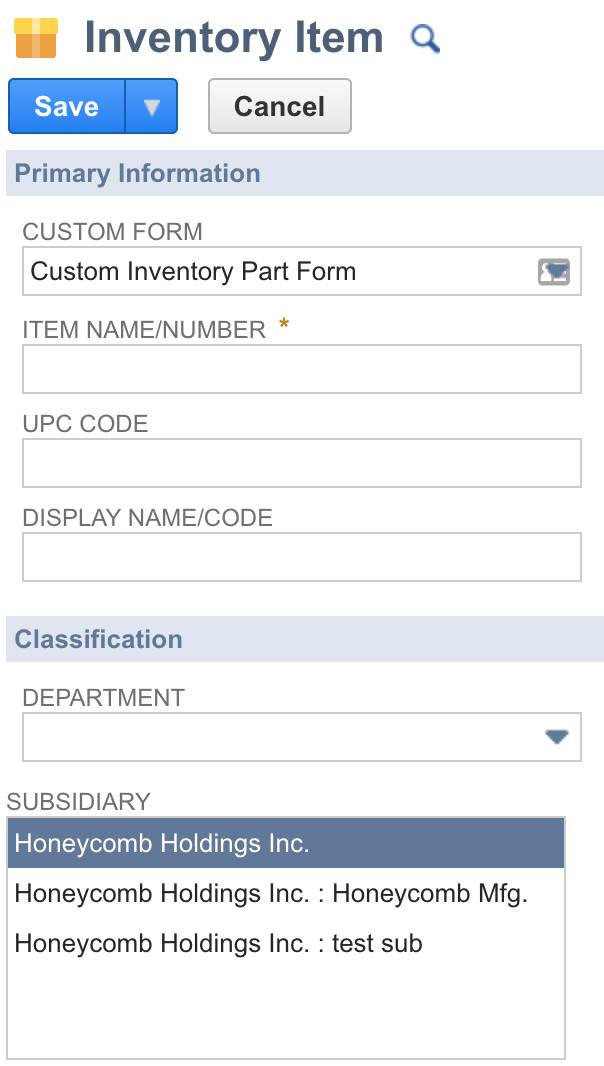
- Click Lists | Accounting | Items | New. The New Item page appears.
- Click Inventory Item. Note the Salesforce Product ID field appears in the Primary Information section.

Then, to be able to view internal IDs in NetSuite, click Home | Set Preferences, select the Show Internal IDs checkbox, and then click Save.
Now, your flow needs to access the Inventory Item and Assembly/Bill of Materials forms to create inventory and assembly items. You must determine the internal IDs of various fields on these forms so your flow can populate them.
Let’s start by looking at the Inventory Item form. In the Subsidiary field, Honeycomb Mfg is one of the values.
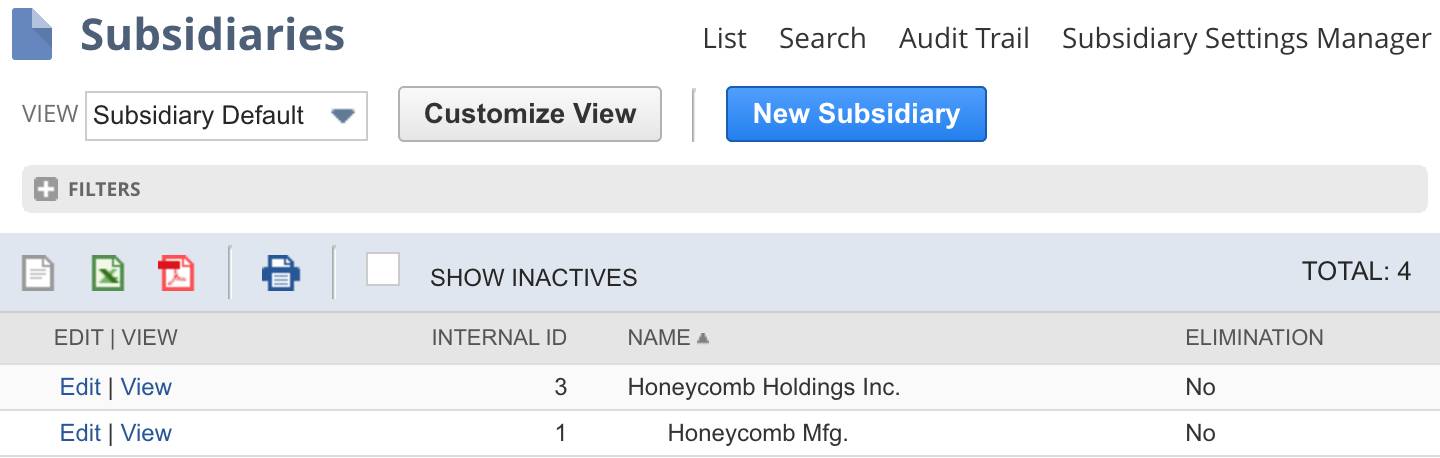
You must find the internal ID of Honeycomb Mfg for your flow. In the Search field of NetSuite, enter subsidiaries and then select Page: Subsidiaries. The internal IDs of various subsidiaries appear. Note the internal ID of Honeycomb Mfg is 1; you use it to populate the Subsidiary field for each inventory item in your flow.
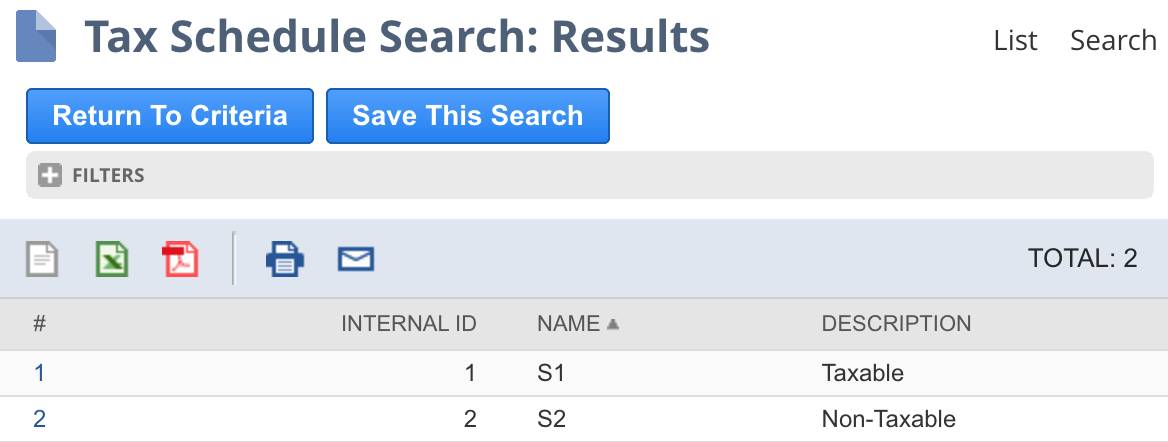
Next, in the Accounting tab of the Inventory Item form, the tax schedule is S1.

You must find the internal ID of the S1 tax schedule for your flow. Follow these steps.
- In the Search field, enter
tax schedulesand select Page: Tax Schedules.
- Click S1 and then click the Search link.
- Click Submit to submit a global tax schedule search. The internal IDs of various tax schedules appear. Note the internal ID of S1 is 1; you use it to populate the Tax Schedule field for each inventory item in your flow.
Next, let’s take a look at the Assembly/Bill of Materials form. In the Subsidiary field, Honeycomb Mfg is one of the values. In your flow, you must set the subsidiary for each inventory item and its associated assembly item to the same value. If you don’t do this, at runtime you get this error code INVALID_SUB and this error message, “You may not add members to a group/kit/assembly unless the subsidiaries for those members completely contain the subsidiaries of the group/kit/assembly.” Recall the internal ID of Honeycomb Mfg is 1; you use it to populate the Subsidiary field for each assembly item in your flow.
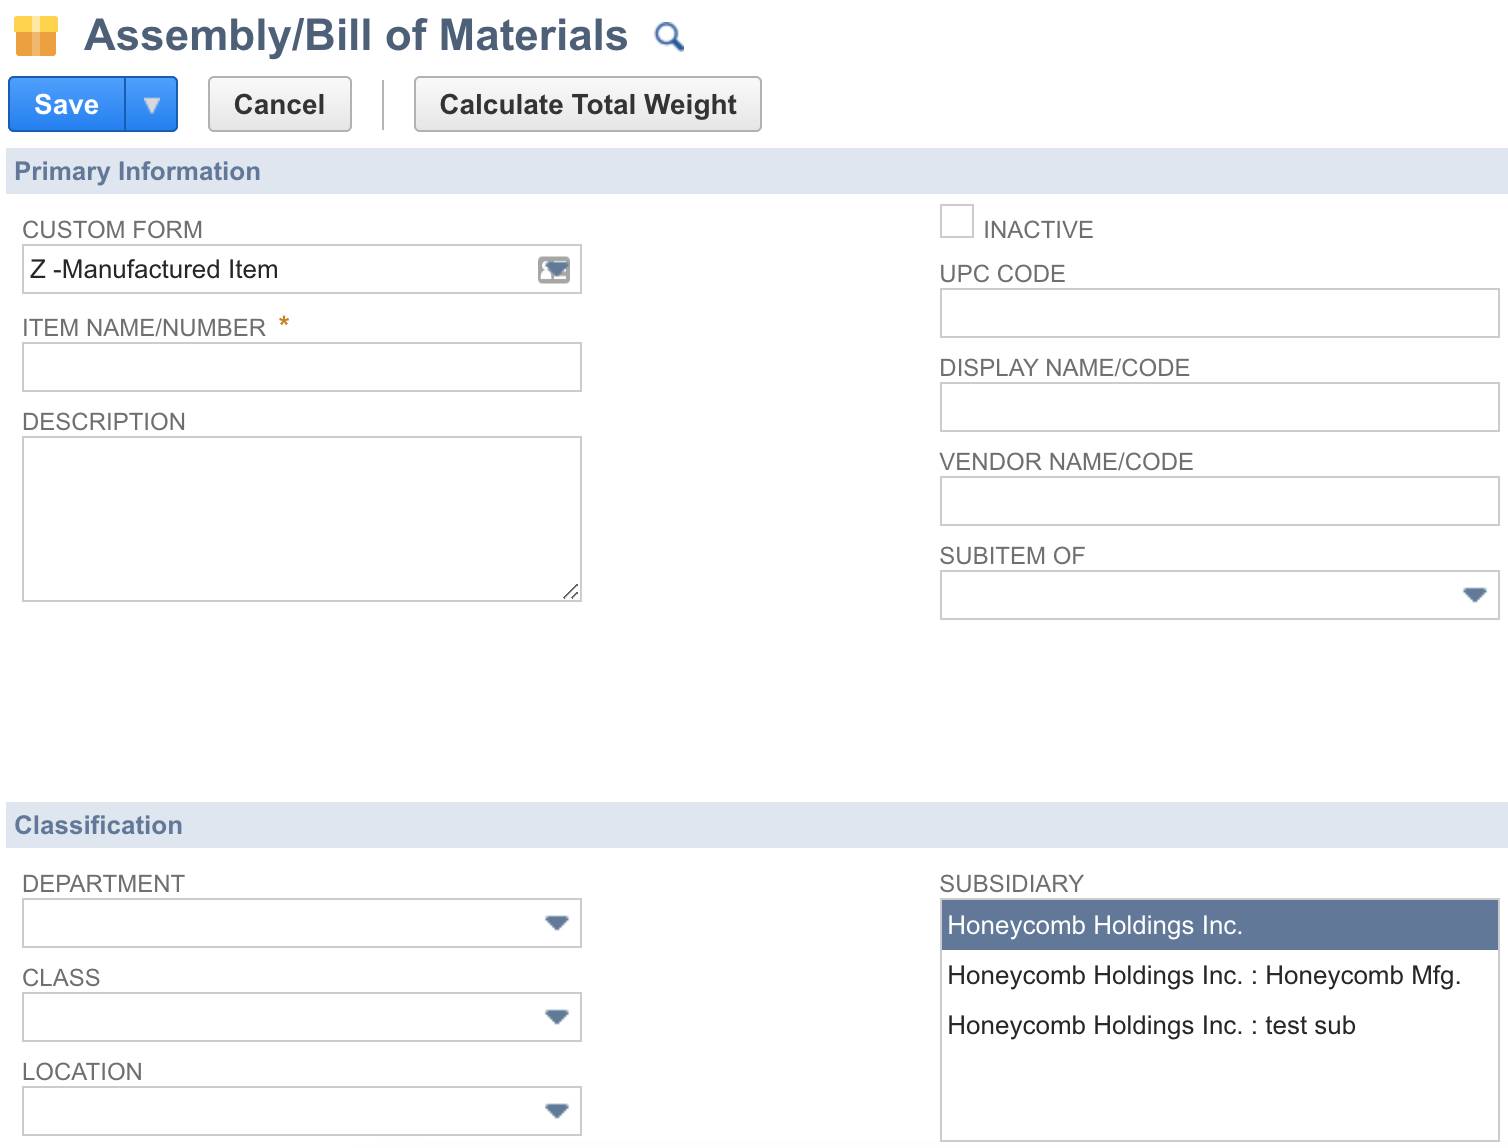
In the Accounting tab of the Assembly/Bill of Materials form, note the Tax Schedule field. Recall the internal ID of the S1 tax schedule is 1; you use it to populate the Tax Schedule field for each assembly item in your flow.

In the Manufacturing tab of the Assembly/Bill of Materials form, your flow has to populate the Components section with an associated inventory item using fields such as Item, BOM quantity, and tax schedule.

In the Sales/Pricing tab of the Assembly/Bill of Materials form, your flow must populate the List Price row of the QTY 0 column in the USA sublist. NetSuite calculates automatically the prices for different discount levels.

That wraps up our tour of the various fields in the Inventory Item and Assembly/Bill of Materials forms your flow needs to populate.
Finally, let’s find out values for a NetSuite connection.
NetSuite Connection Parameters
When you create a connection to NetSuite using MuleSoft Composer, you must specify values for the following parameters.
Connection Display Name
The connection display name is any name of your choice.
Account
To find your NetSuite account, follow these steps.
- In NetSuite, click Setup | Integration | SOAP Web Services Preferences.
- Copy the account ID into a text file of your choice and save it.
Consumer Key and Consumer Secret
To generate a consumer key and consumer secret for a NetSuite connection, follow these steps.
- Click Setup | Company | Enable Features.
- Click SuiteCloud.
- Scroll down to the Manage Authentication section and select the Token-based Authentication checkbox.
- Click I Agree on the SuiteCloud Terms of Service page.
- Click Save.
- Click Setup | Integration | Manage Integrations | New.
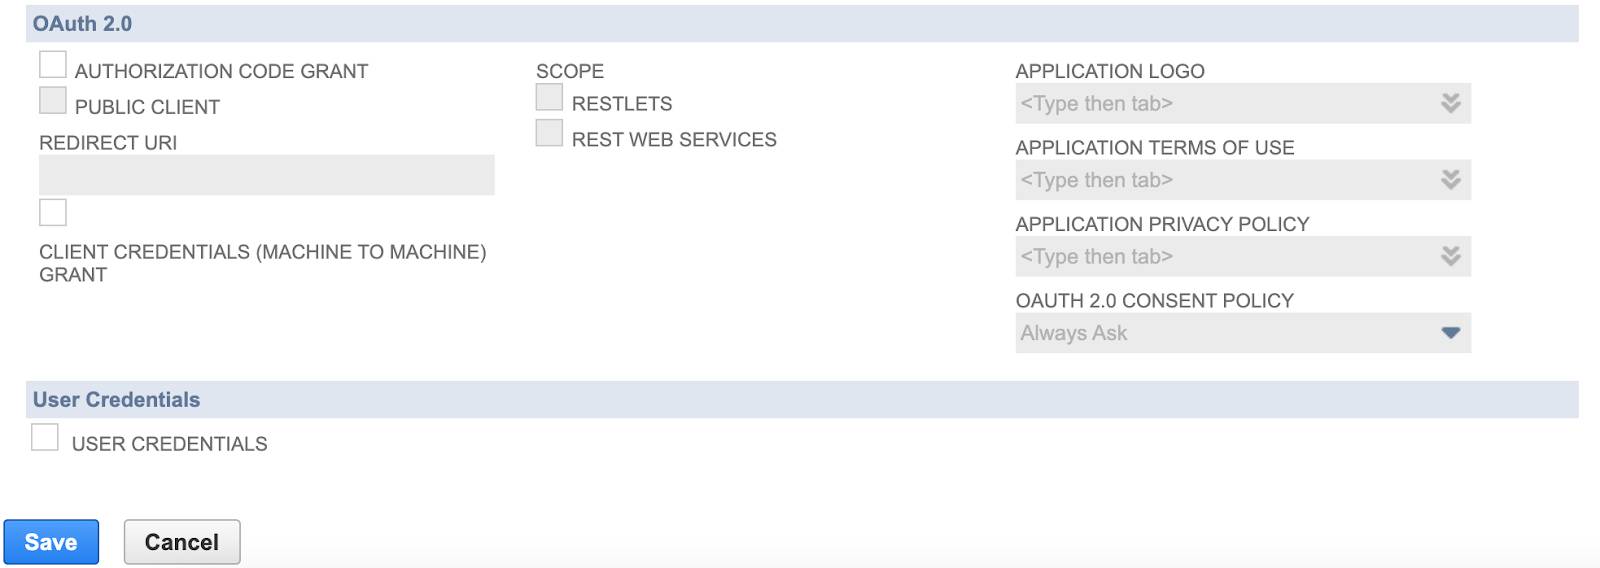
- Configure your integration as follows and then click Save to generate a consumer key and consumer secret.
- Name:
Composer Integration - State: Enabled
- Token-based Authentication: selected
- TBA: Authorization Flow: deselected
- OAuth 2.0 Authorization Code Grant: deselected
- User Credentials: deselected

- Copy the consumer key and consumer secret into the text file and save it.
Token ID and Token Secret
To generate a token ID and token secret for a NetSuite connection, follow these steps.
- Click Setup | Users/Roles | Access Tokens | New.
- Configure the access token as follows, and then click Save to generate a token ID and token secret.
- Application Name:
Composer Integration - Token Name:
Composer Integration - [yourusername], Administrator
- Copy the token ID and token secret into the same text file. You use all the values in this text file when you configure a NetSuite connection using MuleSoft Composer.
You’ve taken the first steps to prepare to create your flow with MuleSoft Composer. In the next unit, you learn how to design your flow.
Resources