Create an Outbound Connection
Learning Objectives
After completing this unit, you’ll be able to:
- Explain what an outbound connection is.
- Create an outbound connection in AWS.
- Create an outbound connection in Salesforce.
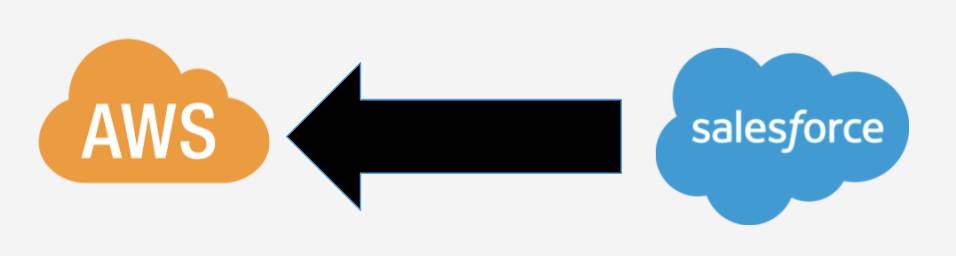
As we described in Private Connect Inbound Connections, Maria Jimenez is Ursa Major Solar’s Salesforce admin. She created an inbound connection to securely send data from an enterprise resource planning (ERP) system that’s hosted on Amazon Web Services (AWS) into Salesforce. Now she must figure out how to securely transfer data from Salesforce to the ERP system in AWS. And for that, she must know all about outbound connections.

What Is an Outbound Connection?
From the perspective of Private Connect, any callouts that are sent from Salesforce to an external cloud provider over the private internet are referred to as outbound. So in outbound connections, data originates in Salesforce and flows out to a public cloud. In this context, a callout is defined as an API call to an external service.
What Are the Components Behind an Outbound Connection?
Happily, Maria is already familiar with the main components of an outbound connection because she used them when she created the inbound connection.
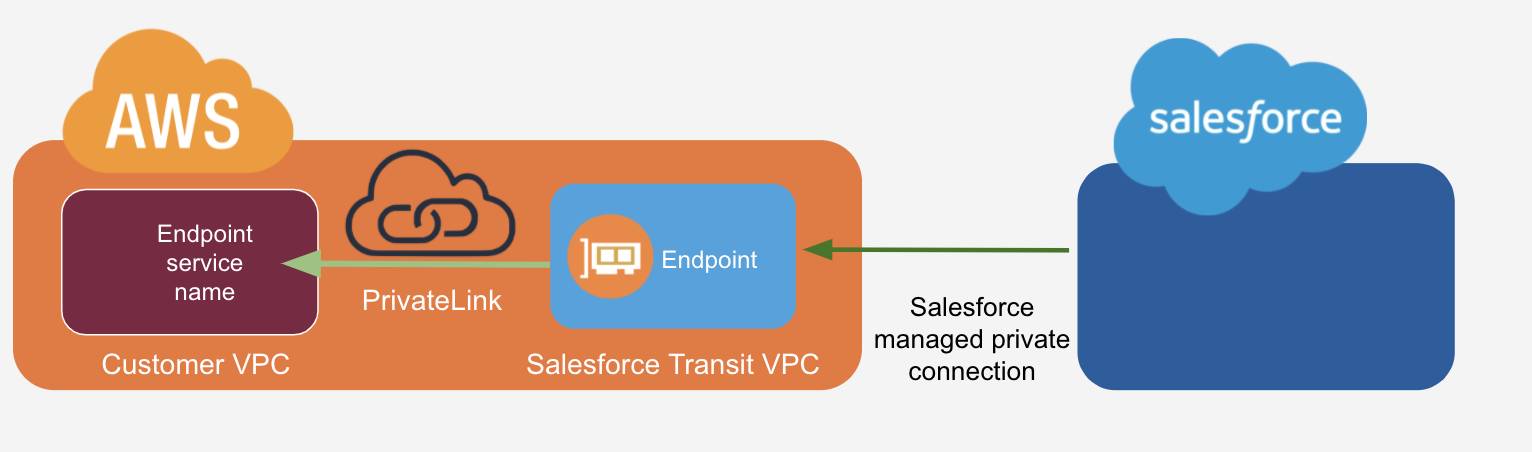
- Salesforce-Managed Transit VPC
- PrivateLink
- AWS Endpoint Service Name
If you need a refresher, see the Private Connect Inbound Connections module.
Authorize the Salesforce Transit VPC in AWS
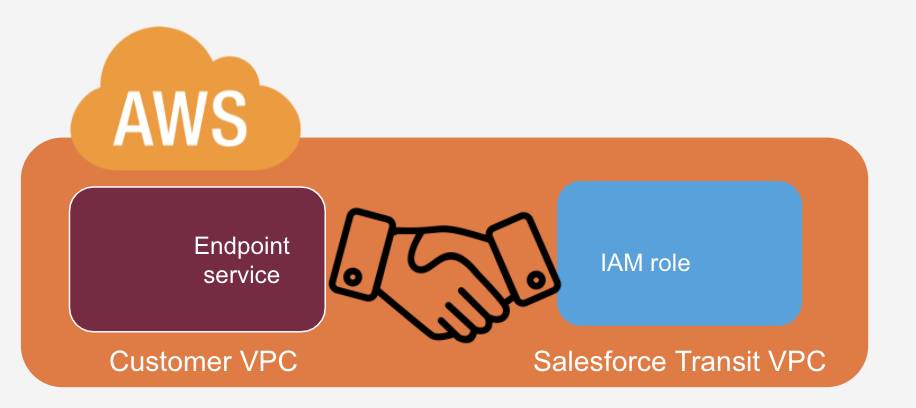
In order for the connection between the Salesforce Transit VPC and Ursa Major’s VPC to properly work, Maria needs to authorize the handshake between the two. That’s where the IAM role comes in. In this example, the IAM role represents the identity of the Salesforce Transit VPC. By allowing the Salesforce Transit VPC IAM role into the customer VPC’s endpoint service, she is authorizing the transit VPC to call into their own VPC. This is a one-time operation per VPC configuration.
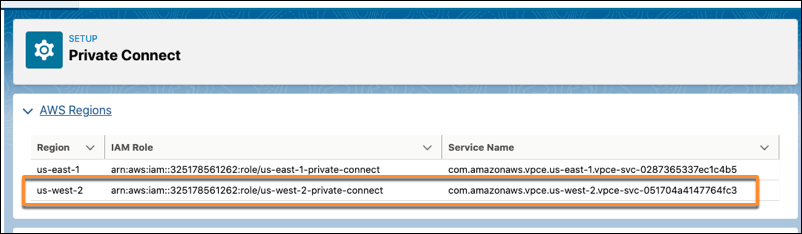
Maria gets the IAM role from the Setup page in the Salesforce org.
- From Setup, enter
Private Connectin the Quick Find box, and then select Private Connect.
- Click AWS Regions to view the available regions, IAM Roles, and Service Names.
- Find the region in which your VPC is hosted and copy the corresponding IAM Role. This is the IAM role of the transit VPC that Salesforce has deployed in your region. Maria uses the service name from
us-west-2.
Maria now uses the AWS Console to navigate to the endpoint services in her VPC dashboard. She makes sure she’s logged in to the same region in AWS from which she retrieved the service name in Salesforce. In this example, it’s us-west-2. In the AWS console she updates the endpoint service she already created and is running inside her customer VPC and adds the IAM role she copied from step 3 above to the Whitelisted Principles tab.
While she’s in the AWS Console, she also copies the endpoint service name because she’ll use it next to create an outbound connection.
Create an Outbound Connection in Salesforce
Maria can now create an outbound connection in Salesforce using the information about the VPC connections in AWS that she’s gathered.
- From Setup, enter
Private Connectin the Quick Find box, and then select Private Connect.
- Click Create Outbound Connection.
- Select the AWS PrivateLink Connection Type.
- Enter a name for the connection, a description, and the endpoint service name copied from the AWS console, described in the previous section.
- Click Save. Your connection appears in the Outbound Connections list with the Status field set to
Unprovisioned.

An unprovisioned outbound connection means the private connection between your Salesforce org and VPC environment is not yet established. You can have as many unprovisioned connections as needed. A connection counts toward your license only when it’s provisioned. Unprovisioned connections are also packageable.
Move on to the next unit to learn how you can use the outbound connection you just created.
Resources
- Salesforce Help: Establish an Outbound Connection with AWS
- Salesforce Help: Considerations for Private Connect with AWS
- AWS Documentation: Set Up API Gateway private integrations