Explore Salesforce Pricing
Learning Objectives
After completing this unit, you’ll be able to:
- List the key areas within the pricing application.
- Sign up for a special developer edition org for Revenue Cloud.
- Set the product selling model of a product.
- Add a product to a price book.
Before You Start
Before you start this module, make sure you complete this content. The work you do here builds on the concepts and work you do in that content.
Price Management Home
In the Salesforce Pricing: Quick Look module, you discovered a key Revenue Cloud component–Salesforce Pricing. You learned how it lets you manage the complete product pricing lifecycle from a single unified platform. This ensures consistent, compliant, and accurate pricing, resulting in faster quoting and ordering.
You can access Salesforce Pricing using the Price Management app, which is the central hub for managing the pricing of your products and services. This image shows the main areas on the Price Management home page. Click the numbered callouts to learn more.
In this module, you get hands-on with each of these components of Salesforce Pricing. But first, start by setting up your own Salesforce org.
Sign Up for a Developer Edition Org with Revenue Cloud
To complete this module, you need a special Developer Edition org that contains Revenue Cloud and our sample data. Get the free Developer Edition and connect it to Trailhead now so you can complete the challenges in this module. Note that this Developer Edition is designed to work with the challenges in this badge, and might not work for other badges. Always check that you’re using the Trailhead Playground or the special Developer Edition org that we recommend.
- Sign up for a free Revenue Cloud Developer Edition org.
- Fill out the form.
- For Email, enter an active email address.
- For Username, enter a username that looks like an email address and is unique, but it doesn’t need to be a valid email account (for example, yourname@example.com).
- After you fill out the form, click Sign me up. A confirmation message appears.
- When you receive the activation email (this might take a few minutes), open it and click Verify Account.
- Complete your registration by setting your password and answering the challenge question. Tip: Save your username, password, and login URL in a secure place—such as a password manager—for easy access later.
- You’re logged in to your Developer Edition Org.
Now connect your new Developer Edition org to Trailhead.
- Make sure you’re logged in to your Trailhead account.
- In the Challenge section at the bottom of this page, click the playground name and then click Connect Org.
- On the login screen, enter the username and password for the Developer Edition you just set up.
- On the Allow Access? screen, click Allow.
- On the Want to connect this org for hands-on challenges? screen, click Yes! Save it. You’re redirected back to the challenge page and ready to use your new Developer Edition to earn this badge.
Enable Pricing
Now that your org is connected, follow these steps to make sure it’s ready to use.
- From Setup, in the Quick Find box, search for and select Salesforce Pricing Setup.
- Under the Sync Pricing Data section, click Sync.

- Confirm that you want to sync your org.
The pricing data sync takes a few minutes to complete, but you don’t have to wait. Proceed to the next step.
Refresh the Decision Tables
Next, refresh the Product Qualification and Disqualification decision tables in your org.
- From Setup, in the Quick Find box, search for and select Decision Tables.
- From the available decision tables list, click Product Disqualification.
- Click the Refresh button. You can tell if the refresh is successful because the Last Refreshed Date updates to just now. If the time doesn’t update, try refreshing the browser tab.

- Similarly, refresh the Product Qualification decision table.
You’re all set to start using your Developer Edition org.
A Business Scenario
Richa Mani is the pricing admin at InfinitraBytes, an electronic product and solution provider.

InfinitraBytes has recently adopted Revenue Cloud, and Richa can’t wait to test its pricing capability. She wants to use it to efficiently manage products and their prices.
Here are some benefits of Salesforce Pricing that can speed up and simplify Richa’s work.
Benefits |
Description |
|
|---|---|---|
Intuitive Drag-and-Drop Pricing Builder |
Simplify all your discount calculations with the easy to use pricing interface. Convert your pricing policies into pricing procedures without any extensive technical know-how. |
|
Reusable Pricing Elements |
Use the modular pricing elements to easily create and configure pricing procedures. This promotes efficiency and consistency across different pricing scenarios, and reduces the time and effort required to set up new pricing models. |
|
Declarative Pricing Rules |
Use pricing rules to create precise and transparent pricing formulas and maintain consistency and fairness in all your pricing decisions. |
|
Transparent Pricing Calculations |
See how different factors influence the final price of a product with the price waterfall. Get a clear and detailed view of every step in the pricing calculation process, helping you to make informed pricing decisions. |
|
Omni-Channel Pricing |
Use pricing actions to set prices for products from any Salesforce object such as Quote, Order, Opportunity, or even custom Salesforce objects. This helps create a smooth sales experience that drives business growth. |
|
Motivated by all these benefits, Richa grabs a cup of coffee and launches the Price Management application to explore how pricing works in Revenue Cloud.
Set Product Selling Model Option
A product selling model option defines how a product is offered to customers. It can be a one-time purchase, a subscription, or a recurring revenue model. This gives businesses the flexibility to sell a wide variety of products, from physical goods to software-as-a-service (SaaS) subscriptions.
In this section, join Richa as she begins her pricing journey by setting the product selling model option for a product. Follow along in your Developer Edition org.
- From the App Launcher, find and select Price Management.
- On the Price Management home page, click the Products tile, or choose Products from the navigation menu.
- Change the list view to All Products.
- Under Product Name, click Tablet.
- On the Related tab, for Product Selling Model Option, click New.
- Add these details:
- Product Selling Model:
One Time
- Product:
Tablet
- Click Save.

You’ve successfully set the product selling model option for the Tablet product. Note that your Product Selling Model Option Name will have a different number than the example screen capture.Next, you add this product to a price book.
Add Products to a Price Book
A price book is a must-have for any business. It’s a single source of truth for your product prices, and makes it easy to ensure you’re charging the right amount for your products. Salesforce Pricing comes with a predefined standard price book, however, you can create your own standard price book by using the Price Management app.
In this section, you add the Tablet product to the standard price book, which is already available in your Developer Edition org.
- From the Tablet product page, which should already be open in another tab, click the Related tab.
- Scroll down until you find the Price Books section, and click Add Standard Price.
- Enter these details:
- List Price:
800
- Product Selling Model:
One Time
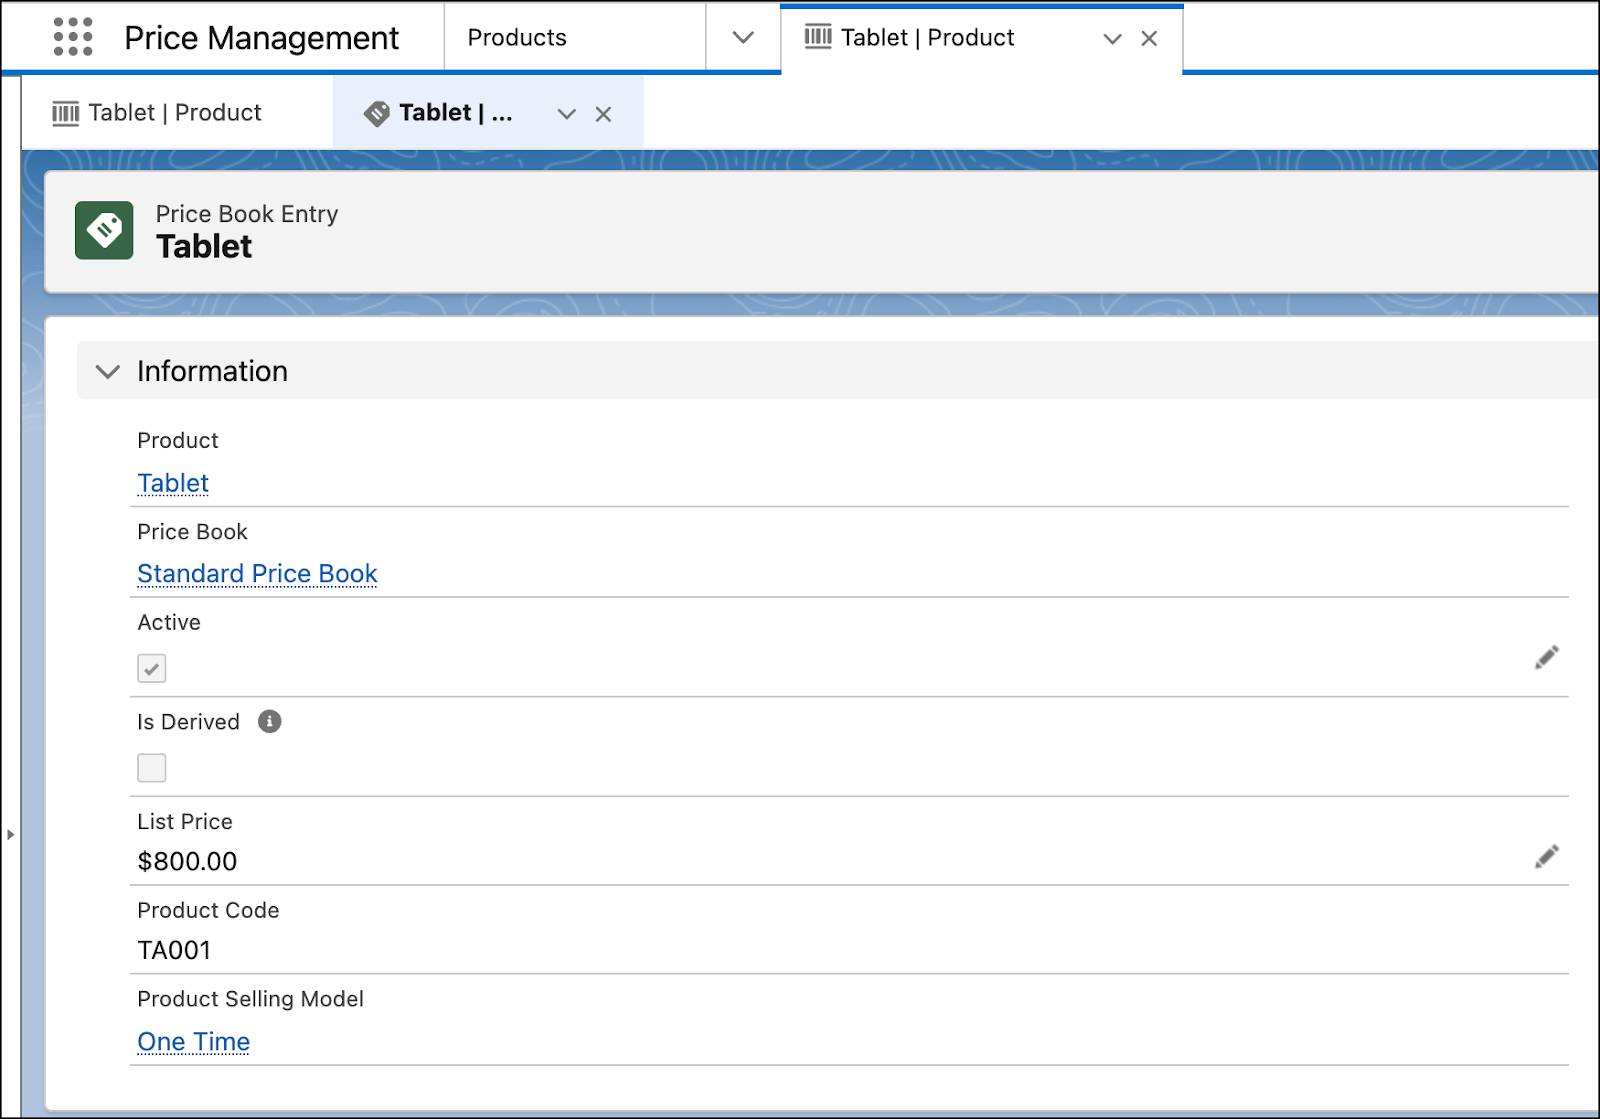
- Make sure the Active checkbox is selected, and click Save.

- On the newly created Price Book Entry page, expand the Information section, and click Standard Price Book.
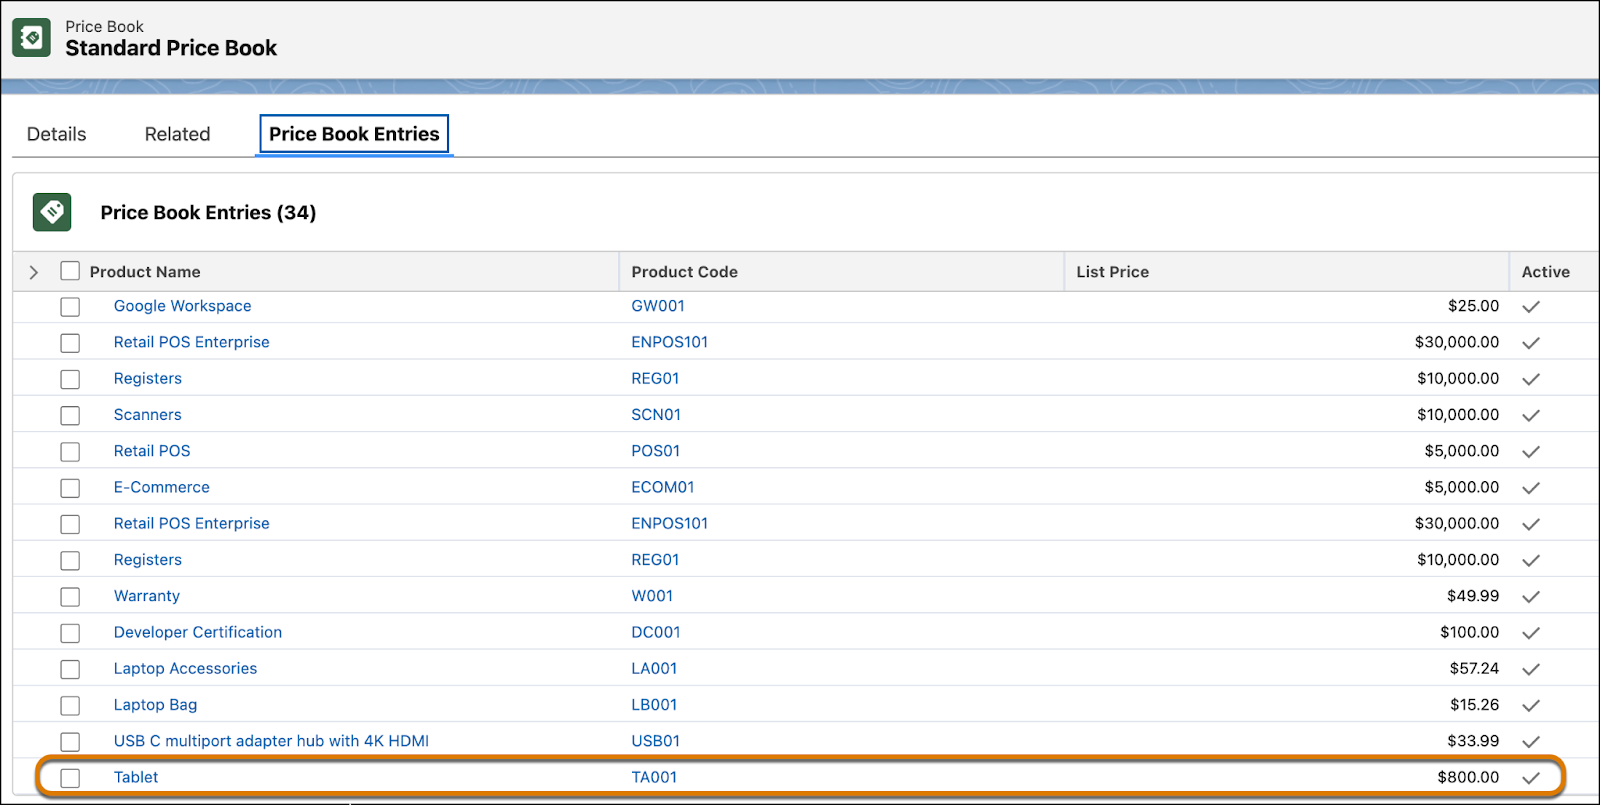
- On the Standard Price Book page, click the Price Book Entries tab.

Scroll to find the Tablet product in the list of product names. Congratulations! Your Tablet product is now on the Price Book Entries list.
Refresh the Decision Table
Next, refresh the Price Book Entries decision table in your org.
- From Setup, in the Quick Find box, search for and select Decision Tables.
- From the available decision tables list, click Price Book Entries.
- Click the Refresh button.

This ensures that the latest pricing data is available in the Price Book Entries decision table.
With your product selling model option and price book entry in place, you’ve taken the first steps on your pricing journey. In the next unit, you learn how to create a pricing procedure to calculate the base price of products.
Before heading to the next unit, be sure to complete the hands-on challenge below.
