Maintain Your Platform App Builder Certification for Winter ’24
Learning Objectives
After completing this unit, you’ll be able to:
- Build screen flows with reactive components.
- Give your mobile users the Dynamic Forms experience.
- Enable Lightning Article Editor and Article Personalization for knowledge content.
Salesforce Certification
If you hold the Platform App Builder credential, keep in mind that you need to complete this module by the due date to maintain your certification. Another important part of maintaining your credential is ensuring your Trailhead and Webassessor accounts are linked.
Interested in learning more about getting certified? Check out the Salesforce Platform App Builder credential.

Protect the Integrity of Your Certification
The quality of our certification exams and the value our credentials provide are our highest priority. Protecting the security and confidentiality of our exams is essential to providing our customers with credentials that are respected and industry-leading.
As a participant of the Salesforce Certification Program, you’re required to accept the terms of the Salesforce Credential and Certification Program Agreement. Please review the Salesforce certification exam-taking policies in the Salesforce Credential and Certification Program Agreement and Code of Conduct Salesforce Help article for more details.
Salesforce introduced a ton of great feature enhancements over the past year. Let’s take a look at some of the more important ones.
Build Screen Flows with Reactive Components
Reduce the number of screens that your users click through, and build screens that feel like single-page applications with reactive flow screen components. Configure supported standard components or custom Lightning web components to react to changes in other components on the same screen in real time.
For example, create a Data Table component that lists Opportunity records. On the same screen, add a Radio Buttons component, and set the default value of the component to the stage of the first Opportunity that the user selects. Previously, if you needed a component to react to changes in another component, you placed the components on separate screens.
Where: This change applies to Lightning Experience in Essentials, Professional, Enterprise, Performance, Unlimited, and Developer editions.
How: For screen flows that are configured to run on API version 59.0 and later, you don’t need to take any extra steps to access reactive components.
For screen flows that are configured to run on API versions 57.0 and 58.0, on the Process Automation Settings page, select Enable Reactive Components for Screen Flows running API Version 57.0 and 58.0. Add components to your screen, and save and run your flows as usual.
The Enable Reactive Components for Screen Flows running API Version 57.0 and 58.0 setting expires in Winter ’25. Before that release, upgrade your flows to run on API version 59.0 or later to take advantage of reactive components.
-
Build Screen Flows with Reactive Global Variables
Save time by referencing global variables in reactive formulas on flow screens. Use custom labels in reactive formulas to display translatable text to your users. For example, create a custom setting called DiscountPercentage, which specifies org, profile, and user discount percentages. Reference the variable in reactive formulas across a screen flow. The screen flow applies the correct discount value for the user running the flow and recalculates the value as the user makes changes.
-
Build Screen Flows with Reactive Selections
Use choice components to respond to user selections elsewhere on the same screen. For example, on a flow screen used for returning merchandise, create a Picklist component with reasons for the return such asDon’t Want. Then add a Radio Buttons component to automatically select how the customer funds are returned, such asStore Credit.
-
Use More Formula Functions in Reactive Screens
If your flows run on API version 59.0 or later, you can now configure a flow screen component to perform real-time logic with the SUBSTITUTE, ADDMONTHS, and ^ formula functions. When the flow detects a change to a value referenced in the formula, it immediately recalculates and updates the value of the corresponding screen component.
-
React to Changes on the Same Screen Using Display Text Components
Configure a Display Text component to react to changes in other components on the same screen. For example, you have a Currency component, where a user enters the wholesale cost of an item, and a Display Text component that shows the retail price of the item, which is three times the wholesale price. Each time the user updates the wholesale cost, the flow updates the displayed retail price.
-
Reactive Components Update the First Time a Screen Loads
A flow now updates the value of a field when the screen loads if the field is configured to react to changes in another field on the same screen. If you navigate to a previous or later screen and then return to the current screen, the flow doesn’t update the reactive components again. Previously, fields didn’t update unless the user performed an additional action, such as manually changing a value in a field. This change applies only to flows that are running on API version 59.0 or later.
-
Inform Screen Reader Users of Reactive Changes on a Flow Screen
Upgrade your flows to run on API version 59.0 or later to let screen reader users know when flow screen components change due to their actions on other components on the same screen. For example, if a user changes a field on a screen that results in a component on the screen becoming visible, the screen reader announces, “Due to your recent changes, the content on the screen has changed.”
Give Your Mobile Users the Dynamic Forms Experience
With Dynamic Forms, you can add and remove fields individually from a Lightning record page, break up record details into multiple sections, and set conditional visibility rules for fields and field sections, all in Lightning App Builder. Previously, Dynamic Forms were available only on desktop. Now, with Dynamic Forms on Mobile, your mobile users can have the same customized experience that your desktop users have.
Where: This change applies to Lightning Experience in Group, Professional, Enterprise, Performance, Unlimited, and Developer editions.
How: From Salesforce Mobile App Setup, enable Dynamic Forms on Mobile.

If you add the dynamic form component to a Lightning record page and that page includes a Record Detail - Mobile component, your users see only the Record Detail - Mobile component from their mobile device, even after you enable Dynamic Forms on Mobile. So that your users can view Dynamic Forms on Mobile content on pages that you upgrade to Dynamic Forms, remove the Record Detail - Mobile component from the pages.
After you enable Dynamic Forms on Mobile, Lightning record pages that you upgrade to Dynamic Forms show dynamic forms on their mobile devices without additional configuration.
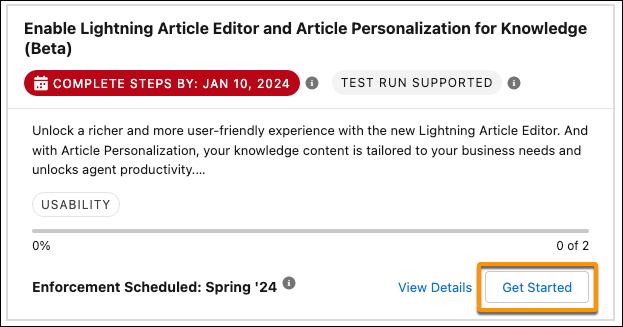
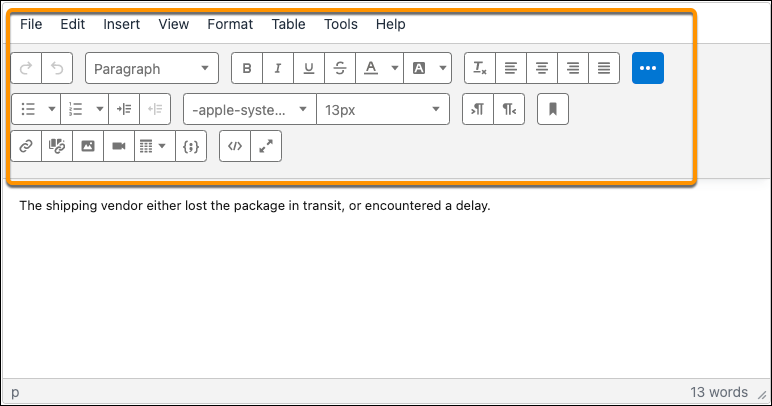
Enable Lightning Article Editor and Article Personalization for Knowledge Content
Unlock a richer and more user-friendly experience with the new Lightning Article Editor. Tailor knowledge content to your business needs and unlock agent productivity using Article Personalization.
Where: This change applies to Lightning Experience in Enterprise, Unlimited, Developer, Essentials, and Professional editions.
When: Salesforce enforces this update in Winter ’25. To get the major release upgrade date for your instance, go to Trust Status, search for your instance, and click the maintenance tab.
Why: With the Lightning Article Editor, you can:
- Boost author productivity with an easily accessible collection of content formatting capabilities and advanced table editing.
- Size the editor to your liking, including full screen mode, to author articles more effectively and to better understand how the articles look to the end user.
- Copy and paste content seamlessly from external sources, such as Google Docs or websites, while maintaining the look and feel of the original source content.
- Ensure your articles follow W3C accessibility standards using the built-in accessibility checker tool.
With Article Personalization, you can create custom visibility rules that hide or show fields based on the user, user permissions, and record. Salesforce admins customize knowledge articles by controlling which parts of an article are shown or hidden from specific audiences. And service agents interacting with the content find answers faster because they see only what they need to see.
How: To enable the Lightning Article Editor and Article Personalization for Knowledge, go to Release Updates in Setup, find the update, and get started.
After you enable the release update, the new Lightning Article Editor replaces the old Knowledge editor.
Resources
- Salesforce Help: Build Screen Flows with Reactive Components
- Salesforce Help: Give Your Mobile Users the Dynamic Forms Experience
- Salesforce Help: Enable Lightning Article Editor and Article Personalization for Knowledge
- Website: About W3C web standards