Create and Package a Data Kit
Learning Objectives
After completing this unit, you’ll be able to:
- Create a data kit.
- Package a data kit.
Why Use Data Kits?
Let’s take a deeper dive into what data kits are and why you use them.
A data kit is like a special container for your Data 360 components that you can then put into a package. Using data kits streamlines the packaging experience.
With data kits, you can:
-
Reuse schema through templates. By putting your Data 360 configuration into a data kit, collaborators and users can easily reuse your configuration by deploying the data kit in their own org.
-
Deploy the data kit to multiple data spaces in the same org. Once you install the package with the data kit in your org, you can choose which data space in that org to deploy it to.
-
Enhance flexibility. Instead of altering runtime metadata, package upgrades update the template, allowing users of the package to retain unchanged elements if not immediately required.
There are some Data 360 components that you wouldn’t put into your data kit. To check which components can be put into a data kit, review the Data 360 Extensibility Readiness Matrix. It’s worth noting that metadata deployed from a data kit cannot be edited or deleted.
With data kits, users can develop exhaustive end-to-end Data 360 solutions, and selectively deploy metadata into a customer’s org.
Create a Data Kit
Get Cloudy has set up its Dev Hub org, namespace org, and scratch org. Now it’s time to create a data kit.
In their scratch org, the Get Cloudy team creates Data 360 elements and adds them to a data kit. This data kit acts as a container for the Data 360 features they wish to include in their app.
Let’s watch a video on how to create and upload a data kit.
We assume you’re a package developer with the necessary permissions to create and install packages in Data 360. If you don’t have those permissions, that’s OK. Read along to learn how your administrator would take the steps in a production org. Don’t try to follow these steps in your Trailhead Playground. Data 360 isn’t available in a typical Trailhead Playground. Before starting, ensure you have Data 360 for Scratch Orgs enabled, as described in unit two.
- Go to Data Cloud Setup in your scratch org.
- In the Quick Find box, search and click Data Kits.
- Click New.
- Name your Data Kit and add an optional description, then click Save.
- Click Add from the Data Stream Bundles section.
- Next, select the connector type based on the supported data source.
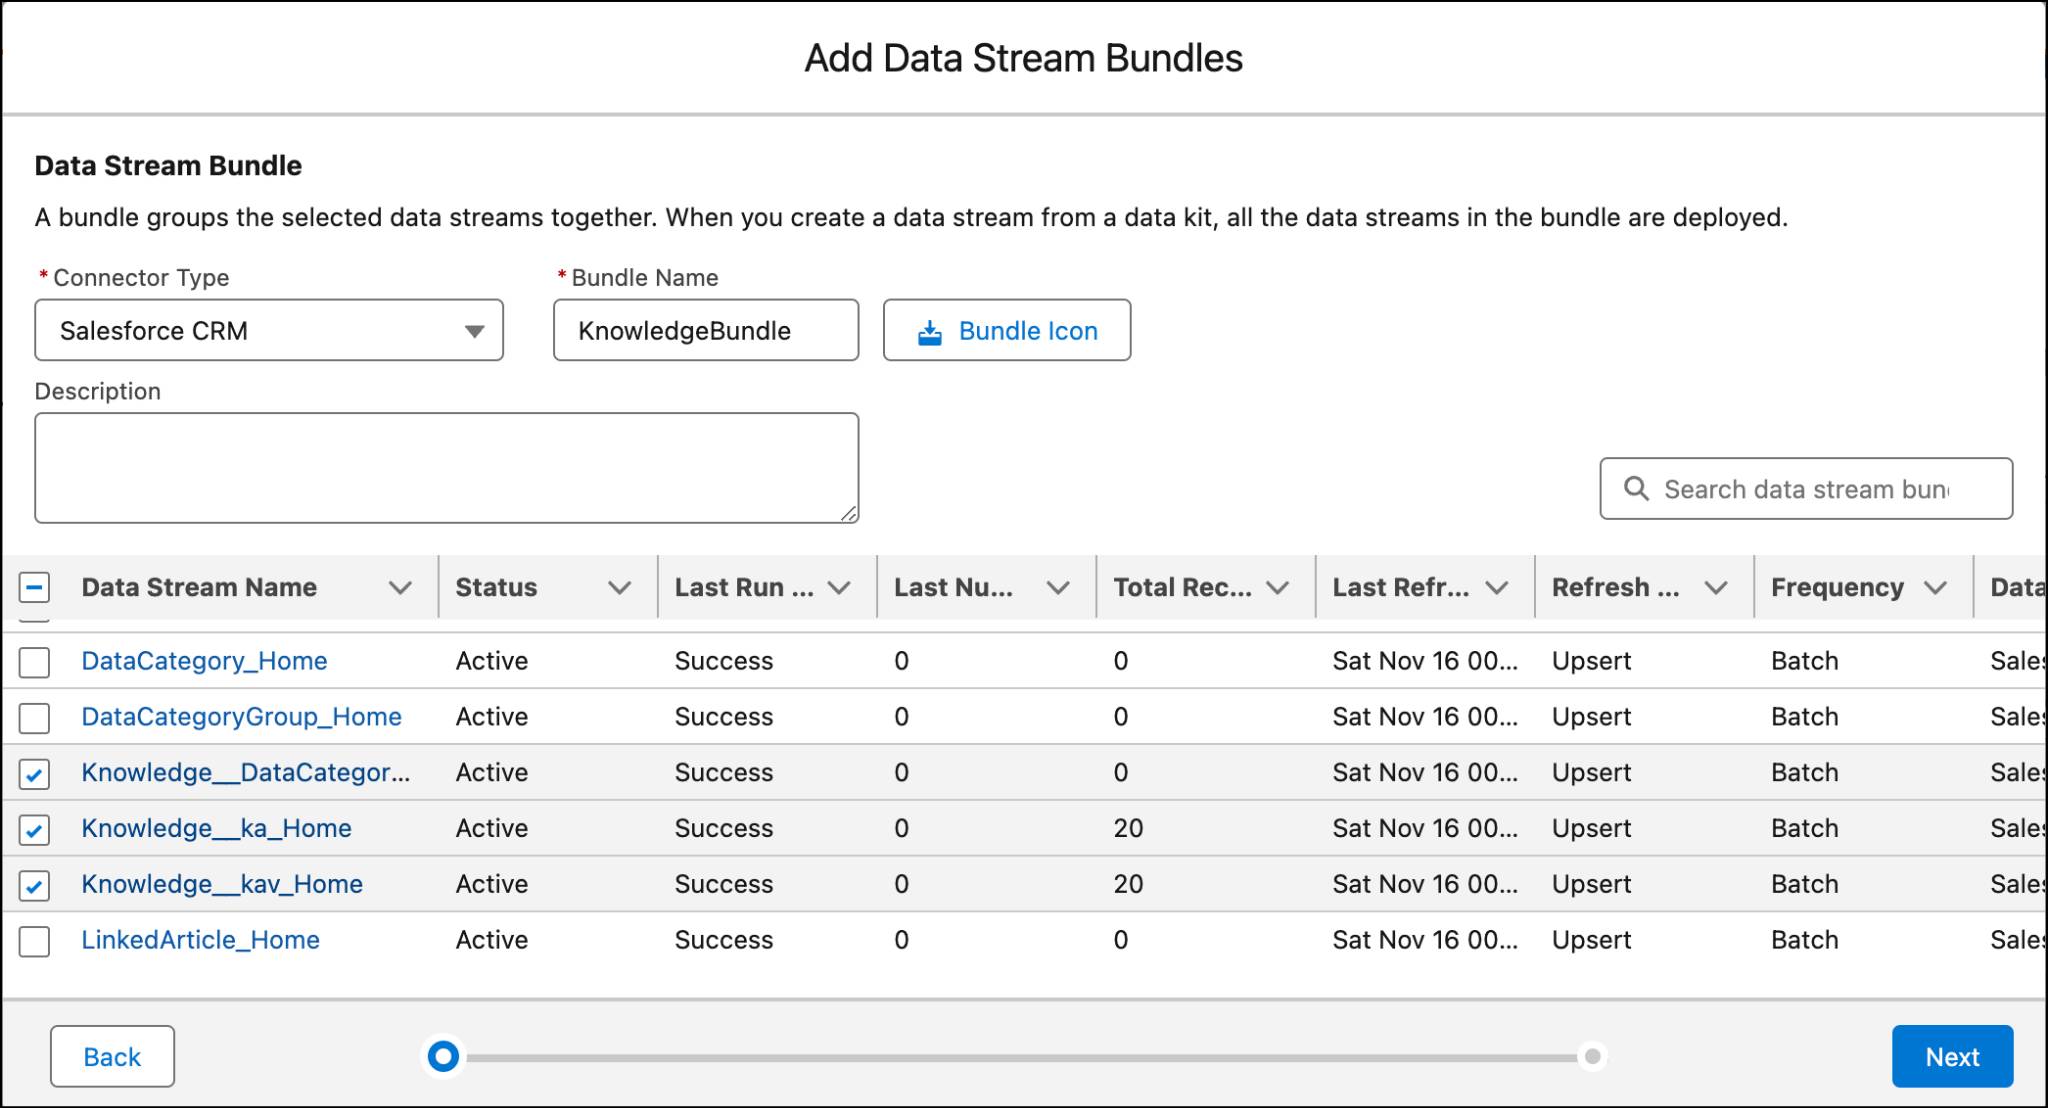
- Add a bundle name (with no spaces) and an optional description.
- Select the data streams you want to package and then click Next.
- Add a Data Model if desired, and then click Save.
- Add a Calculated Insight if desired, and click Save.
- Add additional components as desired.
Next, the Get Cloudy team needs to review the order in which components should be deployed, called the publishing sequence.
Go to the Publishing Sequence tab and review the auto-generated publishing order. This order is generated based on when each component was created in the data kit.
Create a Managed Package with the Data Kit
Get Cloudy has successfully created their data kit. Now it’s time to package it!
In the Salesforce DX project, the Get Cloudy team retrieves the data metadata by referencing the package.xml file they downloaded from the UI. When retrieving data kit metadata, it should live in an independent project folder separated from other metadata types like permission sets, custom objects, and Apex.
Next, determine if a dependency on the Data 360 SSOT package is needed. SSOT contains the core data model objects that power Data 360. If DMO’s in your package have relationships with Unified Individual or other DMO’s with an ssot__ prefix in the API name, your project has a dependency and you should add the following to your sfdx-project.json.
{
  "packageDirectories": [
    {
      "versionName": "ver 0.1",
      "versionNumber": "0.1.0.NEXT",
      "path": "data-app",
      "default": false,
      "package": "yourDCPackage",
      "versionDescription": "My data kit extension package",
      "dependencies": [
        {
          "package": "04t5Y0000015oSB"
        }
      ]
    }
  ]
}
Next, create a Salesforce managed package that points to your data kit metadata folder.
sf package create -n PACKAGE_NAME -t Managed -v DEVHUB_ALIAS -p PATH_TO_DATA_KIT
When the managed package is created, it will produce a 0ho ID. Copy that ID. Next, create a managed package version using that 0ho ID.
sf package version create -v DEVHUB_ALIAS -k INSTALLATION_KEY -p 0ho_ID -w 45 -f config/project-scratch-def.json
This process can take a couple of minutes and will return a 04t ID denoting the package version. The package version will be considered beta, which means that it can only be installed in scratch orgs. When you have verified functionality of the beta package, you can run sf package version promote -v DEVHUB_ALIAS -p 04t to create a version that is installable on Developer Edition and production orgs.
Collaborate
The Get Cloudy team has created and packaged a data kit. They then commit the changes to their version control system and push updates to GitHub, their repository hosting platform, to collaborate with other developers.
Other developers can download the project and deploy the data kit in a scratch org to make additional changes. Then they repeat the process. The new developers add the old and new features to a new data kit, retrieve the data kit metadata into their own project, and then upload the project back into their repository hosting platform.
Resources
- Salesforce Help: Packaging and Data Kits in Data 360
- Salesforce Developer: Package Data 360 Metadata Components
- Salesforce Developer: Data 360 Extensibility Readiness Matrix