Explore the Integration Procedure Designer
Learning Objectives
After completing this unit, you’ll be able to:
- Describe the Integration Procedure Designer in Omnistudio for Managed Packages.
- Explain how to work with Group and Action elements.
Meet the Integration Procedure Designer
The Omnistudio Integration Procedure Designer in Omnistudio for Managed Packages helps you quickly configure Integration Procedures by dragging elements into the Structure panel and configuring the properties for that element on the same screen. We told you it was efficient!
Let’s take a look at the Integration Procedure Designer features, starting with panels and panes.
Available Components Panel
The Available Components panel contains Groups and Actions elements.
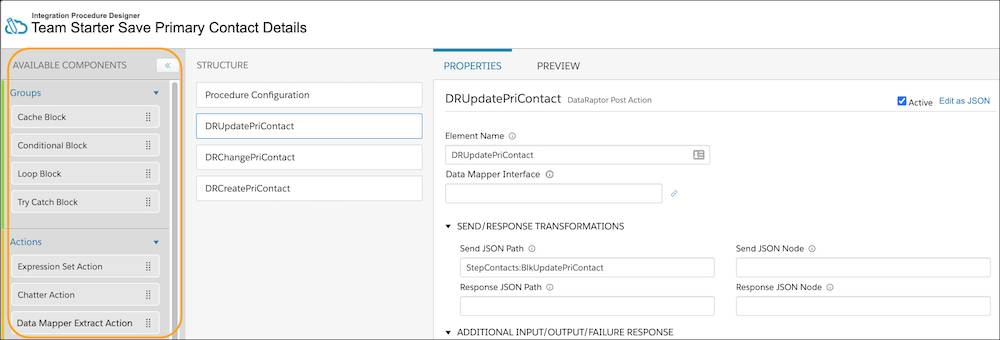
Structure Panel
Drag elements from the Available Components panel to the Structure panel.

Element Properties Pane
Each element has a Properties pane with a link to edit the JavaScript object notation (JSON) of each element.

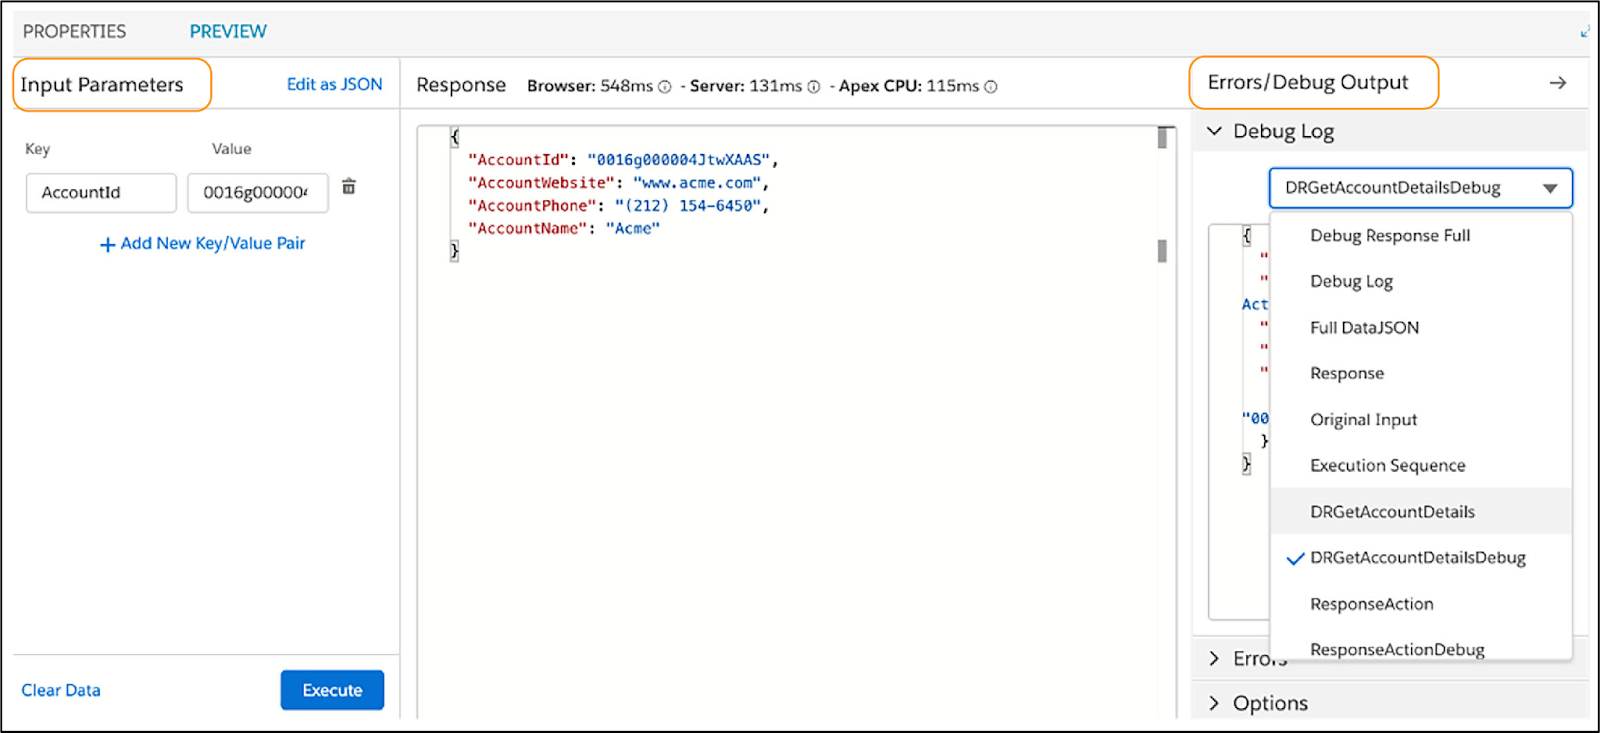
Preview Pane
Use the Preview pane to input parameters and execute the Integration Procedure to confirm it's been configured correctly. Use the Errors/Debug Output to troubleshoot.
Integration Procedure Elements
You might be familiar with using elements in Omnistudio Omniscripts and Flexcards. Integration Procedure elements are a little different. They work behind the scenes, and there are no elements for user interaction.
Let’s see what they do instead. Integration Procedure elements are either Groups or Actions.
Groups
Integration Procedures group related steps as a unit inside a block. Integration Procedures provide the following block types.
Block Type |
What It Does |
Example |
|---|---|---|
Cache Block |
|
An Integration Procedure caches weekly sales numbers but doesn't cache stock prices. |
Conditional Block |
|
Based on a price and a state code, an Integration Procedure calculates the sales tax and reports the total price. |
|
Loop Block
|
|
A user adds four products to a digital shopping cart. One Remote Action within a Loop Block can add all four products. Without a Loop Block, adding four products to a cart would require running four separate Remote Actions. |
|
Try-Catch Block
|
|
An Integration Procedure creates and deletes a Contact with a specified LastName and returns an error message if the LastName field is blank. |
You can nest blocks within other blocks. For example, you can nest a Loop Block within a Try Catch Block or a Cache Block.
All blocks have one property in common—an Execution Conditional Formula.
- If this formula evaluates to true or isn't defined, the block is executed.
- If it evaluates to false, the block is skipped.
Actions
Action elements are essential building blocks of every Integration Procedure. These actions can set data values, perform functions, call Omnistudio Data Mappers, invoke Apex classes, send emails, invoke REST endpoints, run other Integration Procedures, and more. You choose the action that matches the data source you plan to use.
You can also use blocks to group actions for conditional execution, caching, list processing, and error handling. To add an action, drag it from the palette into the Integration Procedure Structure panel.
Read about all of the different actions at Integration Procedure Actions in Salesforce Help.
In this example screenshot, a Response Action element is used to tell the Integration Procedure what data to pass back to the tool that called it. The Response Action limits what is sent back, only sending what's in the Omnistudio Data Mapper Transform Action’s node.

Now that you’ve learned the ins and outs of the Integration Procedure Designer, we think you’re ready to see it in action and walk through the design process. Get excited! We’ve got some great scenarios to show you in the next unit.

Resources
- Salesforce Help: Group Integration Procedure Steps Using Blocks (Omnistudio for Managed Packages)
- Salesforce Help: Define Execution Logic Using Conditional Blocks (Omnistudio for Managed Packages)
- Salesforce Help: Enhance Performance Using Cache Blocks (Omnistudio for Managed Packages)
- Salesforce Help: Process Arrays Using Loop Blocks (Omnistudio for Managed Packages)
- Salesforce Help: Handle Errors Using Try-Catch Blocks (Omnistudio for Managed Packages)
- Salesforce Help: Integration Procedure Actions (Omnistudio for Managed Packages)