Explore Omnistudio Standard Designers
Learning Objectives
After completing this unit, you’ll be able to:
- Introduce Omnistudio Designers and their capabilities.
- Describe the Flexcard and Omniscript designers.
- Summarize the Integration Procedure and Data Mapper designers.
Omnistudio Designer Basics
Omnistudio provides standard designers for Omniscripts, Flexcards, Integration Procedures, and Data Mappers. The designers are declarative builder tools with easy-to-navigate, WYSIWYG (What You See Is What You Get) interfaces. You can build Omnistudio components using simple drag-and-drop and click methods instead of having to write code.
Flexcards, Omniscripts, Integration Procedures, and Data Mappers are available on the list view pages and you can easily access them through App Launcher. The list view page for the standard designer offers an enhanced user experience and better navigation.

To open a component in designer, go to the component list view page and then select a record. You can also create a new component by clicking the New button. A new window opens where you fill in the required basic details. When you save the new record, it opens in the designer.
Omnistudio Designers provide an enhanced user interface that’s logical in design and convenient to use. All the key interface elements and features to create components are in the layout. No more navigating through multiple menus or screens to find the elements you need. The capabilities include a fast way to search for elements, a real-time preview of your components as you design them, quick component creation and activation, and more.
Here’s a screen capture of the Omniscript Designer interface highlighting each capability.
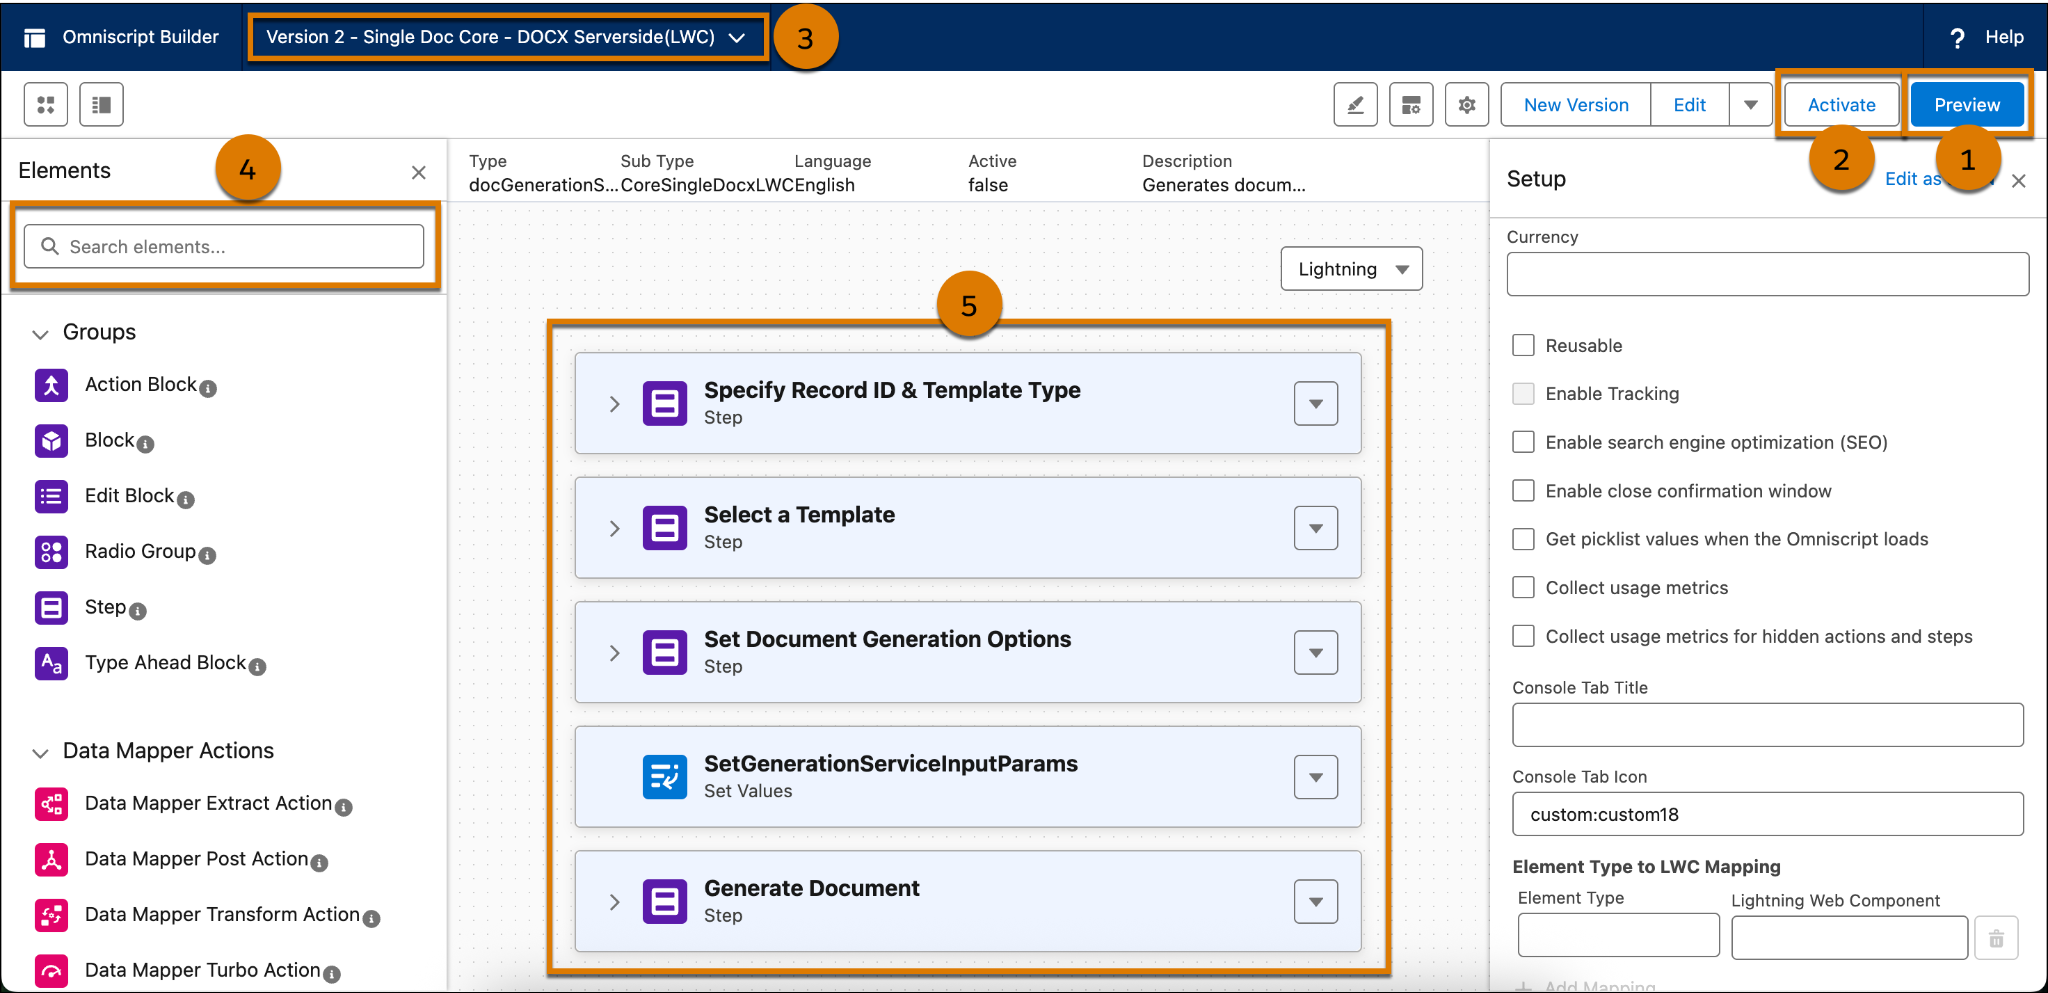
Take a closer look at each feature.
Real-Time Preview (1)
Omnistudio Designers have a Preview button, so you can see how your components look and behave at runtime, as you configure them.
Here’s an image of the Preview screen.

In preview mode, you can review how the UI components appear when published and test your component configuration with sample data. Plus, review the data JSON in the Debug panel.
Quick Component Creation and Activation (2)
The designers help you to create components with minimal effort. In the list view page of a component, select New to create a new component and start adding elements in the designer to configure it. You can also quickly activate and deploy your Flexcards and Omniscripts with just a click.
Quick activation reduces the time and effort required to move from development to production, ensuring you can roll out new features and updates fast.
Easily Shift Between Different Component Versions (3)
Switch to different versions of a component with minimal effort. This feature is crucial for managing and comparing changes over time. You can quickly move between versions using the versions dropdown menu at the top of the interface.
Go from the current version of a component to a previous version to review changes, revert to an earlier state, or merge updates. This way, you keep your development process efficient, making adjustments without losing track of previous work.
Search Elements Easily (4)
Flexcard, Omniscript, and Integration Procedure Designers provide powerful search functionality. You can quickly find and add specific elements—such as groups, actions, functions, or inputs—to the canvas. It’s useful when you’re working with many elements, saving time and reducing the chance of errors. For example, you can search for a Data Mapper Extract Action element and quickly add it to Omniscript without having to go through the entire list of elements.
Rearrange Step Elements (5)
You can move around the step elements and modify the sequence of steps in the canvas. Drag steps to move them up or down in the sequence and drop it where you need it. This flexibility allows you to experiment with different configurations and optimize the data transformation process.
Now that you understand the general capabilities of Omnistudio Designers, take a look at each designer individually.
Flexcard Designer
Use Flexcard Designer to create flexible, card-like views that integrate data and provide contextual actions. The image shows the interface, including the canvas, elements, and setup panels.
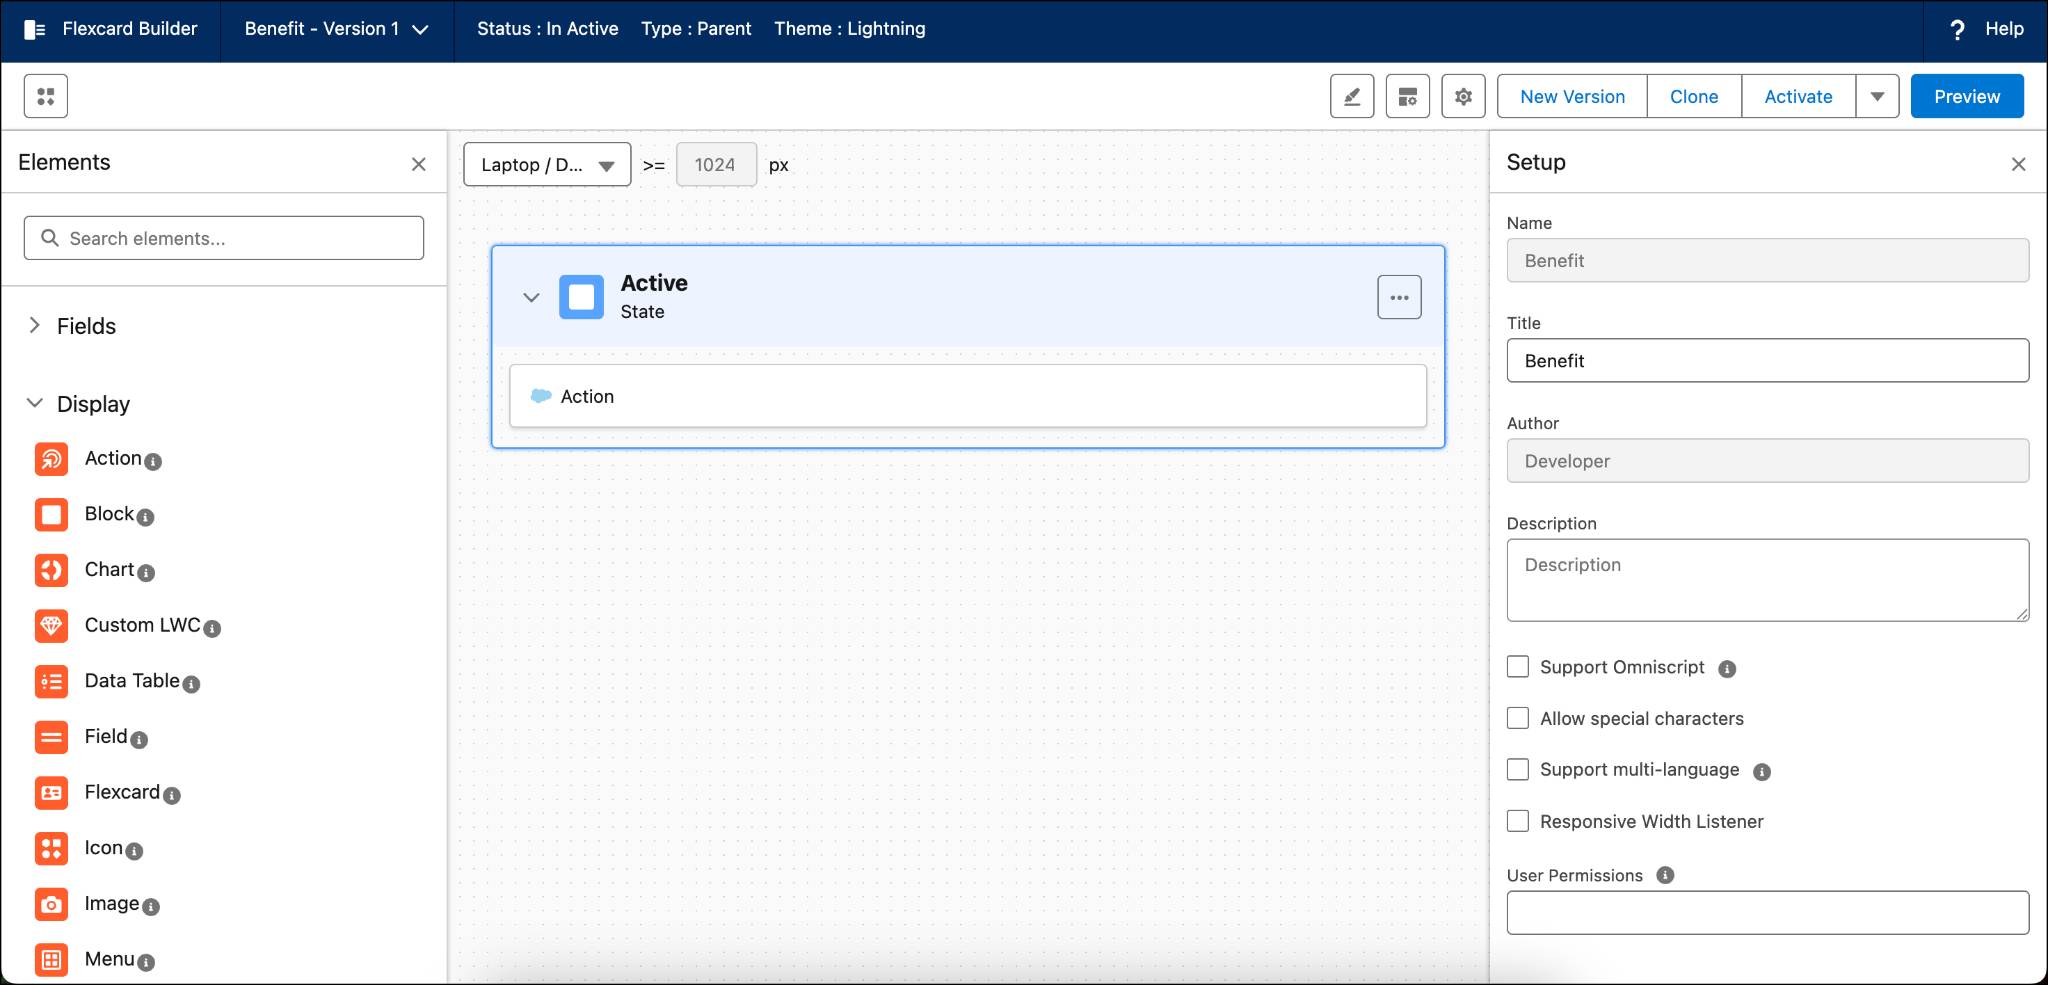
With this designer, build customer-centric, industry-specific UI components and applications that run on Salesforce. Plus, create the look and feel of your Flexcard by styling individual elements in the designer interface.
Omniscript Designer
Build personalized, branded step-by-step guided experiences with the Omniscript Designer. It has a drag-and-drop interface where you visually build and configure guided business processes.
Here’s a look at the Omniscript designer interface showing the canvas, elements, and setup panels.

Drag elements to the canvas and edit their properties simultaneously, without switching between tabs.
Integration Procedure Designer
Automate data aggregation and apply business logic across systems using the Integration Procedure Designer. Use it to configure Integration Procedures in fewer steps. Then preview either the entire Integration Procedure or just specific components.
Here’s a look at the Integration Procedure Designer interface with the TransactionsLoop element open on the canvas.
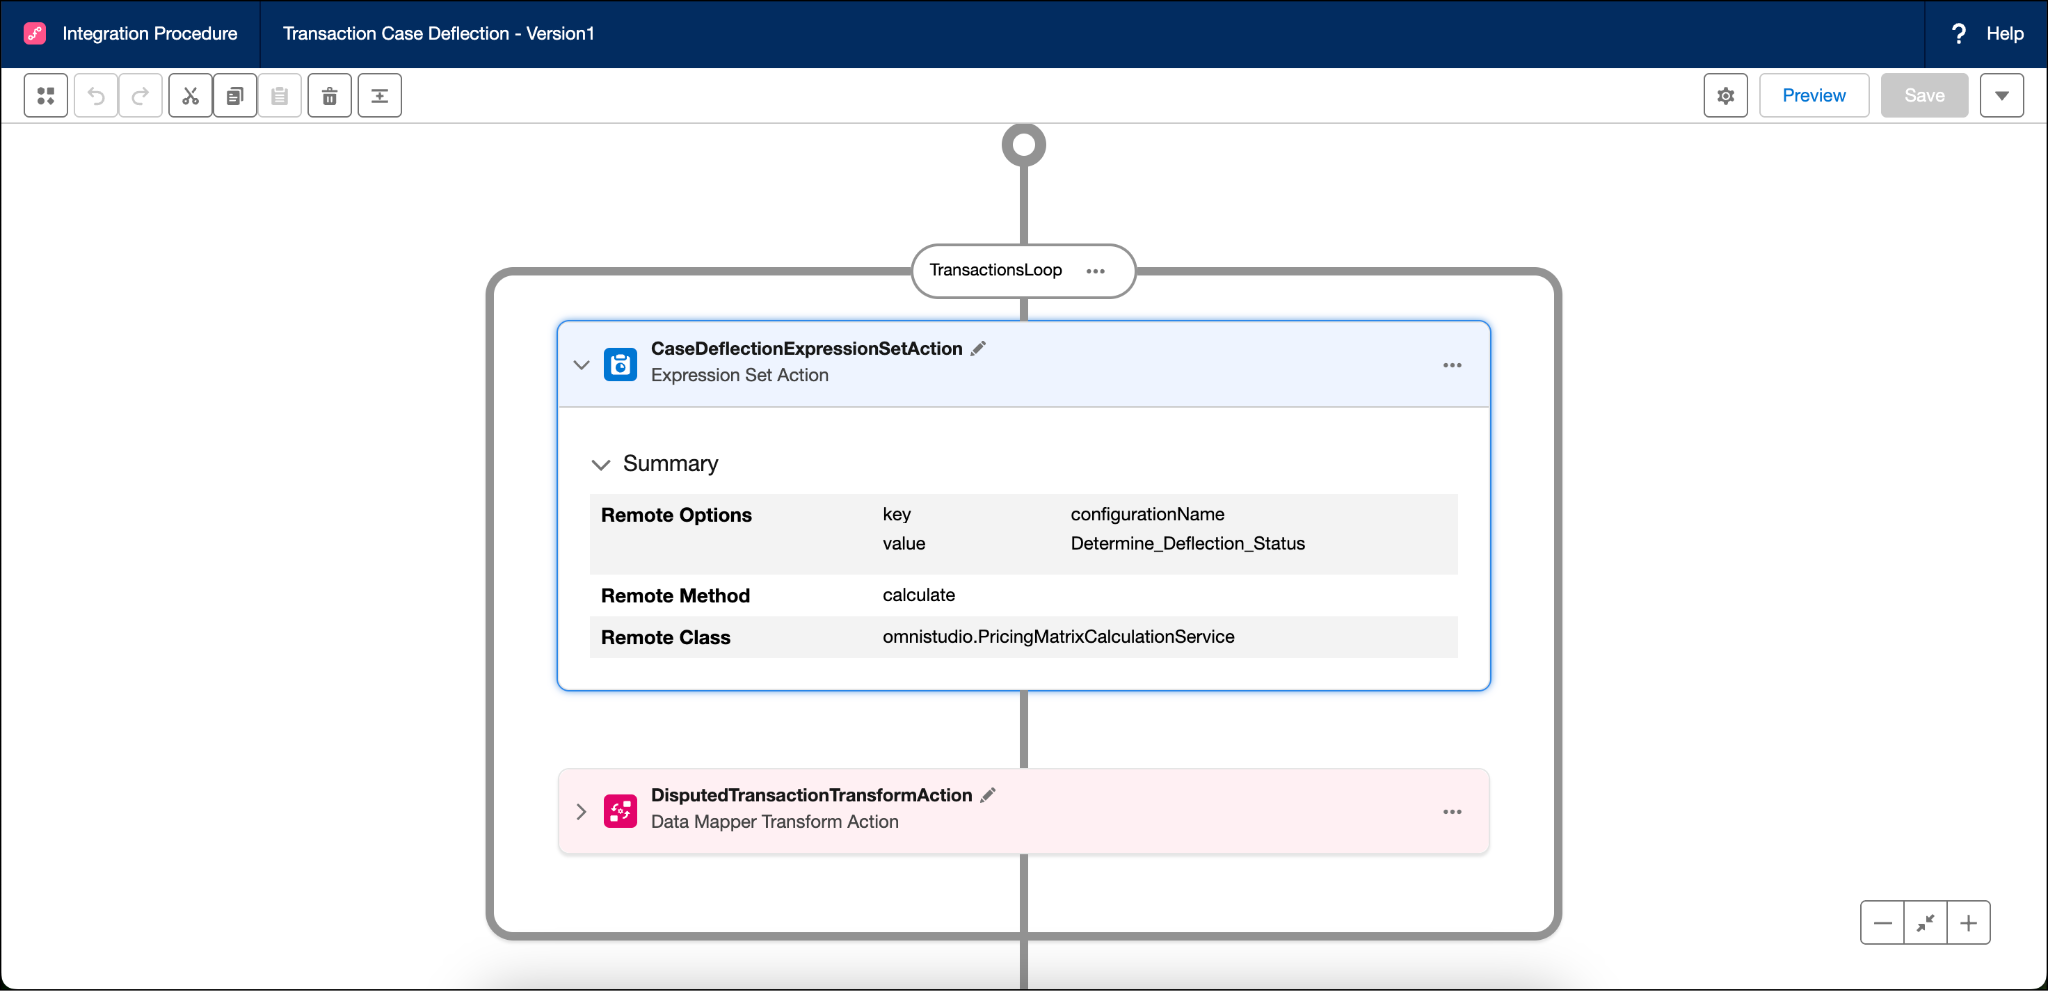
This TransactionsLoop element has two actions: Expression Set Action and Data Mapper Transform Action.
Now, you can quickly add actions to the canvas with a few clicks.
This designer simplifies the creation of complex workflows by giving you a simple way to add elements, like Groups, Data Mapper Actions, and Standard Actions. This makes development efficient and minimizes errors.
The Integration Procedure Designer makes sure that the user interface and workflow remain consistent across different tasks and procedures. This consistency helps you manage the tasks in the workflow efficiently.
Data Mapper Designer
Extract, transform, and load data seamlessly using Data Mapper Designer. The image shows the clean and simple interface of this designer with an Extract Object element on the canvas.

The layout has a canvas with Extract, Formula, and Mapping tabs. Use the Extract and Formula tabs to configure elements, and add object and field mappings for input and output in the Mapping tab. Use the plus icon at the center of the canvas to add object or formula elements to the canvas. Data Mapper Designer makes it easy for you to quickly map fields between objects declaratively.
What’s Next
In this unit, you explored the Omnistudio standard designers and their capabilities. In the next unit, you move on to Omnistudio solution design principles, skills, and best practices.