Prepare Omniscript JSON with Different Conditional Inputs
Learning Objectives
After completing this unit, you’ll be able to:
- Describe how to save data based on different conditional inputs in Omnistudio for Managed Packages.
- Prepare Omniscript JSON to use as input for Data Mapper Loads.
Save Data Based on Different Conditional Inputs
Imagine you have a guided interaction based on user input like the one in the Branching Omniscripts in Omnistudio for Managed Packages module. In the example Omniscript, the user can update the data for the existing primary contact, change the primary contact to another existing contact, or create a new contact and assign them as the primary contact. In other words, there are three potential ways or branches to update the data.
- Branch One: Update the existing primary contact’s email address or phone number.
- Branch Two: Change the name of the primary contact and change the updated contact’s email address and phone number.
- Branch Three: Enter the name, email address, and phone number of a new contact and make them the primary contact.
How do you make sure that data updates are saved no matter which option the end user chooses?
If you completed the Omnistudio Data Mappers in Omnistudio for Managed Packages module, you know that a Data Mapper Load saves updates from an Omniscript back to Salesforce. A Data Mapper Load updates records with changed data and creates new records at the same time. In this case, however, you must build three Data Mapper Loads.
Why?
- You need a Data Mapper Load that saves data for each branch of the Omniscript. You need to build an Integration Procedure to determine which Data Mapper Load is executed.
- You need the full data JavaScript Object Notation (JSON) for all the three branches to build your Data Mapper Loads.
Prepare Omniscript JSON to Use as Input for Data Mapper Loads
When you use Preview to run an Omniscript, it builds a Data JSON populated with the data required for the interaction. The Omniscript JSON is in the Request Data pane of the Omniscript’s Action Debugger. This Omniscript JSON is what you use as input JSON for the Data Mapper Load.
When you run an Omniscript with conditional outcomes, the JSON for only one of the outcomes populates. Because you need the full data JSON for all three outcomes to build your Data Mapper Loads, step through the Omniscript to populate the JSON with each of the conditional inputs.
Let’s explore how you do this for the Update Account Primary Contact Omniscript.
- In the Preview tab, enter an
AccountIdas the ContextId, the select Update primary contact and then select Next.
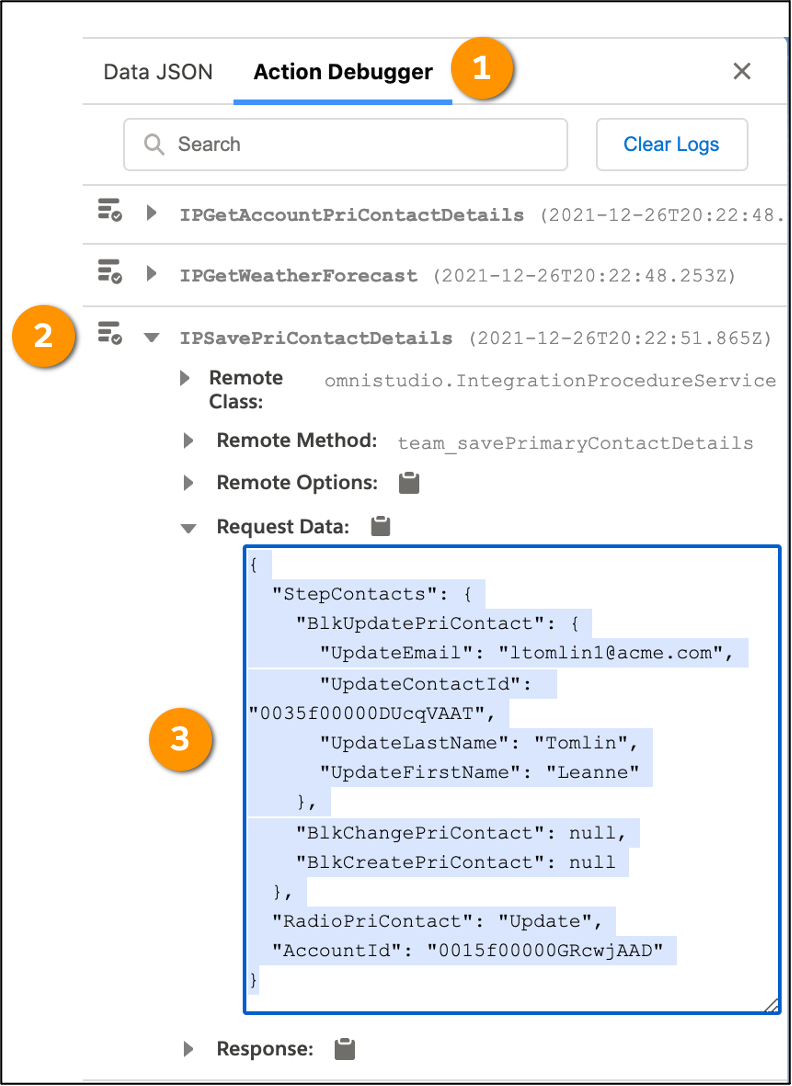
- In the Omniscript’s Action Debugger (1), expand IPSavePriContactDetails (2) and copy all of the data in the Request Data pane (3).
Note that the BlkChangePriContact data and BlkCreatePriContact data both have null values in the text box. We come back to this in a moment.
The process is the same for the other two options in this example Omniscript, although you don’t copy all of the JSON in the Request Data pane. Instead, copy only the JSON you need to replace the null values for the BlkChangePriContact data and BlkCreatePriContact data.
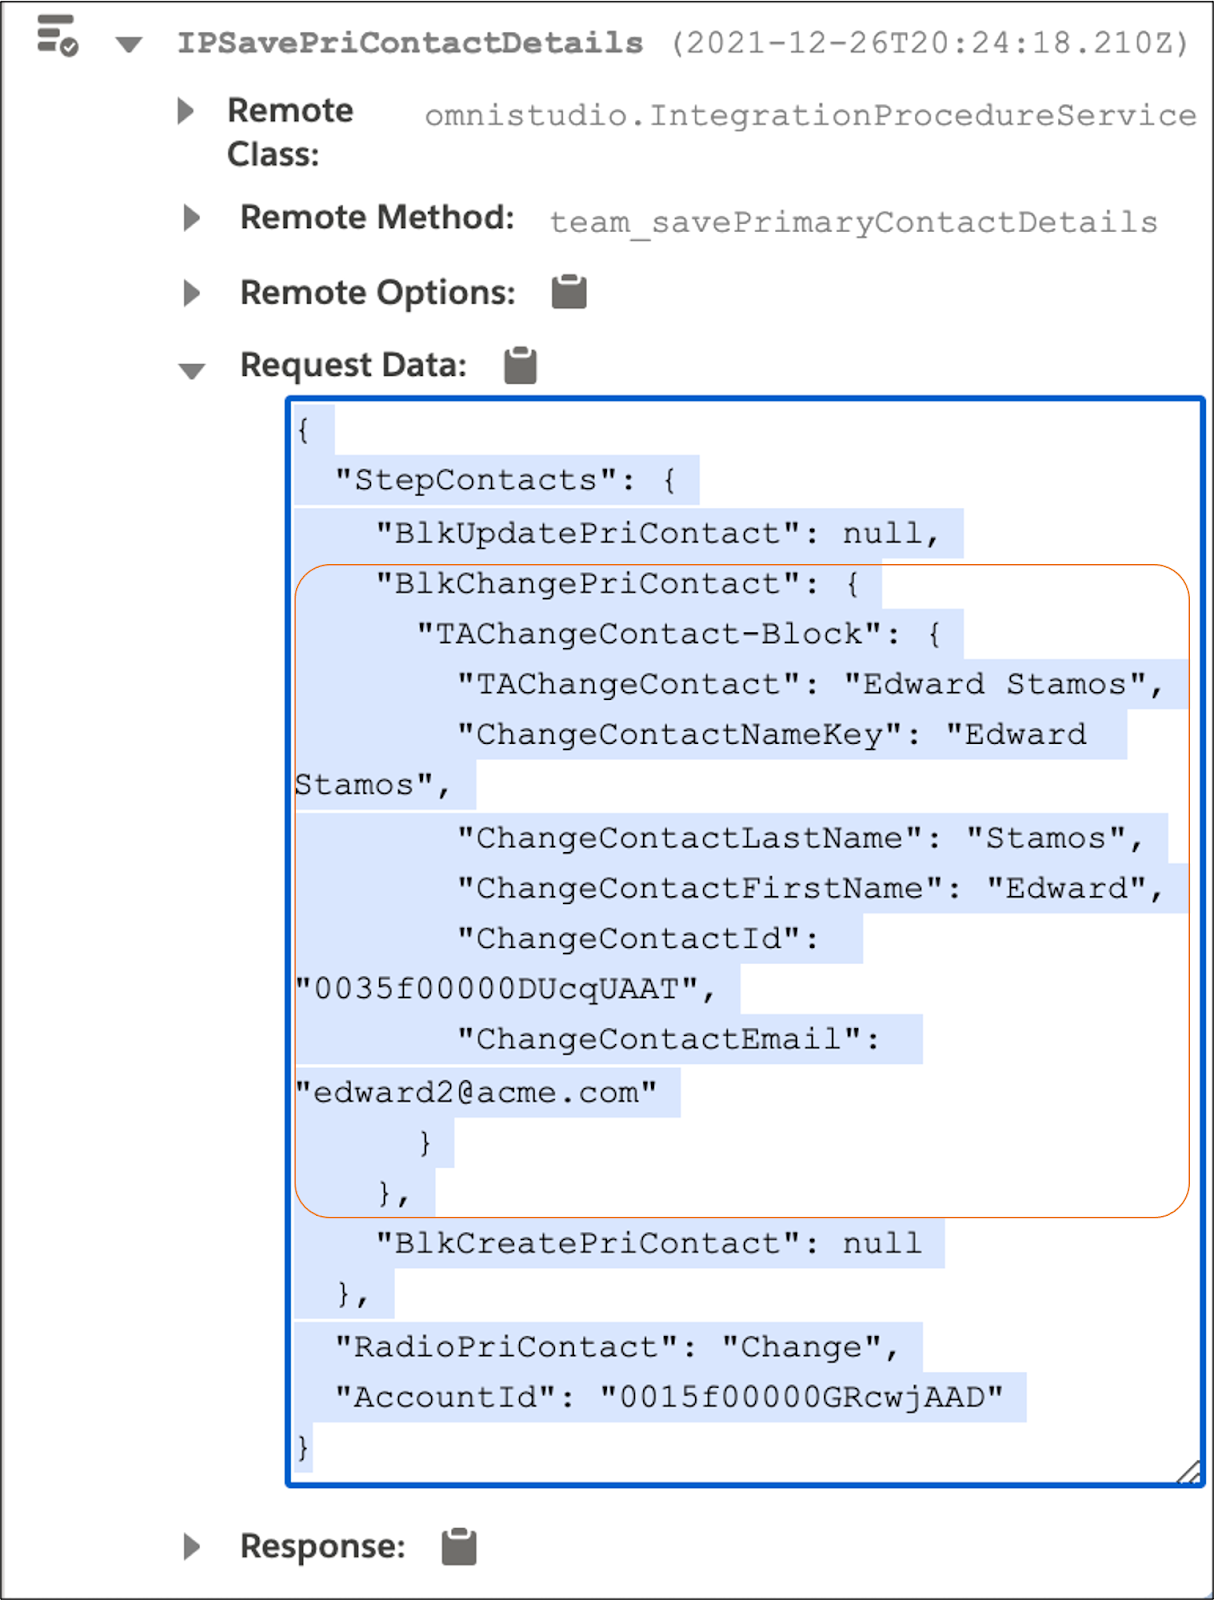
To display the JSON for the change primary contact option, select and copy the BlkChangePriContact data in the text box. Be sure to include the four brackets, as shown in the highlighted portion of the image.
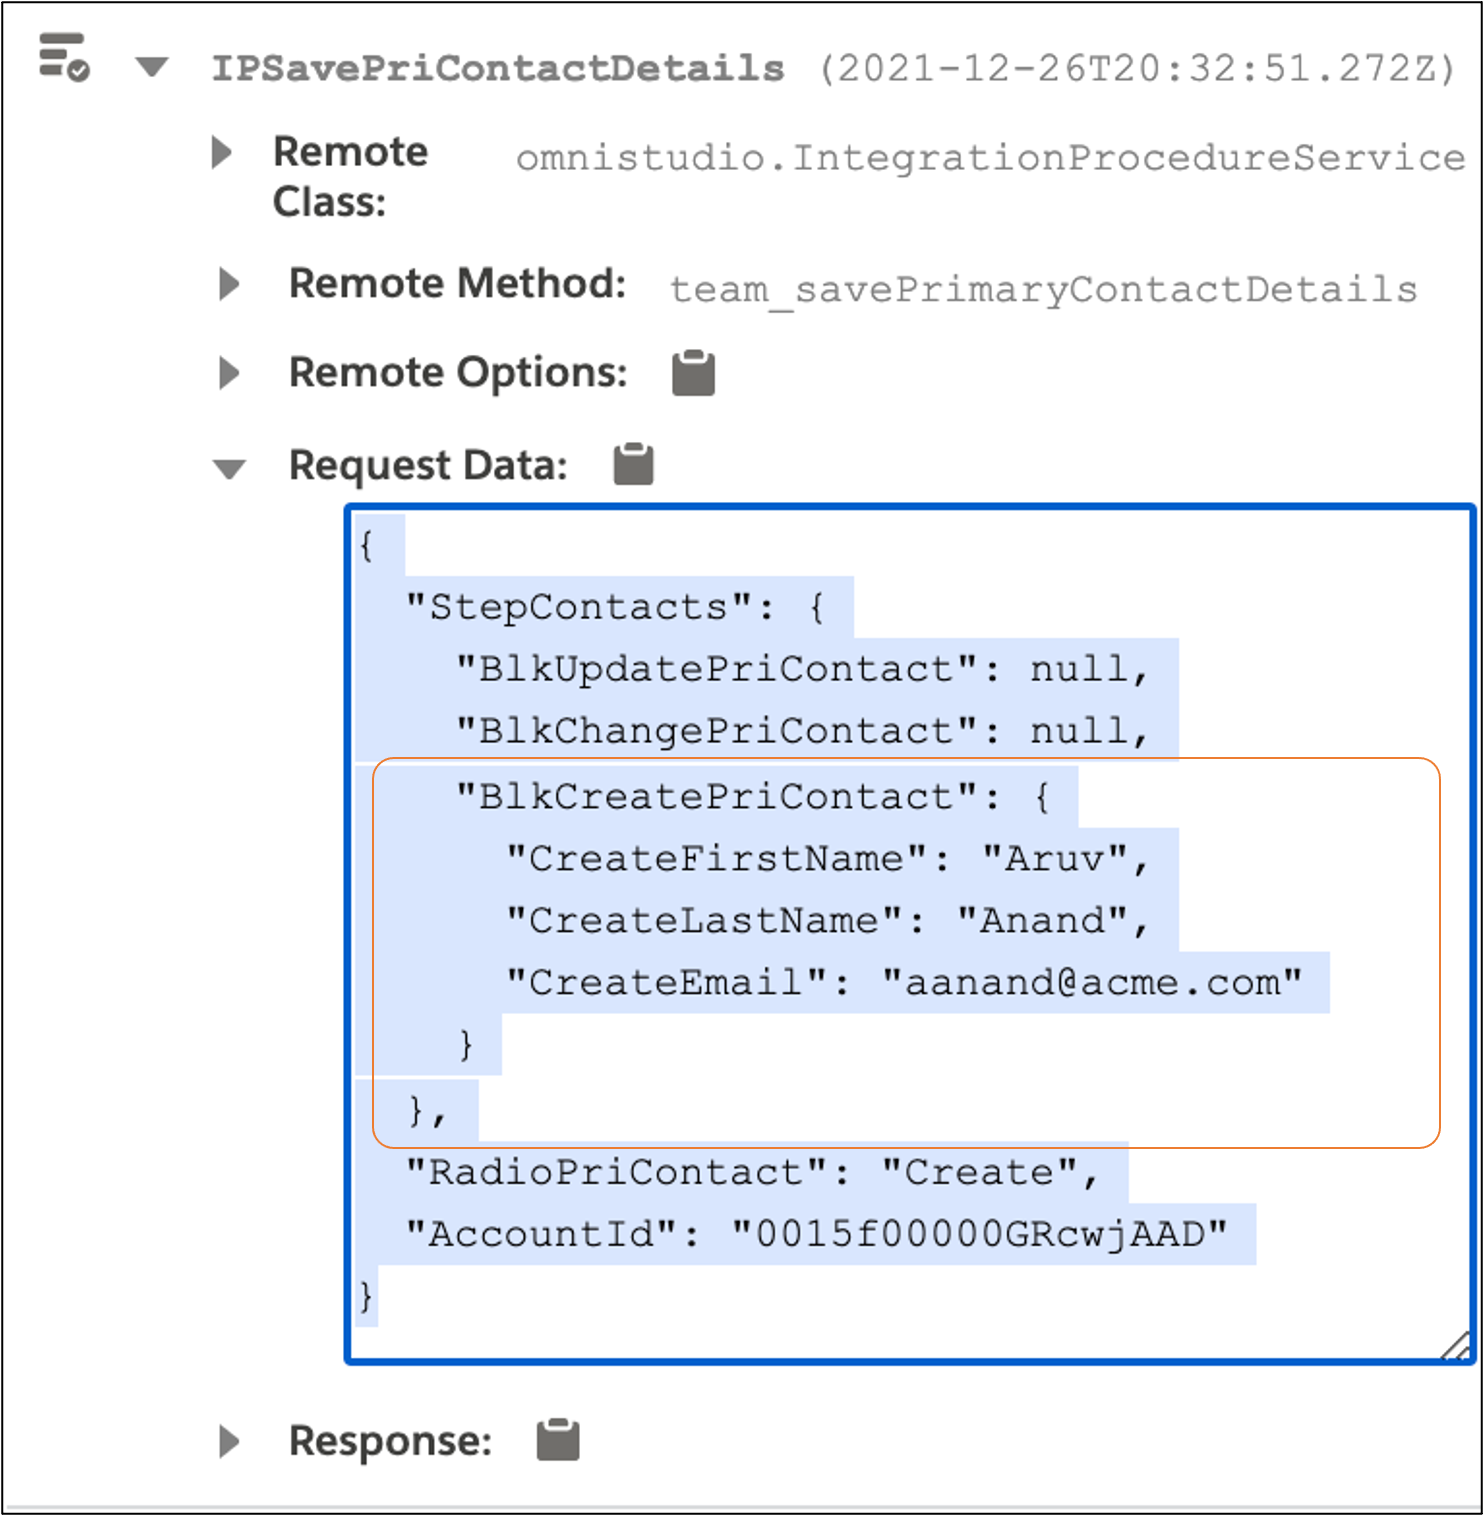
To display the JSON for the create a new primary contact option, select and copy the BlkCreatePriContact data in the text box. Be sure to include the two brackets, as shown in the highlighted portion of the image.
Go back to the JSON for the update primary contact option and replace the null values for the BlkChangePriContact data and BlkCreatePriContact data with the JSON you copied for the Change primary contact and Create a new primary contact option.

Now you have the full JSON path to build three new Data Mapper Loads. Before you build them, prepare the Integration Procedure that connects them to the Omniscript. Let’s tackle this in the next unit.
Resources
- Trailhead: Branching Omniscripts in Omnistudio for Managed Packages
- Salesforce Help: Omnistudio Data Mapper Load Overview (Omnistudio for Managed Packages)