Build an Integration Procedure with Conditional Data Mapper Loads
Learning Objectives
After completing this unit, you’ll be able to:
- Build an Integration Procedure with branching capabilities in Omnistudio for Managed Packages.
- Add Data Mapper Loads to an Integration Procedure.
Build an Integration Procedure with Branching Capabilities
The example Omniscript in this module branches three different ways. Does that mean you must build three different Integration Procedures to handle the data updates? While that's an option, there’s another solution—build a single Integration Procedure with branching capabilities.
To match the Omniscript’s branching logic, this Integration Procedure has three ways of updating the records. It uses conditional actions to determine which of the Data Mapper Loads to execute.


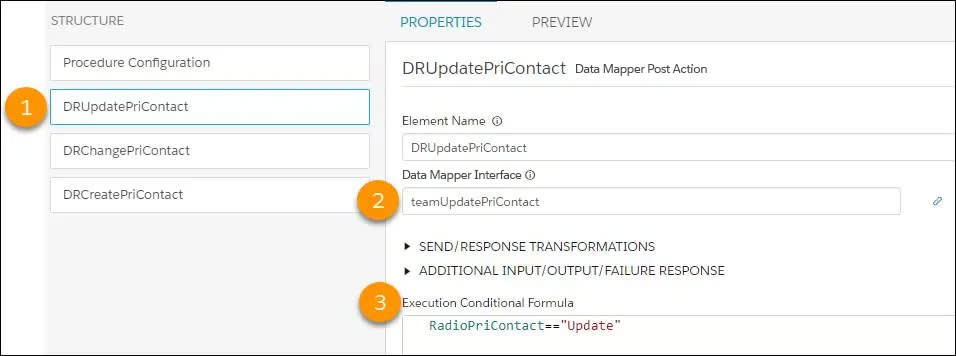
The Integration Procedure’s Structure includes a Data Mapper Post Action (1) for each of the three Data Mapper Loads (2). The Action names describe their purpose: Update, change, or create a primary contact.
In the example Omniscript’s StepContacts element, the option selected for RadioPriContact defines when a particular Data Mapper runs. In the Integration Procedure, set a condition in each Data Mapper Post Action that matches the option in the StepContacts element.
The action properties include an Execution Conditional Formula field, which determines when the action executes. In this example, the DRUpdatePriContact Action (1) is set to execute the teamUpdatePriContact Data Mapper (2) when its Execution Conditional Formula (3) is RadioPriContact=="Update".
Here are the formulas for the Data Mapper Post Actions.
Element Name |
Value |
|---|---|
DRUpdatePriContact |
RadioPriContact=="Update" |
DRChangePriContact |
RadioPriContact=="Change" |
DRCreatePriContact |
RadioPriContact=="Create" |
Create Data Mapper Loads and Add Them to an Integration Procedure
To create each Data Mapper Load, you only need a portion of the JSON you pasted into the Integration Procedure Preview: The particular node of the array and the AccountId. Here are the different Send/Response Transformation and Additional Input properties for the Data Mapper Post Actions.
Element Name |
Data Mapper Post Action Properties |
|---|---|
DRUpdatePriContact |
Send JSON Path = StepContacts:BlkUpdatePriContact |
DRChangePriContact |
Send JSON Path = StepContacts:BlkChangePriContact:TAChangeContact-Block Additional input key-value pair = AccountId/ %AccountId% |
DRCreatePriContact |
Send JSON Path = StepContacts:BlkCreatePriContact Additional input key-value pair = AccountId/ %AccountId% |
When you create a Data Mapper Load, use these tabs in the Data Mapper Designer to specify what you want the Data Mapper Load to do:
- Objects
- Fields
- Preview
Each Data Mapper Load has a different purpose, so let’s examine how you use the different tabs.
The Objects Tab
Use the Objects tab to specify the Salesforce objects you want to update.
- In the Update Primary Contact Data Mapper, select Contact as the object because you want to save the updated primary contact data back to the Contact object.

- In the other Data Mappers, select Account as the second object. This allows you to save the account’s new primary contact back to the Account object.
- Link the Account object to the Contact object.
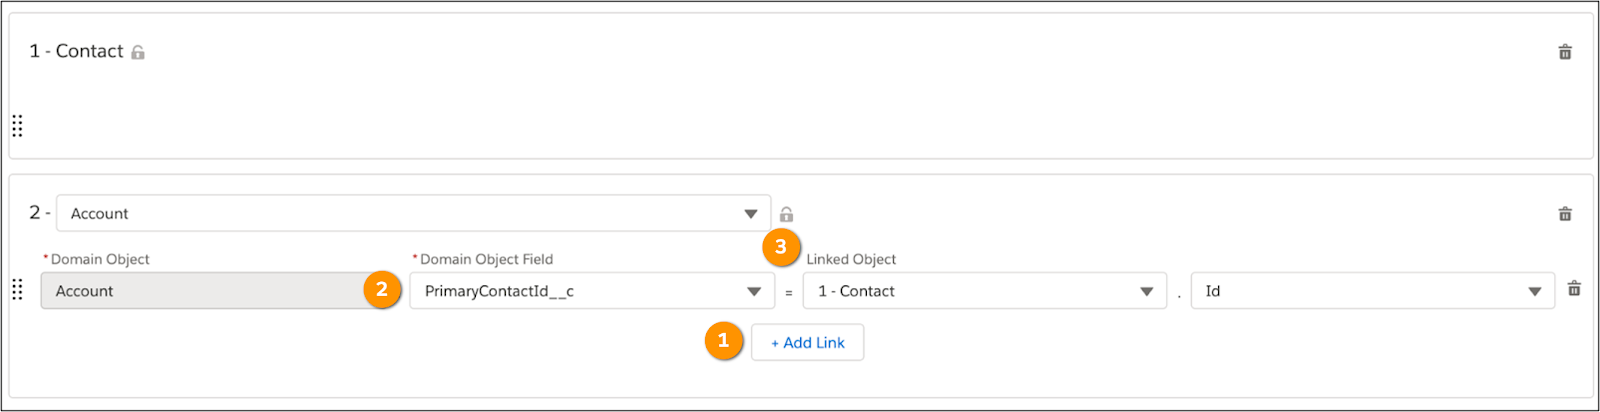
- Select +Add Link (1).
- Select the primary contact custom field in the Domain Object Field (2).
- Select 1 - Contact and Id in the two Linked Object dropdowns (3).
- Select +Add Link (1).
This is a good example of the power of Data Mappers. You want to use the RecordId of the newly created or changed Contact to update the value of the Primary Contact field on the Account. The Data Mapper first creates the Contact and then uses data from that newly created record to populate other records linked to it—in this example, the Account.
The Fields Tab
Use the Fields tab to map the input data to the Salesforce object fields you want to update.
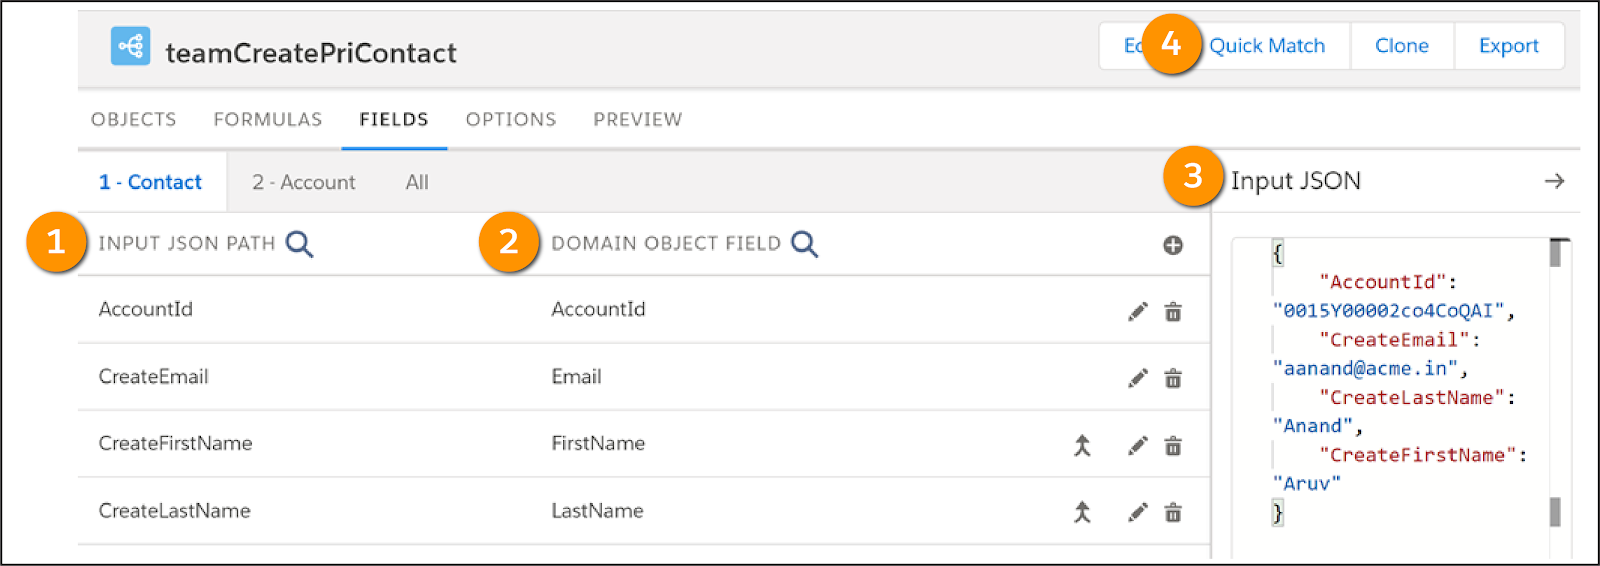
The Input JSON Path (1) specifies the key of the JSON node containing the data you want to write to the Salesforce object. The Domain Object Field (2) specifies the field on the Salesforce object you want to update. Paste JSON into the Input JSON panel (3) to create input mappings. Then select Quick Match (4) to match the input mappings to the object fields.
This process is the same for each of the Data Mapper Loads. The difference is in the JSON you paste into the Input JSON panel—this determines the mappings to match.
A Data Mapper Load saves updates to records in Salesforce by overwriting existing data or creating new records if that data doesn’t yet exist. Two settings control this Upsert process.

When you select the Upsert Key checkbox (1) for a field, this means it is required to match a unique record in Salesforce. Because you want to update an existing Account record, adding an Upsert Key is required.
There are two requirements when configuring a Data Mapper Load to create a new contact record.
- Do not create a new contact when one already exists. Select fields such as the Contact’s first name and last name to confirm a contact does not already exist.
- Include all of the required fields for that record type in your Data Mapper. In Salesforce, Last Name is the only required field on the Contact record. Select the Is Required for Upsert checkbox (2) to make sure data is present in that field. Otherwise, the Data Mapper won't upsert the record.
The Preview Tab
Use the Preview tab to test the Data Mapper’s output.
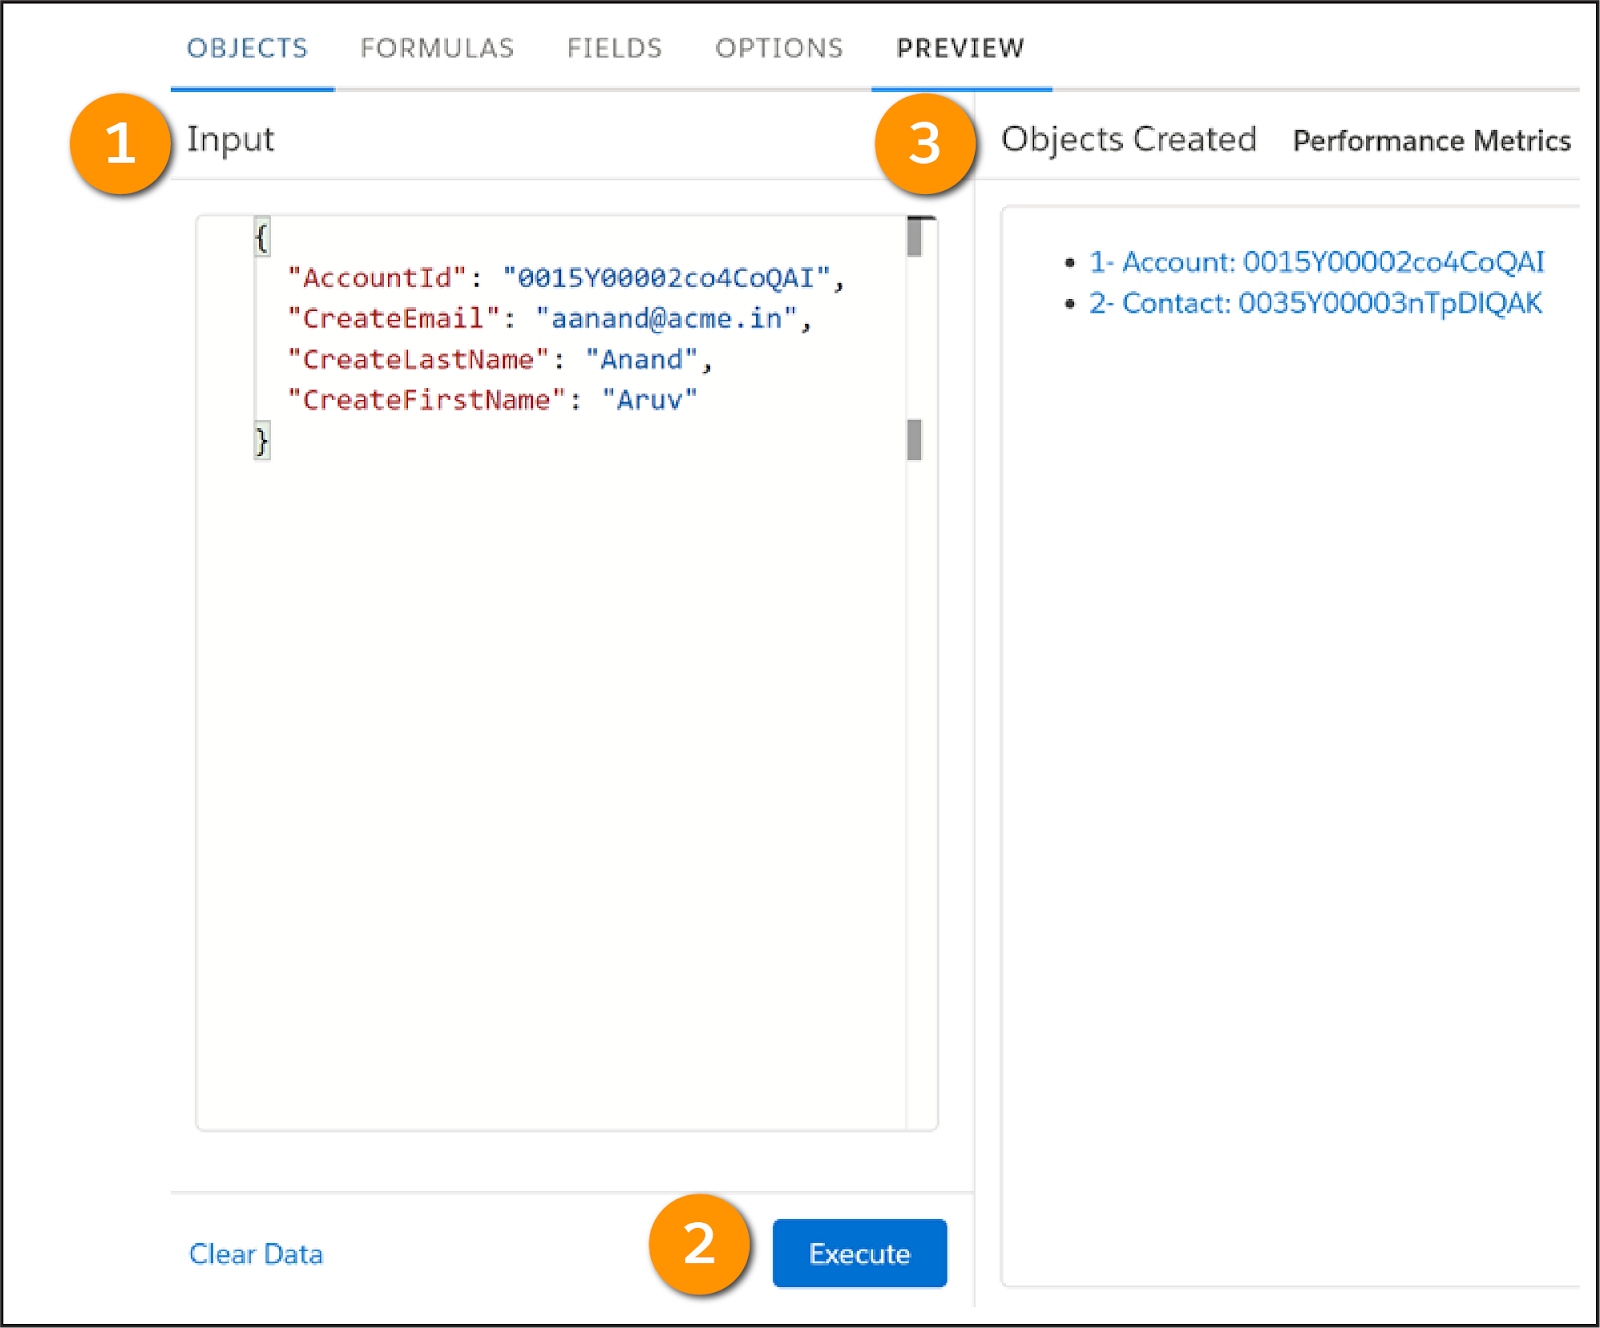
- Paste the JSON from the Integration Procedure into the Input panel (1).
- Click the Execute button (2).
- The Objects Created panel (3) lists the resulting objects, which are saved permanently.
You now understand how to build an Integration Procedure with conditional Data Mapper Loads.
We hope you’re starting to see how powerful Omnistudio tools can be when you use them together. In the next unit, you learn how Omnistudio tools work with another component in Omnistudio’s UI layer: Flexcards.