Build a Data Mapper Extract for a Type Ahead Block
Learning Objectives
After completing this unit, you’ll be able to:
- Describe how a Type Ahead Block works in an Omniscript in Omnistudio for Managed Packages.
- Build a Data Mapper Extract for a Type Ahead Block.
- Configure the Data Mapper Extract Action in an Omniscript.
How Does a Type Ahead Block Work?
Have you ever started typing in an input field and selected a record from the list of results that appears? If so, you’ve experienced typeahead functionality. In the Omniscript Designer, use the Type Ahead Block element to configure this behavior. This special block element works with a data element inside the block and its data source.
In this example Type Ahead Block, a user enters a letter in the first field, and this populates two contact name results.

In a Type Ahead Block element, you define which search parameters to use. The data element determines what information to send to the data source. The data source searches for matches to those parameters as the user types into the field, letter by letter, and presents them with a list of matching options. The user then selects from the list of results.
With a Type Ahead Block, you aren't restricted to displaying only the search term. It’s easy to add fields to the block and configure the data source to pull additional data. Then, when a user selects from the list in the Type Ahead field, the Omniscript displays additional information related to the record. This means people using your Omniscript can search for a contact by name, and once they select a name, they can view the contact’s name, email address, and phone number.
In this unit, you learn how to build a data mapper specifically for this element. Let’s go!
Build a Data Mapper Extract for a Type Ahead Block
You’ve already learned how to build a Data Mapper Extract in unit 1. Now let's learn how to build one for a Type Ahead Block. To do this, you work with two tabs in the Data Mapper Designer: the Extract tab and the Output tab.
Extract Tab
Let’s start with the Extract tab.
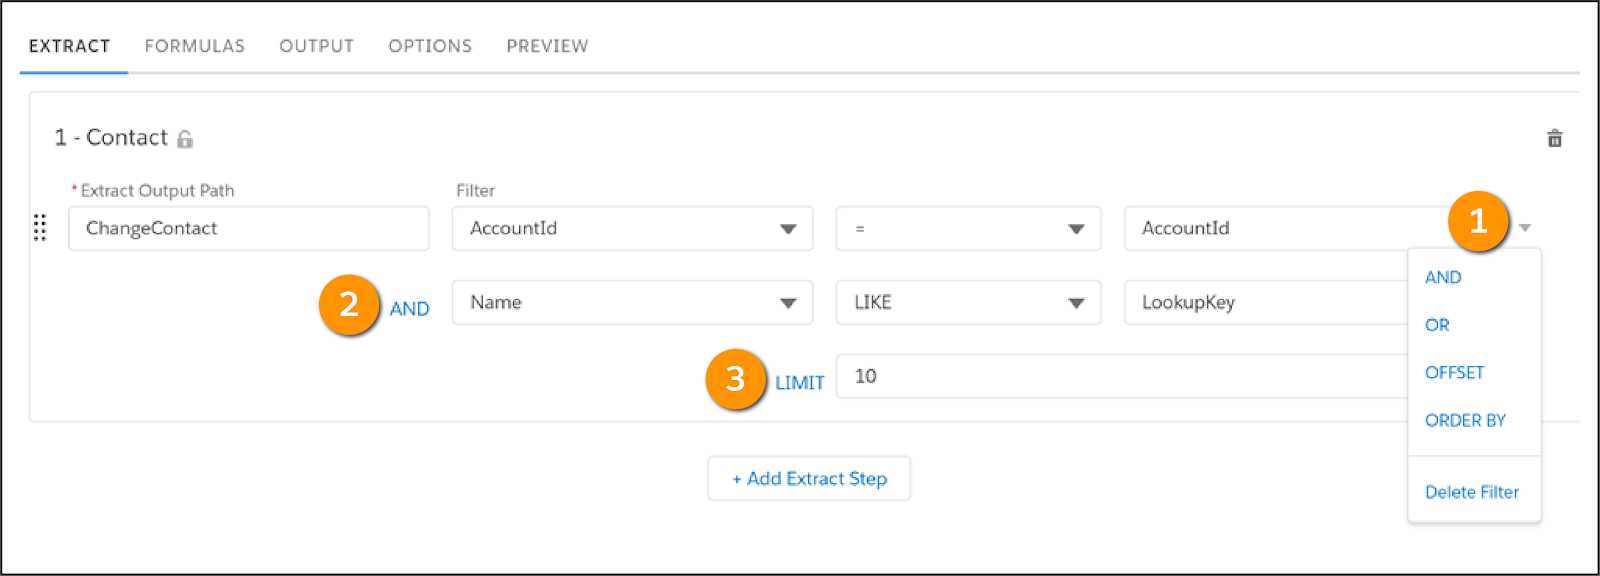
- In the Extract tab, select Contact as the Salesforce object you want the Data Mapper to query.
- In the Extract Output Path, enter
ChangeContactas the name of the incoming JSON node the Data Mapper needs to find.
- Create a filter that determines what data to be read from the object. In this example, the filter is AccountID = Account ID.
- To extend your search, click the dropdown icon (1) for the Extract filter and select AND to add a second filter (2).
- Set the Filter as Name LIKE LookupKey.
- Use the dropdown icon again, and this time, add LIMIT as a third filter (3).
- Enter
10. This limits the results of your query to 10 records. Because the query runs every time the user types in a letter, you want to limit the results when the query is very broad to one or two letters.
Output Tab
Remember that in the Output tab, you map data from the extract step JSON to the output JSON. When an end user selects a name from the list in the Type Ahead field, the Omniscript displays the contact’s name and email address.

- For the name, enter
ChangeContact:Name(1) in the Extract JSON Path.
- Enter
ChangeContactNameKey(2) in the Output JSON Path.
When you finish building the Data Mapper, the next step is to add it to the Type Ahead Block using a Data Mapper Extract Action.
Configure the Data Mapper Extract Action in the Type Ahead Block
When you configure the Data Mapper Extract Action in the Omniscript’s Type Ahead Block, set two input parameters.
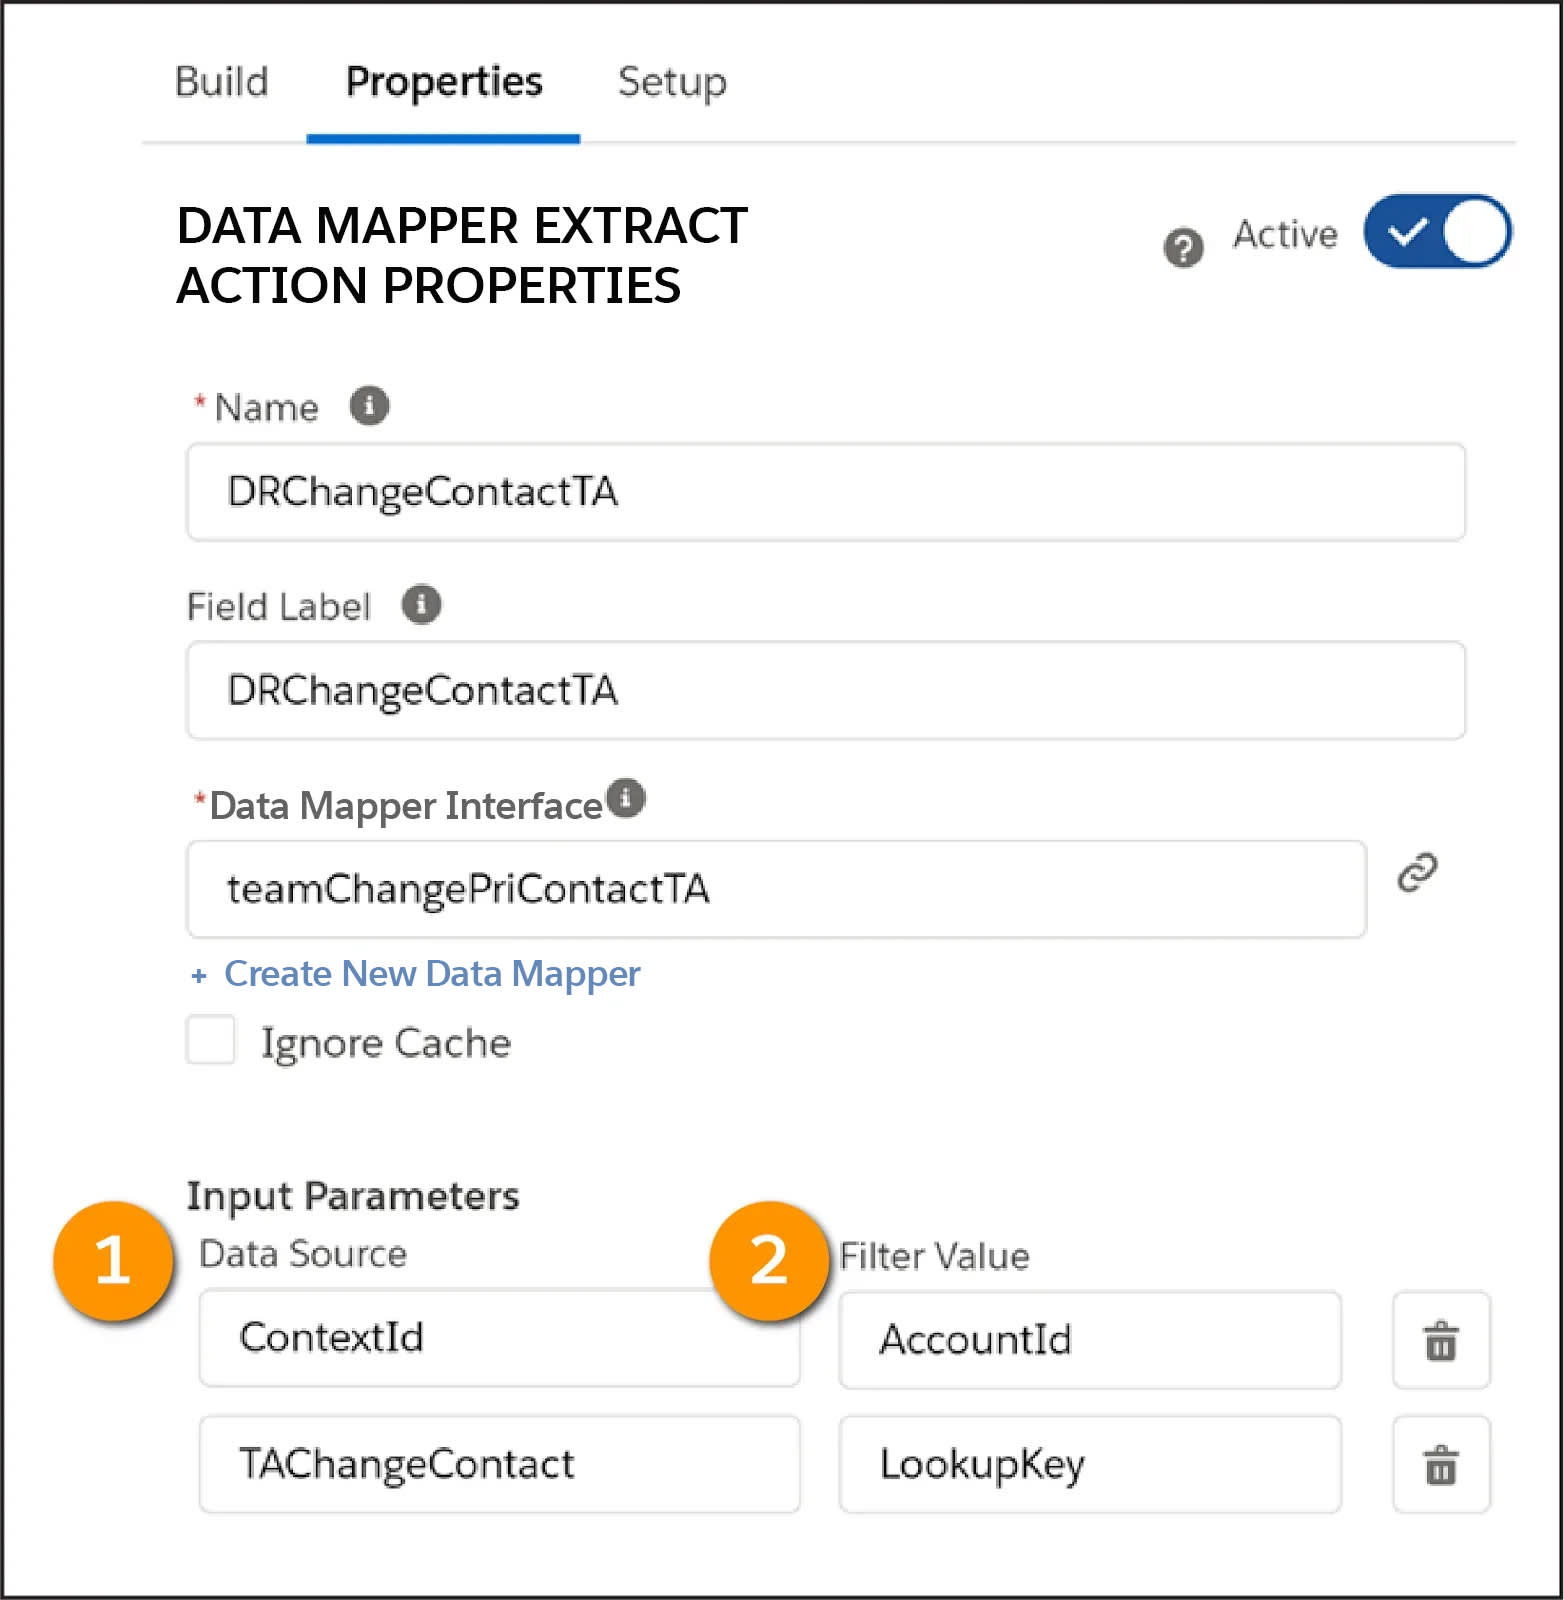
- A Data Source (1) that tells the system where to look for information. In this example, the Data Source is a ContextId and TAChangeContact.
- A Filter Value (2) that presents matches based on what the end user enters into a specified element. In this example, the Filter Value is an AccountId and a LookupKey.
To ensure your Type Ahead Block works seamlessly, you need to add two input parameters to the block’s Data Mapper.

If you want the Data Mapper to only look for contacts associated with an account, limit the context to a particular account. The best way to identify an account is the AccountId (1). Fortunately, this is already in your Omniscript’s JSON.
You also must add a second parameter to define what to use to conduct the search. The data source is what the end user types into the Type Ahead field and the filter value is LookupKey (2).
The Data Mapper is your data source—the one that searches for matches to the parameter. Make sure it links the LookupKey to the appropriate field in the object. Here, you're using the Contact Name (3). It’s also important to specify in the Output JSON Path how to identify the key in the JSON the Data Mapper sends back to the Omniscript. Here, you're using ChangeContactNameKey (4) to do this.
After you set up the Data Mapper, configure the Type Ahead Block properties to link back to the Data Mapper. This ties all of the parts together!
In the Properties panel of the Type Ahead Block, fill in the Type Ahead Key field (4) with the name of the key, using the exact match for what was defined in the Data Mapper Output JSON Path.
To prevent typos, copy the name from the JSON in the Response node from the Action Debugger. Now you’ve configured your Type Ahead Block with the properties it needs to operate without a hitch.
Now, let’s see this all in action.

- Click Preview in the Omniscript and enter an AccountId as the ContextId.
- Select the Change primary contact radio button.
- In the Start Typing Contact Name field, enter
e. Confirm the contacts from the account display.
Great work! Now, what happens if you change the primary contact? In the next two units, you learn how to save updated data for this branch and the other two branches of the Omniscript by building an Integration Procedure with conditional Data Mapper Loads.
Resources
- Trailhead: Branching Omniscripts in Omnistudio for Managed Packages
- Salesforce Help: Type Ahead Block (Omnistudio for Managed Packages)
- Salesforce Help: Use Type Ahead Block with Omnistudio Data Mapper (Omnistudio for Managed Packages)