Validate Data and Handle Errors
Learning Objectives
After completing this unit, you’ll be able to:
- Explain why it’s important to prevent user errors.
- Prevent errors with a Set Values element in Omnistudio for Managed Packages.
- Make sure data is complete with a Set Errors element.
Two Elements to Prevent User Errors
In this module, you've focused on creating a sample interaction that shows how users can change the main contact information for accounts in Salesforce. You’ve kept the user’s perspective in mind as you build your Omniscript. However, it’s also vital to build an interaction that helps preserve your database’s integrity.
To do this, consider what kind of errors a user can make while using your Omniscript. Then think about what type of error checking you want to configure to help prevent these mistakes. Preventing end user errors helps them, but, more critically, it protects the integrity of your data!
You configured some simple data validation when you set fields as required. After all, the Omniscript won’t let a user move forward if a field is empty.
Now it’s time to explore two more tools to prevent errors.
- Set Values elements stop users from moving forward if they haven't done anything.
- Set Errors elements make users go back to a previous step if they make a mistake.
Let’s take a closer look at these two helpful elements.
How Set Values Elements Prevent Errors
Set Values elements have a lot of potential in an Omniscript. You can use them to do:
- Access and rename data JSON by using merge fields.
- Populate elements with values.
- Concatenate values, or bring two values together into a single, combined value.
- Define values sent into the data JSON from a response or parameter.
- Create values determined by Omniscript Functions and Supported Formula Operators.
Let’s look at how to use a Set Values element with a formula to prevent end-user error.
In your sample Omniscript, you decide to use a Set Values element with an IF formula that shows Not OK in the JSON if key fields from each of the three branches are empty—or null— and OK if there’s data in at least one of the branches.

If the user generates a null—or doesn’t change the primary contact data—you’ve identified the error in the JSON. Great. But how do you redirect the end user to fix the error? That’s where the Set Errors element comes in.
Set Errors Elements Make Sure Data Is Complete
A Set Errors element sends an end user back to an incomplete step and helps them fix that problem. This makes sure the data is complete. Required fields and formula messaging in the UI only work on the current step. Set Errors elements, on the other hand, work for future steps.
Consider a different example. You’ve designed a four-step interaction that helps users sign up for cell-phone service. In Step one, the user enters key contact data. In Step four, the user selects a checkbox to receive a text message when they reach 80% of their data usage. But what happens if they select that checkbox but didn’t provide a mobile phone number in Step one? A Set Errors element returns the user to Step one so they can fill in the mobile phone number field.
Now let's go back to the example primary contact Omniscript. It only has one Step element. So what do you do if key fields from each branch are null? And what if there's no primary contact in the first place? You can highlight the error for the user and ask that they fix it using a Set Errors element. Let’s see how.
First, for a Set Errors element to work, you need these three properties.
Property |
Description |
|---|---|
Element Error Map |
Tells the system which element displays the error message. |
Value field |
Defines the instructional text you display. |
Conditional View |
Defines when the element fires. |
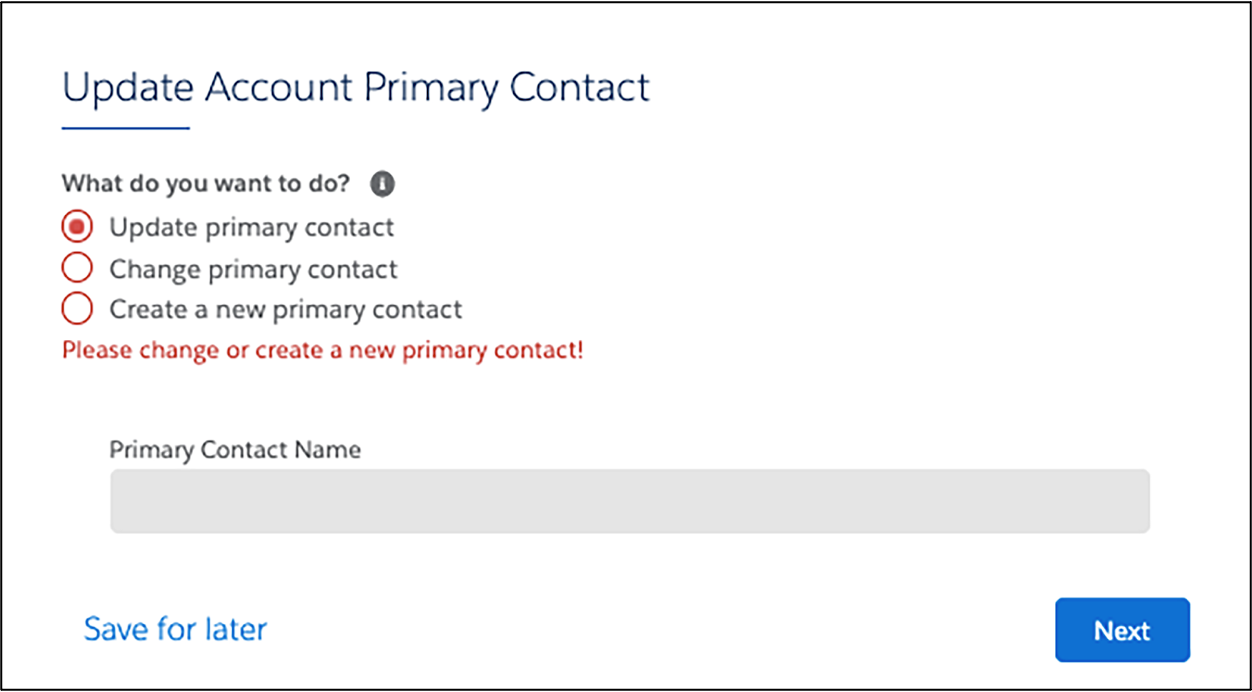
In your Omniscript, you configure the following Set Errors properties.
- Element Error Map: Radio Buttons element.
- Value field: You remind end users they need to change or create a new primary contact.
- Conditional View: You set the Conditional View to display the instructional text if there is no primary contact.
Once you set these up, you’re good to go—or, rather, you’re good to send your end users back.
Doesn’t it feel good to prevent user errors? In the next unit, you learn how to display external data in your Omniscript.
Resources
- Salesforce Help: Set Values in an Omniscript (Omnistudio for Managed Packages)
- Salesforce Help: Set Errors In an Omniscript (Omnistudio for Managed Packages)