Display External Data
Learning Objectives
After completing this unit, you’ll be able to:
- Display data from an external source in Omniscripts in Omnistudio for Managed Packages.
- Use a Messaging element in an Omniscript.
Display External Data on an Omniscript
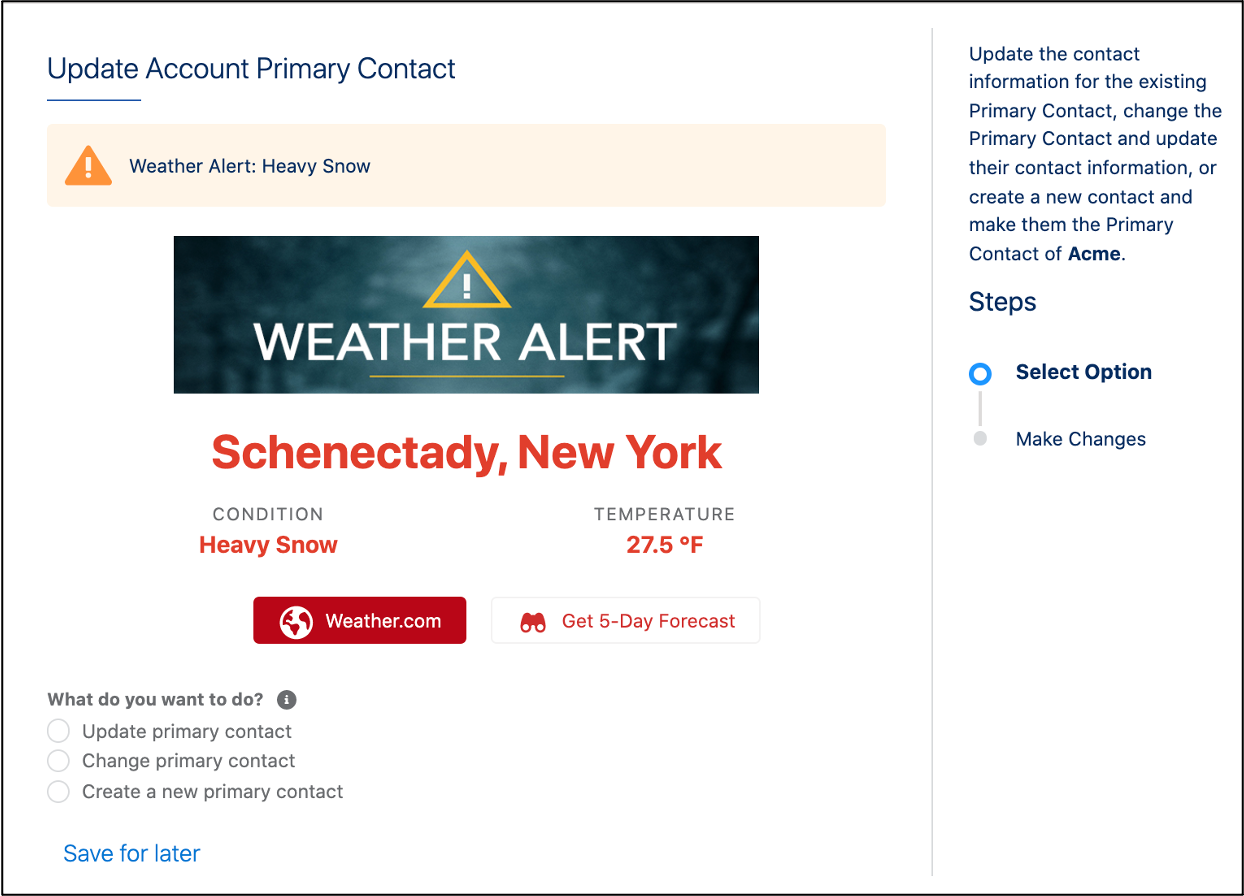
You’re on the verge of releasing your example Update Account Primary Contact Omniscript. Before you can release it, you need to add weather forecast information for the account's location and alerts if there are any dangerous weather conditions.
Here’s the user story for the new requirement: In the Update Account Primary Contact guided workflow, I'd like to view weather forecast information for the account’s location and see alerts if there are any hazardous weather conditions.
Luckily, you’re prepared for this kind of last-minute request. You plan to add the weather information to the top of the Omniscript.
How does this work?
To display external data on an Omniscript, start by focusing on the requirements. In this example, you need three things to fulfill the requirement.
- A way to get data from an external source.
- A way to display this data on the Omniscript.
- A way to add warning messages for hazardous conditions.
Now, let’s determine which Omniscript elements meet these requirements.
One of the reasons Omnistudio Integration Procedures are a best practice for retrieving data is their ability to extract data from multiple sources. Adding a second Integration Procedure before the Step provides the internal Salesforce data—an account postal code—that’s needed to get weather data from an external source. You decide to use an API to retrieve the weather data.
Now that you’ve figured out how to get this external data, it’s time to choose the best solution to show the weather. Your org already has a weather Flexcard and you can embed this weather card in your Omniscript using a custom Lightning Web Component (LWC) element. Knowing this, you decide reusing this card is the best way to show the weather.
The final requirement is to add warning messages when there are hazardous weather conditions in the account’s location.
You decide to use a Messaging element because Messaging elements require a logical condition—or set of conditions—and validation that determines when to show the banner. After you set Validation or Conditional Views for a list of hazardous conditions, the banner only displays when these conditions are met.
You decide to add an Integration Procedure to extract weather data preceding the Step and add a Messaging and Text Block element to the top of the Omniscript step to meet the last-minute requirements. There'll now be two Integration Procedures before the Step.
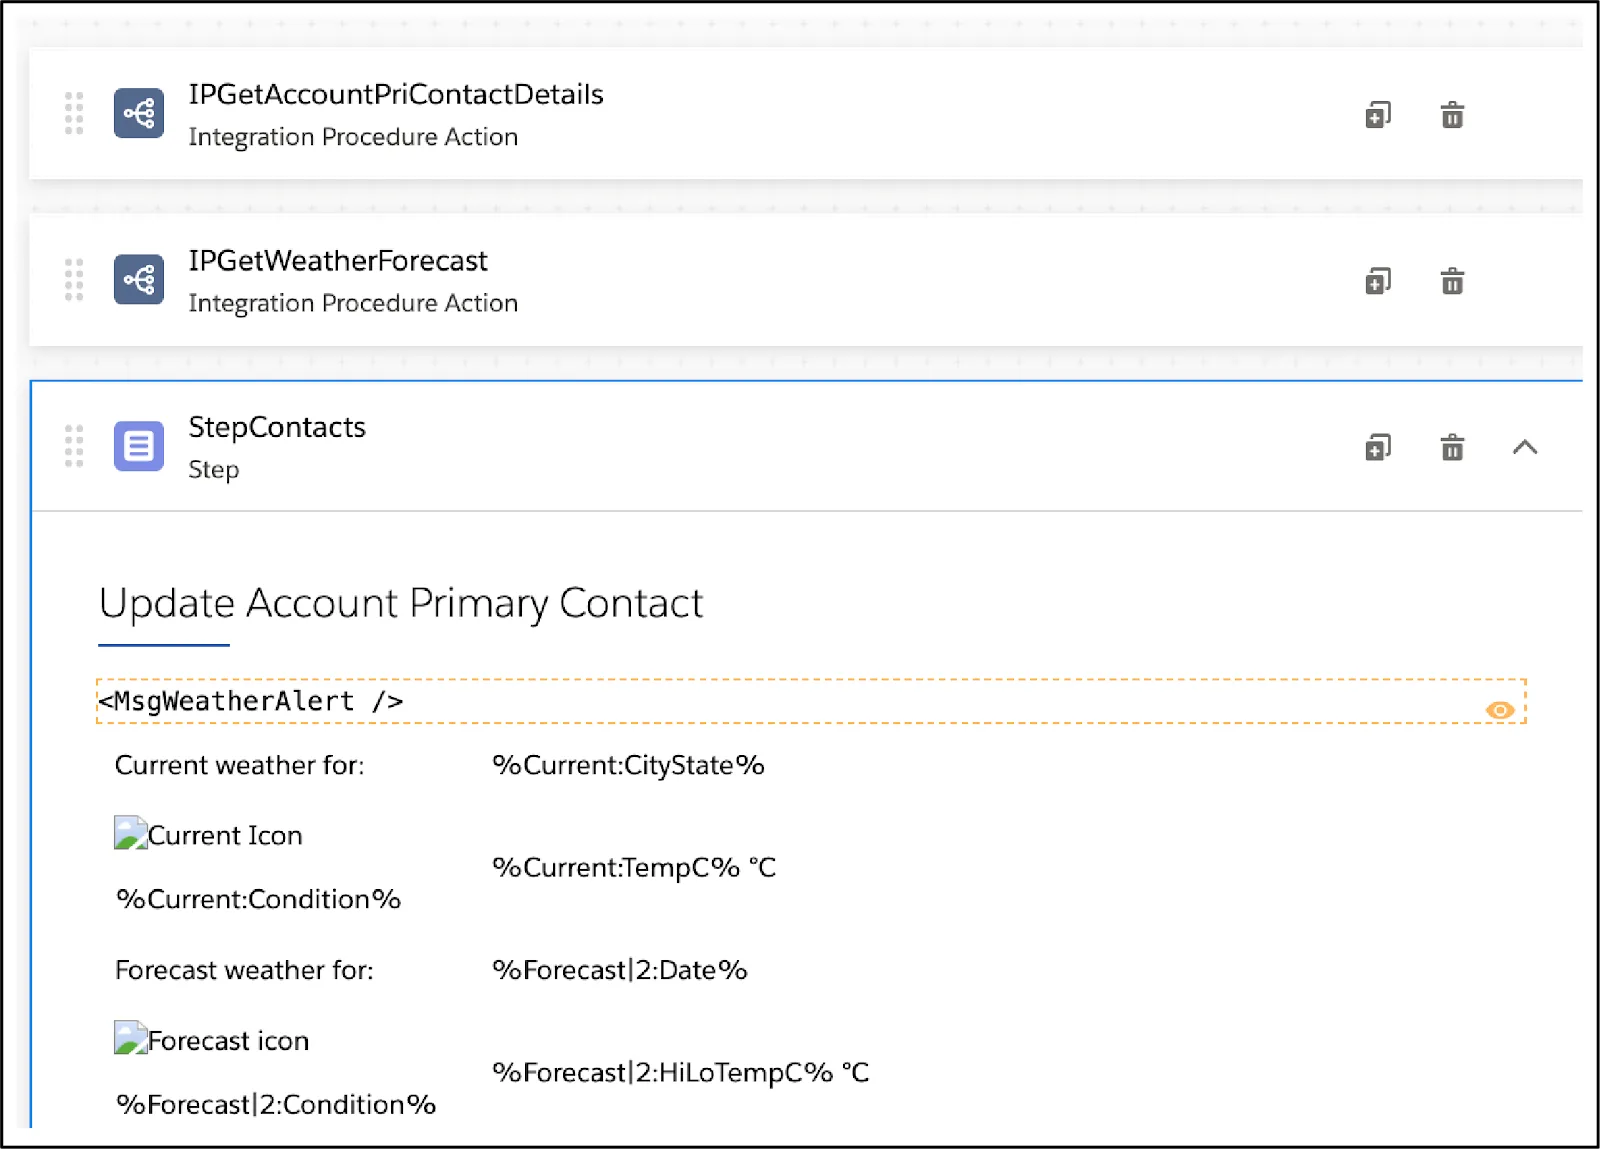
You’ve planned the way to meet the requirements and are ready to configure the changes.
Embed a Flexcard
Flexcards can be embedded in Omniscripts using a Custom Lightning Web Component element.
This element allows you to reuse components you have developed elsewhere. You already have a weather Flexcard in your org that displays the current weather for the account with a flyout that displays a five-day weather forecast. Display the current weather and have a forecast available at the click of a button? Yes, please!
Reusing this card is all a part of the configure once, deploy in multiple places approach of Omnistudio.

Use Messaging to Display Warnings
You plan to use the Messaging element to display a warning message when local weather for the account matches certain conditions.
If needed, you could show two different messages based on whether the weather condition is true or false. If the false statement is required, users can't move forward until that condition is true. For example, you can't complete scheduling a service call if the weather is colder than freezing.
The following table lists the banner types available, and if they're visible if the condition is true, or met, or if it's false, or not met. Notice the Requirement message type is only available if the condition is false, or not met
Message Type |
Description |
True |
False |
Example Message |
|---|---|---|---|---|
Comment |
Grey banner |
✅ |
✅ |
Please confirm the weather conditions in %CURRENTLOCATION% |
Success |
Green banner |
✅ |
✅ |
You've verified the weather conditions in %CURRENTLOCATION%. |
Warning |
Yellow banner |
✅ |
✅ |
There's freezing rain at %CURRENTLOCATION%. |
Requirement |
Red banner |
✅ |
You can't schedule a service call if there are hazardous conditions at %CURRENTLOCATION%. |
With the messaging complete, you’ve finished building your Omniscript. After activating it, you’re ready to deploy it!
And, just like that, you have a branching Omniscript. Remember, branches make for engaging and meaningful interactions that guide users through a complex process with many potential paths
Resources
- Trailhead: Flexcards in Omnistudio for Managed Packages
- Salesforce Help: Embed Flexcards in an LWC Omniscript (Omnistudio for Managed Packages)
- Salesforce Help: Display Messages in Omniscripts (Omnistudio for Managed Packages)