Use the Omnichannel Inventory App
Learning Objectives
After completing this unit, you’ll be able to:
- Use and customize the Omnichannel Inventory console.
- Explain how to look up inventory availability.
- Describe the process for adding locations, location groups, and location group assignments.
What Is the Omnichannel Inventory App?
The Omnichannel Inventory app lets you view inventory counts and manage your locations, location groups, and location group assignments in an easy-to-use Salesforce console.
Use the Omnichannel Inventory app to:
- Look up available inventory for a SKU.
- View, add, edit, and delete locations.
- View, add, edit, and delete location groups.
- Assign locations to location groups.
- Remove locations from location groups.
- Commit location and location group updates.
Get Started with the Omnichannel Inventory Console
The Omnichannel Inventory console is the first thing you see when you open the Omnichannel Inventory app. Use the Omnichannel Inventory console to look up inventory availability and manage locations, location groups, and location group assignments.
- If you’re using Omnichannel Inventory and Salesforce B2C Commerce, open the Omnichannel Inventory app by using the App Launcher in your Salesforce org.
- If you’re using Omnichannel Inventory and Salesforce Order Management, open the Omnichannel Inventory app by using the Navigation bar dropdown in the Salesforce Order Management console or by using the App Launcher.
Here’s the Home page in the Omnichannel Inventory console.

- The Inventory Lookup tab (1) lets you search for inventory availability by SKU and location group.
- The Location Management tab (2) shows list views for locations and location groups. From this tab, you can open records to see detailed information about your locations and location groups; add, edit, and delete locations and location groups; and synchronize changes that you make in the Omnichannel Inventory app with the data maintained in the Omnichannel Inventory service.
- The navigation bar dropdown (3) lets you switch between the Home page view and list views for Locations and Location Groups.
Customize the Omnichannel Inventory Console
While the standard console is fully functional straight out of the box, chances are you’ll want to customize it for your team. Putting a personal stamp on the console user interface can help speed its adoption among users.
Configure console settings by using the App Manager in Setup. For example, you can customize the console by modifying these settings.
- Update the console name, description, and branding.
- Assign the app to the appropriate user profiles.
You can further customize the console by modifying the standard components, tabs, and fields.
- Add, remove, or change the location of components on a page, create custom pages, and modify the contents of components by using the Lightning App Builder in Setup.
- Add custom tabs and fields, and modify page layouts by using the Object Manager in Setup.
Don’t worry about doing a complete makeover on day one. You can make changes to the console and roll them out incrementally as you learn what works best for your team.

Look Up Inventory
Use the Inventory Lookup tab in the Omnichannel Inventory console to search inventory availability by location group for a specified SKU.
- Open the Home page in the Omnichannel Inventory console.
- On the Inventory Lookup tab, enter a SKU and select a location group.
- Select Get Inventory Data.
The lookup queries the inventory totals stored in Omnichannel Inventory and returns the following SKU inventory availability information for the location group and each location in the location group.
- Available to fulfill (ATF)
- Available to order (ATO)
- Quantity on hand
- Future inventory
- Reservations
- Safety stock count
Manage Locations and Location Groups
As you know by now, Omnichannel Inventory lets you aggregate inventory availability information across all your locations and location groups.
Let’s quickly recap what you’ve learned so far.
- Locations represent physical locations—distribution centers, warehouses, or retail stores—where you have inventory available for fulfilling orders.
- Location groups represent sets of related locations.
- Location group assignments represent the relationships between your locations and your location groups.
You use the Omnichannel Inventory app to add, edit, and delete locations, location groups, and location group assignments.
Adding locations, location groups, and location group assignments is an easy four-step process.
- Add locations.
- Add location groups.
- Assign locations to location groups.
- Assign locations to location groups based on your business needs and fulfillment processes. (Assign each location to one or more location groups.)
- Associate each location group with one or more storefronts.
- Commit your entries to update the location data in the Omnichannel Inventory service.
You must set up your locations and location groups before you upload any inventory data to the Omnichannel Inventory service.
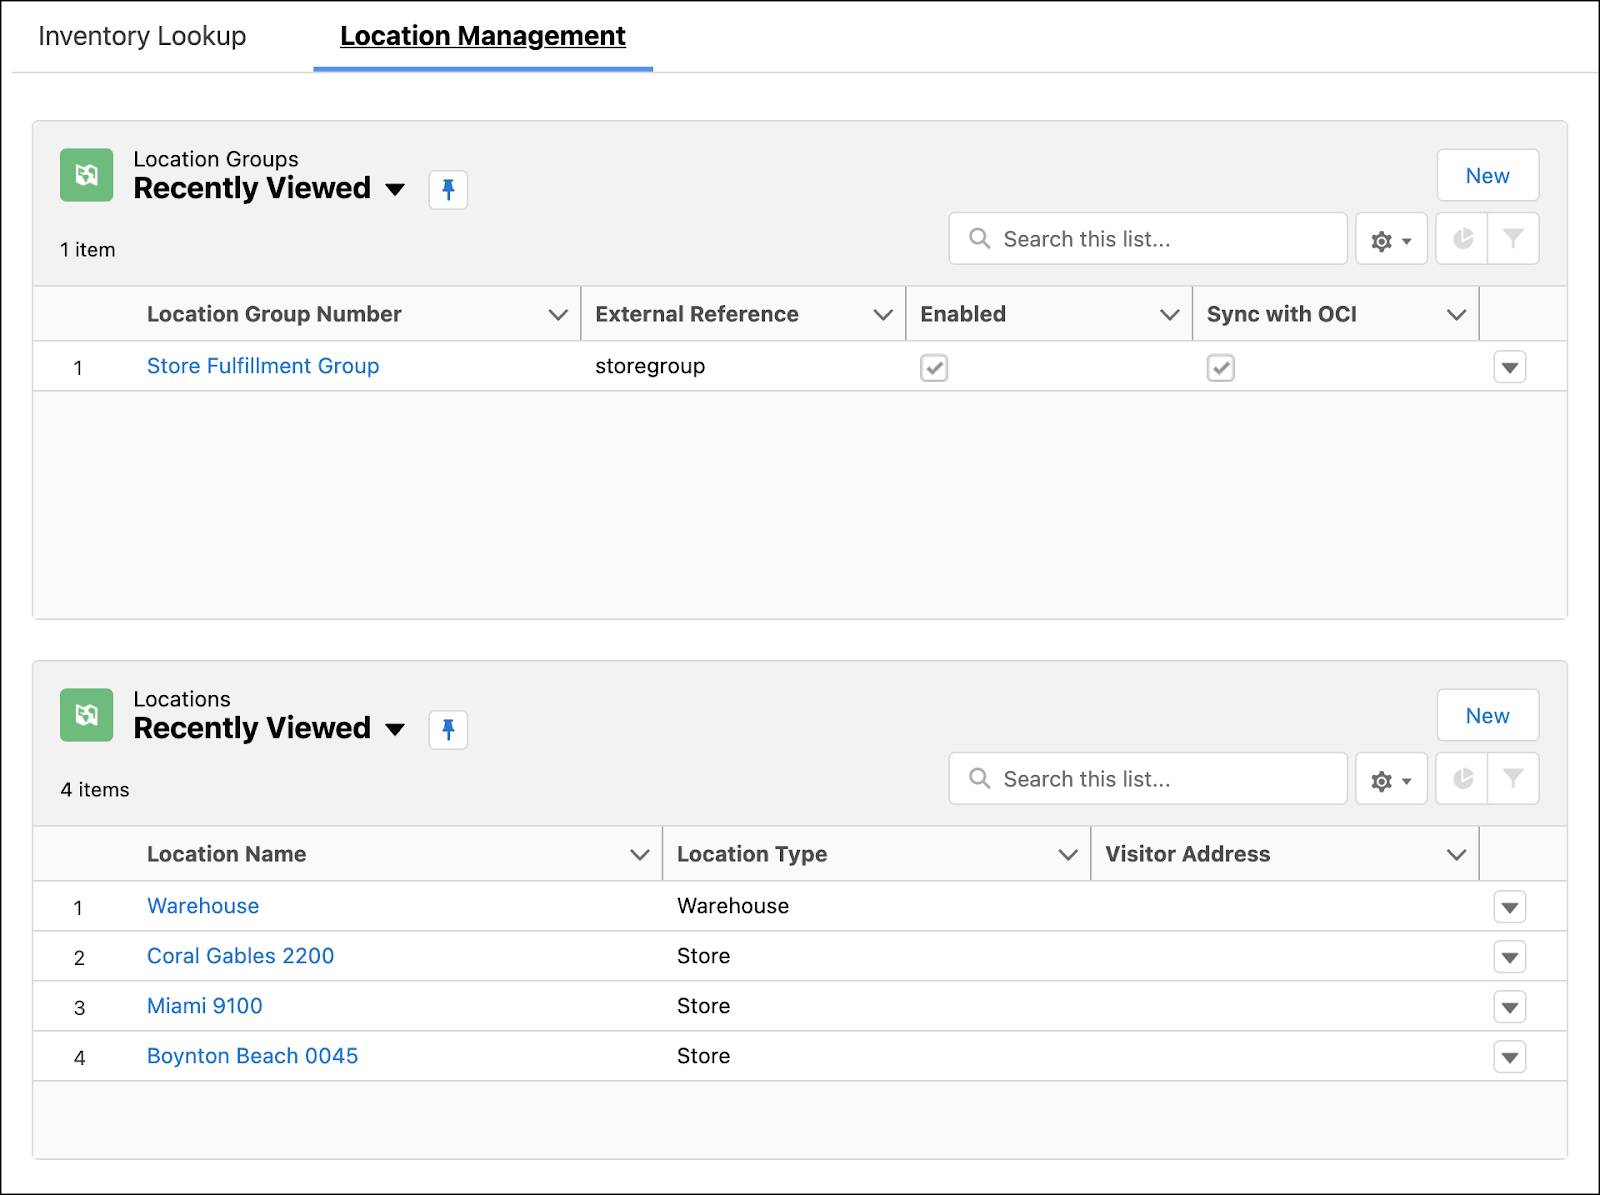
View Location and Location Group Records
You can access the location list views from the navigation bar in the Omnichannel Inventory app or from the Location Management tab.
-
Locations: Select a location name from the list and open the corresponding location record. View location details and location group assignments for the location.
-
Location groups: Select a location group number from the list and open the corresponding location group record. View location group details and a list of locations assigned to the group.
You can search, sort, and filter data in the list views, or customize the list views to show only the records or data that you want.
This screenshot shows the list views on the Location Management tab.
Next Steps
Now that you know your way around the Omnichannel Inventory app, let’s take a closer look at how you can benefit from integrating Omnichannel Inventory with B2C Commerce.
Resources
- Salesforce Help: Omnichannel Inventory App
- Salesforce Help: Salesforce Console
- Salesforce Help: Find and View Your Data
- Salesforce Help: Personalize Your Navigation