Optimize a Briefcase with Advanced Rules
Learning Objectives
After completing this unit, you’ll be able to:
- Set related object rules to select records in a briefcase.
- Use a custom formula field with a briefcase.
More Records to Filter
Now that Maria has Offline Briefcase set up for her team, she wants to be sure it works optimally for their growing business. Ursa Major Solar is getting more customers, more solar water heater installation appointments, and more field workers across the US. She hears from the installation team that they want to see work orders based on their state or location.
Maria has a couple options for setting up the installation team’s briefcase with the most relevant records. She can set related object rules in the briefcase to select work orders that match the briefcase user’s location. Or she can create a custom formula field that matches each installation team member with records from accounts that are located in their same US state. Maria looks at each option before she decides which one to use.
Use Related Object Rules
With related object rules, mobile workers can access information that’s stored in different, related objects. For example, your briefcase users want to see all their assigned service appointments and the associated quotes. The service appointment information is stored in the Service Appointment object, and the quote information is stored in the Asset object. You can use related object rules to make the related object records viewable offline.
In each object rule, you can define filters to select the most relevant records. However, there can be cases where the most accurate way to select records for your briefcase is to use related object rules instead of defining filters on the objects.
Maria sees that the Service Resource object, which represents a field technician or crew, and the Work Order object both have the LocationId field. She wonders if she can set up related rules for the Service Resource and Work Order objects to match each installation technician with work orders in their location.
First, Maria creates a top-level rule for Service Resource that filters records by the current user. To do this, she follows these steps.
- From Setup, in the Quick Find box, enter
Briefcase Builder, then select Briefcase Builder.
- Click New Briefcase.
- Enter a name, developer name, and a description for the briefcase.
- Name:
Installation Team Records by Location - Developer Name:
Installation_Team_Records_by_Location - Description:
This briefcase contains the records for the installation team. Each installation team member will see only the records for work orders in their location.
- Click Next.
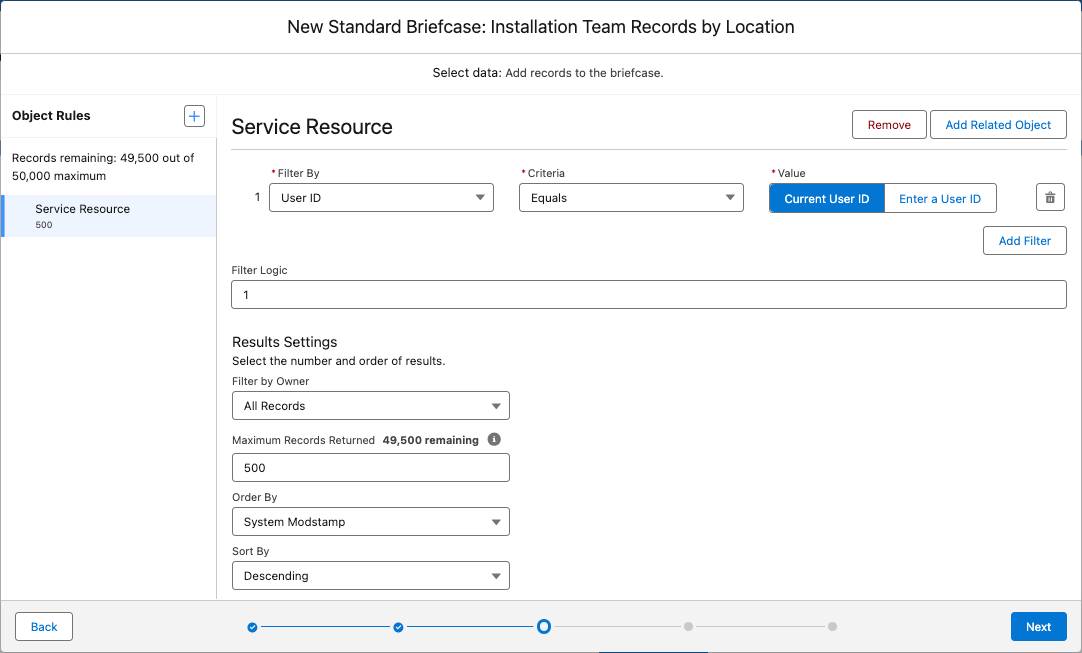
- From the Object Rules pane, click the plus sign (+), then select Service Resource.
- For Filter By, select User ID. For Criteria, select Equals. For Value, select Current User ID.
Maria adds related rules for the Location object, then the Work Order object. To do this, she continues with these steps.
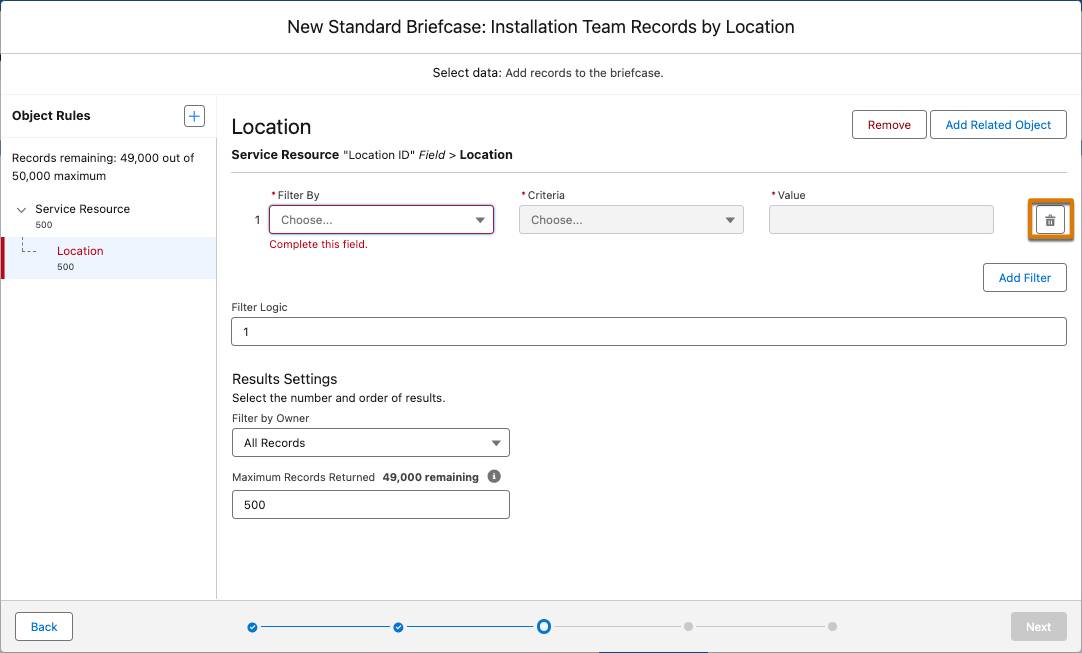
- With the Service Resource rule still selected in the Object Rules pane, click Add Related Object. Then, under Lookup Fields, click Location ID.
- In the Location object rule, delete the default filter by clicking the trash icon on the right of the filter’s row.
- With the Location object rule still selected in the Object Rules pane, click Add Related Object. Then, under Related Lists, click Work Order.
- In the Work Order object rule, delete the default filter by clicking the trash icon on the right of the filter’s row.
- Click Next.
- Select the users or groups assigned to this briefcase, then click Next.
- Select applications to associate with the briefcase, then click Save or Activate.
Now when Maria’s users look at records in their mobile app, they see only records from their current state.
Create a Custom Formula Field
You can create a custom field on an object that stores data based on a formula. With a custom formula field, you can use one field to reference fields across objects. After you create a formula field that stores data specific to the records for a briefcase, you can use the field in an object rule filter.
To create a briefcase for the installation team that only shows them the records in their state, Maria creates a custom formula field to indicate that the account’s US billing state matches the current user’s state. For example, if the briefcase user is in Arizona, they’ll see records for companies that are also in Arizona.
First, Maria creates a custom formula field and then she uses it to create the offline briefcase.
To create the custom formula field, she follows these steps.
- From Setup, enter
Object Managerin the Quick Find box, then select Object Manager.
- Click Account to view the details of the Account object.
- Click Fields & Relationships, then click New.
- For Data Type, select Formula.
- Click Next.
- For Field Label, enter a label to help you identify the field. Maria enters
Is In Current User Stateas the label.
- For Formula Return Type, select Checkbox.
- Click Next.
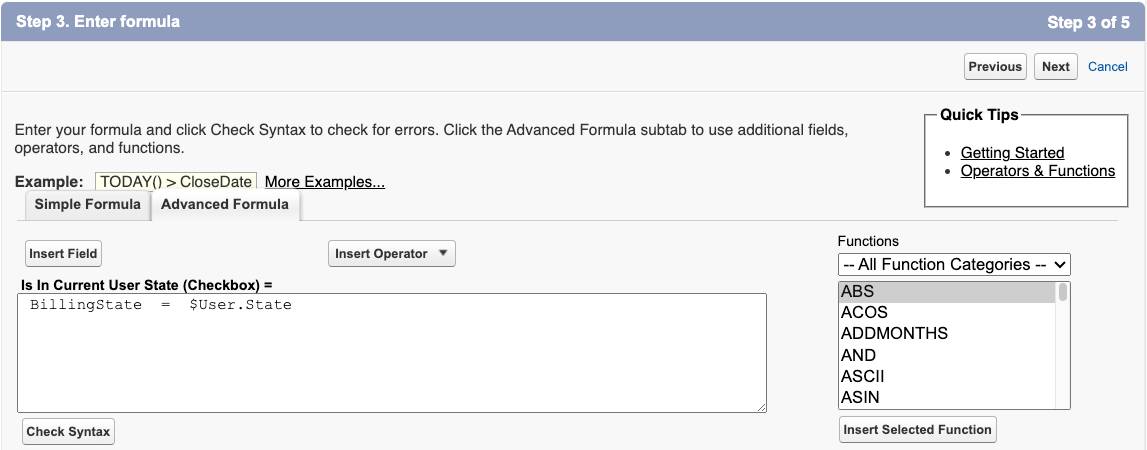
- Click the Advanced Formula tab, then click Insert Field.
- In the Insert Field window, select Account >, select Billing State/Province, then click Insert.
- Click Insert Operator, then select Equal =.
- Click Insert Field again, select $User, select State/Province, then click Insert.
- Maria confirms that she sees this formula:
BillingState = $User.State.
- Click Next.
- Select the profiles that can view this field, then click Next. Maria grants view access only to the
System Administratorprofile.
- Select the page layouts that will include this field, then click Save.
Next, when Maria creates the briefcase, she adds a briefcase rule filter that evaluates whether the custom formula field is true.
- From Setup, in the Quick Find box, enter
Briefcase Builder, then select Briefcase Builder.
- Click New Briefcase.
- Enter a name, developer name, and a description for the briefcase. Maria enters these values.
- Name:
Installation Team Records by State - Developer Name:
Installation_Team_Records_by_State - Description:
This briefcase contains the records for the installation team. Each installation team member will see only the records for accounts located in their state.
- Click Next.
- From the Object Rules pane, click the plus sign (+), then select Account.
- For Filter selects the new custom formula field labeled
Is In Current User State.
- For Criteria, select Equals.
- For Value, select True.
- Click Next.

- Select the users or groups assigned to this briefcase, then click Next.
- Select applications to associate with the briefcase, then click Save or Activate.
As before, Maria’s users now see records in their briefcase that correspond to their current location.
In this unit, Maria learned two ways to create a briefcase that downloads the most relevant work orders for each installation team member. Now Offline Briefcase allows the Ursa Major Solar installation team to get the information they need as efficiently as possible.
Resources