Enable Document Tracking and Approvals
Learning Objectives
After completing this module, you’ll be able to:
- Assign the Document Checklist permission set.
- Update the Opportunity and Account page layouts.
- Set up document types and allow borrowers access to document checklist items in Experience Cloud sites.
- Create a community user profile and assign it to a site.
- Update user profiles with granular permissions for the Document Checklist permission set.
- Set up sharing.
- Create an approval process.
Explore Document Checklist Items
You know by now that most loans require a lot of paperwork, and mortgages are no different.
Borrowers find that applying for a mortgage is the most complicated and time-consuming task they experience when engaging with a financial services institution. In fact, it takes an average of 46 days to close on a mortgage, due to data and archaic processes that are fragmented across many different silos and stakeholders.
The document tracking and approvals innovation from Salesforce is just what the doctor ordered for this problem. Document tracking streamlines borrower engagement by allowing borrowers like Richard and loan officers like Sofia to upload supporting documents that are required for a mortgage application.
Sofia can create a list of document checklist items for Richard, so he can clearly see what documents are required. Each document goes through the approval process as defined by Cumulus, and both Richard and Sofia (as well as Shah, the underwriter) gain visibility into the status of each document.
As an admin, you can create document types that define commonly required documentation for completing a mortgage process. Sofia can then create a document checklist item for each file required from customers like Richard. Richard then uploads a relevant file for the document checklist item, and the files are tracked through an approval process, ultimately being approved or rejected by underwriters like Shah. Richard uploads new versions of rejected documents and tracks the progress of his uploaded documentation from submission to approval.
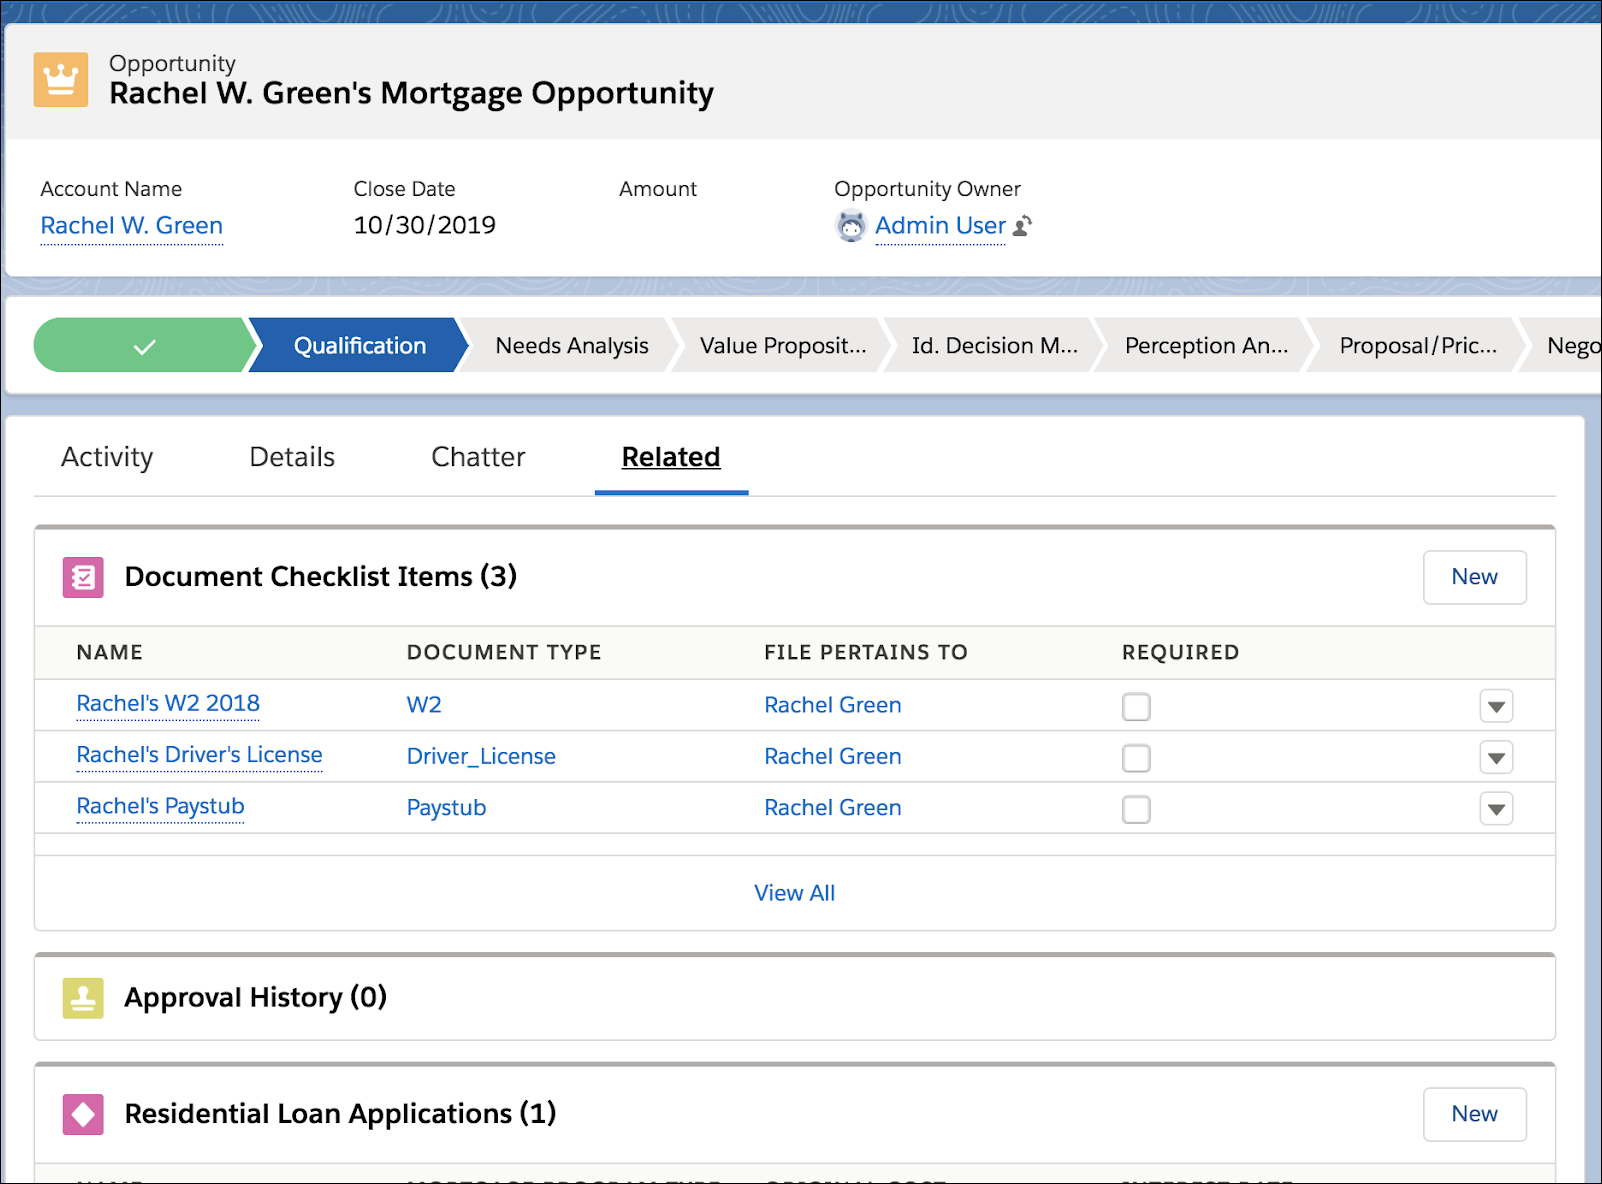
Update Opportunity and Account Page Layouts
Next up, add the Document Checklist Items component to the Related Lists sections on Opportunity and Account page layouts.
- From Setup, open Object Manager.
- Enter
Opportunity, then click Opportunity.
- Click Page Layouts and then select the layout that your document checklist items users will see.
- On the palette, select Related Lists.
- Drag Document Checklist Items from the palette to the Related Lists section and click Save. If you’re prompted to overwrite user’s related list customizations, click Yes.
- From Setup, open Object Manager.
- Click Account.
- Click Page Layouts and then select the layout that your document checklist items users will see.
- On the palette, select Related Lists.
- Drag Document Checklist Items from the palette to the Related Lists section and click Save. If you’re prompted to overwrite user’s related list customizations, click Yes.
Set Up Document Types
You must also define commonly required document types to associate a new document checklist item with a document type. Examples include W-2, driver’s license, and paystubs. You can use these document types for filtering in reporting too.

- From Setup, in the Quick Find box, enter
Document Type, then select Document Type.
- Click New Document Type.
- On the New Document Type screen, enter a label. For example, enter
Driver’s License.
- To add another document type, click Save & New, or to finish, click Save.
Give Borrowers Access to Document Checklist Items in Experience Cloud Sites
You can empower customers like Richard by providing them direct access to document checklist items through sites.
This is a two-step process.
- Create a community user profile for Richard.
- Assign Richard’s profile to a specific site.
Let’s see how you go about these steps.
Create a Community User Profile
Create a customer community plus profile with access to document checklist items.
- From Setup, in the Quick Find box, enter
Profiles, then select Profiles.
- On the Profiles list, select Customer Community Login User, Customer Community Plus Login User, Customer Community Plus User, or Customer Community User.
- On the profile page, click Clone.
- Enter a name for the cloned profile and save. For example, enter
Mortgage Community.
- Save your work.
- On the Profile Edit page, click Object Settings.
- Find and select Document Checklist Items.
- Click edit.
- In Object Permissions, make changes so that only Read in enabled
- Save your work.
Assign a Profile to an Experience Cloud Site
You can now assign the Mortgage Community user profile to a site. In this site, Richard, and other customers like him, can upload the required files.
- From Setup, in the Quick Find box, enter
Digital Experiences, then select All Sites.
- Click Workspaces next to the site you want to assign a user profile to.
- Click the Administration tile.
- Click Members in the left pane.
- Under Select Profiles, select Customer in the search dropdown list. Enter the name of the customer community plus user profile with document checklist item access that you created and click Find. For example, enter
Mortgage Community.
- Under Available Profiles, select Mortgage Community, click Add, and save.
Finally, assign the profile you added to Selected Profiles to site users who need access to document checklist items.
Update User Profiles
You can also add relevant permissions for the Document Checklist Item object to user profiles such as Loan Officer and Underwriter. For loan officers like Sofia, you can provide read, edit, create, and delete access. This allows Sofia to adequately support their customers.
For underwriters like Shah, you can provide only read access. This allows Shah to view records relevant to his job but prevents him from modifying records.
- From Setup, in the Quick Find box, enter
Profiles, then select Profiles.
- On the Profiles page, click Edit next to the profile you want to add document checklist item access to. For example, select Loan Officer. Recall that you created this profile, along with Underwriter, earlier in this module.
- Select Object Settings.
- Find and select Document Checklist Items.
- Click Edit.
- In Object Permissions, select Read, Create, Edit, and Delete.
- Save your work.
You can repeat these steps for the Underwriter profile, but assign only Read permission for Document Checklist Items.
Set Up Sharing
You can use sharing settings to control user access to document checklist items.
He sets up sharing for document checklist items using an account sharing model, including account teams, sharing rules, or a role hierarchy. A document checklist item owner can also manually share the record. Check the Resources section for more information.
Create an Approval Process
Create an approval process for the Document Checklist Item object.
Drive your approval process using the standard Status field or a custom field. Approvers for a document checklist item can be account teams, custom fields on the document checklist item, queues, or custom groups. Check the Resources section for more information.
Change Item Deletion Settings
Change the Checklist Items with Attachments setting to let document checklist items be deleted, even if files have been uploaded for them. By default, you can’t delete a document checklist item after a file has been uploaded.
- From Setup, in the Quick Find box, enter
Document, then select Document Checklist Settings.
- On the Document Checklist Settings page, click Checklist Items with Attachments. When the value is set to On, it allows document checklist items to be deleted even when related files have been uploaded. (The uploaded files are not deleted.)
Wrap Up
With all the required admin set up now out of the way, Sofia and Shah are all set to usher in true digital transformation to Cumulus’s mortgage lending business. They’re amazed at how Mortgage for Agentforce Financial Services simplifies and accelerates the mortgage application process by unifying the experience for borrowers, lenders, and partners.

Guided loan applications speed up the end-to-end mortgage process while streamlined document tracking and approvals ensure there’s no more manual paper pushing or clerical grunt work. Finally, the new mortgage data model for lenders helps loan officers like Sofia build deeper, more complete relationships with each borrower. Cumulus may have cracked that Holy Grail of client servicing: personalization par excellence.
Resources
- Salesforce Help: Assign the Document Checklist Permission Set
- Salesforce Help: Update Opportunity and Account Page Layouts for Document Tracking and Approvals
- Salesforce Help: Set Up Document Types
- Salesforce Help: Allow Experience Cloud Site Users to Access to Document Checklist Items
- Salesforce Help: Sharing and Record Access Features
- Salesforce Help: Who Has Access to Account Records?
- Salesforce Help: Automate Your Approvals with Flow Approval Processes
- Salesforce Help: Change Item Deletion Settings