Modify the Forceios Native App
Learning Objectives
After completing this unit, you'll be able to:
- Add a button that lets users delete a Salesforce contact.
- Add a new REST request to the native iOS template app.
- Handle the REST response.
Follow Along with Trail Together
Want to follow along with an expert as you work through this step? Take a look at this video, part of the Trail Together series.
(This clip starts at the 18:11 minute mark, in case you want to rewind and watch the beginning of the step again.)
Customizing a Forceios Swift App
The template used by forceios to create Swift apps displays a list of account names from a Salesforce organization. From that list, you can view details of a selected account, and from there a list of the account's contacts. You can then select a contact to view its details. Customers can’t use the app to interact with data—they can only view it. Let’s spice up a forceios Swift app by adding a button to the Contact details view that lets the user delete that contact's record. If the user taps this button, your code responds as follows:
- Sends a REST request to delete the selected Contact record.
- Asks the customer to confirm the deletion.
To do this exercise, you can use the Mobile SDK workspace that you created in the opening unit of Native iOS.
Views and Models
If you look at the Classes folder of your Xcode project, you see two subfolders--SwiftUI and Models. As their names imply, these folders express the view-model architecture of SwiftUI apps.
- The SwiftUI folder contains view definitions (also known as "UI stuff"). For the most part, these files contain SwiftUI layout configurations and their visual attributes. SwiftUI views are typically defined as structs.
- The Models folder contains the data functionality that powers SwiftUI views. Views call into models to perform data tasks, such as obtaining Salesforce account names or deleting a Contact record. Models usually include a central class definition for defining functionality, and perhaps some structs for data organization.
Each model in this template app shares a filename prefix with its paired view. For example, ContactDetailsModel.swift provides the model for ContactDetailsView.swift.
Add the Delete Button
First things first! Let's start by implementing the cosmetic, or visual, side. We can design, code, and test the Delete Contact button before we make it fully functional.
The template's ContactDetailView struct is an aggregated list of items defined elsewhere in this file. To keep the button and this pre-existing List element independent of each other, you create a VStack container that wraps them both. This container tells iOS to align its elements vertically as they're arranged in the code. To make the Delete button appear at the bottom of the scene, for instance, you place it after the List in the VStack.
In SwiftUI, Button constructors require an action argument. This action runs when the customer taps the button. For now, we'll just send a message to the Xcode console confirming the customer's tap.
- From the Xcode Project Explorer, open Classes > SwiftUI > ContactDetailsView.swift.
- Scroll to the
ContactDetailViewstruct. It begins with the line containing the following string:struct ContactDetailView: View { - In the definition of
var body: some View, wrap theListdeclaration with aVStack. Remove thereturnkeyword beforeList.
var body: some View { VStack(alignment: .center, spacing: 3) { List { FieldView(label: "First Name", value: contact.FirstName) FieldView(label: "Last Name", value: contact.LastName) FieldView(label: "Email", value: contact.Email) FieldView(label: "Phone Number", value: contact.PhoneNumber) AddressView(contact: contact) } } }- Below the List block, just before the closing brace of the VStack, add the
Buttonblock.var body: some View { VStack(alignment: .center, spacing: 3) { List { FieldView(label: "First Name", value: contact.FirstName) FieldView(label: "Last Name", value: contact.LastName) FieldView(label: "Email", value: contact.Email) FieldView(label: "Phone Number", value: contact.PhoneNumber) AddressView(contact: contact) } Button(action:{ print("Delete Contact button tapped.")}) { Text("Delete Contact") .bold() .font(.title) .padding() .foregroundColor(Color.white) .background(Color.gray) } } }
If you ran the app now, you'd see the button at the bottom of the view, but it wouldn't do anything meaningful. If you tap it, it only prints an informational message to you, the developer, in Xcode.
Customers run the risk of tapping the Delete Contact button unintentionally--for example, if they're riding on bumpy public transit while using your app. To protect the customer's data, it's a good idea to ask for confirmation before deleting a contact. Let's add an action sheet to remind customers that they're deleting the Contact record in their Salesforce org. An action sheet is like an alert with multiple action buttons. In this case, two buttons--OK and Cancel--are sufficient. If the customer clicks the Cancel button, the app abandons the delete request.
- At the top of the
ContactDetailViewdefinition, add a private state variable nameddeleteWarning, and set it tofalse. This variable will control the presentation of our action sheet.struct ContactDetailView: View { @State private var deleteWarning = false - In the Button action that you defined, set
deleteWarningtotrue. This assignment occurs when the customer taps the button.Button(action:{ self.deleteWarning = true print("Delete Contact button tapped.")}) - After the closing brace of the
VStackblock, add the action sheet definition..actionSheet(isPresented: $deleteWarning) { ActionSheet(title: Text("Deleting Contact"), message: Text("This action deletes this contact in your org."), buttons: [ .cancel {}, .default(Text("OK")) { // TO DO } ] ) }
Here's your view definition to this point.
var body: some View {
VStack(alignment: .center, spacing: 3) {
List {
FieldView(label: "First Name", value: contact.FirstName)
FieldView(label: "Last Name", value: contact.LastName)
FieldView(label: "Email", value: contact.Email)
FieldView(label: "Phone Number", value: contact.PhoneNumber)
AddressView(contact: contact)
}
Button(action:{
        self.deleteWarning = true
        print("Delete Contact button tapped.")})
{
Text("Delete Contact")
.bold()
.font(.title)
.padding()
.foregroundColor(Color.white)
.background(Color.gray)
}
}
.actionSheet(isPresented: $deleteWarning) {
ActionSheet(title: Text("Deleting Contact"),
message: Text("This action deletes this contact in your org."),
buttons: [
.cancel {},
.default(Text("OK")) {
// TODO!
}
]
)
}
}You've added a fair amount of code. Let's test the setup.
- Click Run to check your app for errors.
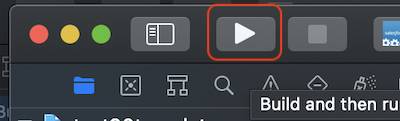 If your work so far has no errors, an iPhone simulator launches and, after a few seconds, displays the Salesforce login screen.
- Log into your developer org and authorize data access.
- In the Accounts view, click any account name to see its list of contacts.
- Click any contact's name to see its details. You're now in the ContactDetails view.

- Click the Delete Contact button. If this button isn't present, recheck your code.
- To confirm that the button is configured correctly, check the Xcode debug console for a line saying "Delete Contact button tapped."
- Don't like the colors? Try changing your Button's
foregroundColorandbackgroundproperties. To see the changes, stop and restart the app.

Now, let's make this button do its eponymous job: Delete the Contact record.
Send the Delete Request to Salesforce
To delete a Contact record, you add code to the model source file. If you browse the Classes/Models/ContactDetailModel.swift file, you see that the ContactDetailModel class is minimal.
class ContactDetailModel: ObservableObject{
    @Published var contact: Contact
    init(with contact: Contact){
        self.contact = contact
    }
}
You can use the Id member of the self.contact property to identify the currently viewed record.
To create the REST request, you call the RestClient.shared.requestForDelete(withObjectType:objectId:apiVersion:) method. This request is unusual among Salesforce API requests because, if successful, it has nothing important to return to the caller. Since your app won't receive a data package to parse and deploy, you can handle the REST response in a simple completion closure.
- From the Xcode Project Explorer, open Classes > SwiftUI > ContactDetailsModel.swift.
- Under the existing code of the
ContactDetailModelclass, define a new emptyfuncnameddeleteContact. This new method takes a single argument,contact, of typeContact, and returnsvoid.
class ContactDetailModel: ObservableObject{ @Published var contact: Contact init(with contact: Contact){ self.contact = contact } func deleteContact(contact: Contact) -> Void { } }- At the top of your new function, call the REST API method to define
request, yourRestRequestobject.func deleteContact(contact: Contact) -> Void { let request = RestClient.shared.requestForDelete(withObjectType: "Contact", objectId: contact.Id, apiVersion: nil) } - To send the request to Salesforce, call the
RestClient.shared.send(request:_:)function. The first argument is the pre-formatted request that you created. For the second argument, stub in a completion closure.func deleteContact(contact: Contact) -> Void {let request = RestClient.shared.requestForDelete(withObjectType: "Contact", objectId: contact.Id, apiVersion: nil) RestClient.shared.send(request: request) {result in } } - Fill in the completion closure with a
switchblock that handles two cases:.success(_)and.failure(_). For this simple exercise, print a status message for each result to the Xcode debug console.
-
func deleteContact(contact: Contact) -> Void {let request = RestClient.shared.requestForDelete(withObjectType: "Contact", objectId: contact.Id, apiVersion: nil) RestClient.shared.send(request: request) {result in switch result { case .success(_): print("Contact deleted.") case .failure(_): print("Your attempt to delete this contact could not be completed. This is possibly because it is associated with cases or other dependencies.") } } }
And you’re done with the model class! You've coded Mobile SDK functionality to delete a Salesforce record. Only one thing remains to do: Call your new deleteContact(_:) method. Can you guess where to make that call? Remember the action sheet?
- Open the ContactDetailsView.swift file.
- Scroll to the
.actionSheetdefinition. In thebuttonsarray of the action sheet, the.defaultbutton (the "OK" button) offers an empty closure.
- Add your calls in the
.defaultclosure. First, create an instance ofContactDetailModel, passing in the localcontactvar, and then calldeleteContact(_:)on your model instance.
.actionSheet(isPresented: $deleteWarning) {
    ActionSheet(title: Text("Deleting Contact"),
        message: Text("This action deletes this contact in your org."),
        buttons: [
            .cancel {},
            .default(Text("OK")) {
                let model = ContactDetailModel(with: contact)
                model.deleteContact(contact: contact)
            }
        ]
    )
}
This finished product falls short of production quality. Customers won't know whether their deletion succeeded until they return to the Contacts list view and see that the contact is no longer listed. Or, if they find that the contact hasn't disappeared from the view, they're given no clue to what went wrong. One way you might fix that shortfall would be to replace the RestClient.shared.send(request:_:) statement with a Combine publisher, and publish the result of the deletion call. Then, in ContactDetailView, show the result to the customer in the view UI or an alert box.
Try It Out!
You’re ready to build and run your code in the iOS simulator. Notice that you get an error response when you try to delete any default contact in the Developer Edition database. These errors occur because each contact that comes pre-packaged in a Developer Edition org is the parent of other records. To prepare for testing, log in to your Developer Edition org and create one or more test contacts that don’t own other records.
Resources
- Developer Guide: Handling REST Responses
- Developer Guide: Native Swift Template
- Developer Guide: Managing Model Data in Your App (iOS Developer Library)
- External Link: Closures (The Swift Programming Language)