Message with a Customer
Learning Objectives
After completing this unit, you’ll be able to:
- Explore the agent experience of interacting with a customer’s messages.
- Identify productivity features that enhance the agent experience.
The Service Console is where Enhanced Chat agents spend their time chatting with end-users. Let’s walk through a simple chat scenario from accepting, to responding, to transferring or ending the conversation.
Accept a Customer’s Message
When an agent starts their shift, they open up the the App Launcher ( )and select the Service Console app. Then, they click Omni-Channel in the footer of the screen to expand the Omni-Channel utility. Here’s a typical agent interface.
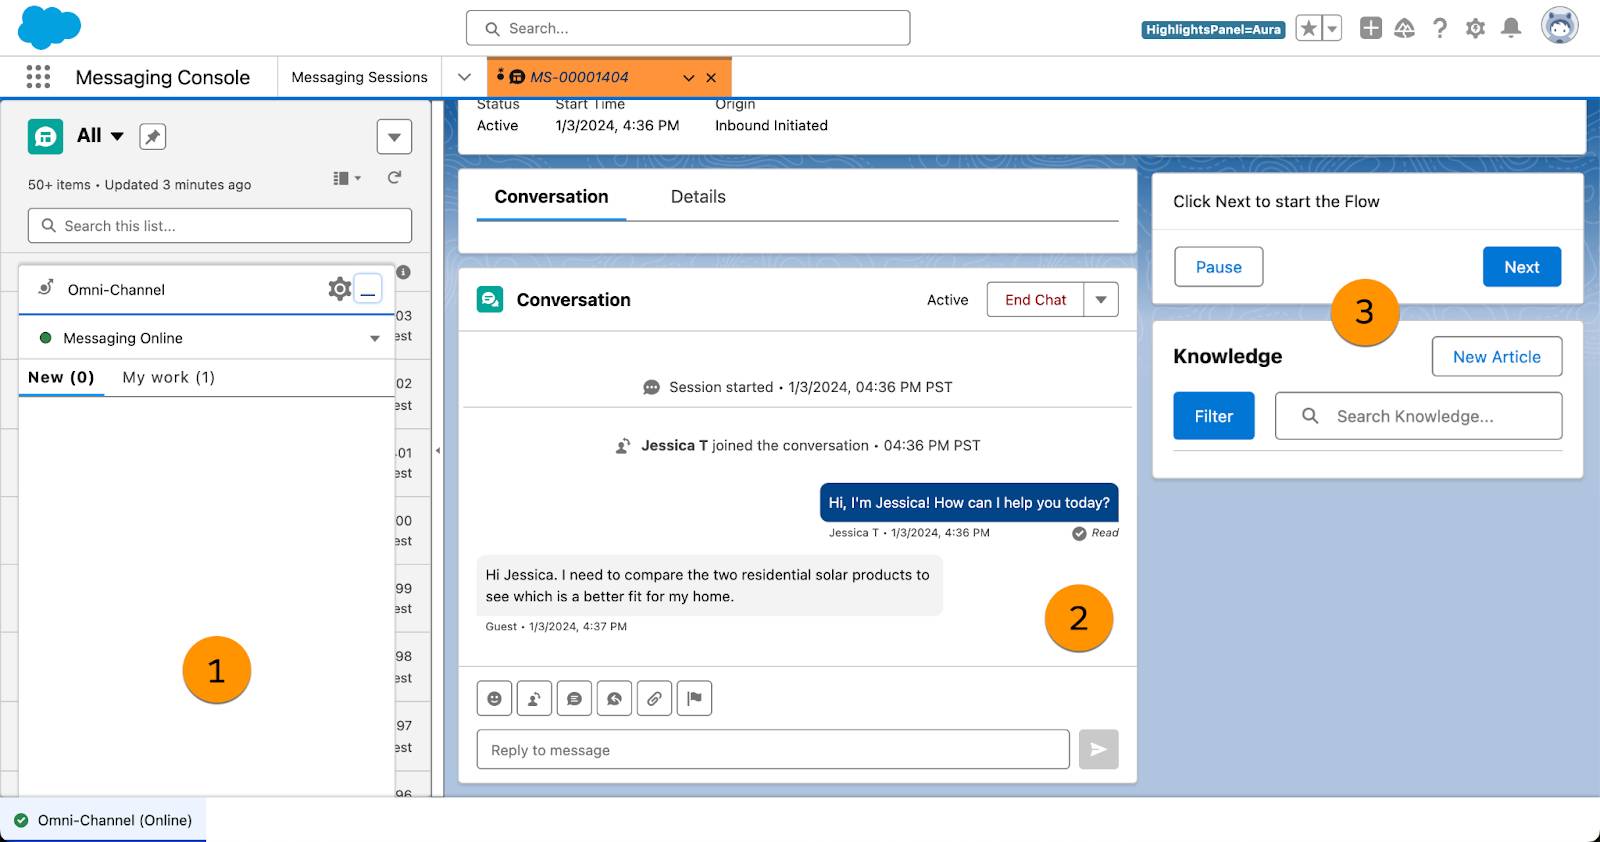
The agent makes themselves available to chat with customers in the Omni-Channel widget. Then they accept incoming messages in the widget (1). A messaging session opens in the enhanced conversation component, where agents have a toolbar to help craft messages across the bottom and a button at the top to inactivate or end a chat (2). To the right of the enhanced conversation component, agents can work with tools that their admin has chosen to make available, such as Actions & Recommendations, After Conversation Work, or flows that trigger dynamic messaging components (3).
Let’s take a closer look at some of these elements and walk through a conversation from start to finish.
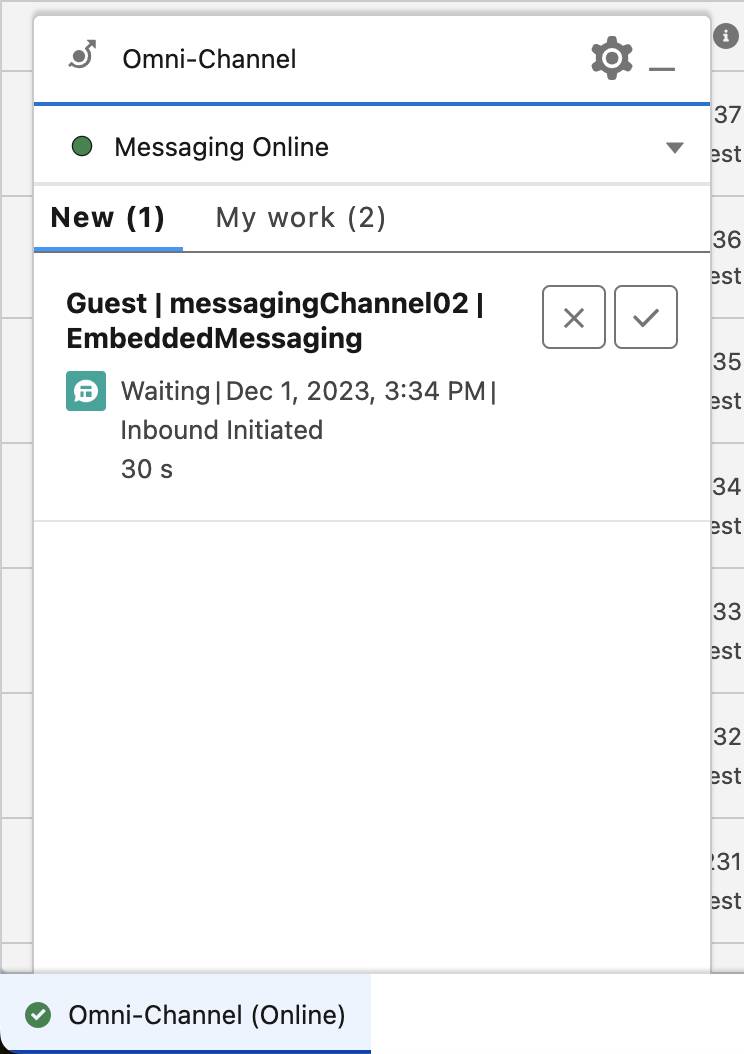
During setup, you (the admin) created Omni presence statuses, which indicate an agent’s level of availability to engage with incoming messages. An agent who’s available selects the presence status indicating so. When a green dot appears next to the status, they’re ready to chat with customers. They select the checkmark icon to accept an incoming conversation.
Now, let’s experiment with sending different types of content in the channel.
Send Messages
Enhanced Chat agents have many options beyond simply typing out a customer response. These options are available in the toolbar of the enhanced conversation component, or in any additional components you’ve added to the right column of the agent console.
Let’s start with what’s available, by default, in the enhanced conversation component’s toolbar.
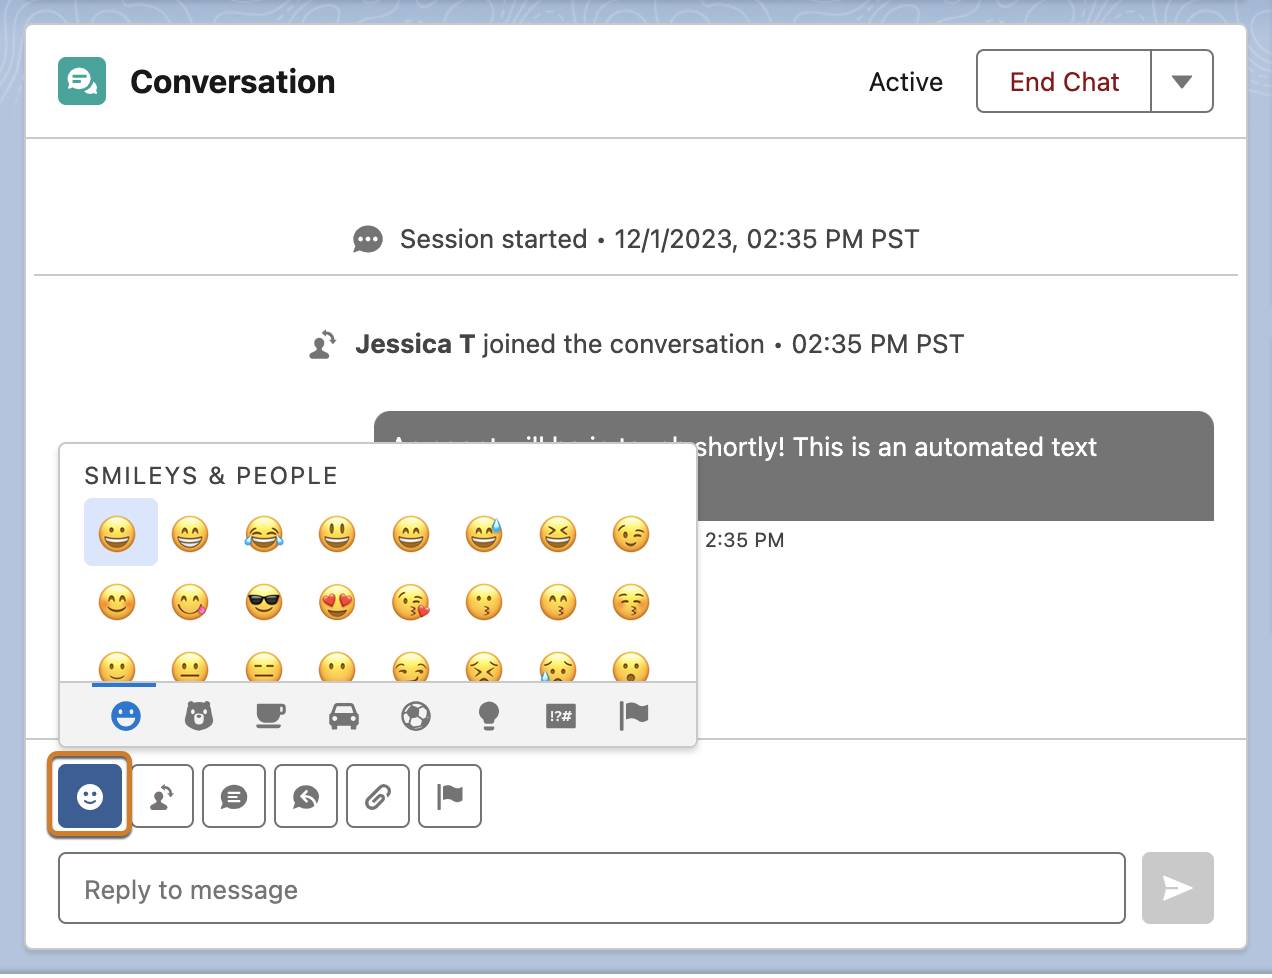
Send Text and Emojis
First up, we have the emoji icon. Modern digital communication sometimes relies on emojis to make a conversation seem more familiar and informal. An agent simply clicks the icon, then inserts an emoji into the conversation window by selecting it.
Send Quick Text
Admins create Quick Text snippets to let agents send pre-written, common responses in a single click rather than typing them out. To send a quick text snippet, an agent clicks the quick text icon and searches for the snippet they need.

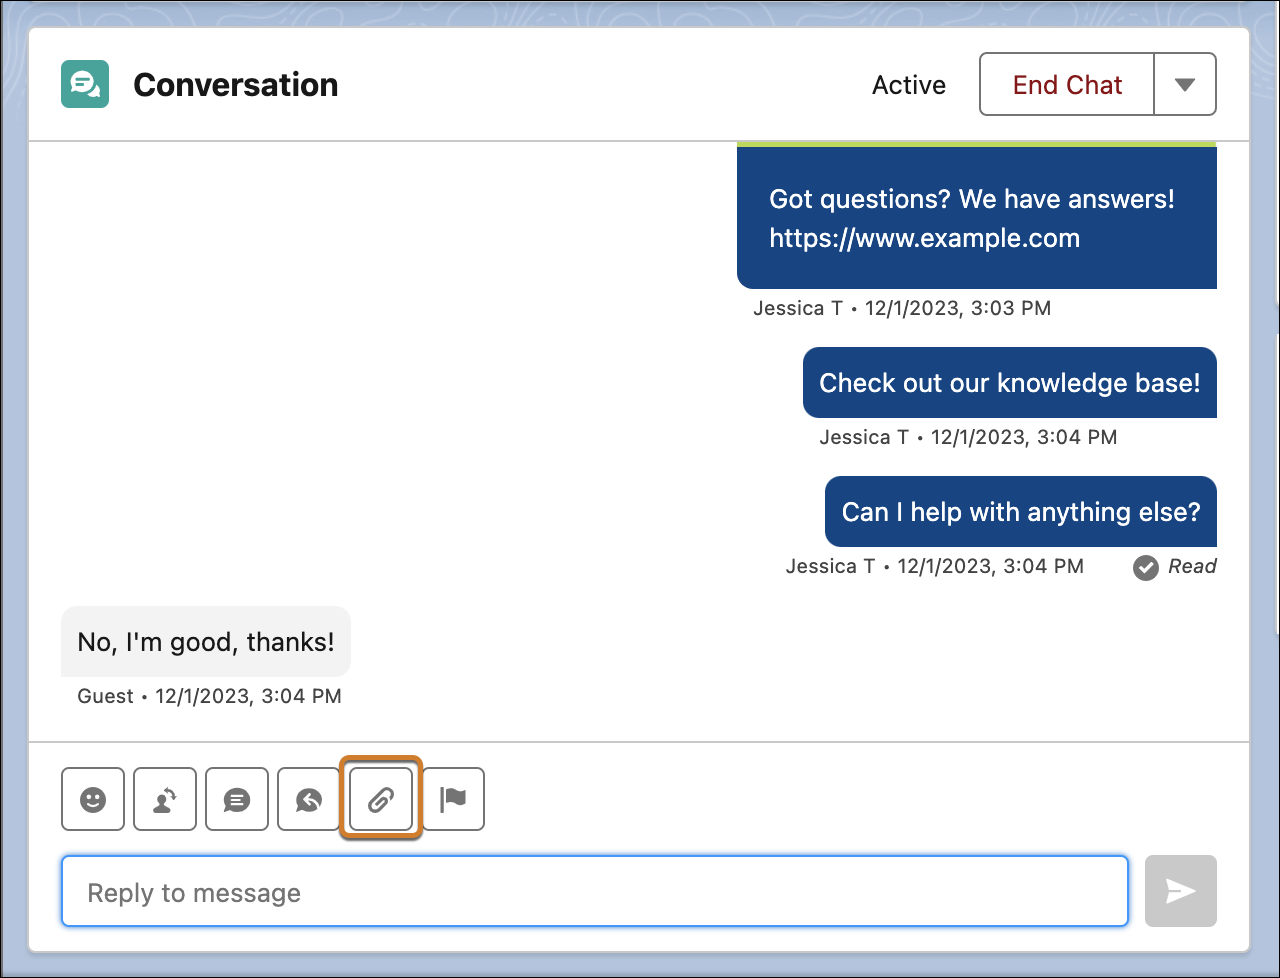
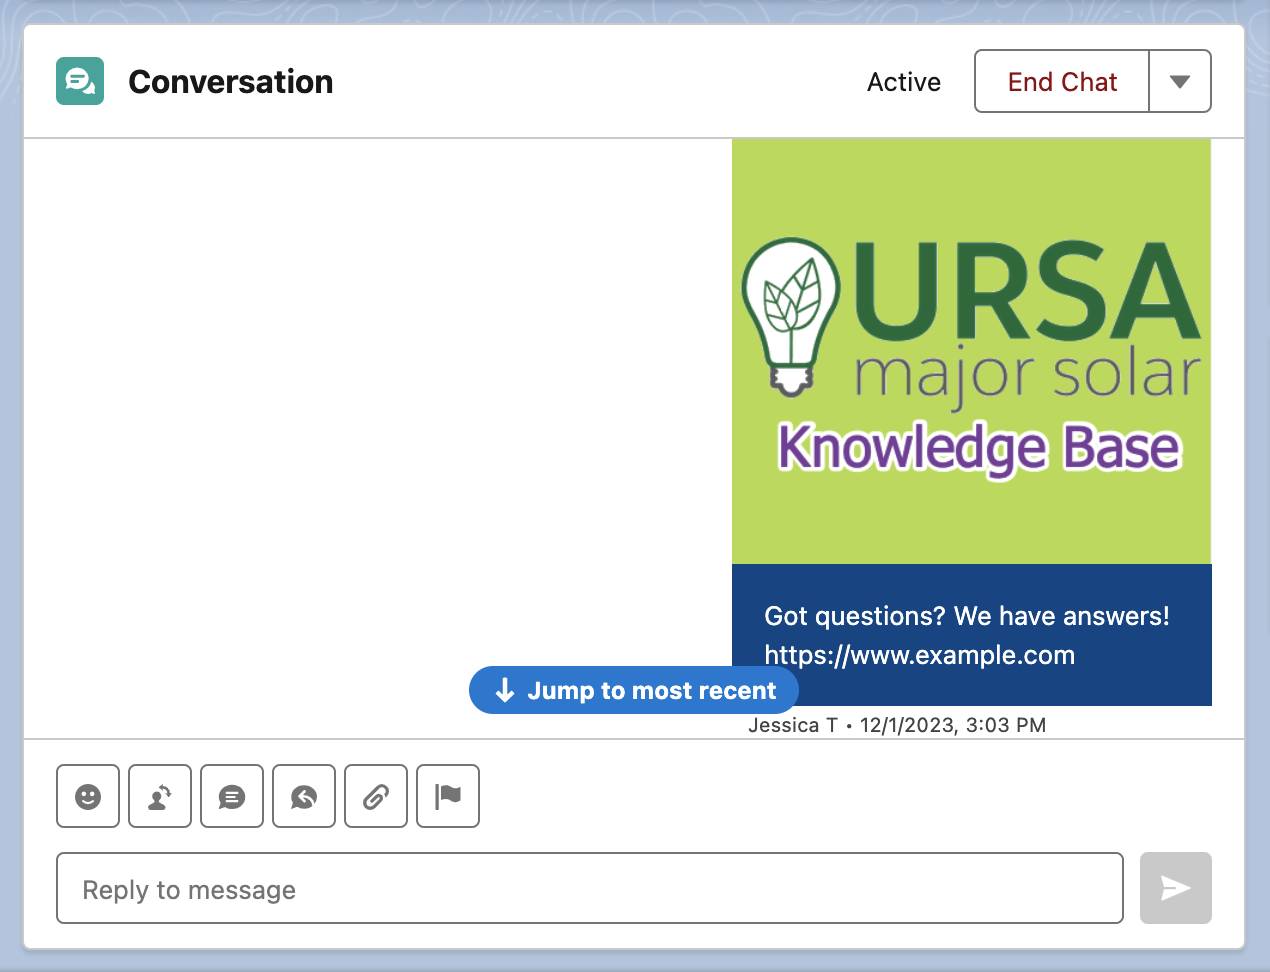
Send Images, Videos, and Files
Sometimes an end-user’s question is best answered with a link or attachment. Enhanced Chat agents can send .pdf, .png, .jpeg, .jpg, .bmp, .tiff, and .gif files, each up to 5MB. To send a file, the agent clicks the paperclip icon, selects the file, then presses Send.
Send Messaging Components
We learned about sending structured, rich content with messaging components in unit 4. To send a messaging component with static content, an agent clicks the messaging component icon in the conversation window. Then, the agent clicks Send.

Optionally, use the filter at the top to show only components of a certain type. Select your component in the list, and then click Send. When the customer clicks an option, it’s sent as a response message.
To send a messaging component with dynamic content, an agent finds the corresponding Flow component to the right of the conversation window. The agent runs the flow to insert the component into the message field. Then, they click Send.
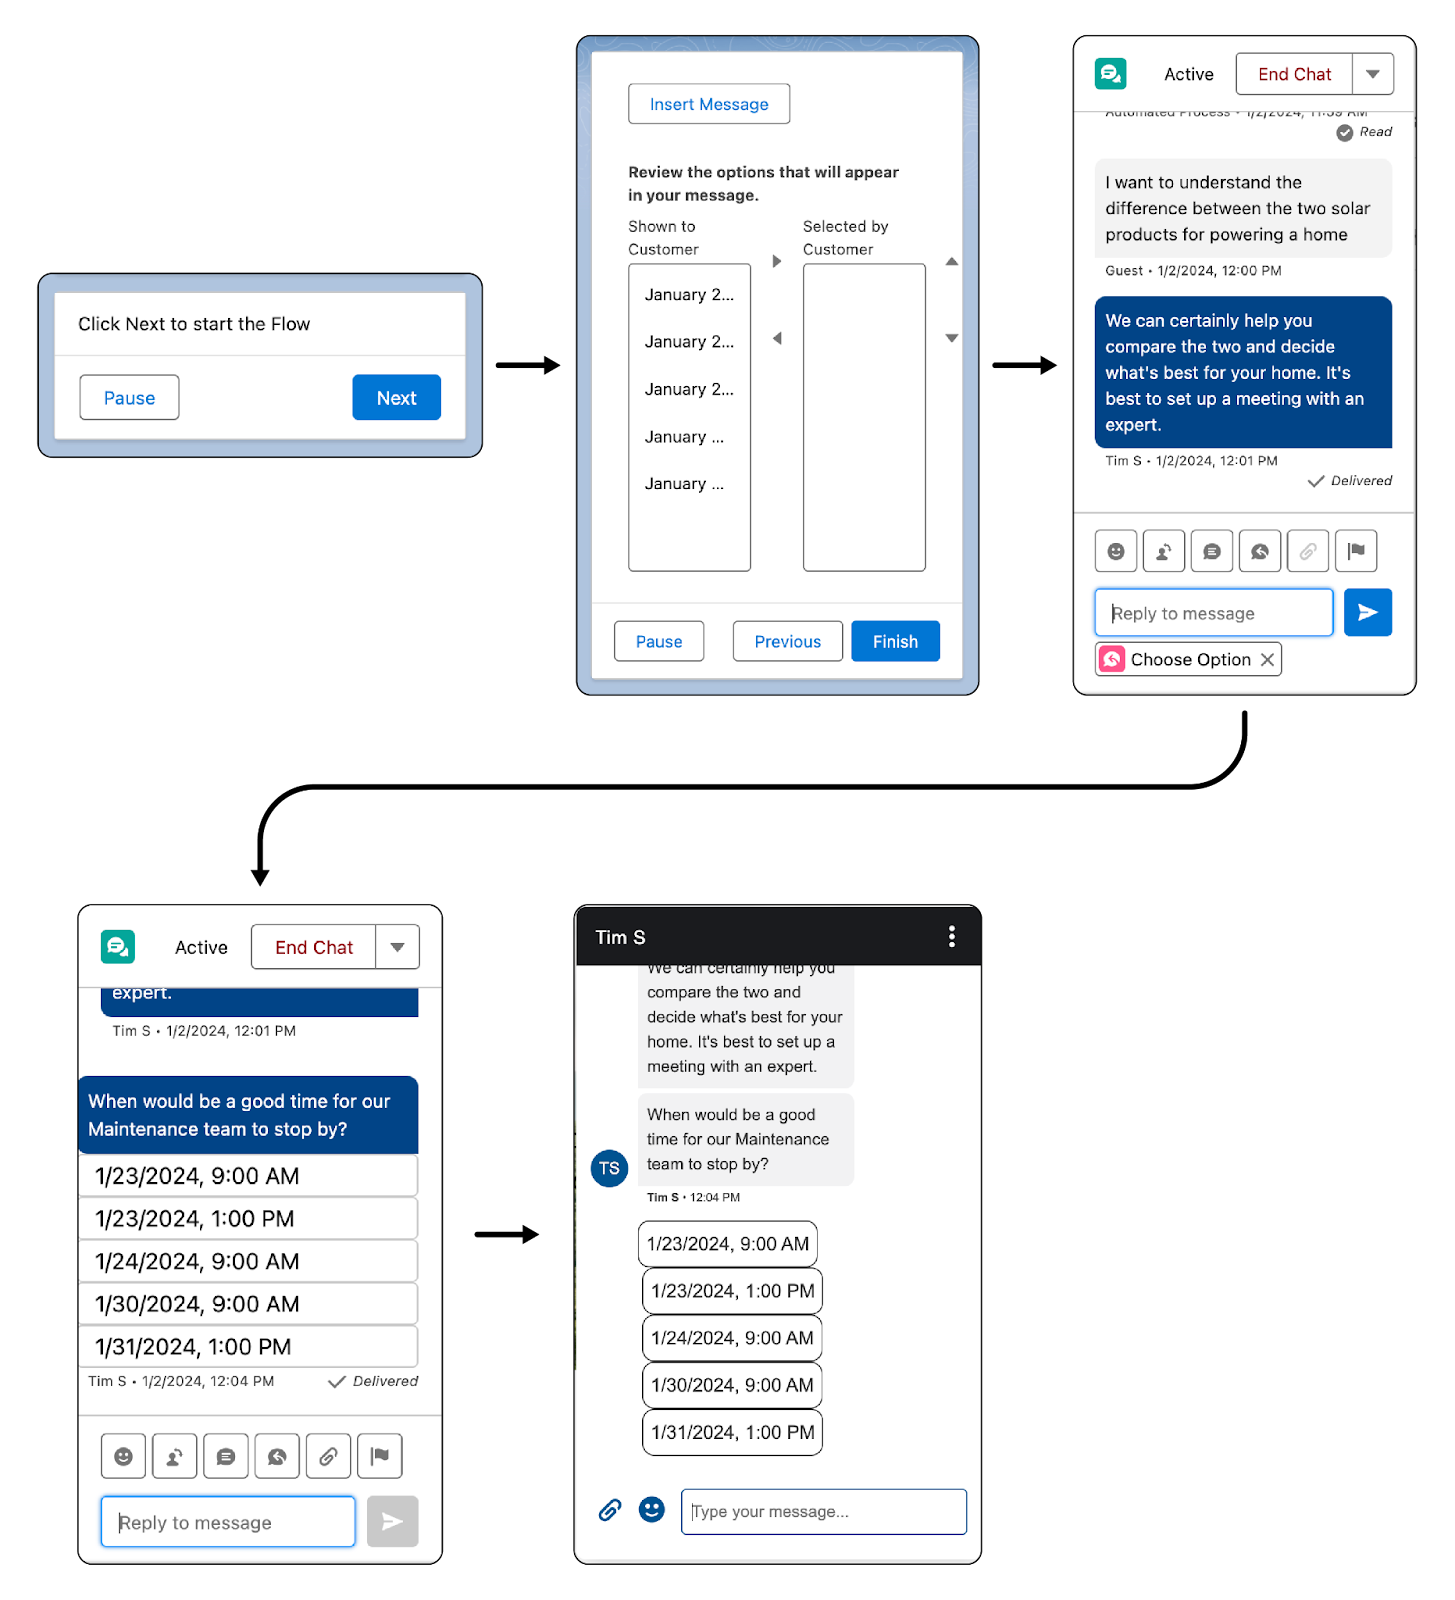
When the customer clicks an option, it’s sent as a response message.
Request Assistance from a Supervisor
The enhanced conversation component toolbar also offers options beyond messaging the end-user. To get help from a supervisor without the customer being aware, an agent can click the flag icon and enter their question. Supervisors are alerted in Omni Supervisor and can “whisper” an answer that the end-user never sees. When the agent has the help they need, they click the icon again to lower the flag.
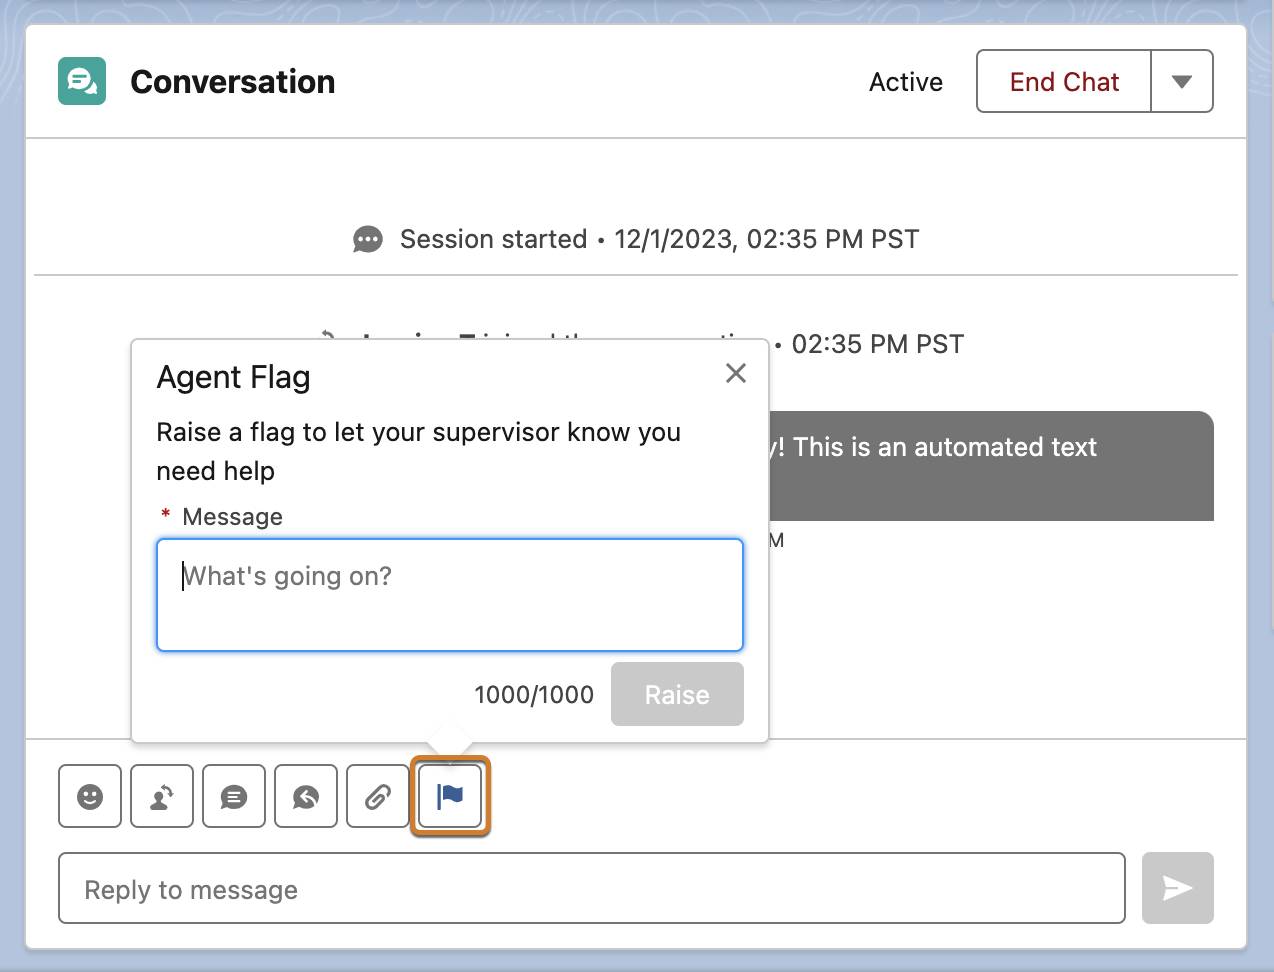
Tip: Admins can also use Einstein Conversation Intelligence to automatically raise an agent’s flag whenever an agent or customer sends a certain word or phrase.
Send Knowledge Articles from the Knowledge Sidebar
Add a lightning knowledge component to the agent console so agents can receive keyword-based article recommendations and search for articles.
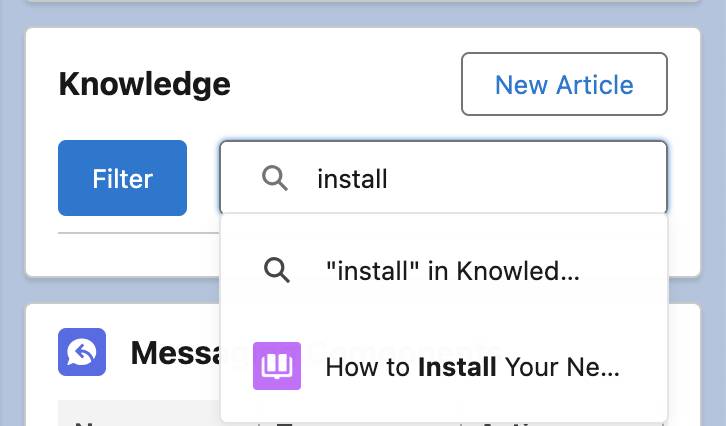
When you’re ready to set it up, check out Use the Lightning Knowledge Component help article.
Use Generative AI to Review a Conversation
In the age of artificial intelligence, we continue to evolve our messaging product. Work Summaries and Conversation Catch-Up bring generative AI into the messaging experience to help agents work more efficiently.
Add Work Summaries to use generative AI to provide a summary of the issue, resolution, and conversation at the end of a messaging session. Agents can use this information to quickly review past conversations with a customer in order to help them at present.
To set it up, review the help article, Einstein Work Summaries.
Add Conversation Catch-Up to provide a summary of an ongoing conversation to an agent who receives a transferred messaging session. Supervisors can also select Monitor from the Omni Supervisor dashboard to see conversation catch-up for a messaging session that’s been escalated or has a flag raised.
To set it up, review the help article, Show Agents and Supervisors Mid-Conversation Summaries.
Transfer or End Your Messaging Session
While a valuable benefit of Enhanced Chat is persistent conversation history (with user verification) and conversations that can be picked back up at any time, that doesn’t prevent agents from ending messaging sessions. In fact, ending a session doesn’t impact whether end users can see their history or pick the conversation back up. It just allows agents to free up their availability and meet their own SLAs and other performance metrics. Let’s explore ways for agents to end or transfer the chat conversation.
Mark the Session Inactive
If your agents are incentivized by a time-to-resolution SLA or to maintain a certain number of active messaging sessions, you may want to encourage marking sessions as Inactive when a customer disappears. This frees up the agent’s capacity to accept new messaging sessions.
To mark a session as Inactive, an agent just clicks the dropdown menu in the conversation window, and selects Customer Inactive.

If the customer sends a message after the session is marked inactive, the session is rerouted to the next available agent. Inactive sessions are automatically ended after approximately one day.
Transfer the Session
If an agent doesn’t have the right skills or job title to resolve a customer issue, they can transfer the messaging session to an agent who’s better qualified. Agents can initiate a transfer by clicking the transfer icon in the conversation component. They can search for and select an agent, flow, or enhanced bot.
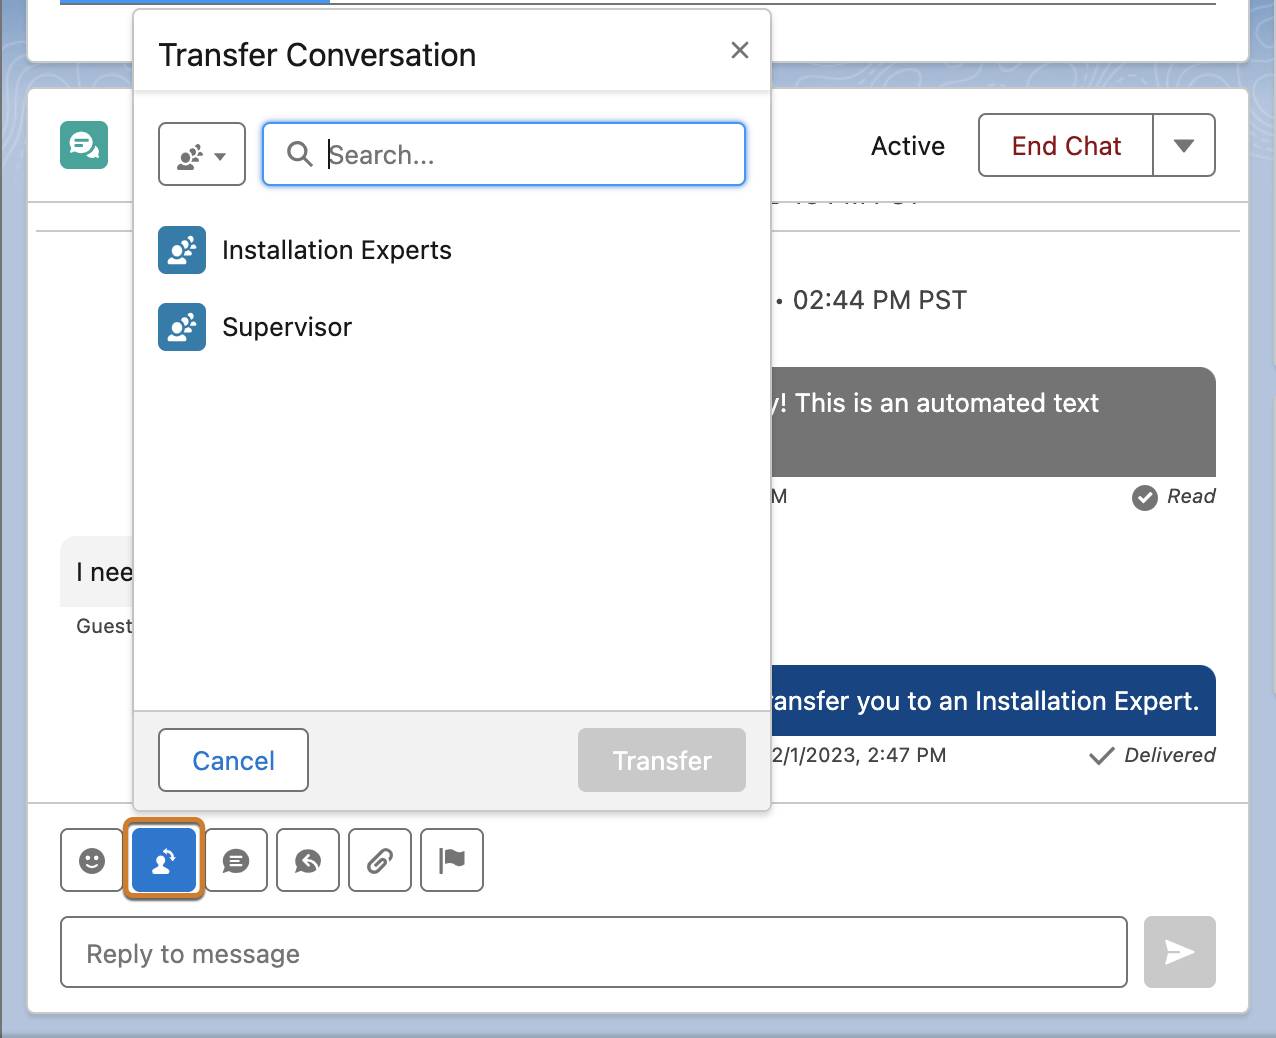
When the selected agent accepts the transfer, the original agent is removed from the conversation.
End the Session
When both parties come to a resolution, an agent can click End Chat in the conversation window and close the session tab.

Resources
- Salesforce Help: Message with Customers in the Service Console
- Salesforce Help: Lifecycle of a Messaging Session
- Salesforce Help: Add Messaging to the Service Console
- Salesforce Help: Use the Lightning Knowledge Component
- Salesforce Help: Einstein Work Summaries
- Salesforce Help: Show Agents and Supervisors Mid-Conversation Summaries