Manage Business Units
Learning Objectives
After completing this unit, you’ll be able to:
- Describe what a business unit is.
- Create a business unit.
Business Units
As we mentioned earlier in this module, you can organize Marketing Cloud Engagement by business units if you’re working with an Enterprise 2.0 tenant. Business units control access to information and sharing of information throughout Marketing Cloud Engagement. For example, a company with multiple divisions or brands can create a business unit for each brand, so that users within that business unit can access only their brand-specific content. You can then use user roles and permissions to control what users can do within a business unit.

Users working in a business unit can access all items created in that business unit. Share items with users in other business units by placing the items in a shared items folder in the Content and Subscribers sections of the applications.
Before creating business units, map out your organizational structure for business units. Do you want to mirror hierarchical structure of your company? Or geographical regions? Perhaps you want to align with workflow processes or an operational structure? Build a list or chart of the business units to review with your stakeholders first. After creation, the next step is to assign users to business units.
Create a Business Unit
Creating a business unit in the Setup app is easy.
- Navigate to Setup in Marketing Cloud Engagement.
- Click Business Units.

- Click Create to get started.
- Define the name, description, and other properties for the business unit.
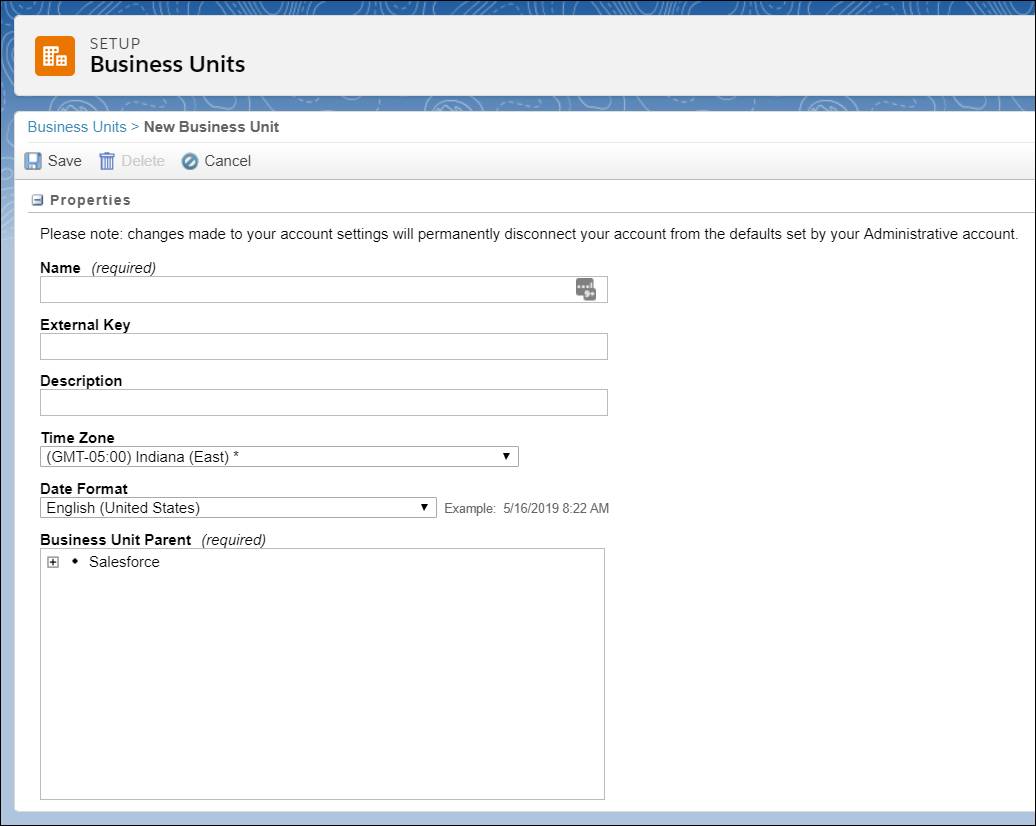
- You can customize the time zone and date format for the business unit, so consider where the majority of that business unit's users are working to choose something appropriate.
- Select the parent (top) level business unit for this new child business unit.
- Add the display name and address used as the default email address when sending emails from the business unit.
- Add a physical mailing address information that is included by default on emails from this business unit, as required by CAN-SPAM regulations.
- Select an option for Unsubscribe Settings. If a subscriber clicks the unsubscribe link from an email sent by this business unit, does it unsubscribe that person from only the business unit? Or from all business units within the enterprise account?
- Save your new business unit.
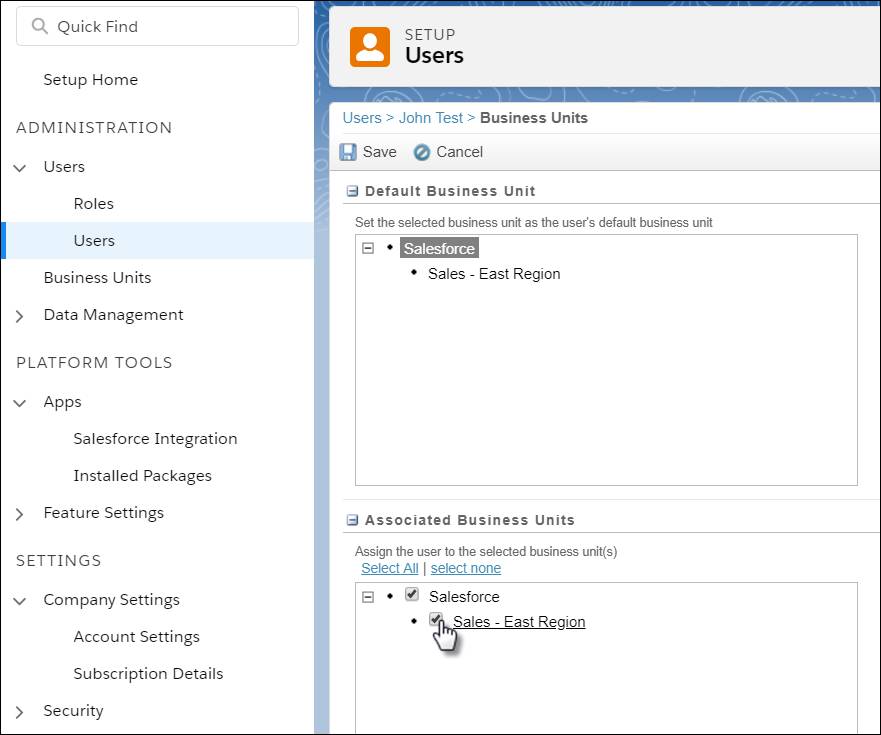
Add a User to a Business Unit
With your business units ready, you can now add users to the applicable business units.
- Navigate to Setup in Marketing Cloud Engagement.
- Click Users.
- Select the user and click Manage Business Units to add a user to a business unit. (Tip: You can import a file that creates multiple users in a business unit.)
- Select a default business unit for the user.
- Assign the user to business units.
- Save your changes.
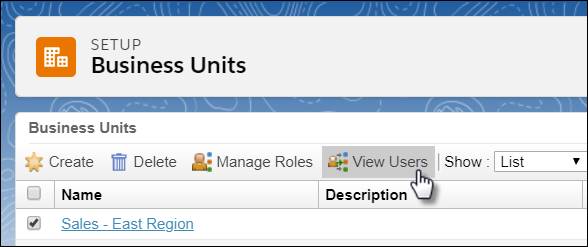
Want to view all users in a business unit? No problem. In Marketing Cloud Engagement Setup, click Business Units. Select the checkbox next to a business unit and click View Users.
Now that business units are added, we can complete some final preparations for sending from your Marketing Cloud Engagement account.
Resources
- Salesforce Help: Business Units in Marketing Cloud Engagement
- Salesforce Help: Unsubscribe Settings
- Salesforce Help: View Users in Business Units