Roll Out Lightning Experience to Your Users
Learning Objectives
Roll Out Phase: Kick Off Your Transition Plan
Remember our Broadway musical analogy? You’re the Director, and your show just got green-lighted. So now what?
Now it’s time to get busy preparing your org — and your users — for Lightning Experience. In the Roll Out phase, you kick off your change management strategy. And tackle release development activities, including implementing Lightning Experience features and adjusting the priority issues identified in your Readiness Report. The last piece is going live by giving users access to the new interface!

Sure, executing your Lightning Experience transition project involves rolling up your sleeves. But there should be a sense of fun too! After all, what’s the point of introducing game-changing new features if your users aren’t excited about what’s coming? So we’ll look at ideas for turning your launch into an awesome event at your company.
If you’re rolling out gradually to groups of users, you’ll repeat some of the activities in this phase until everyone is on the new interface. And remember, you don’t have to address everything all at once!
Let’s dive in.
Prepare Your Users to Work in Lightning Experience
Kick off change management activities now and keep them up throughout the rest of the transition project. Busy users aren’t always receptive to change. So your focus at this point is to win hearts and minds with communication, collaboration, training...and even a little bit of marketing to build excitement. Each step of the way, use the Lightning Experience Transition Change Management Hub for guidance and tools to ensure that your users are well prepared for your launch.
Let’s look at the change management activities that should be a staple of your Roll Out phase.
Create a Chatter Group for the Rollout Team
You need a place where you can communicate and collaborate with stakeholders and affected users as you roll out Lightning Experience. We recommend setting up a Chatter group and inviting everyone who’s involved.
The Change Management Hub makes doing this a snap. It even provides a “welcome message” template for kicking off the Chatter group on the right note.
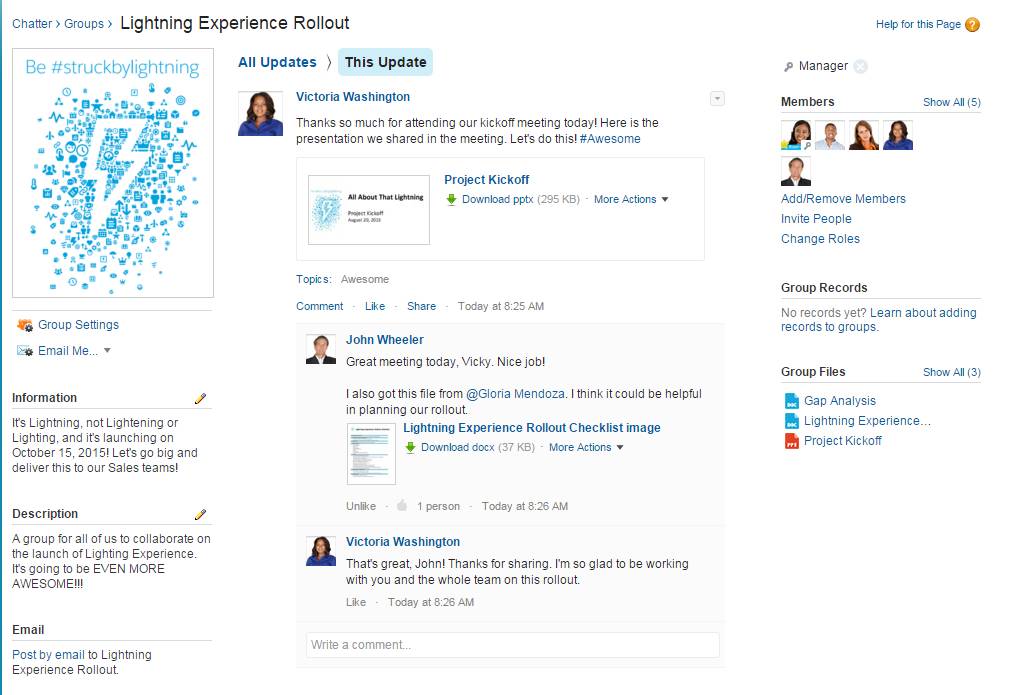
With the Chatter group in place, you can share the rollout schedule, post updates, and collaborate in context.
Unleash the Power of Your Salesforce Champions
Champions are employees who understand the value of your implementation, want to help you improve what’s in place, and are passionate about helping others adopt Salesforce. Champions are often closely engaged with your employee community and have good insights into which features and processes get use, and which pain points are preventing adoption. Get your champions on board early in your transition project so they can act as Lightning Experience evangelists and help you answer questions and provide support.
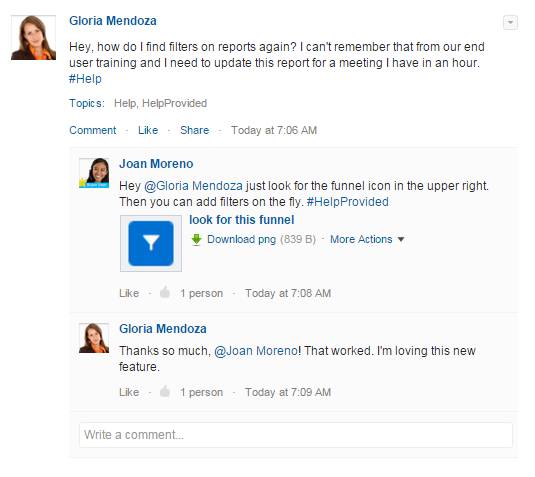
Give your champions sneak peeks at Lightning Experience. In fact, enlist their help at the start of the Roll Out phase to validate the priorities in your rollout plan. Have them take Lightning Experience for a test drive. Or better yet, ask them to do their jobs in the new interface for a week. Then get their feedback on what’s working and what’s not. This feedback may reveal that things you thought were problems aren’t. Or that you haven’t accounted for features or processes that your users need.
Tip: Like this idea? Enlist Champions to Validate Your Lightning Experience Rollout Priorities in Salesforce Help shows you the steps to make it happen.
Officially recognize your champions’ super user status through a special designation, like a custom icon on their Chatter profile photo, a button, a t-shirt — or all three! Make them moderators or managers of your Lightning Experience Rollout Chatter group. All of this helps validate their role as leaders of the transition project and empowers them to help others.

It’s Coming, It’s Coming! (Or: How to Promote Your Launch)
A key part of preparing users for Lightning Experience is making sure that they know it’s coming — ahead of time! Equally important is demonstrating the value of Lightning Experience and showing users what’s in it for them. You can nail these objectives, and build buzz and excitement, using simple marketing strategies.
This is the part of the rollout where you can inject some fun into the project. No matter your budget, use your creativity to make your go-live a true event. Here are some ideas to get you started.
- Create a topic in your Chatter group for all of your communication updates. Starting early in the project, make regular posts that drive awareness. As you get closer to your launch, focus more on specific benefits and features. You could have a “feature of the week” segment.
- Run a drip campaign that promotes Lightning Experience and shows users what’s in it for them. The Change Management Hub (and the Roll Out Phase folder in the enablement pack) includes several campaign templates that highlight key Lightning Experience features. You can tailor the messages to reflect your implementation. You can even use the Hub to publish the campaign to Chatter, or use other communication channels like email.
- Have a raffle with prizes, such as gift cards, a free day off, or lunch with an executive.
- Host a launch party with cupcakes or cake.
- Order swag and branded items to distribute on the day of your go-live.
It’s helpful to have a communication and events calendar with key milestones. For example, make sure that the entire company gets an official communication on the day of the launch, as a Chatter post or email from your executive sponsor, VP of Sales, or CEO.
Here’s a sample communication timeline:
| 4 weeks prior | Email from executive sponsor |
| 4 weeks prior | Chatter group created |
| 3 weeks prior | Email drip campaign #1 |
| 3 weeks prior | Champions identified and announced |
| 2 weeks prior | Email drip campaign #2 |
| 2 weeks prior | Raffle announced |
| 1 week prior | Email drip campaign #3 |
| 1 week prior | Email from company President |
| 1 day prior | Email with reminders, instructions, and where to get help |
| Launch day | Chatter post from company CEO and launch party |
Train Your Users to Work in Lightning Experience
Train users to do their jobs in Lightning Experience so they’re comfortable and productive from day one of your launch.
A good starting point is self-paced training. Direct your users to Trailhead and the Lightning Experience for Salesforce Classic Users module. This module is designed to show Salesforce Classic users how to switch gears to Lightning Experience.
Depending on how customized your user interface is, or how complex your processes are, you may also want to run some in-person training sessions. We provide a customizable training deck in the Roll Out Phase folder of the enablement pack that you can use as a starting point.
To prepare for training sessions, consider these questions:
| Goals | What is the specific outcome you want to achieve? |
| Trainer | Who will conduct the training? |
| Trainees | Who needs to be trained? |
| Materials | What materials do you need for the training? What needs to be developed? |
| Location | Will you train remotely or in-person? |
| Metrics | How will you determine if the training was successful? |
To extend your training reach, consider using a train-the-trainer model with the help of your champions. Rather than training all your users personally, you can train your champions. Then have them deliver user training sessions. Your champions understand the value of Lightning Experience and the needs of your users, so they’re a perfect authority to get others on board.
Also consider follow-up training sessions or office hours after you launch Lightning Experience, to reinforce the right behaviors and keep your users current. If you have a support team, involve them in the training too, so they can be prepared for user questions.
Implement Lightning Experience Features
Take advantage of the hundreds of innovative features in Lightning Experience to transform how users work. There’s a lot to choose from, so start with the features that directly benefit each group of users that you transition. Then keep iterating to add even more value.
Here are some great candidates to consider.
Activity TimelineAdjust Your Existing Features and Customizations
Most of your Salesforce customizations work just fine in Lightning Experience. But there might be some aspects of your implementation that require some attention for best results in the new interface. Use the Lightning Experience Readiness Report, the Lightning Experience Configuration Converter, and good old fashioned testing to figure out where things stand.
Leverage the usage data in each section of the Readiness Report and the Configuration Converter to decide if an issue is worth your effort. For example, if you have custom JavaScript buttons but no one is using them, why bother converting them for Lightning Experience?
If there’s work to do, check out the transition tools at your disposal. These tools lighten your workload by automating many adjustments and streamlining remaining steps.
| Issue | Transition Tool | Details |
|---|---|---|
| Missing actions and buttons | Lightning Experience Configuration Converter — Actions and Buttons tab | If some actions, such as Log a Call and New Tasks, are missing on pages in Lightning Experience, use the Configuration Converter to automatically get them into the right places. |
| JavaScript buttons, links, and alerts | Lightning Experience Configuration Converter — JavaScript Buttons tab | JavaScript buttons, links, and alerts aren’t supported in Lightning Experience. Use the Configuration Converter to scan your org for these elements. The tool can automatically recreate many buttons, links, and alerts as Lightning-friendly alternatives. And it provides guidance on how to manually recreate items that can’t be automatically converted. |
| Hard-coded URLs | Lightning Experience Configuration Converter — Hard-Coded URLs tab | Hard-coded references to your org’s instanced URL, such as https://na189.salesforce.com, aren’t recommended because your instance name can change with an org migration. Use your org's My Domain login URL instead. You can find your org's My Domain login URL on the My Domain Setup page. Then use the Configuration Converter to locate your hard-coded URLs and update them to your My Domain URLs with a single click. |
| Visualforce pages | Lightning Experience Configuration Converter — Visualforce Pages tab | Most Visualforce pages work as-is in Lightning Experience. But there are a few Salesforce Classic features and attributes that aren’t compatible with the new interface. The Configuration Converter scans your org for pages that might need modification and provides instructions on how to proceed. You can also use the tool to automatically apply the Lightning look-and-feel to your Visualforce pages, without affecting how they appear in Salesforce Classic. |
| AppExchange packages | Lightning Experience Configuration Converter — AppExchange Packages tab | Scan your org for AppExchange packages and find out which ones are ready for Lightning Experience and which should be updated or replaced. |
| Attachments and classic notes | Magic Mover for Notes and Attachments tool | Move your org off attachments and classic notes so you can give your users a better experience and stop supporting unnecessary features. Download this Salesforce Labs app from AppExchange, then run it to automate the conversion of classic notes to enhanced notes and attachments to Salesforce Files. |
| Classic Knowledge base | Lightning Knowledge Migration tool | If your company uses Classic Knowledge, Lightning Experience users must switch to Salesforce Classic to do things like find or create Knowledge articles. Moving your Classic knowledge base into Lightning Knowledge gives your Lightning Experience users a seamless experience and much better workflow. When you’re ready, the Lightning Knowledge Migration Tool does most of the heavy lifting for you. |
To learn more about each of these tools, see Adjust Your Existing Customizations in Salesforce Help.
Launch Lightning Experience to Your Users
There comes a time in every successful project where you’ve planned everything, executed on all those plans, and then the launch date arrives. If this is your Broadway musical, then it’s opening night, and Salesforce admin, it’s your time to shine!
When it’s launch time, set up access to Lightning Experience for the intended group of users. If you’re doing a “big bang” rollout, set up everyone in your org. But if you’re rolling out to users gradually, set up just the users for your first group (and so on). Let’s take a closer look.
Decide Who Can Use Lightning Experience
To use Lightning Experience, users must have the Lightning Experience User permission. This permission is automatically enabled in all standard Salesforce profiles. But custom profiles don’t usually include this permission by default.
Whether you want to roll out Lightning Experience to everyone at once or do it in phases, use this checklist to make sure that you haven’t accidentally included — or excluded — someone.
| Want to roll out to a small group of custom profile users without giving access to everyone assigned to these profiles? | Create a permission set that includes the Lightning Experience User permission. Then apply the permission set to each user. |
| Want to roll out to everyone who’s assigned to a specific custom profile? | Edit the profile and enable the Lightning Experience User permission. |
| Have you created any custom profiles by cloning a standard profile? | Starting with Winter ’16, custom profiles inherit the Lightning Experience User permission from standard profiles. You can edit these profiles to disable the user permission, as needed. |
| Do you have users with standard profiles who aren’t ready for Lightning Experience yet? | Move these users to custom profiles that don’t include the Lightning Experience User permission. |
What Happens When Users Get Access to Lightning Experience
| If a user was added to Salesforce... | Their default interface when they get the Lightning Experience User permission is... | How it works |
|---|---|---|
| Before Lightning Experience was turned on | Salesforce Classic | These users can access Lightning Experience but they stay in Salesforce Classic until they switch themselves to the new interface. If you want, you can make Lightning Experience the default for some or all of these users. See Switch Users to Lightning Experience in Salesforce Help to learn how. |
| After Lightning Experience was turned on | Lightning Experience | These users log in directly to Lightning Experience. They can access Salesforce Classic, if needed. |
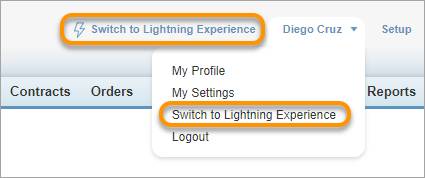
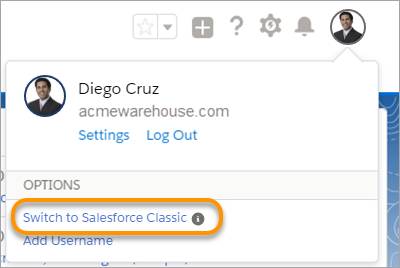
All Lightning Experience-enabled users automatically get the Switcher. Which they can use to...wait for it...switch between Lightning Experience and Salesforce Classic anytime they need.
- In the Salesforce Classic header, click Switch to Lightning Experience.
- In the Lightning Experience header, click the profile picture and select Switch to Salesforce Classic.
Rollout Mission Accomplished
Well done! You’ve successfully launched Lightning Experience and your users can dive into the new interface to their hearts’ content. Before rushing to the next phase in the transition, take a moment to celebrate. Have a launch party. Acknowledge everyone’s hard work. Indulge in some well-earned cake.
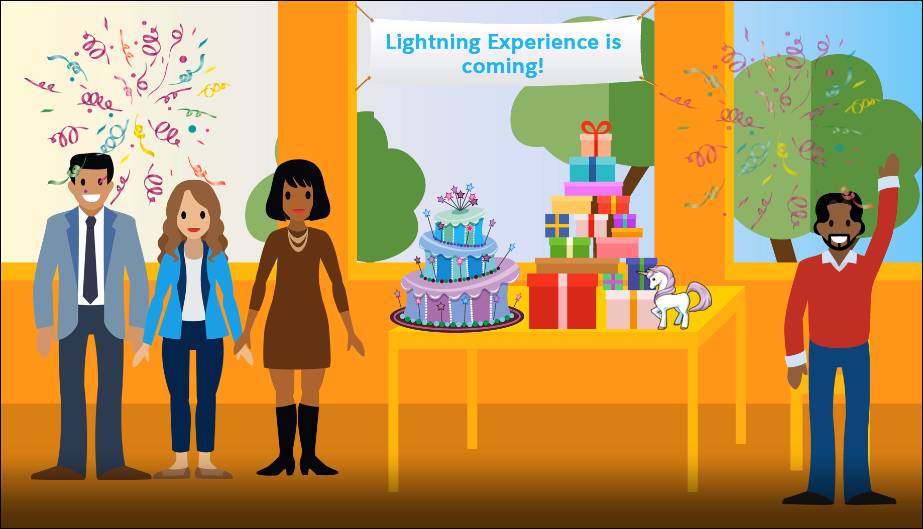
Then continue to the next unit and we’ll look at how to ensure a successful conclusion to your transition by making sure that everyone is getting what they need from Lightning Experience.
Resources
- Video: Manage Change for a Successful Transition
- Video: Lightning Experience Transition Tools
- Help: Get Started with the Lightning Experience Configuration Converter
- Video: Convert Your JavaScript Buttons
- Video: Prepare Your Visualforce Pages
- AppExchange: Magic Mover for Notes and Attachments
- Help: Lightning Knowledge Migration Tool
- Blogs: Lightning Experience Pro Tips Series
- Video: Lightning Experience at Your Pace
- Help: Set Up Users for Lightning Experience
- Help: Switch Users to Lightning Experience