Get Started with Journey Builder
Learning Objectives
After completing this unit, you’ll be able to:
- Navigate to the Journey Builder app.
- Describe key features of the Journey Builder dashboard.
- Describe key features and functionality of the Journey Builder canvas.
Get to Know the Journey Builder Dashboard
Marketers use Journey Builder to create and manage a variety of responsive, automated, multi-channel marketing campaigns, including:
- Welcome campaigns for new customers who subscribe or opt-in
- Promotional campaigns for new products, services, sales, or special events
- Reengagement campaigns for customers who abandon their cart or search
- Retention campaigns for customer birthdays, anniversaries, or renewal dates
Before we dive into the application, it’s important to understand that while Journey Builder is powerful and effective, it’s not a standalone product. Journey Builder uses the content and audiences you created in Email Studio, Mobile Studio, Advertising Studio, Content Builder, and Contact Builder within Marketing Cloud Engagement in order to do its work.
To begin using the Journey Builder application, log in with your Marketing Cloud Engagement username and password. If you’re not a Marketing Cloud Engagement customer or Journey Builder is not enabled in your account, don’t worry. In this and subsequent modules, we show you lots of screenshots and give you step-by-step instructions so you can see just how easy it is to navigate and use Journey Builder.
- Go to mc.exacttarget.com.
- Enter your Username.
- Enter your Password.
- Click Log In.
- In Marketing Cloud Engagement, hover over Journey Builder in the top navigation bar.
- Click Journey Builder.
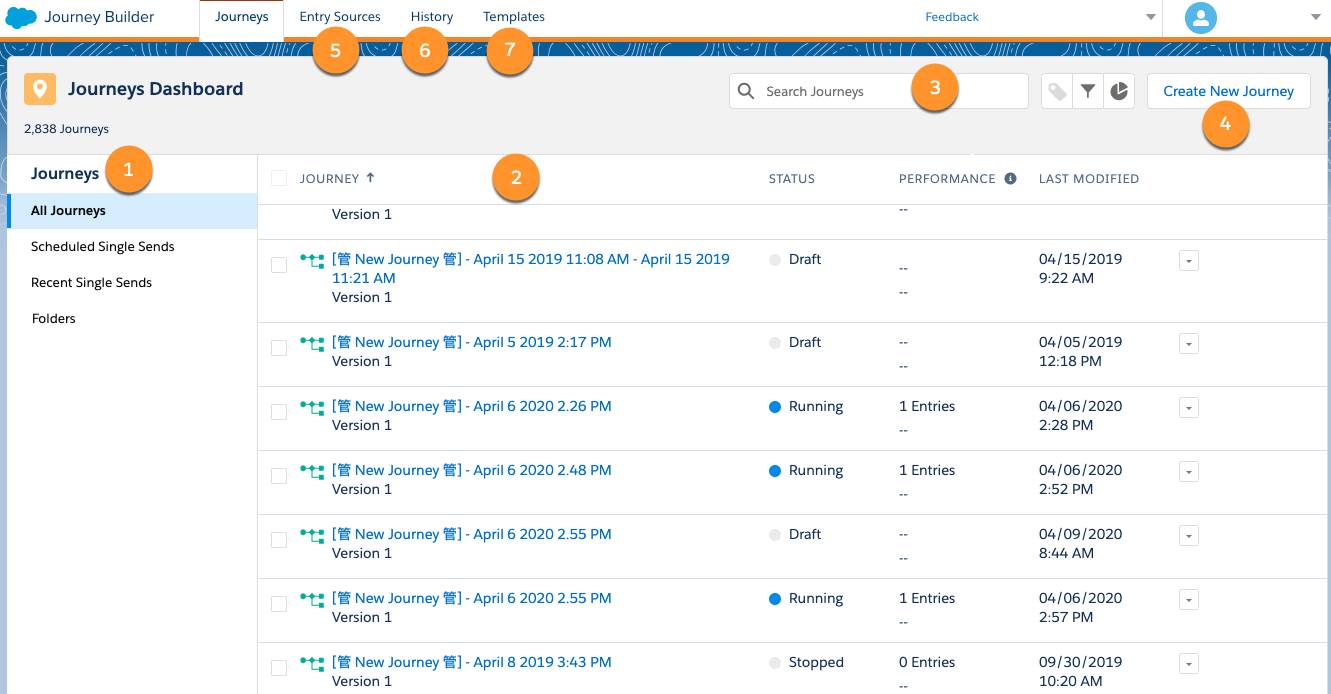
You’ve arrived! Now, let’s explore the components of the Journey Builder dashboard.
-
Journey Folders: Store journeys in folders so they’re easy to find. You can organize your journeys immediately after creating and saving them, or you can add journeys to folders from the Journey Builder dashboard at any time.
-
Journey: View a list of all journeys or the journeys available within each folder. This list includes status, performance, and when the journey was last modified.
-
Search Journeys: Looks at journey titles and descriptions to help you find specific journeys.
-
Create New Journey: This is your starting point to create a new journey from scratch or a template.
-
Entry Sources: View the entry sources previously used for your journeys. Entry sources can be unique or shared among journeys. From here, you can also test, copy, or delete entry sources.
-
Journey History: Use the Contact Key to view a contact’s path through a journey or journey version.
-
Journey Templates: Contains predefined, editable journeys that show in-context guidance based on common use cases and marketing best practices. Get a head start creating your journey with Journey Templates.
Explore the Journey Builder Canvas
Now that you’ve toured the Journey Builder dashboard, let’s take a look at the Journey Builder canvas. The canvas looks slightly different depending on the status of the journey. Let’s start by looking at a journey in draft status. Click Create New Journey or click an existing journey draft. We discuss how to create a single-send journey later in this module, and you can learn about building more complex journeys in Journey Builder Campaigns. Right now, let’s focus on what’s available on the canvas.
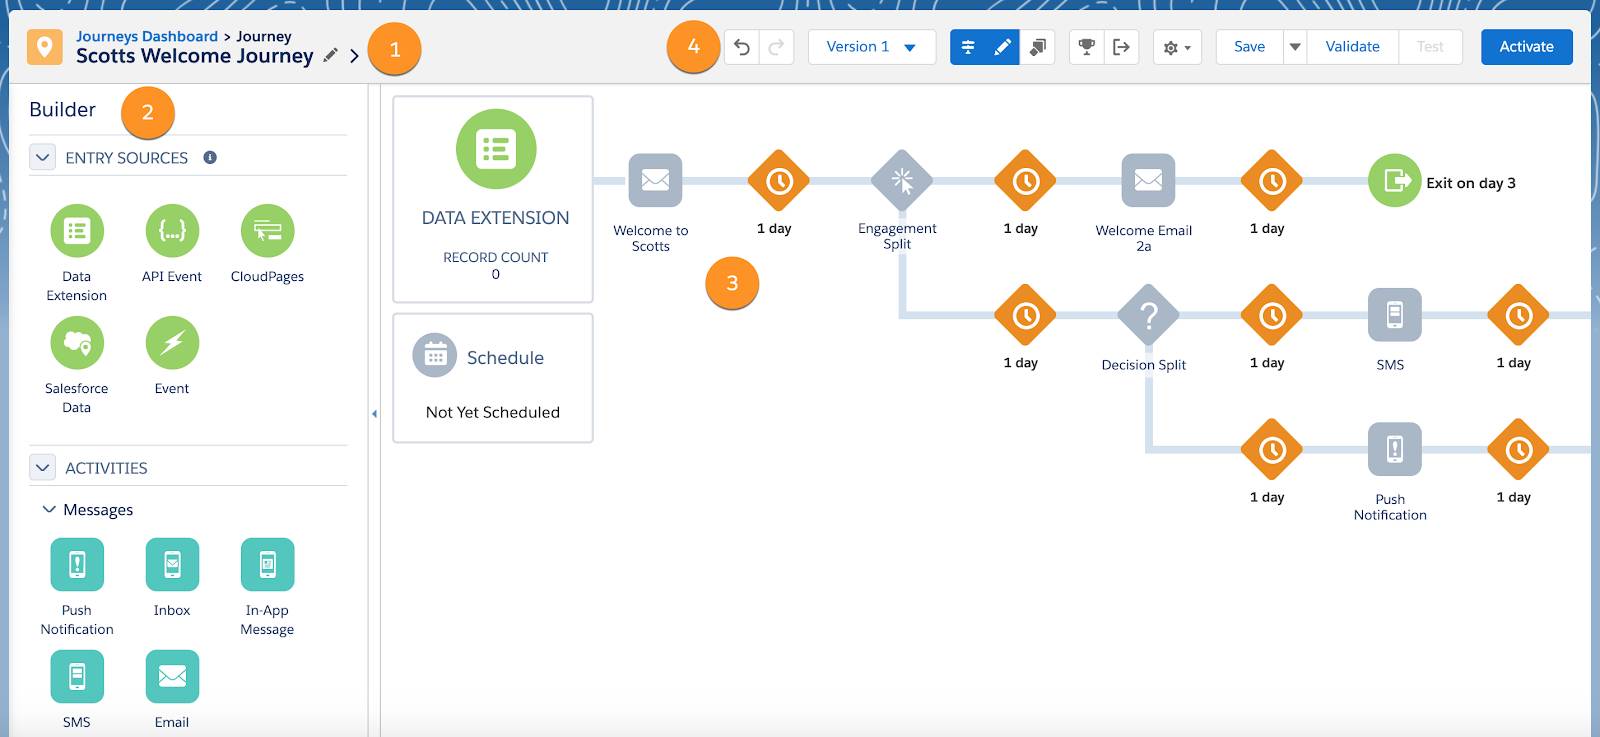
The canvas has four components:
- Journey title and description
- Entry sources and canvas activities
- Journey Canvas
- Journey Builder toolbar
Let’s look at these in more detail.
Journey Title: The first thing you notice is the title and a description of the journey you’re viewing. If you are creating a new journey, add a title and description here. You will also see which version of the journey you’re viewing. If there is more than one version, you can click to see other versions. We talk more about journey versions later.
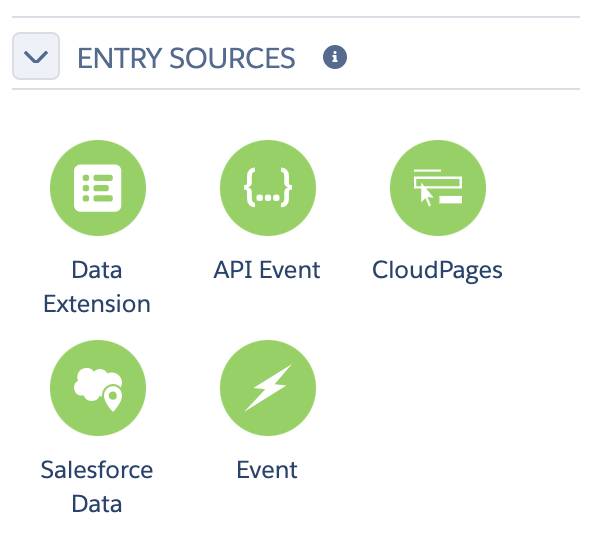
Entry Source: This tells Journey Builder the data source for a particular journey. Entry sources include Data Extensions, API events, audiences, CloudPages, Salesforce data, or events. All journeys must begin with an entry source.
Canvas Activities: These are available message actions, decision points, updates, or a combination of these elements that guide the customer journey until the customer reaches a goal or the endpoint of the journey.
-
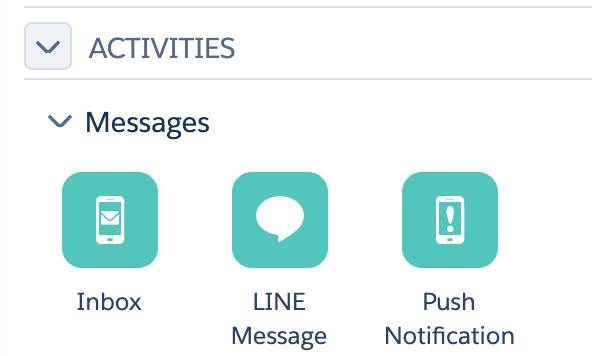
Message Activity: Includes email, SMS, push notifications, or any other form of content sent to your contacts.
-
Advertising Activities: Ad Audience allows you to build an advertising audience in Journey Builder. Ad Campaign lets you create an advertising audience and a simple Facebook advertising campaign without leaving Journey Builder.
-
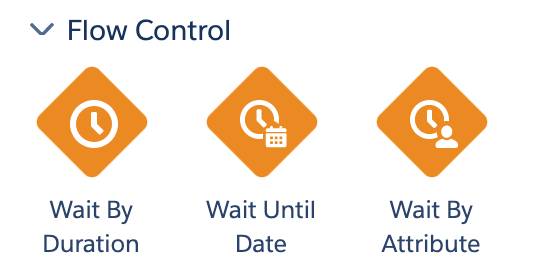
Flow Control Activities: Flow control activities are how you manage your contact’s experience through the journey.
- A Wait activity pauses your customer between activities for a certain amount of time before they move to the next activity. During Wait activities, Journey Builder evaluates customers to see if they have met a goal, reached criteria for a decision split, or engaged with a message.
- Use Split activities to customize the path a customer takes based on their interactions with messages or other actions, either randomly or by using Einstein.
- A Join activity returns contacts to the original path after they’ve gone through a split activity that separated them from the original path.
- Use the Wait Until activity to pause your customer between activities for a period of time set by you.
-
Customer Updates: This activity prompts the Marketing Cloud Engagement system to update a contact’s information in a data extension.

-
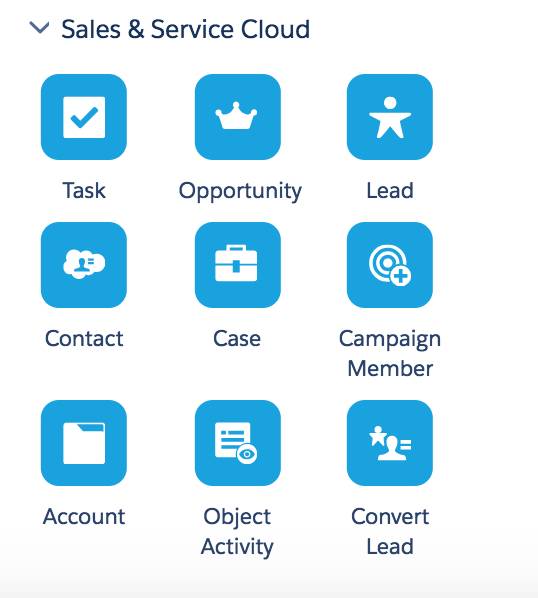
Sales & Service Cloud Activities: Use these activities to interact with Salesforce Sales & Service Cloud within Journey Builder. These activities are only available in accounts that have the Marketing Cloud Connector installed.
Journey Canvas: The Journey Canvas is where you drag and drop canvas activities to build the customer journey—in other words, where the magic happens. We go into more detail when we create a journey in the Journey Builder Campaigns trail.

Journey Builder Toolbar: Finally, the toolbar shows the status of the journey you’re viewing. This is also where you manage the journey you’ve created.
- Undo, redo, copy, and paste actions related to the journey plan.
- Toggle open or close the sidebar containing canvas activities.
- Turn on guidance.
- Set a goal.
- Define exit criteria.
- Edit settings.
- Save, validate, test, and activate the journey.

We go into more detail when we create a journey in the Journey Builder Campaigns module.
View an Existing Journey
Now let’s take a look at the journey canvas when a journey is running or stopped.
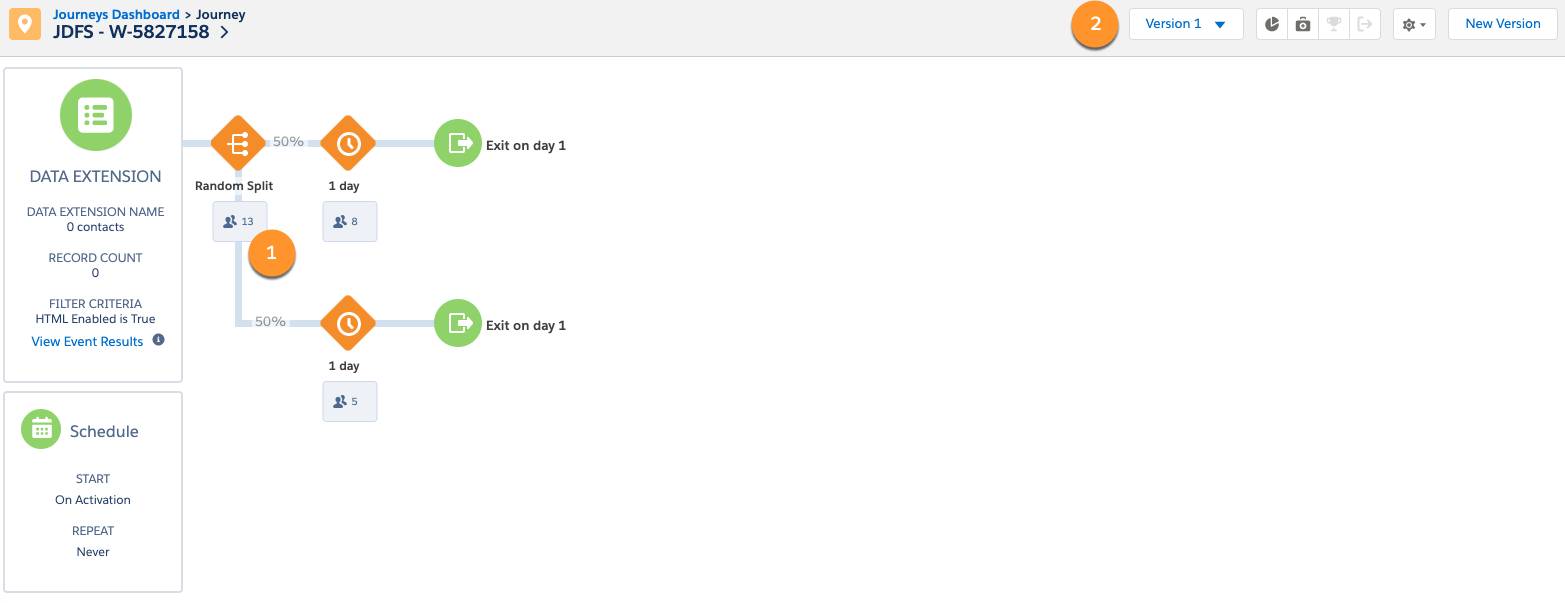
The primary difference between a stopped journey and a running one is that your builder containing entry event and canvas activity options is hidden. However, now you can see how many contacts completed each step in the journey (1). The toolbar (2) now provides the option to stop the journey if it is running, or start a new version of the journey. You also have the ability to check the overall health of your journey.
Now that you’re familiar with the Journey Builder app, you can begin putting the principles you learned in the Customer Journey Basics module to work.
