Examine an Integration Use Case
Learning Objectives
After completing this unit, you’ll be able to:
- Describe the challenge of keeping new or updated customer service cases in Salesforce in sync with issues in Jira.
- Explain how to use MuleSoft Composer to sync new or updated customer service cases in Salesforce with issues in Jira.
- Prepare to create a flow.
Before You Start
This module builds on MuleSoft Composer Installation and Configuration, so make sure to complete it before you continue. Recall from that module, you need to have the MuleSoft Composer User permission set if you want to build and run integration flows.
In this module, we assume you’re an authorized MuleSoft Composer user. If you’re not a MuleSoft Composer user, that’s OK. Read along to learn how they perform the steps. Don’t try to follow the steps in a Trailhead Playground, because MuleSoft Composer isn’t available in the Trailhead Playground.

In this unit, you step into the role of admin for Northern Trail Outfitters (NTO), an outdoor and recreational gear retailer. First, you examine an integration challenge faced by NTO, and then you learn about a MuleSoft Composer integration solution. Finally, you learn how to prepare to create your flow.
Integration Challenge
Let’s take a look at an integration challenge NTO is facing. Your customer support team at NTO manages and maintains customer service cases in the NTO org’s Service Cloud. Your engineering team plans, tracks, releases, and reports product issues such as epics, stories, tasks, subtasks, and bugs in Jira. To improve customer service and foster team collaboration, both teams need to have immediate visibility into critical customer data about product issues to diagnose and resolve cases.
Currently, the two teams perform these tasks manually. Every time there’s a support case that requires engineering assistance, the customer support team creates the case in Service Cloud. Next, they send an email with relevant case details to the engineering team. Finally, the engineering team creates an issue with the case details in Jira and works to resolve it. This process is time-consuming and highly error-prone, so the teams want to automate it.
Integration Solution
As a solution, you need to automate the integration between the NTO org’s Service Cloud and Jira to achieve near real-time integration. To do this, you use MuleSoft Composer to create an integration flow that automatically syncs new or updated customer service cases in Service Cloud with issues in Jira. Specifically, the flow must perform the following tasks.
- Find any new or updated case that requires engineering assistance in Service Cloud.
- Determine if a corresponding issue exists in Jira.
- If a corresponding issue doesn’t exist:
- Create an issue with relevant case details in Jira.
- Update the case with the Jira issue ID in Service Cloud.
- If a corresponding issue exists, update the issue with relevant case details in Jira.
To implement the solution using MuleSoft Composer, you perform these flow creation tasks.
- Prepare to create a flow.
- Design and test a flow.
- Activate a flow.
- Monitor and troubleshoot a flow.
You learn how to perform these tasks in the rest of this module.
Prepare to Create a Flow
Ready to get started?
First, gather all required information about the systems and assets your flow is going to use. The following table describes the systems the flow needs to connect to and the information you need for those systems.
System |
Required Information |
|---|---|
NTO’s Service Cloud |
|
Jira |
|
As a best practice, use a test environment for these systems and data when you design and test your flows. After you complete testing, run the flows using your production systems and data.
Next, you learn about the prerequisites for your Salesforce and Jira environments.
Prerequisites for the Salesforce Environment
First, we assume you have a sandbox org and a production org to build and run flows that sync with Salesforce.
Note: If you don’t have a sandbox org to design and test your flows, you can use a developer org.
Follow these steps to sign up for a free developer org.
- Go to https://developer.salesforce.com/signup.
- Enter your contact information.
- Enter a unique username.
- Click Sign me up, and wait for your welcome email.
- In the welcome email, click the link to set your password.
Next, when you create a connection to Salesforce using MuleSoft Composer, you’re prompted to grant MuleSoft Composer permissions. Ensure your Salesforce accounts for both your sandbox and production orgs are ready to grant MuleSoft Composer the following permissions.
- Access the identity URL service.
- Manage user data via APIs.
- Perform requests at any time.
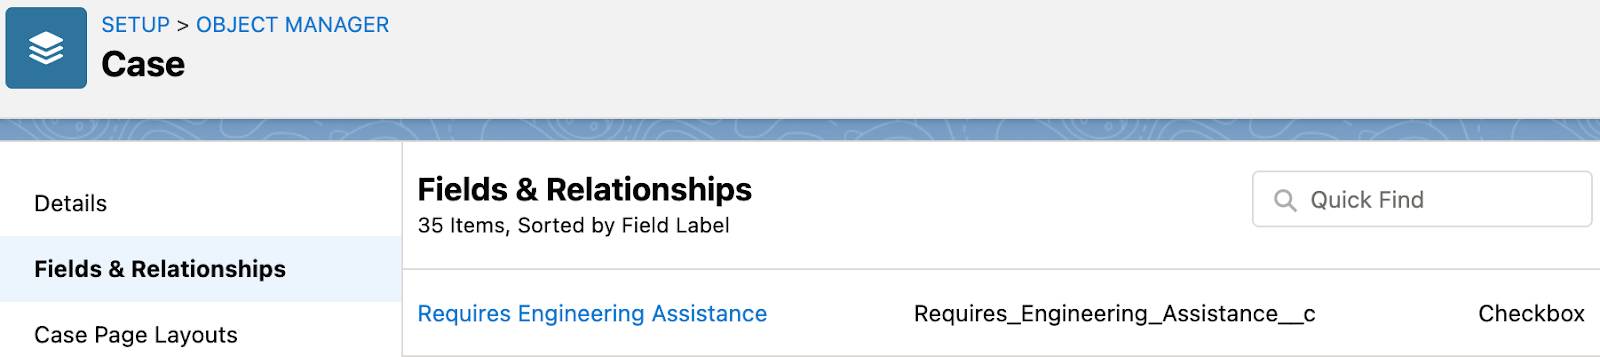
Then, to determine whether to create a Jira issue for a case, ensure a checkbox custom field called Requires Engineering Assistance is created for the Case object in the NTO org. Here’s an example of Requires Engineering Assistance for Case in the NTO org.
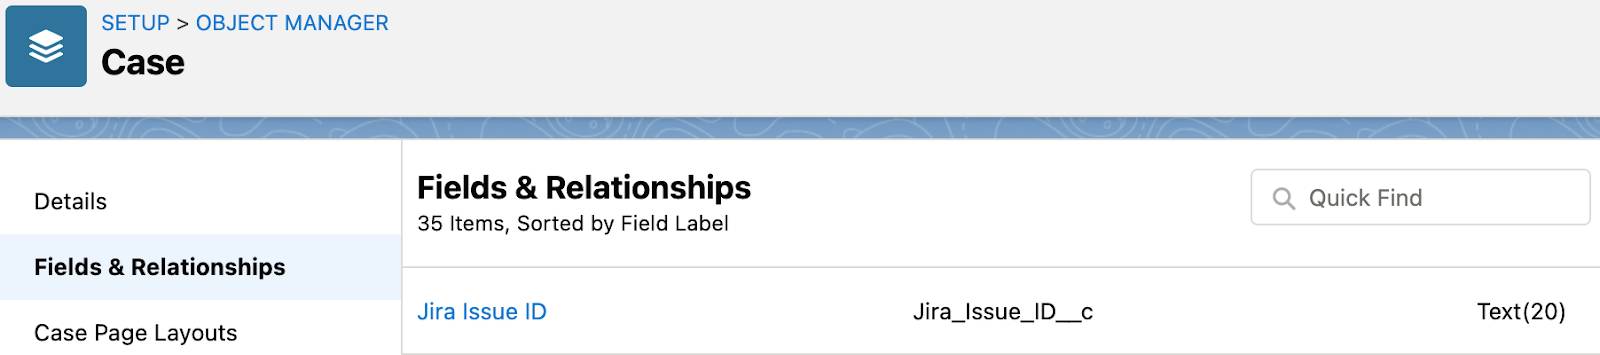
Finally, to capture the Jira issue ID for the Case object, ensure a text custom field called Jira Issue ID is created for the Case object in the NTO org. Here’s an example of Jira Issue ID for Case in the NTO org.
To learn how to create custom fields, see Customize a Salesforce Object.
Prerequisites for the Jira Environment
First, when you create a connection to Jira using MuleSoft Composer, you’re prompted to grant MuleSoft Composer a number of permissions to your Jira account. Be ready to grant MuleSoft Composer the following permissions.
- View user, project, and issue information.
- Create, edit, and delete issues, post comments, and create worklogs.
- Create and edit project settings and project-level objects.
- Take administration actions.
Next, to create Jira issues for NTO customer service cases, you need to have a Jira project. Follow these steps to create a Jira project.
- Log in to Jira using your email address and password.
- Select the Projects menu, and then click Create project.
- Click Select company-managed.
- Enter
Customer Supportas the project name andCSas the key, and then click Create. The Customer Support project appears.
Finally, to populate Jira issues with Salesforce case IDs and case reasons, you need to have two corresponding Jira custom fields. Follow these steps to create two Jira custom fields called Salesforce Case ID and Salesforce Case Reason.
- Click the Settings icon and click Issues.
- Under FIELDS, select Custom fields.
- Click Create custom field.
- Select All to view all available field types.
- Select Text Field (single line) and click Next.
- In the Name field, enter
Salesforce Case ID, and then click Create.
- Select CS: Scrum Bug Screen, CS: Scrum Default Issue Screen, Default Screen, Resolve Issue Screen, and Workflow Screen, then click Update.
- Repeat steps 3 through 7 to create another custom field called Salesforce Case Reason.
You’ve taken the first steps to prepare to create your flow with MuleSoft Composer. In the next unit, you learn how to design your flow.
Resources