Configure Your App
Learning Objectives
After completing this unit, you’ll be able to:
- Set different process types for Heroku deployments.
- Manage configuration efficiently and securely with config vars.
- Manage dependencies.
- Monitor app issues with Heroku’s logging system and real-time logs.
Wei meets with her team about some new additions to the app. The changes include updating the app’s start command, adding a Node.js library, and adding an API key. Wei sets out to learn about how to make these changes in the app.
Configure the Procfile
Heroku apps include a Procfile that specifies the commands that the app executes at startup. It’s a simple text file named Procfile, without a file extension. It must live in the app’s root directory.
A Procfile lists its processes on individual lines like this:
<process type>: <command>
- <process type> is the name of the command.
- <command> indicates the command that each dyno of the process type executes on startup.
The Web Process Type
A web process type is a special process type that receives external HTTP traffic from Heroku’s routers. If a Heroku app includes a web server, it must use the web process type. For this example Procfile, every web dyno executes the command npm start on startup: web: npm start.
Remember…
- The most common process types are
webandworker.
- Heroku runs one web dyno automatically, but other process types won’t start by default.
Manage Config Vars
To keep secrets secure and eliminate hard-coded values, store an app’s environment-specific configuration in environment variables. On Heroku, you can use config vars to store environment variables.
Use one of the following to view, set, or remove a config var.
-
Heroku Dashboard: In the app’s Settings tab
-
Heroku CLI: $heroku config commands
-
Platform API: Use a valid Heroku access token for the REST client
In the Heroku app’s dashboard (https://dashboard.heroku.com/apps/<app-name>), go to Settings and click Reveal Config Vars to add or edit your variables.
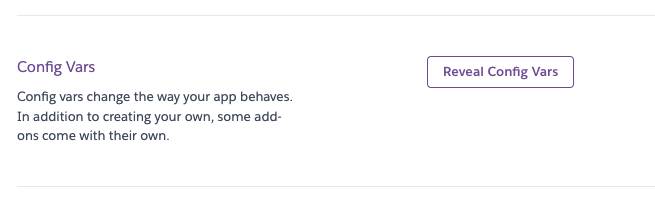
[Alt text: Config Vars section within the Settings tab of the Heroku Dashboard.]
The application is reaching out to an external system which requires authentication. Wei is looking to store the secret key securely outside of the code. She wants to use a config var in her code instead of hard coding the value which would then end up exposed in source control for anyone with access to see.
Access Config Var Values from Code
In Node.js, use process.env to access your config vars.
For example, Wei can access the app’s SECRET_KEY config var with process.env.SECRET_KEY. Wei updates the app code to use this config var value.
Remember…
- Config var keys can only use alphanumeric and underscore characters.
- Config var keys cannot include hyphens.
- Config var data cannot exceed 32 kb for each app.
- Config var keys should not begin with a double underscore.
- Config var’s key should not begin with HEROKU_.
Manage Dependencies
Node.js dependencies are specified in the app’s package.json file. Wei adds a new one to the file, but wonders how to get it installed on Heroku.
Buildpacks are a set of scripts that retrieve dependencies and help turn your source code into a form that can execute on Heroku. There’s a collection of officially supported buildpacks. For example, this official Heroku buildpack for Node.js apps.
By default, Heroku automatically detects the correct language buildpack to use with your app. The presence of a package.json file signals to Heroku to use the Node buildpack. To add a dependency to a Node.js app on Heroku, Wei adds it to package.json, and runsnpm install. That command generates a package-lock.json file. The next time she runs git push heroku main, the new dependency installs with her code deploy.
If Heroku’s officially supported buildpacks don’t meet your requirements, you can search for custom, third-party buildpacks in the Elements marketplace.
Dive into Logging
Wei wants to view her app’s logs for debugging, monitoring, and auditing.
Heroku combines the output of all running processes, system components, and other services for an app into a single stream of runtime logs. Heroku aggregates these categories of logs into that stream.
-
App logs: Log output from the application.
-
System logs: Log messages from Heroku platform on behalf of the application.
-
API logs: Log messages from admin action and developers working on the app.
-
Add-on logs: Log messages from add-on services.
Heroku’s Logplex router is responsible for collating and distributing the log entries generated by your app and other components of the Heroku platform. It’s a high-performance, real-time system for log delivery. It retains the last 1,500 lines of the consolidated logs which expire after 1 week. It’s highly recommended to forward your logs to another service for longer retention. The Heroku Elements Marketplace has many third-party providers for logging add-ons. (You learn more about add-ons in the last unit.)
View Logs
A developer can view an app’s runtime logs using the following methods.
- Heroku CLI:
- Get the past 100 loglines:
heroku logs
- Real-time tail:
heroku logs –tail - Add flags to filter the logs by source (
-s) or dyno (-d)
- Get the past 100 loglines:
- Heroku Dashboard:
- Go to https://dashboard.heroku.com/apps/<app-name>
- Select More | View Logs.
- Go to https://dashboard.heroku.com/apps/<app-name>
- Logging add-on:
- Use one of the logging add-ons
- Use one of the logging add-ons
Log Format
Here’s the output format for runtime logs.timestamp source[dyno] : message
-
Timestamp: The date and time when the log was generated.
-
Source: Dynos (web dynos, workers, and so on) have the source (
app). Heroku system components have the source (heroku).
-
Dyno: The name of the dyno or component that wrote the logline.
-
Message: The content of the logline.
In this unit, you learned about Procfile, config vars, buildpacks, and logging to successfully run an app on Heroku. Next, Wei wants to double-check that all the developers on her team have a local environment that matches Heroku’s to streamline development.