Create Offers
Learning Objectives
After completing this unit, you’ll be able to:
- Create an offer and apply a product specification to the offer.
- Add an attachment to an offer.
- Add a price to an offer.
- Summarize the requirements for releasing a product.
Offer It Up
Infiwave Product Designer Devi has successfully configured product specification (spec) for the new smartwatch product, Infiwatch 5. There’s just one more step that he must take to make his product available for sale. Soon, customers from all over will be sporting the brand new smartwatch. In this unit, follow along as he creates the smartwatch offer using the product spec he configured in the previous unit. He follows these steps.
- Create a product with an offer specification type and assign a product spec to the product.
- Specify metadata for the offer.
- Add an image attachment to the offer.
- Assign a price to the offer.
Create an Offer
In Vlocity Product Designer, navigate to the Products tab, and click Create New Product.

On the New Product page, enter basic information for the offer and assign the Infiwatch 5 product spec so the offer inherits its attributes.
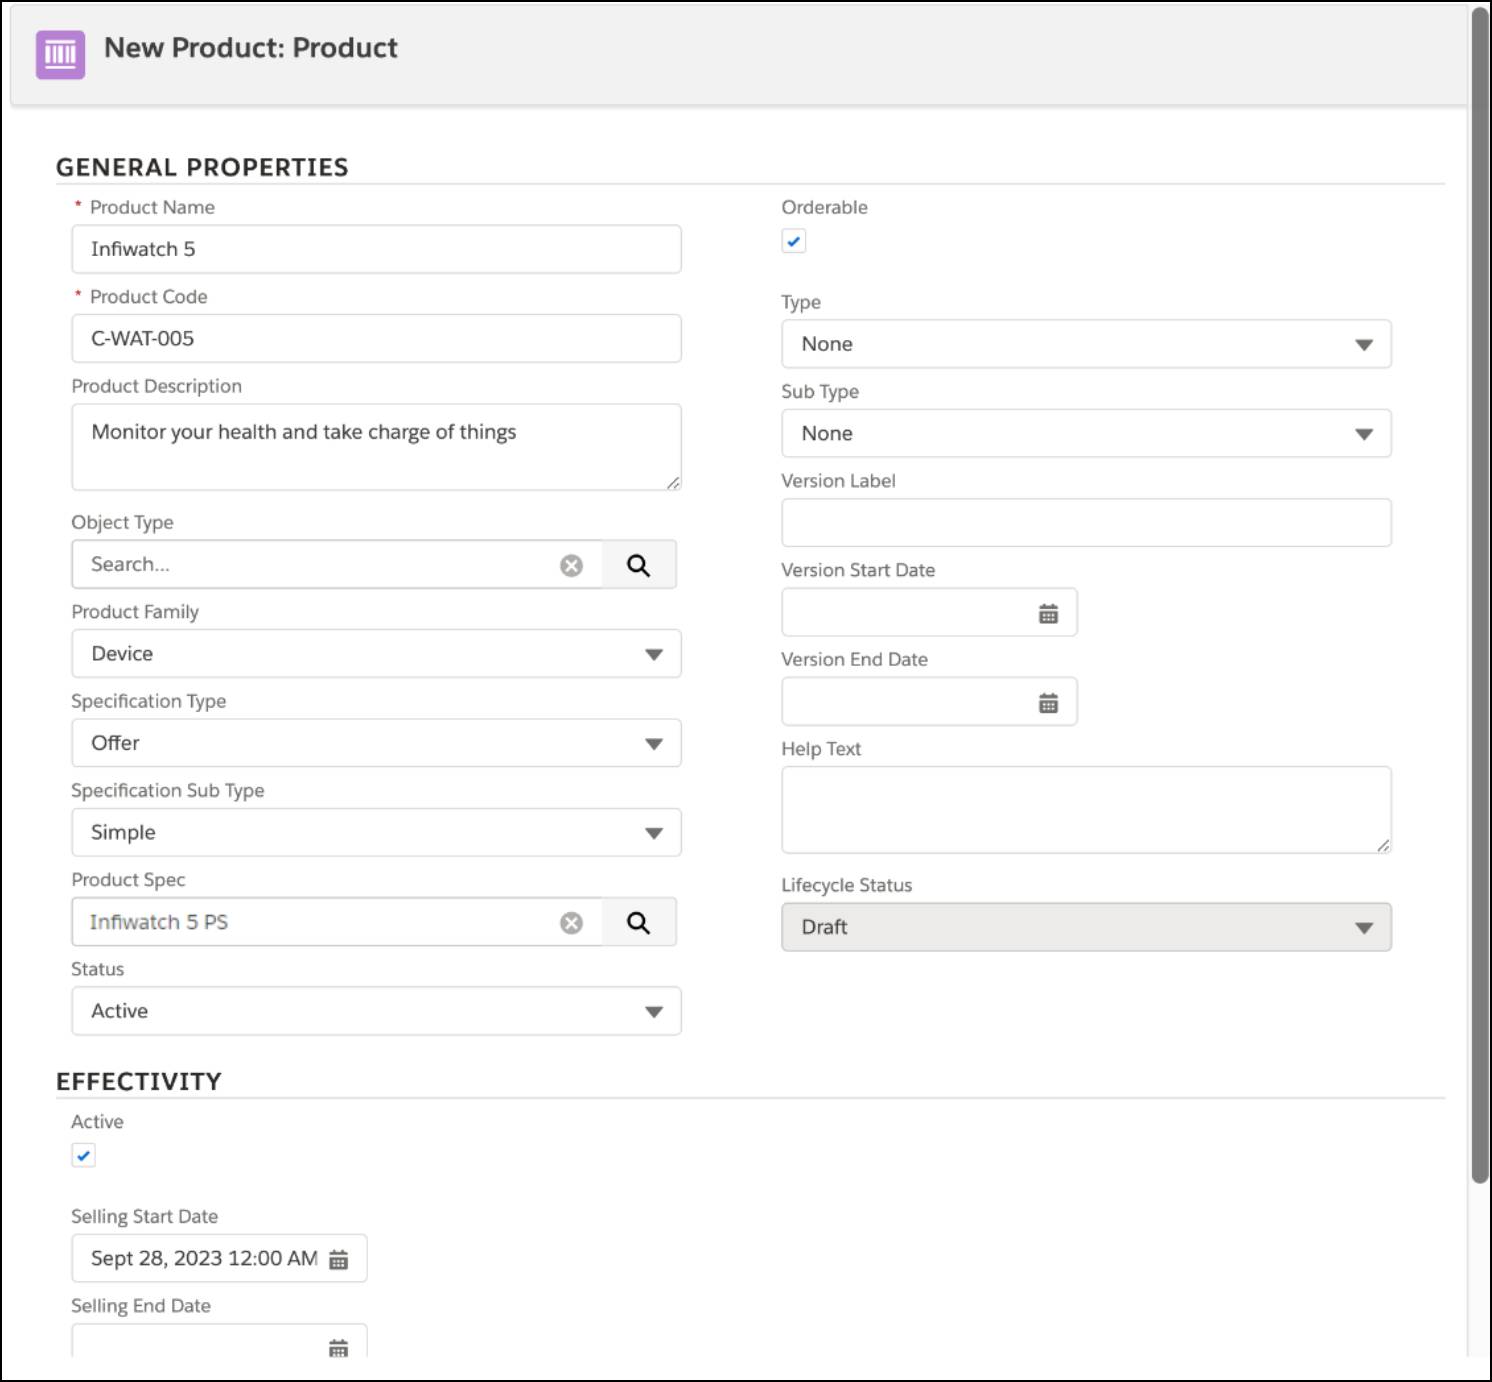
To apply a product spec, set the product’s Specification Type to Offer and its Specification Sub Type to Simple. To make the product orderable in the CPQ Cart, set Status to Active, and select Orderable.
In the Effectivity section, select Active, and set the Selling Start Date and Fulfillment Start Date to today’s date. This step makes the product available for sale and fulfillment immediately.

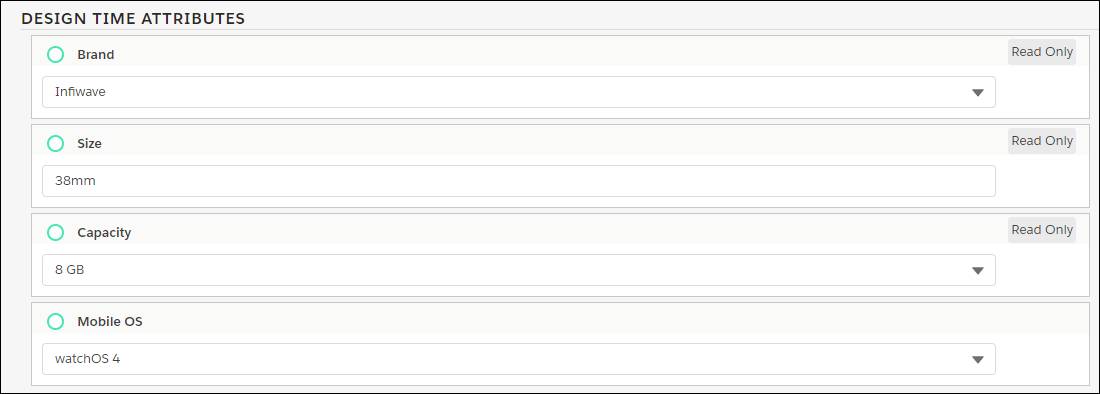
On the Infiwatch 5 offer page, notice that the design-time and run-time attributes are inherited from the product spec. Nice!
Click the Structure tab and notice the dotted line indicating the relationship between the offer and the product spec.

For product bundles, you can use the Structure tab to view and configure parent and child products.
Add an Attachment to an Offer
Next up, Devi adds an image of Infiwatch that appears in the Cart alongside the product. On Infiwatch 5 product page, click the Attachments tab, and drag and drop the image on to the upload area.

Enter basic information, and save the attachment.
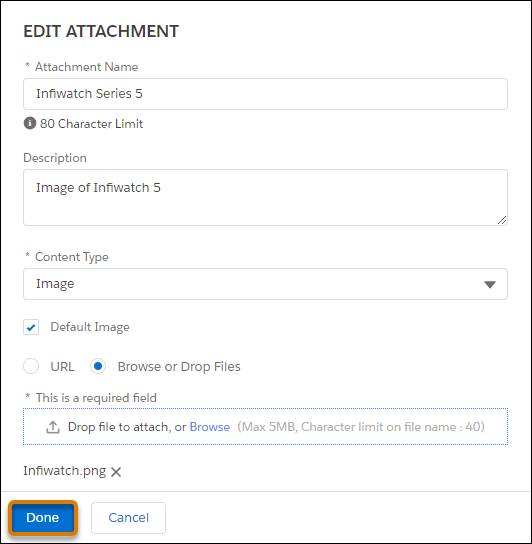
On the Attachments tab, you can store multiple files and images related to the product.
Navigate back to the Details tab, and click to display the new product image. Wow, the Infiwatch is looking good! 
Add a Price to an Offer
Finally, Devi adds a base price to the product. Click the Pricing tab and then click New Price.

Notice that this tab also displays the applied promotions and costs for the product.
In the Price List field, search for and select the B2C Price List. In the Display Name field, enter a price that shows next to the product in the Cart.

Notice that there’s also an option to make the price a virtual price, which is used for parent products in a bundle for price rollups. We explore bundle prices later in this module.
In the Pricing Details section, notice that the Type is set to Charge by default. Enter an amount to match the display text.
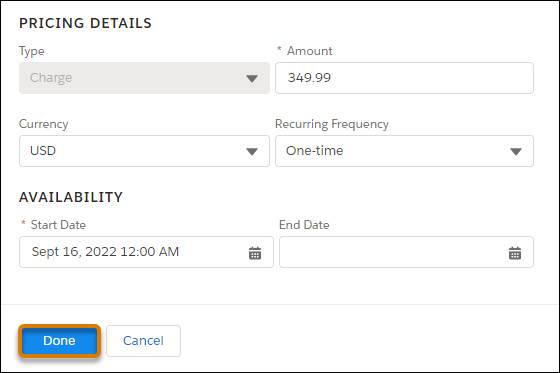
In the Prices section, you can also change the currency, or whether the frequency is one-time or recurring. Under Availability, make sure the Start Date is set to today’s date to make the charge available immediately. Also, make sure that the product has an available price so that it displays in the Cart.
Devi expands the Prices drop-down to see the new price entry.

Notice that you can add Rules (1) directly to the price, or Edit or Delete it (2).
There are three additional tabs on the Product page: Attribute Rules, Context Rules, and Fulfillment.

Here’s a quick summary of what you can do with these tabs.
- The Attribute Rules Tab: Manage rules that define how the product’s attributes and their values are displayed or hidden from users at run time.
- The Context Rules Tab: Manage rule sets that control what products, promotions, and prices appear in the Cart. Context rules provide loads of capabilities for customizing how your catalog offerings are sold.
- The Fulfillment Tab: Set orchestration scenarios and decomposition relationships to drive order fulfillment.
Release the Offer
Devi takes a moment to admire the new Infiwatch product he’s just created. Then he makes sure that he’s accurately included and defined all the necessary fields and attributes for the product. He remembers that in order for a commercial product to be visible, searchable, and sellable in the Cart, it must:
- Have a price.
- Be active.
- Be orderable.
- Have a valid selling start date.
Test the Offer in the Cart
Just to make sure everything’s working properly, Devi creates a new order in the Cart and sets it to use the same business-to-consumer (B2C) price list as the product. He searches for the product in the product list, and sure enough, there it is.
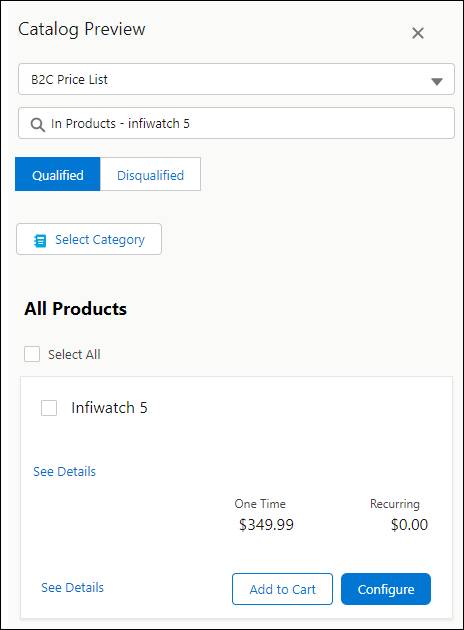
Devi checks if the run-time attributes are configurable in the Cart, and everything is working as expected. Great Job, Devi!
The Infiwatch is now available to customers, and Devi is getting a lot of appreciation from his seniors. Next up, he expands his Product Designer skills by learning to configure product bundles.