Create Time Plans and Time Policies
Learning Objectives
After completing this unit, you’ll be able to:
- Describe how time plans and time policies work in Enterprise Product Catalog (EPC).
- Create a time plan for a product’s price.
- Build a time policy for a product’s price.
Back to the Real World
Infiwave pricing manager Ada has returned from a joyful and restful vacation in the tropics. She’s now ready to roll up her sleeves—not only to show off her suntan—but to get back to developing pricing configurations for Infiwave’s products. Her first item of the day is to create time plans and time policies for subscription products. This way, she can set limits on the duration of recurring product prices.
Time Plan and Time Policy
Products such as data plans, internet services, and other ongoing subscription products generally have a recurring price. Because you may want to change or limit special pricing to a specific time frame, Shared Catalog contains time plans and time policies to help manage these price changes. You can apply time plans and policies to base prices, adjustments, or overrides.
A time plan is the length of time that pricing applies to a product measured by days, weeks, months, or years. A time policy indicates the event that triggers when the time plan should start and stop. When you create a time policy, you can set a start policy, such as the purchase date, cycle start date, first day of the month, or when the product activates. For the end policy, you can select events such as the last day of the month, cycle end date, or end of plan duration.
In this example, you can see a time plan and time policy for a 2-year cellular service subscription.

Here, the time plan sets the monthly price to be active for 24 months. The time policy begins upon activation of the product and then expires at the end of the 24th month.
Creating a Time Plan and Time Policy
Ada has a few products in mind that could benefit from a time plan and time policy. She starts by limiting a data plan product’s price to four years from the date of activation. She can then reuse these timing components in future price configurations.
Create a Time Plan
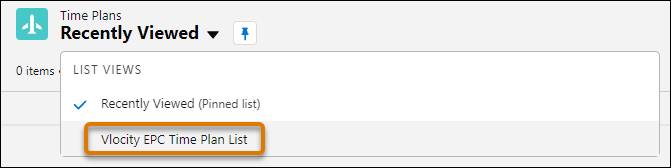
Launch Pricing Designer, and select Time Plans from the navigation menu.

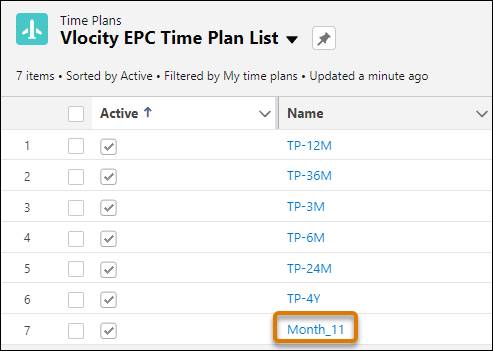
Change the List View to show Vlocity EPC Time Plan List.
Here check the list of existing time plans to make sure there isn’t already an available 4-year time plan. If you don’t see one, click New.

On the New Time Plan screen, you can enter the following information.
Field |
Value |
|---|---|
Name |
TP-4YBest practice is to indicate the duration of the plan in the name. |
Description |
4 year plan |
Total Duration |
4 |
Total Duration Unit of Measure |
Year |
Active |
Selected |
Effective Start Date |
Today’s date |
Here’s the New Time Plan configuration screen.

Next up, Ada needs to specify when the time plan will start and end.
Create a Time Policy
Click Time Policies from the navigation menu, and select Vlocity EPC Time Policy List from the list view.

Click New to create a new time policy. On the configuration screen, enter the following information.
Field |
Value |
|---|---|
Name |
TPOL-ACTSTART-ENDPLAN |
Description |
Activation to end of plan |
Start Time Policy |
Activation Start |
End Time Policy |
End of Plan Duration |
Active |
Selected |
Effective Start Date |
Today’s date |
Set the time policy to begin with the date the product activates, and expire when the plan ends.

Also notice that you have options to make the policy proratable, or delay the start of the policy.
Apply a Time Plan and Time Policy in the Industries CPQ Cart
Ada finishes setting up the time plan and policy. Next, she explores how to apply these in the Cart so she can show this process to sales associate Arif later.
Open Industries CPQ, create a test order, and add the 5G Data Plan product to the Cart.
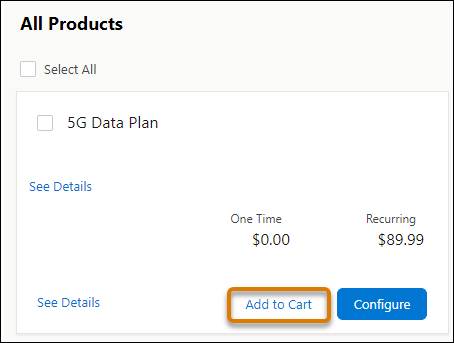
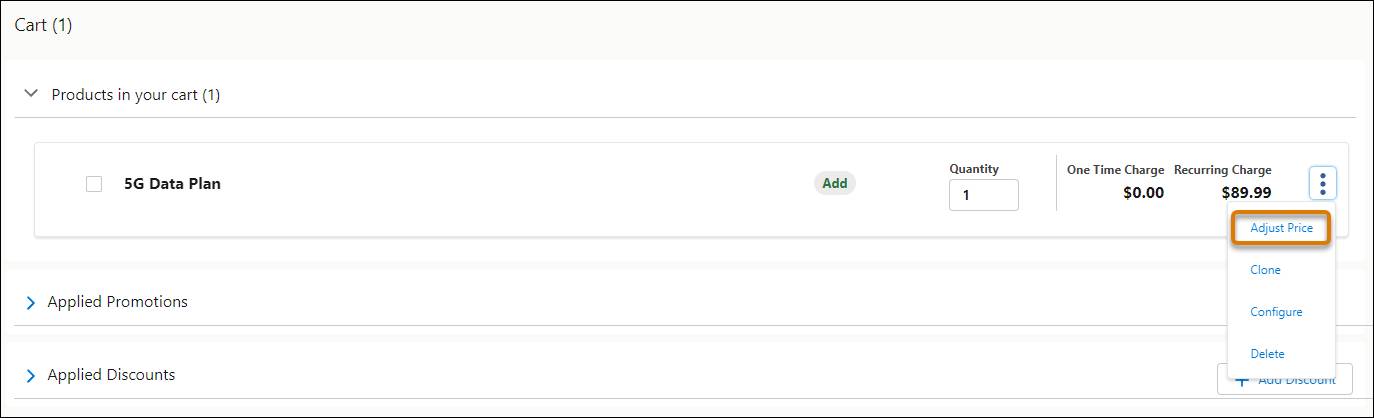
Make a note that the product has a recurring price of $89.99. Click Adjust Price next to the line item to apply an adjustment.
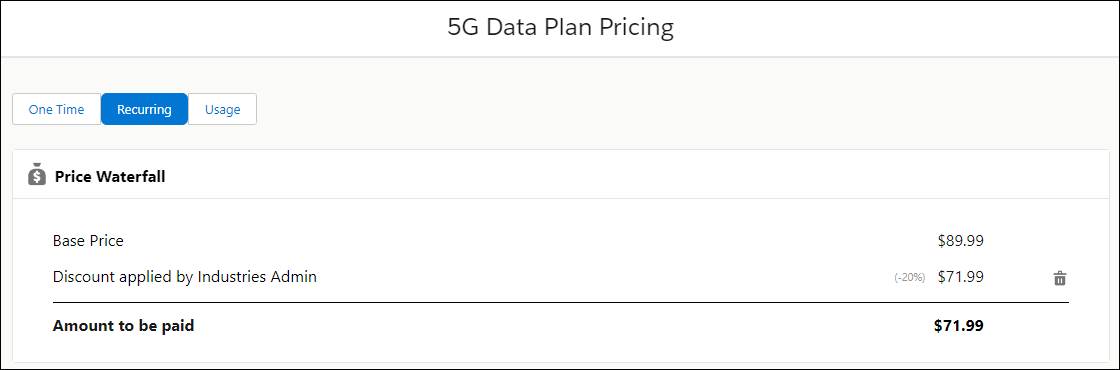
Here, you click the Recurring tab and apply an adjustment to reduce the recurring price by 20%. Click the Limit Time Adjustment checkbox to open the Duration and Policy settings, and choose the time plan and time policy you just created to limit the price adjustment to 4 years from the start of activation. Then click + Add to apply the adjustment to the line item.

The Price Waterfall updates to show the 20% discount.
Ada’s excited to show Arif how easy it is to put time limits on the discounts offered to customers.
Set a Time Plan and Time Policy for a Base Price
Ada now has a good understanding of how she can apply time plans and policies to adjustments in the Cart, but what if she wants to build these timing components directly into a product’s price? She explores this capability by opening the B2C Price List and searching for the No Limits Data Plan product to view its current price list entry.
The first thing she does is end the current pricing.
Click the price list entry and set its effective end date to today’s date.

Now, click New Charge and enter the new pricing information for the No Limits Data Plan. Click Add Timing to expand the same time plan and time policy options you saw when creating these components earlier. This time, you’re building these settings directly on the new charge.
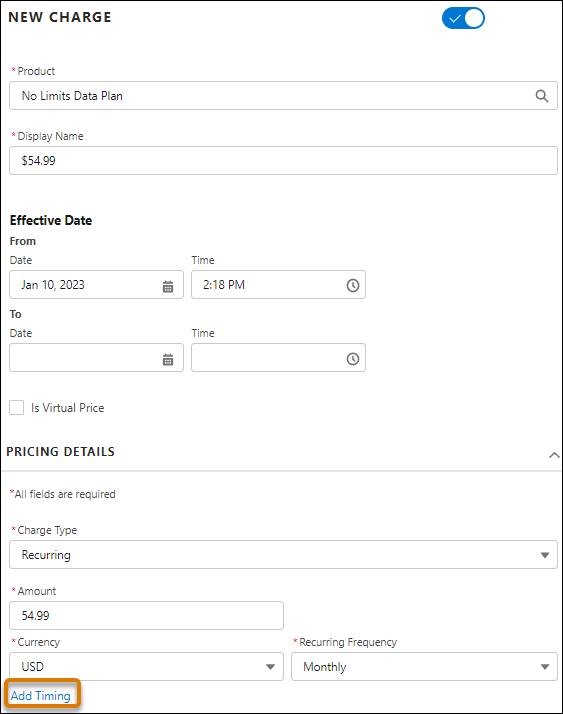
In the Timing section, set the plan’s Duration to 11 months and the plan to start on the Purchase Date. Then click Add Delay to expand the options for offsetting the new time plan.
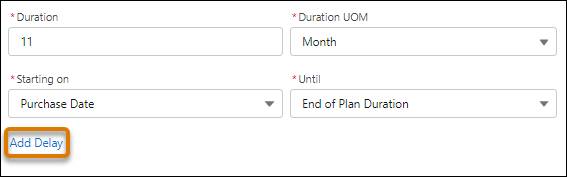
Set the Delay to 1 month. This means that the new time plan will go into effect 1 month after the date the customer purchases the product.

Click Done, and notice both the new and old price list entries appear in the B2C Price List. Here, you can see when each price is available.

These new components are now available in the Time Plans and Time Policies workspaces with auto-generated names, for you to reuse them later.

Ada thinks it’s great that the price of the data plan product now has built-in timing, but also that she and Arif can reuse these components to change the duration of applied adjustments in the Cart. Pretty cool!
Wrap Up
Congratulations! You’ve learned a whole lot about pricing in this module, and believe it or not, these are only the basic capabilities that Shared Catalog and Pricing Designer offer. You can learn more about advanced pricing in a different module, but for now, join Ada as she celebrates completing her to-do list once again.
Want to Learn More?
If you’re a Salesforce customer, check out the following learning journeys to find out how to skill up on our amazing suite of digital transformation tools and industry applications.
-
Communications Cloud Developer
-
Communications Cloud Consultant
-
Media Cloud Developer
-
Media Cloud Consultant
-
Energy & Utilities Cloud Developer
-
Energy & Utilities Cloud Consultant
If you’re a Salesforce partner, you can find the same great learning plus additional partner resources on Partner Learning Camp. #AlwaysBeLearning