Set Up Range Attribute-Based Pricing
Learning Objectives
After completing this unit, you’ll be able to:
- Describe the benefits of pricing based on a range of values.
- Explain how to configure attribute-based pricing for numeric ranges.
Up for the Challenge
Infiwave Developer Eliza has seen the power of attribute-based pricing and appreciates the ability to control the prices of products using simple configurations. So far, she’s priced products based on attributes with specific values. Now, she wants to configure pricing to adjust automatically when a customer chooses a value within a defined range.
To encourage bulk orders of the Home Hub Modem product, the marketing team at Infiwave would like to offer reduced pricing when a customer orders five or more modems at once. They want this special pricing to apply only when the customer orders the version of the modem with the best grade.
As always, Eliza is up for the challenge. She knows she must set up attribute-based pricing slightly differently to account for the value ranges dependency.
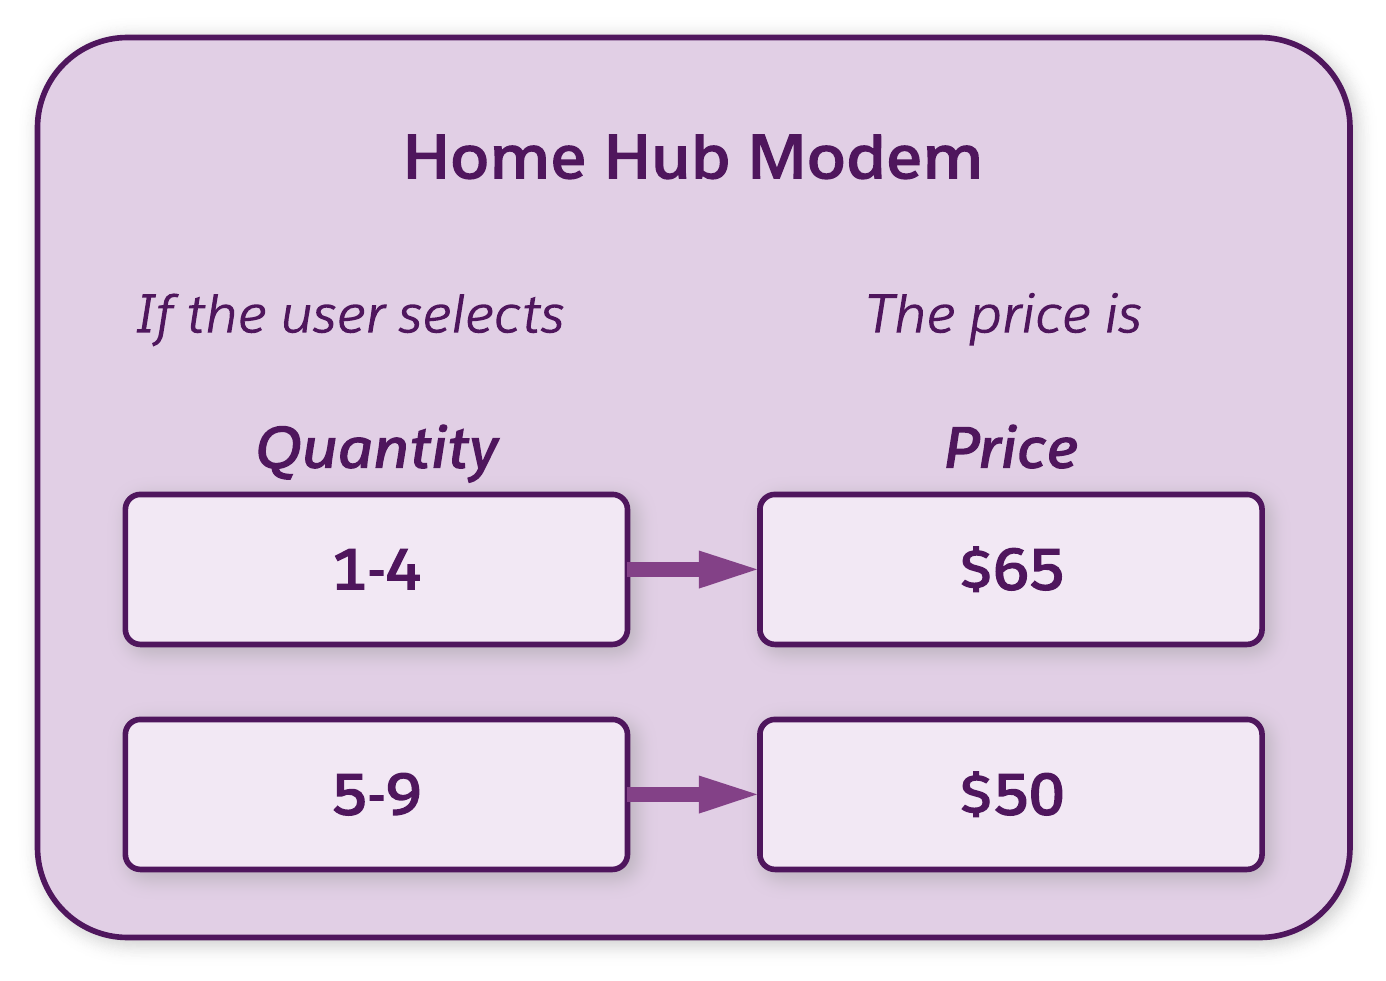
This diagram shows what she’s trying to achieve. When the customer orders one to four modems, the price is $65. If they order five to nine modems, the price reduces to $50.
Range-Based Attribute Pricing Configuration
To configure range-based attribute pricing, Eliza follows the same steps she did when creating standard attribute-based pricing. She sets up a lookup table with defined values and prices, creates an expression set to perform calculations, and inserts a new pricing plan step that calls the matrix and procedure.
Create a Lookup Table
Start by creating a new version of the RangeAttributePricingMatrix, a preconfigured matrix that comes with the datapack. Using this matrix, implement attribute-based pricing that evaluates a range of numeric values in an attribute or field. You can also use this matrix to enable volume-based pricing based on the ordered quantity.
As this screenshot shows, the matrix contains columns that define source products, product characteristics, and prices for monthly recurring charge (MRC) and non-recurring charge (NRC).
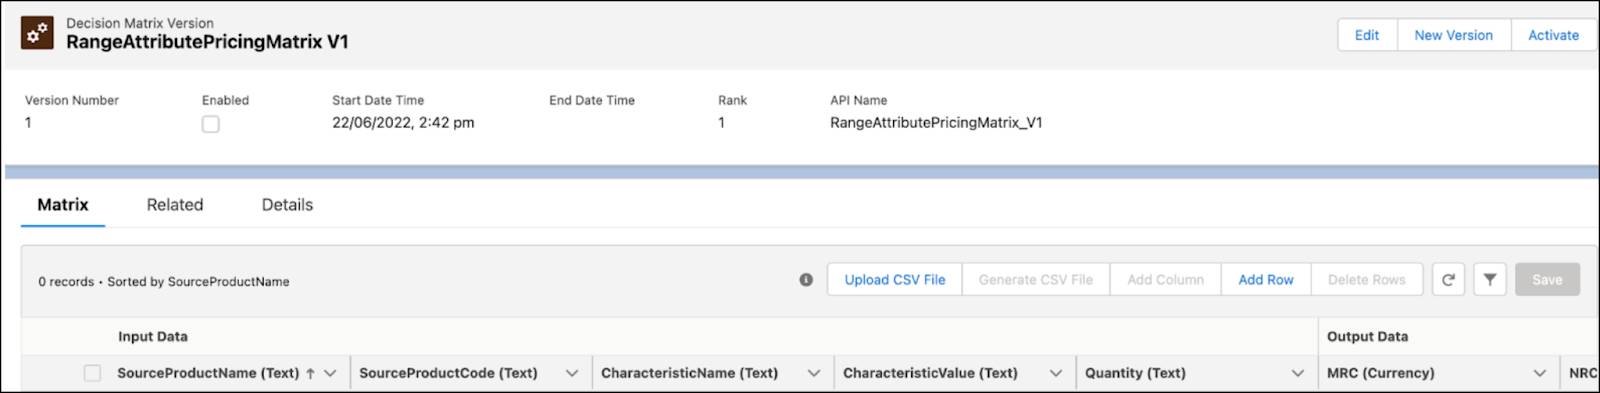
There’s also a Quantity input column where you can enter numeric ranges for each product quantity. Notice this column uses a Text column type instead of a Number Range column type. While either format is acceptable, we recommend you use Text column types for numeric ranges. This column type is easier to manage and helps to maintain consistency when using several ranges in a single matrix.
Add two rows and populate them with the necessary product information for the Home Hub Modem with the best possible grade.
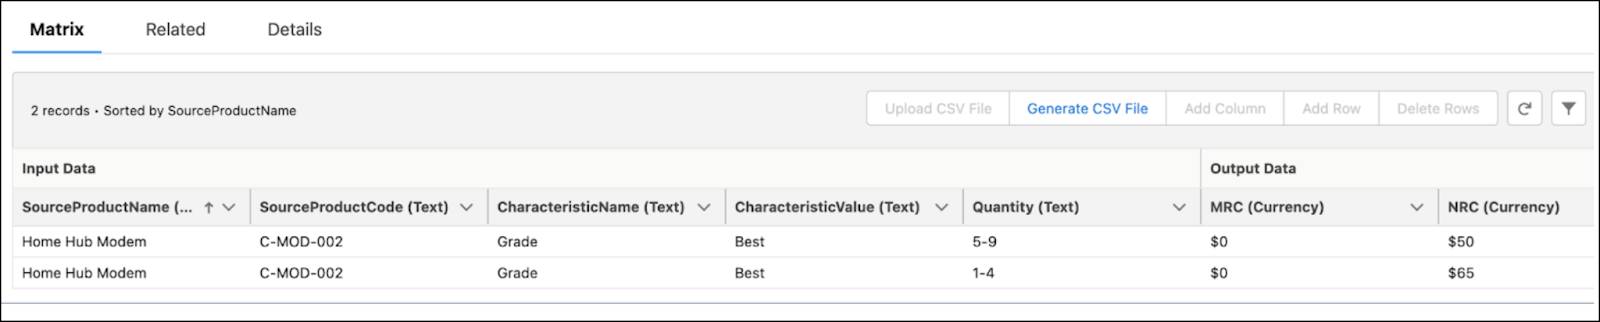
The marketing team has asked Eliza to apply the special pricing quantity for only up to nine modems. In the Quantity field, enter ranges of 1-4 and 5-9 for each row. For the NRC currency, enter $65 for the 1–4 range and $50 for the 5–9 range. Finally, save and activate the matrix so it can be used in an expression set.
Create an Expression Set
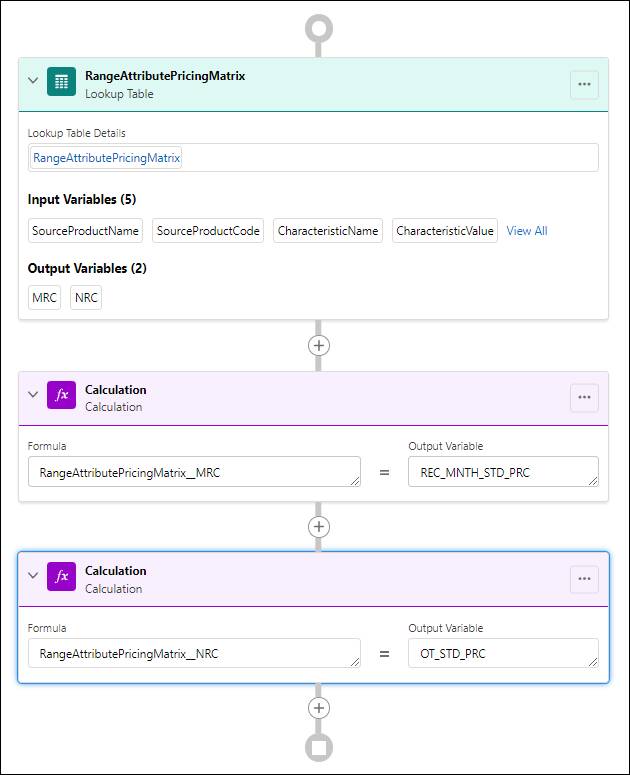
Eliza must create an expression set to perform calculations using the lookup table. The configuration of this expression set is very similar to the one she created for standard attribute-based pricing.
- Add a Lookup Table element in the canvas that calls RangeAttributePricingMatrix.
- Configure two variables for the MRC and NRC price outputs.
- Create two calculation steps to map the MRC and NRC outputs from the lookup table to these expression set variables.
Create a Pricing Plan Step
With the range attribute lookup table and expression set ready to go, Eliza moves to the next step: setting up a pricing plan step that calls these components.
Follow the same steps you did in unit 2 to execute RangeAttributePricingProcedure and RangeAttributePricingMatrix you just created.
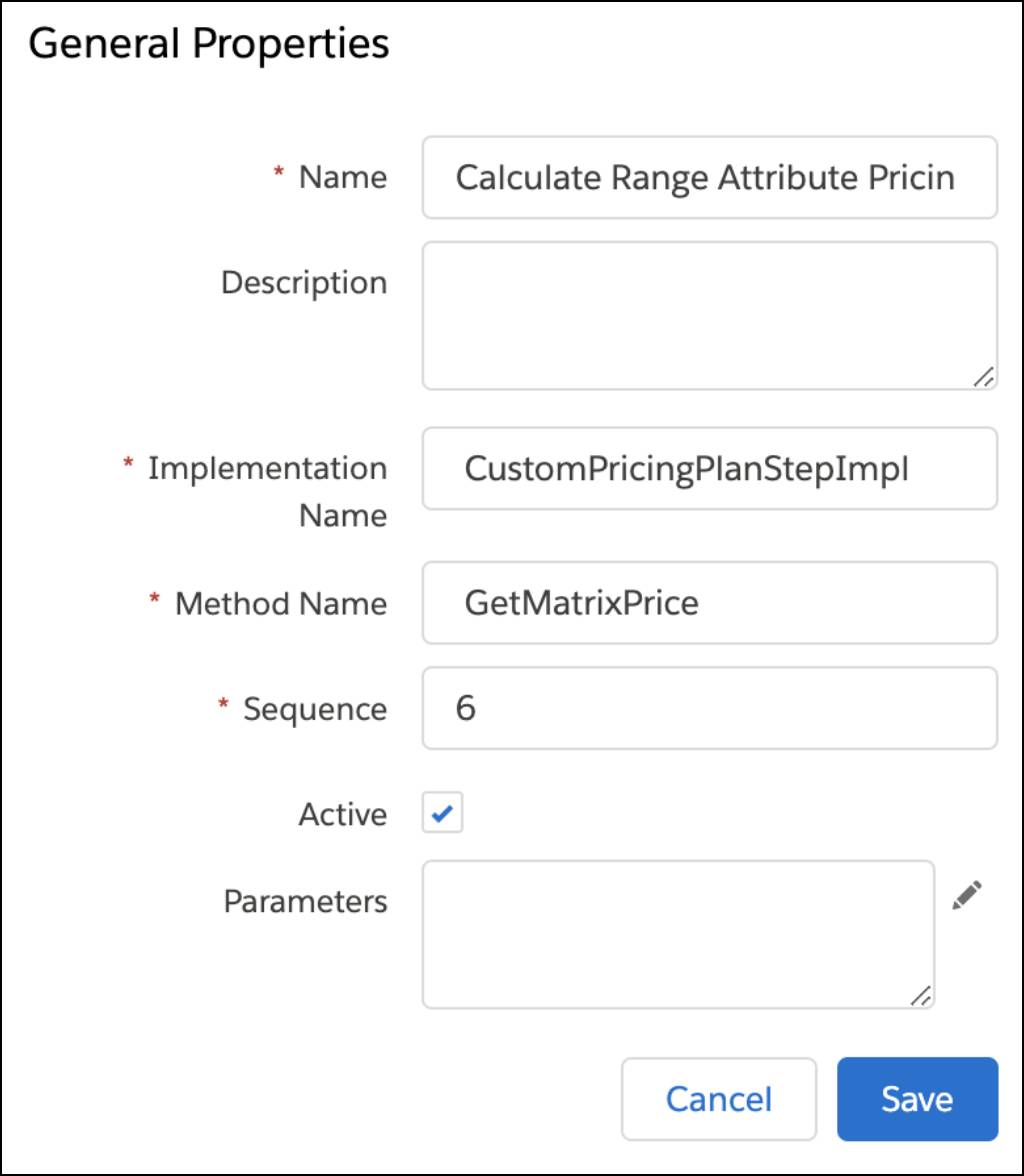
In the General Properties pane, enter the name of the step, the implementation name, the method name, and the sequence number.
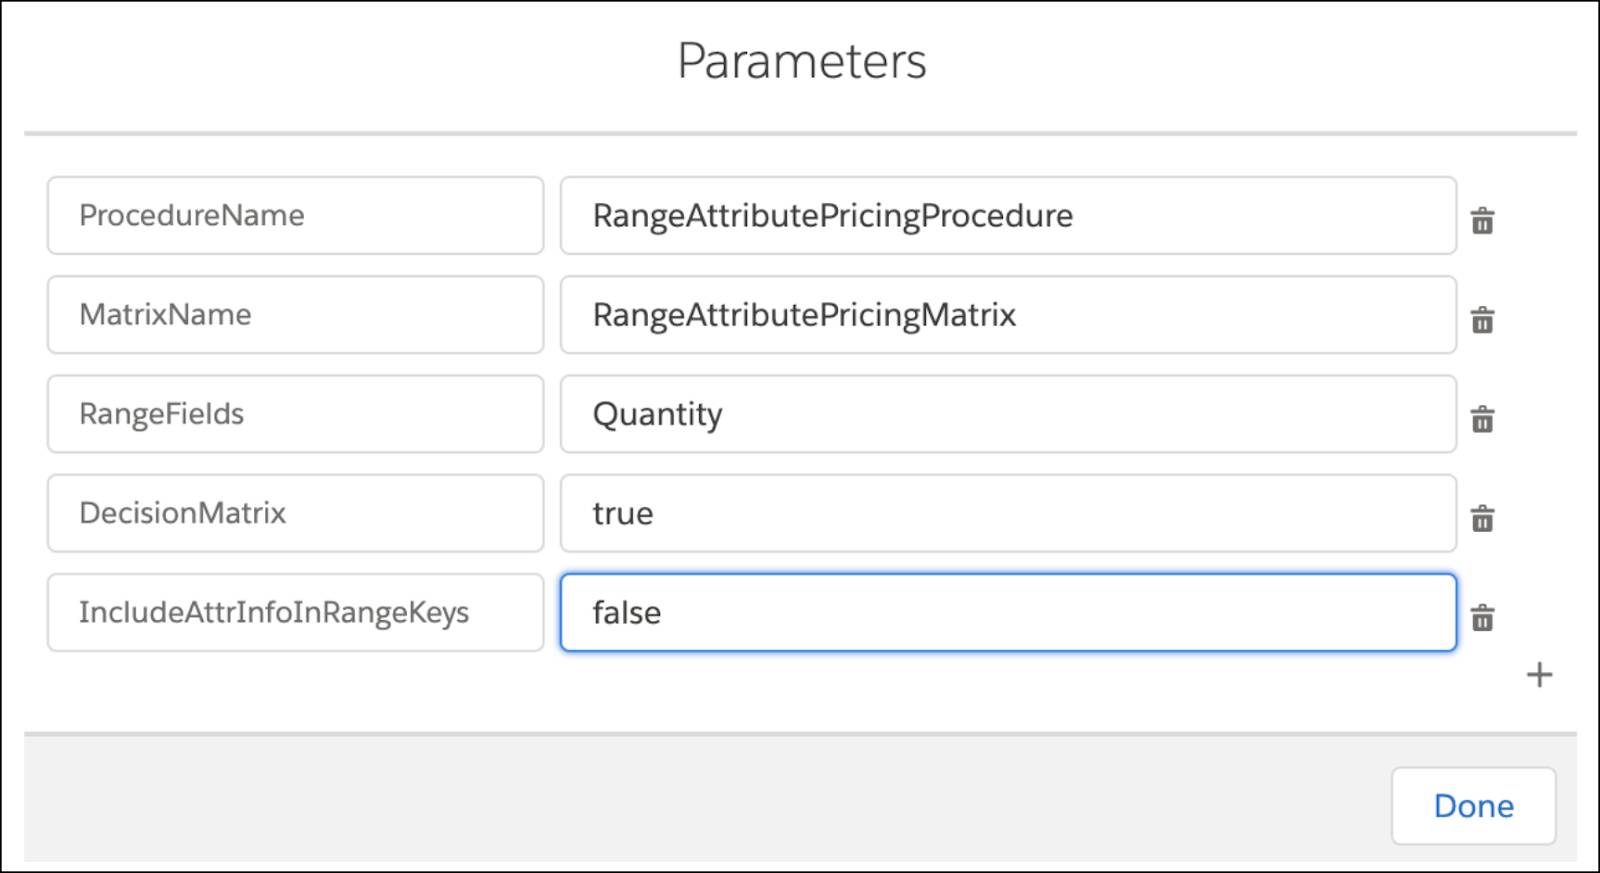
Then, enter the parameters for the step.
Finally, save your changes. The new pricing step appears at the top of the pricing plan.
Eliza decides to test the new pricing configuration with the Home Hub Modem product.
Launch an order and add the Home Hub Modem product to the Industries CPQ Cart. In configuration, change the Grade attribute to Best. Notice the one-time price for the line item shows $65 when the quantity is set to 4 or below. Now adjust the quantity to 5 and the price changes to $50. Success!
Eliza is feeling confident as she now knows how to adjust product prices based on product characteristics and order quantities. Next, she explores how to control the price of a product based on whether another product is part of the same order.