Configure Standard Attribute-Based Pricing
Learning Objectives
After completing this unit, you’ll be able to:
- Describe how standard attribute-based pricing works.
- Explain how to create a lookup table for standard attribute-based pricing.
- Explain how to create an expression set for standard attribute-based pricing.
- Describe how to configure a pricing plan step for standard attribute-based pricing.
Standard Attribute-Based Pricing Configuration
Infiwave Developer Eliza knows that using attributes to control pricing is useful for many of her company’s products. This functionality enables a product’s price to automatically adjust based on customers’ product preferences, thus eliminating the need for extra product configurations in the catalog. In this unit, follow along as she uses standard attribute-based pricing to set up the pricing of a digital subscriber line (DSL Service) product as per the upload and download speed the customer selects.
There are three main steps Eliza uses to set up standard attribute-based pricing.
- Configure a lookup table to map recurring prices to attribute values.
- Create an expression set that performs price calculation using the lookup table.
- Configure a step in the pricing plan to call the expression set and lookup table.
Configure a Lookup Table
Eliza starts by creating a decision matrix to store the attribute values and corresponding prices.
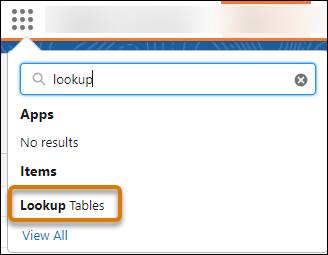
In the App Launcher, find and select Lookup Tables.
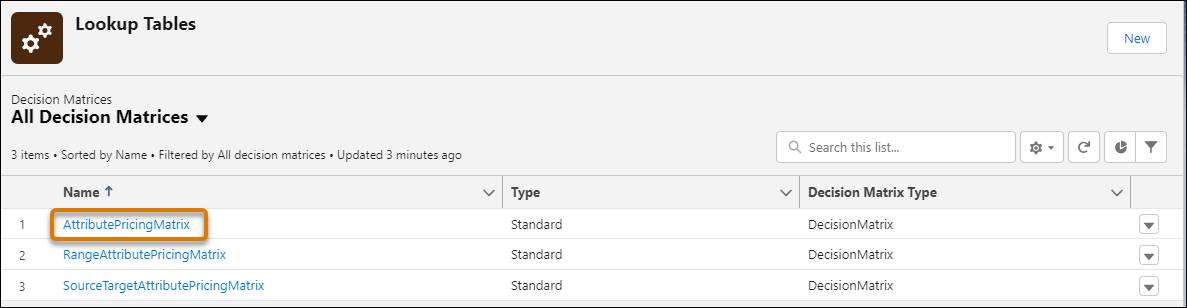
In the Lookup Tables page, notice the sample decision matrices that came with the datapack. There’s one for each type of attribute-based pricing method. Select AttributePricingMatrix.
Then, click the Related tab and notice there’s already a version of the matrix.

Click AttributePricingMatrix V1 to open it.
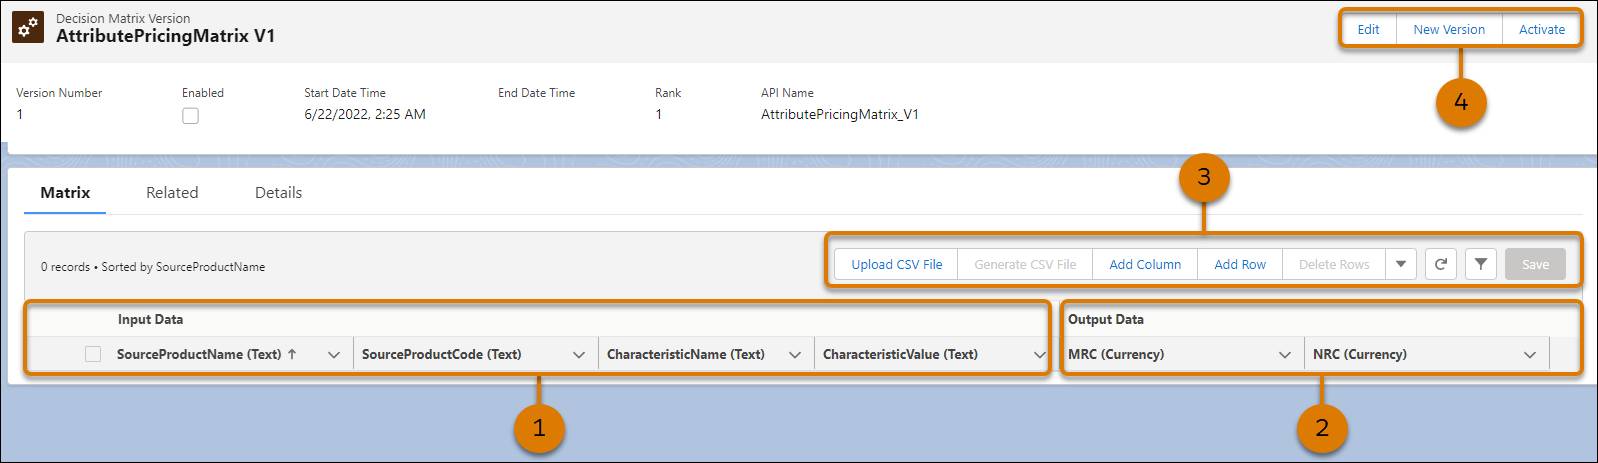
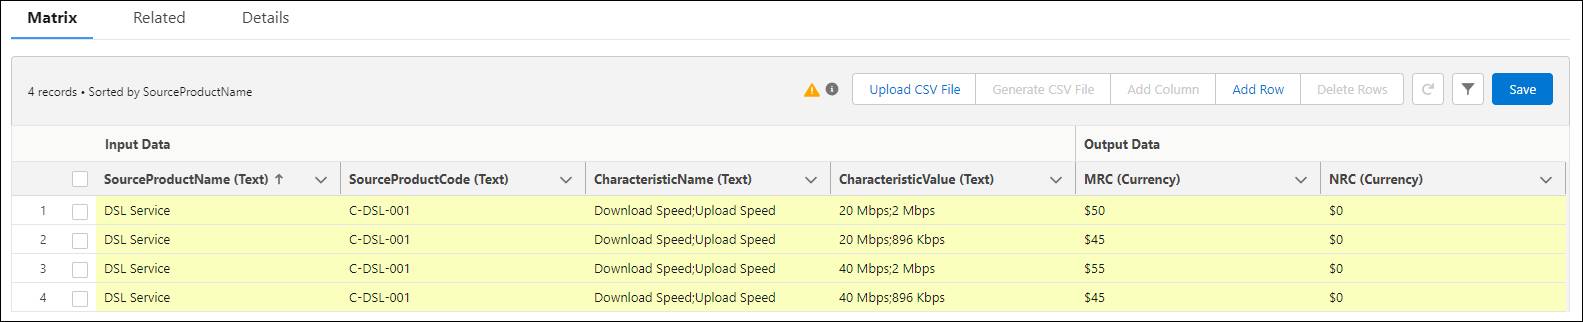
On the AttributePricingMatrix V1 page, there are already columns set up for Input Data (1), including the source product’s name and code, and characteristic name and value. There’s also Output Data (2) that includes the monthly recurring charge (MRC) and non-recurring charge (NRC) columns where Eliza can store the prices for the different attribute values.
Notice the Upload CSV File, Add Column, and Add Row (3) options. You can Edit this version’s properties, create a New Version, or Activate (4) this version. Select New Version to leave this blank version intact.
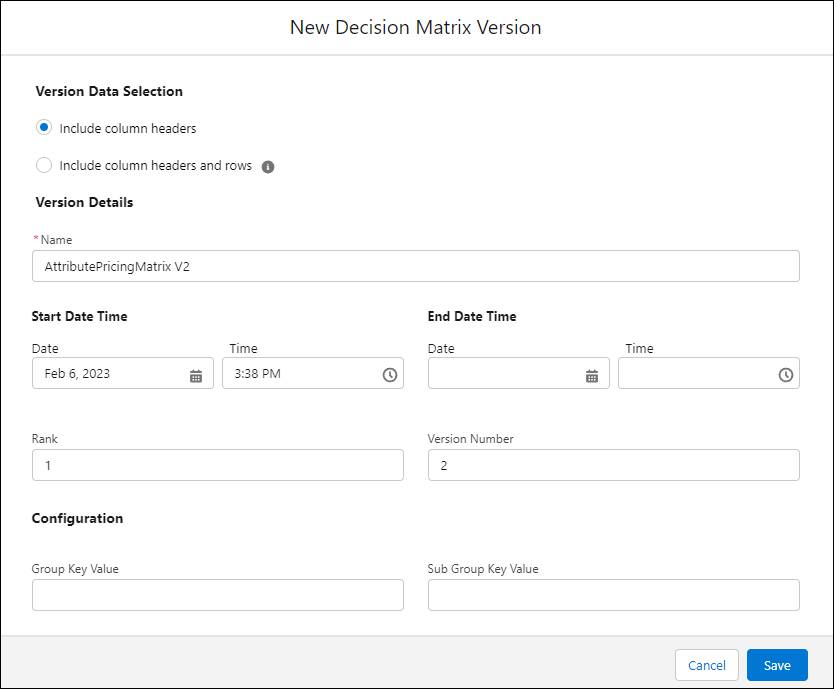
On the New Decision Matrix Version window, enter a new name, version number and rank. If more than one matrix version is enabled, the rank determines which version to use. Expression sets use the version with the highest rank.
Now that Eliza has created a new version, she’s ready to add information to the matrix.
Add four rows to the table. In the Input Data fields, provide product name, product code, and download and upload speeds for the DSL service.
In the Output Data section, add values for MRC and NRC to correspond with each attribute value.
Save and activate the matrix. The matrix is now available for use in an expression set.
Create an Expression Set
Now, Eliza creates the expression set to calculate the product price using the data entered in the matrix.
From the App Launcher, find and select Expression Sets.

In the Expression Sets workspace, click New.

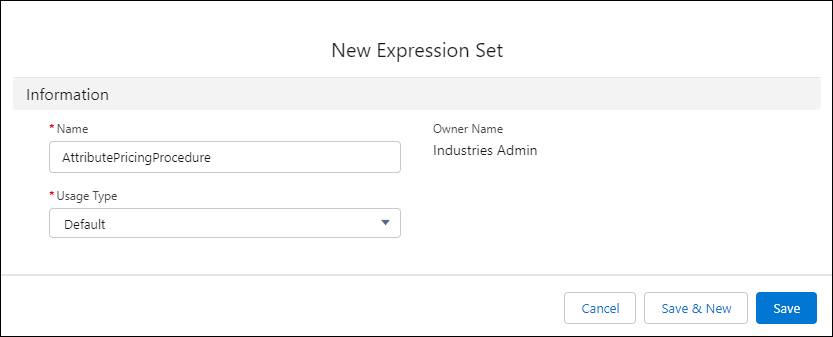
In the New Expression Set window, enter a name for the expression set and save it.
In the Details tab, select theAttributePricingProcedure V1 expression set. This opens the expression set in Expression Set Builder.
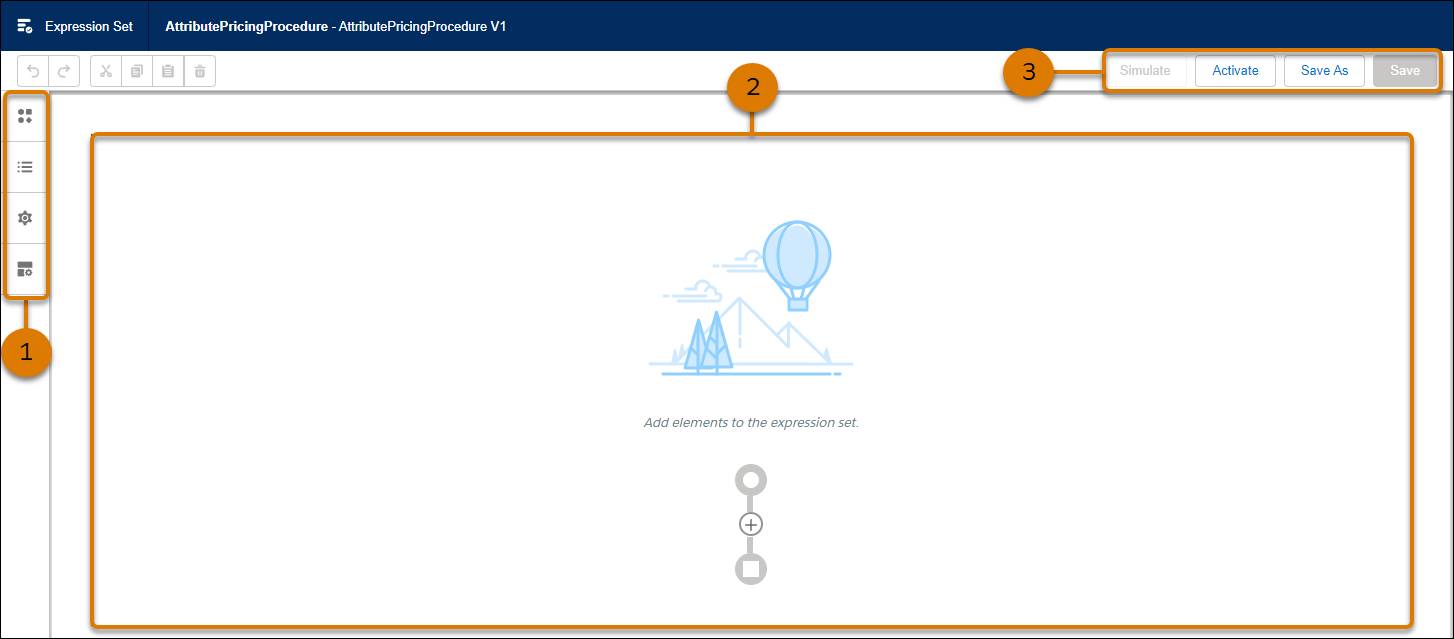
The Expression Set Builder contains elements, resources, and properties tabs that include components (1) you can add to the workspace (2). Notice there’s also an option to test the expression set (3). To learn more about Expression Set Builder check out Expression Sets.
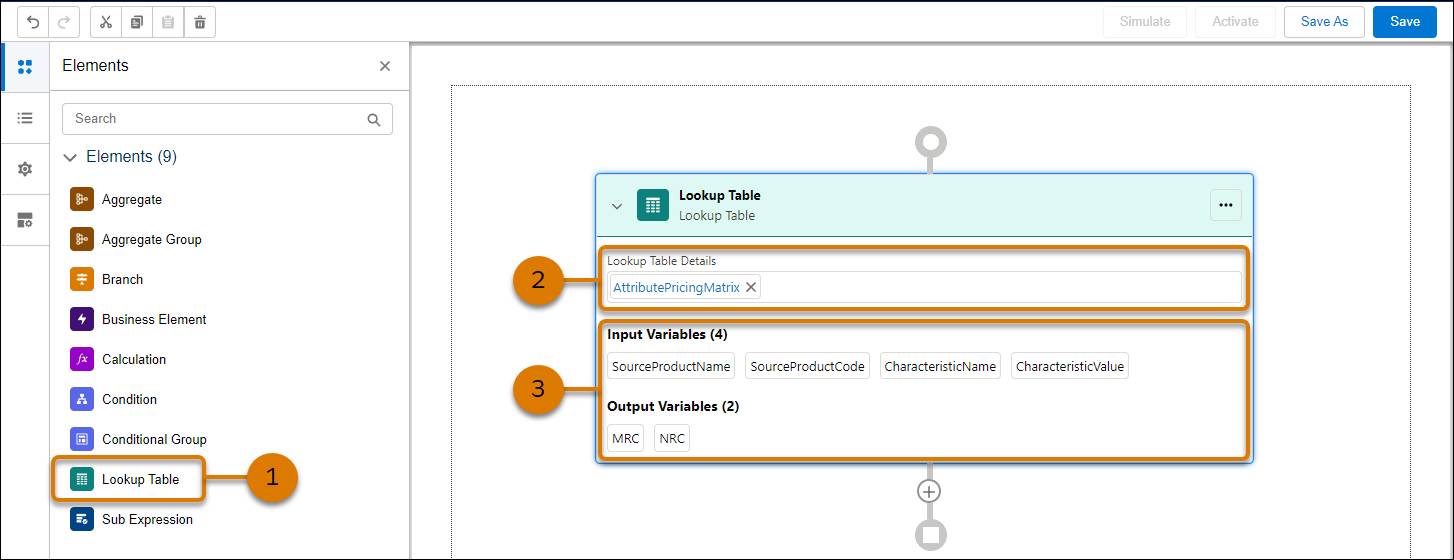
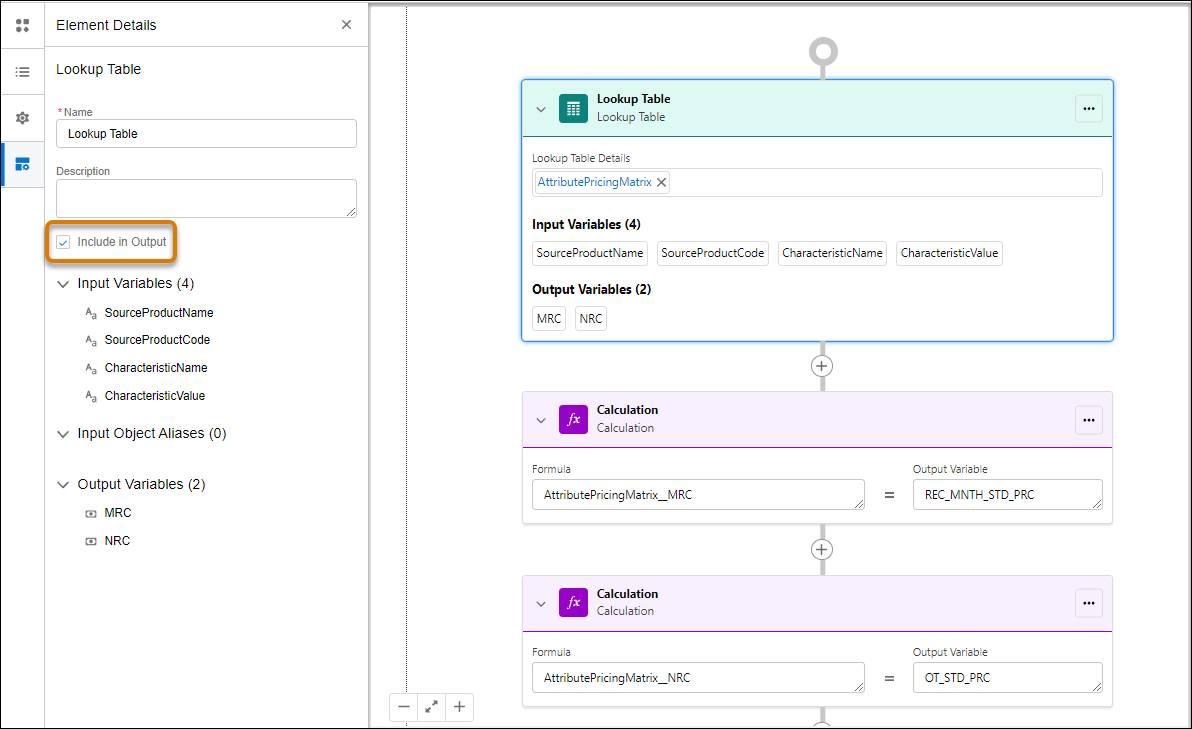
From the Elements tab, click and drag a Lookup Table (1) to the expression set workspace. Then, use the Lookup Table Details field (2) on the element to find and select the AttributePricingMatrix. Notice that the Input Variables and Output Variables (3) from the decision matrix appear on the element.
Next, Eliza must add variables for the MRC and NRC that act as placeholders for values that pass between steps in the expression sets.
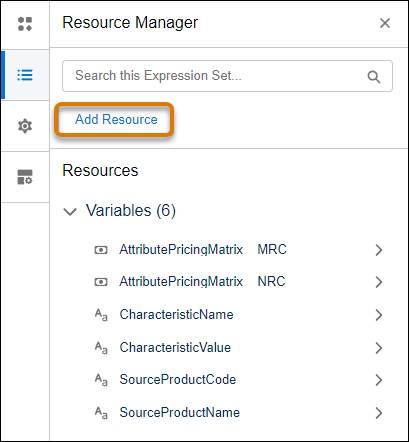
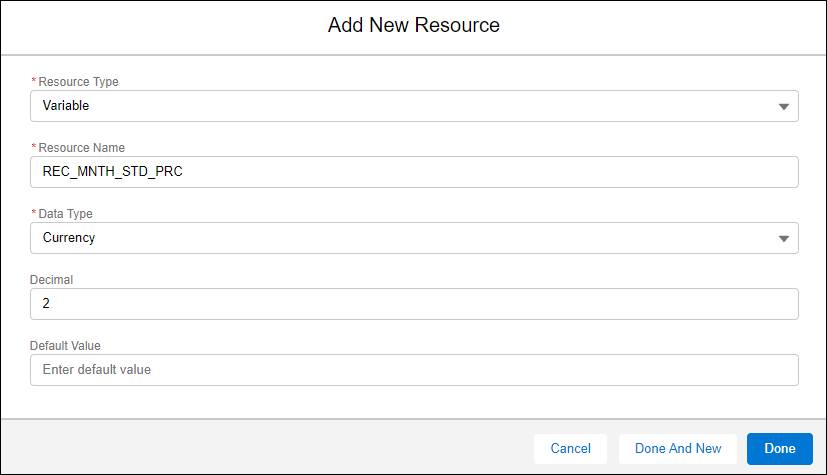
Click the Resource Manager tab and add a new variable of Currency data type.
From the Elements tab, include a calculation element for the monthly standard price.
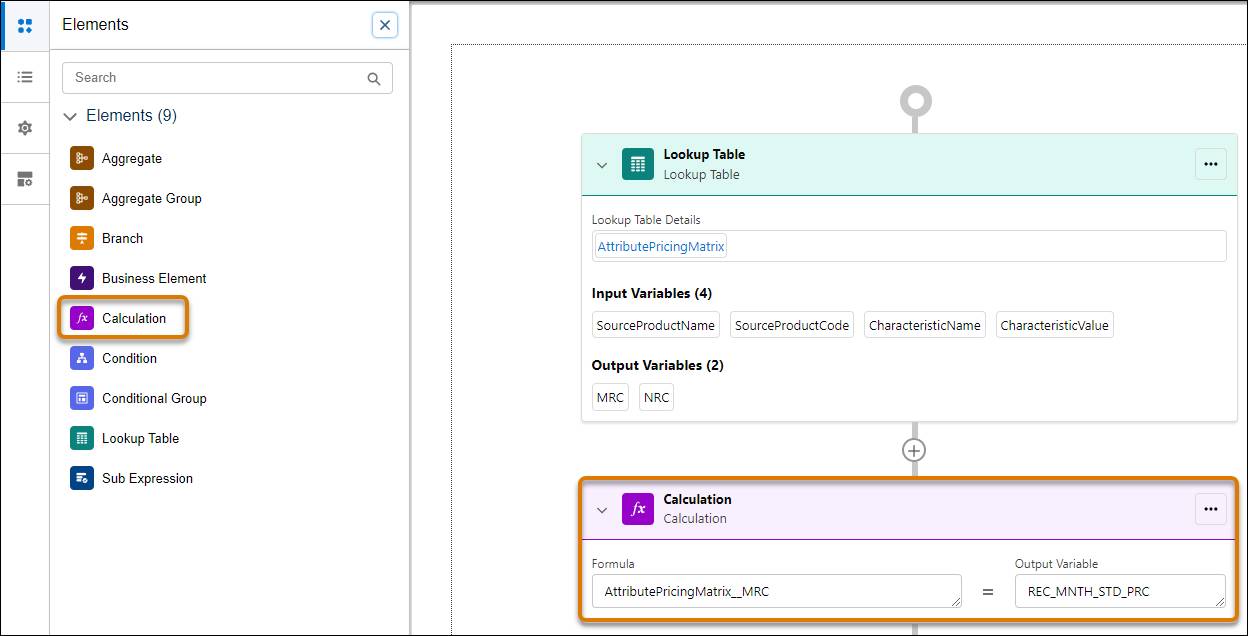
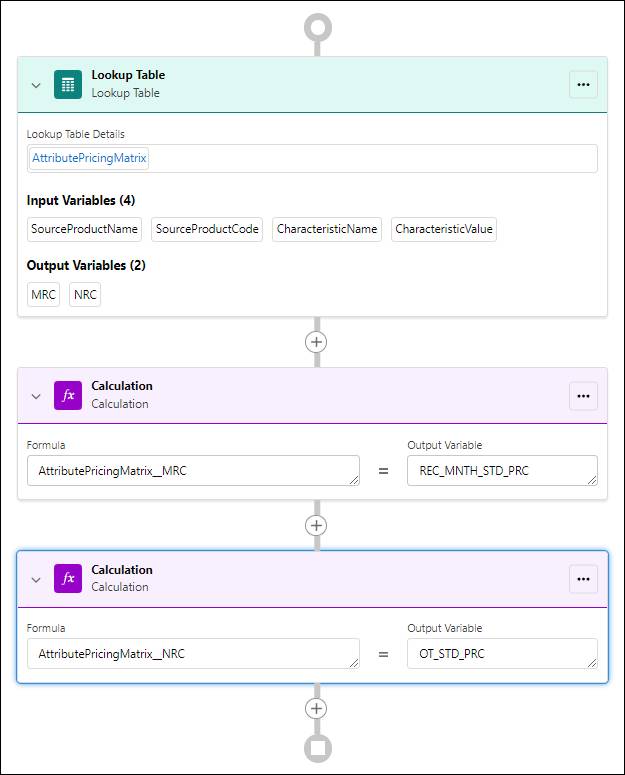
This calculation step uses the MRC variable of the matrix to calculate the monthly charge, and then outputs the value to the REC_MNTH_STD_PRC variable that you just created. Repeat this process to add a one-time standard price variable and calculation step.
Select each step in the sequence and click Include in Output from the Element Details tab to make sure the expression set returns all of the necessary data.
Save and activate the expression set.
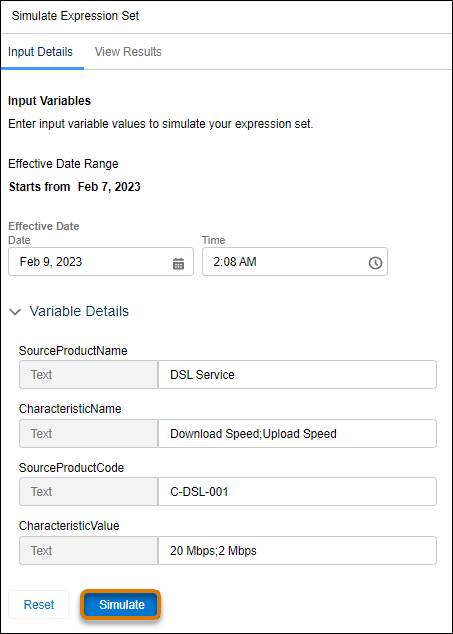
Finally, Eliza tests out the procedure using simulation.
In the Simulate Expression Set pane, enter test values in each of the variable detail fields and then click Simulate.
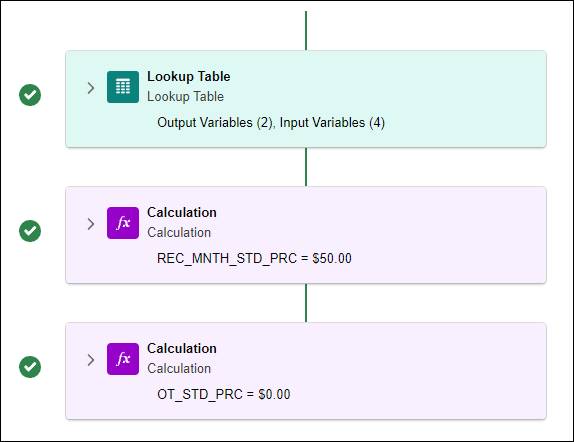
After running the simulation, each step shows a green tick and the MRC variable shows the correct amount based on test values. The expression set is working correctly!
Configure a Pricing Plan Step
Now that Eliza has created the lookup table and expression set, she’s ready to add a step to the pricing plan to reference these components.
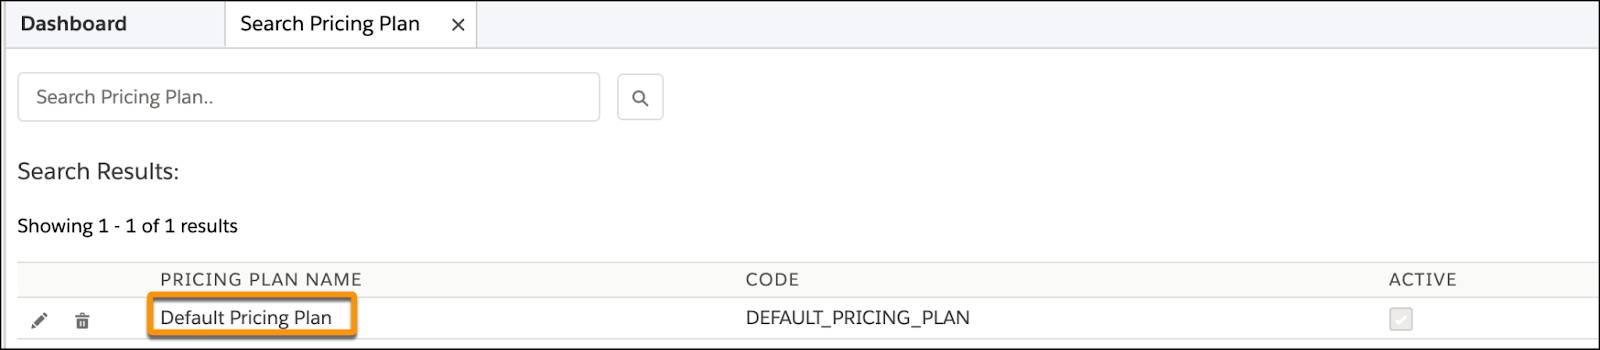
In the App Launcher, find and select Vlocity Product Console. Next to Pricing Plan in the Pricing area, find and select Default Pricing Plan.
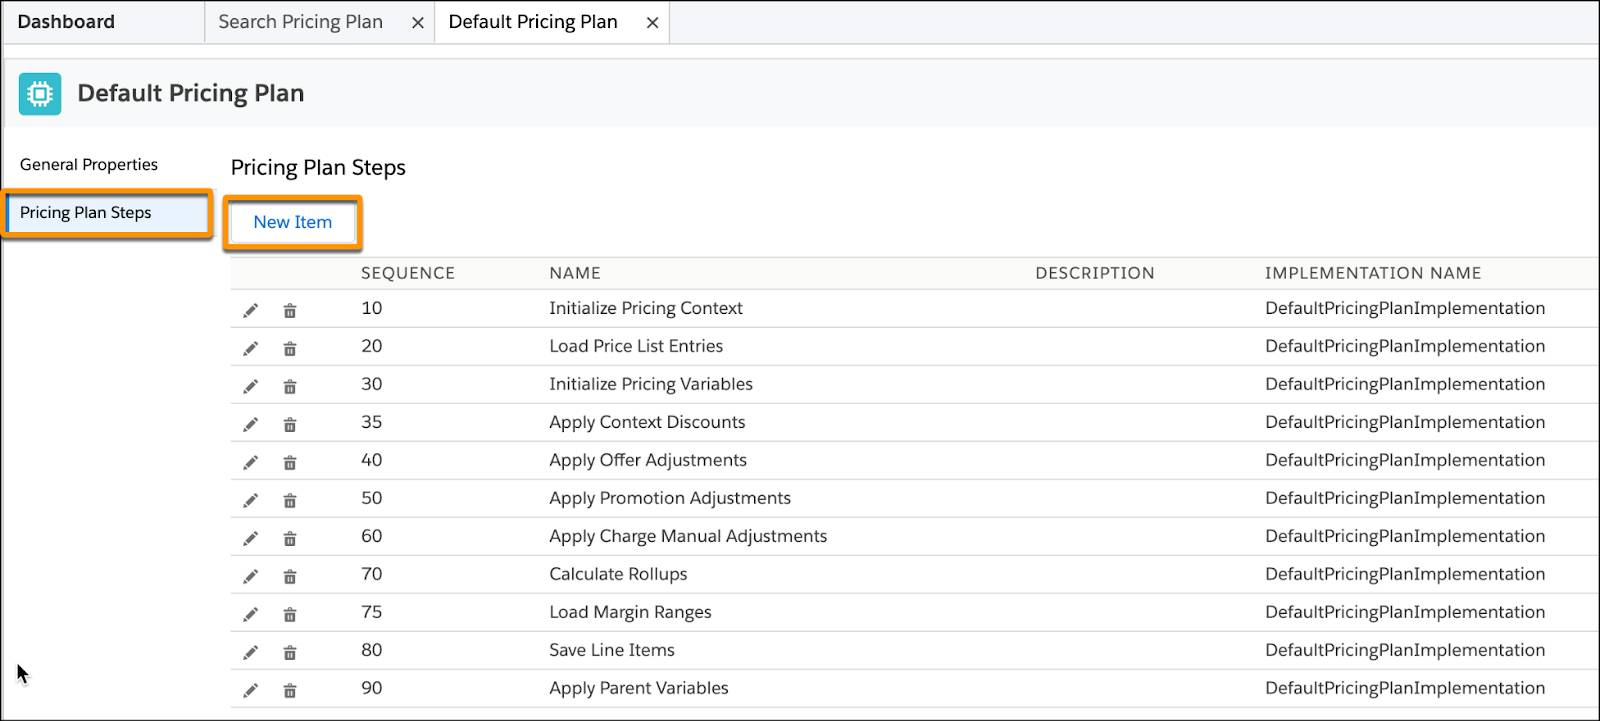
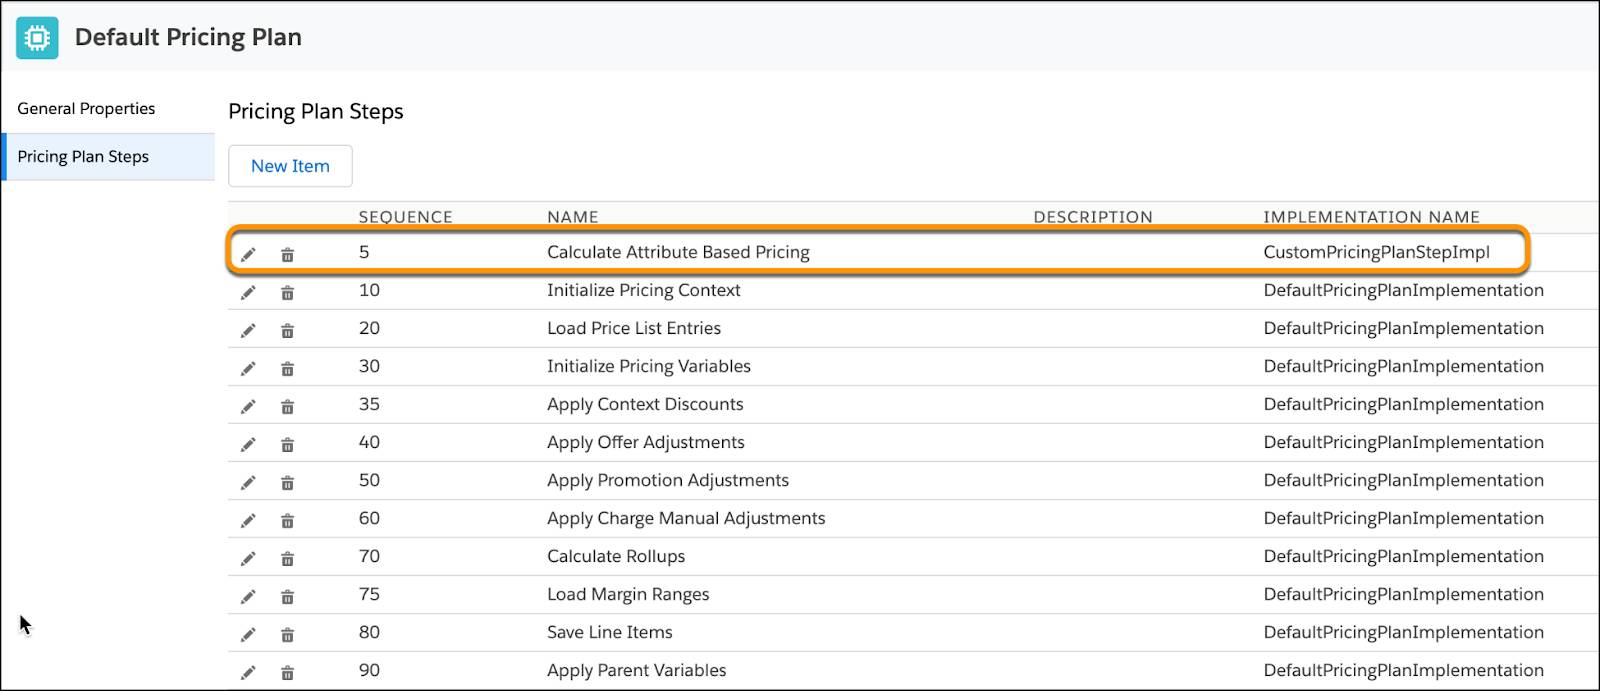
Click Pricing Plan Steps to review the sequence of steps. Then, click New Item to create the Attribute-Based Pricing step.
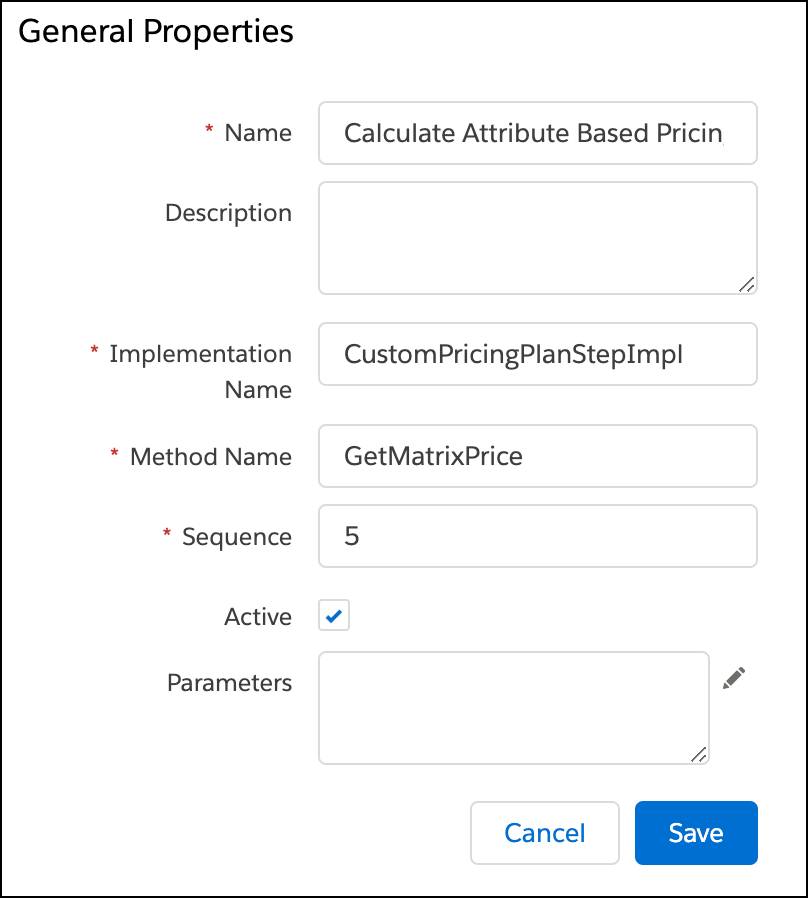
In the General Properties pane, enter the step’s name, implementation name, method name, and sequence number. Also, make sure to activate the step.
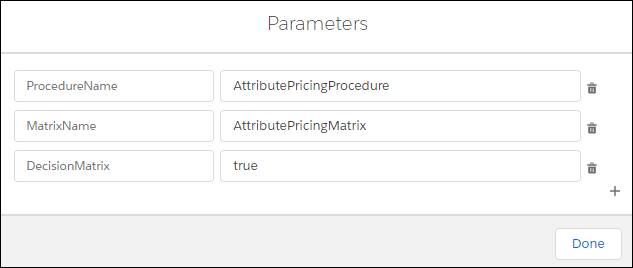
Then, open the Parameters window, and add new parameters to the step.
Next, map the ProcedureName parameter to the AttributePricingProcedure expression set, and the MatrixName parameter to the AttributePricingMatrix lookup table. Finally, save your changes.
The new pricing step appears at the top of the pricing plan. Nice!
Eliza has successfully set up a lookup table, an expression set, and a pricing plan step. She’s now ready to test the new functionality in the Industries CPQ Cart.
- First, clear and refresh the platform cache, which is necessary after introducing a pricing plan step.
- Then, launch an order and add DSL Service to the Cart.
- Finally, configure the download and upload attribute values for the product and notice how the price changes depending on the combination of speeds.
You’ve now learned how attribute-based pricing is useful in assigning prices based on a product’s qualities. Next up, follow Eliza as she configures pricing to automatically apply discounts on bulk orders using range-based pricing.