Configure Source-Target Attribute-Based Pricing
Learning Objectives
After completing this unit, you’ll be able to:
- Describe the benefits of source-target attribute-based pricing.
- Explain how to configure source-target attribute-based pricing.
Final Task
Infiwave Developer Eliza has made noticeable improvements in how Infiwave manages its prices, and the sales and marketing teams are grateful for her work. But she’s not finished yet. Her final task is to configure an automatic pricing adjustment for a product that triggers only when the customer adds another specific product to the Industries CPQ Cart. The pricing manager has identified a promotional backpack as a good starting point.
Source-Target Attribute Pricing Configuration
Using attribute-based pricing, you can create a dependency that controls the price of a product based on the existence of another product in the Cart. The product that controls the price is the source, and the product whose price the source adjusts is the target.
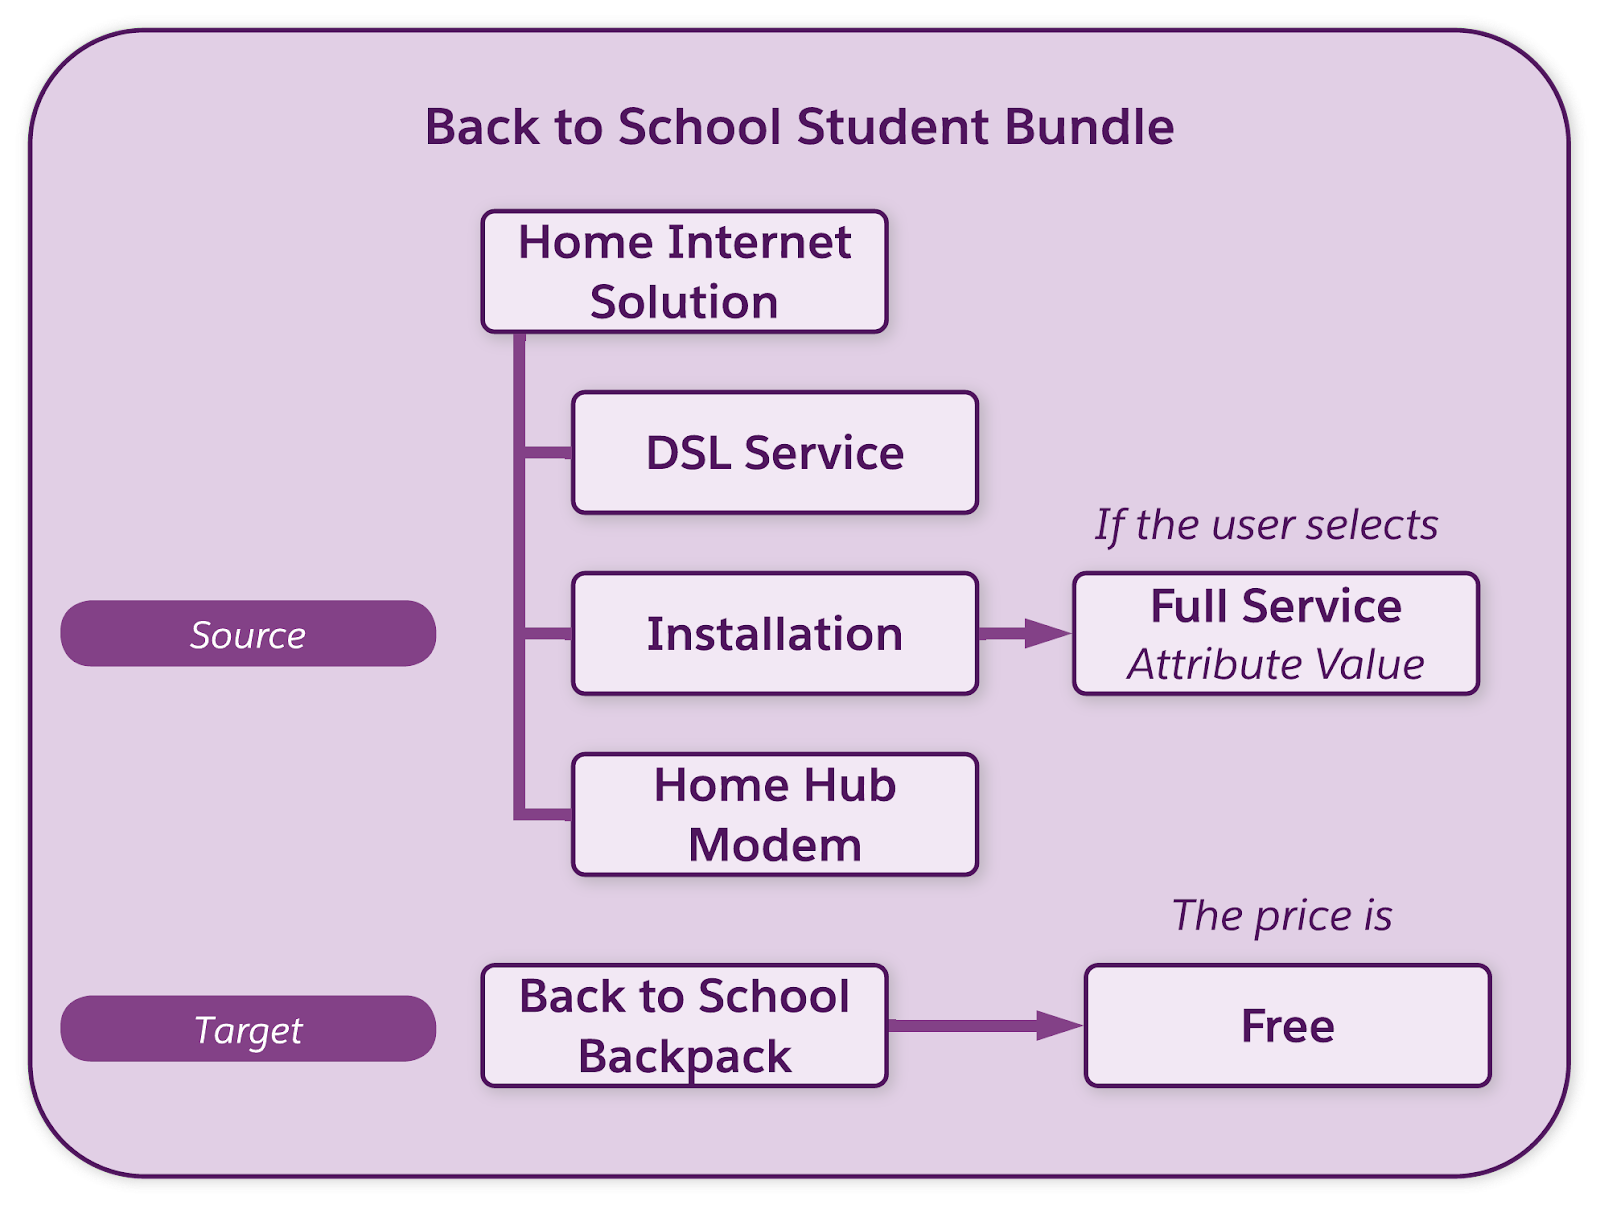
Before Eliza sets this up, she takes a look at the requirements from the pricing manager. The Back to School Student offer includes a Back to School Backpack and a bundle containing DSL Service and Installation products. If a customer chooses a full service installation for the internet product, they get the backpack for free.
As this diagram shows, the DSL Service product acts as the source, and the Back to School Backpack is the target.
Create a Lookup Table
We’ve already set up a decision matrix called SourceTargetAttributePricingMatrix in the playground org to support source-target attribute pricing. Open this matrix and create a new version.
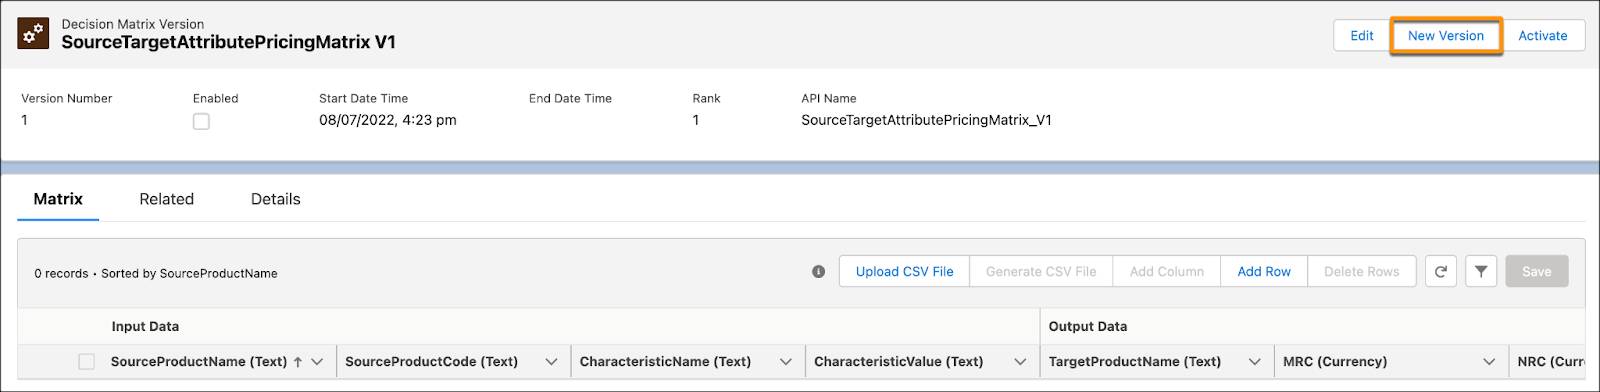
In the new version of the matrix, add a row and enter the source product’s name and code, and the characteristic name and value in the input data fields. In the output data fields, enter the target product’s name, monthly recurring charge (MRC), and non-recurring charge (NRC).
In this screenshot, notice that the source product name is set to Installation. The characteristic name points to the Installation Type attribute on the product, and the characteristic value is set to Full Service Install. For the Target Product Name, you can enter a product name for price adjustment. If you want to price only a specific occurrence of a product within a bundle, use a path parameter such as Path1.

When you’re done, save and activate the matrix.
Create an Expression Set
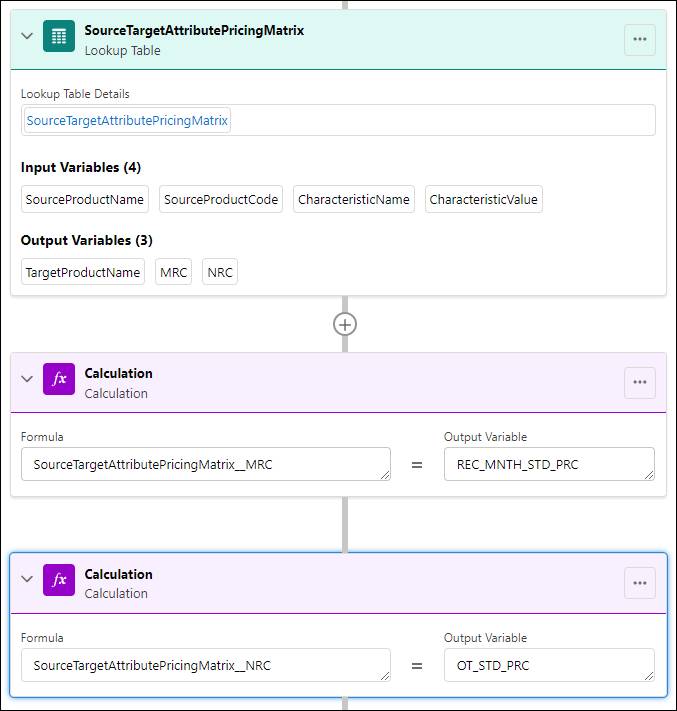
Next up, Eliza creates an expression set to perform calculations using the lookup table. The configuration of this expression set is very similar to the one she created for standard attribute-based pricing.
Follow these steps in the Expression Set Builder.
- Add a Lookup Table element to call SourceTargetAttributePricingMatrix.
- Configure two expression set variables for the MRC and NRC outputs.
- Create two calculation steps to map the MRC and NRC outputs from the lookup table to the expression set variables.
Finally, save and activate the expression set.
Create a Pricing Plan Step
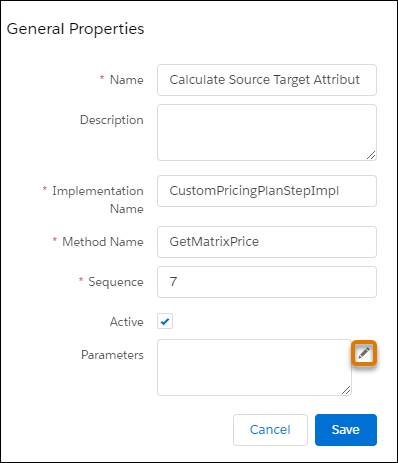
As she did in the other attribute-based pricing configurations, Eliza creates a pricing plan step to execute the source-target attribute pricing lookup table and expression set.
In the General Properties pane, enter the name of the step, the implementation name, the method name, and the sequence number.
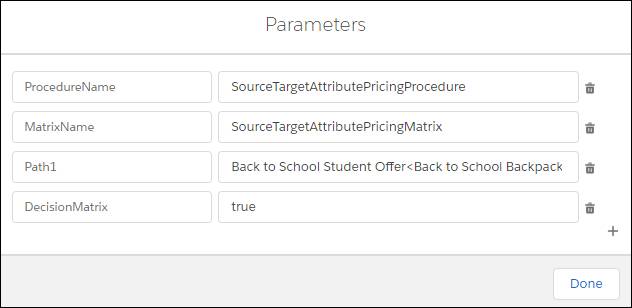
Now enter the parameters for the step. In the Parameters window, enter the expression set name in the ProcedureName field, and the lookup table name in the MatrixName field. Remember you entered Path1 in the Target Product Name output column? Here you assign this path to the product. The pricing plan step applies to the Back to School Backpack, but only when it’s part of the Back to School Student offer.
Enter the target path using this format.
[root product name]<[parent1 product name][parent2 product name][…]<[product name]
Save your changes and notice the new pricing step at the top of the pricing plan.
Finally, Eliza tests her work by launching an order and adding the Back to School Student offer to the Cart.
Change the Installation Type to Full Service Install and notice that the Back to School Student Backpack shows a price of $0. If you add the backpack product on its own to the Cart, the standalone product displays its regular price. This is the power of source-target attribute-based pricing.
The sales and marketing teams are pleased with all the new pricing functionality Eliza has set up. The product and pricing designers are thrilled that they don’t have to manage additional catalog components. With attribute-based pricing, it’s always a win-win situation!