Create a Custom Attendance Report to Support At-Risk Students
Learning Objectives
After completing this unit, you’ll be able to:
- Navigate Custom Report Types to include EDA objects.
- Create a list of students, based on specific parameters.

Reporting on Student Attendance
In this unit we follow Cloudy College academic advisor Valerie Keckler as she builds a report that looks at students’ attendance, focusing specifically on absences for students who are known to be at risk. Once she identifies students who are at risk and have a high absence rate, Valerie can reach out and ask them to come in for an appointment so she can help these students develop a game plan to get back on track.
You may remember Valerie from other Agentforce Education modules, but let’s do a quick introduction in case this is your first time meeting her.
-
Valerie Keckler is an academic advisor in the School of Health and Human Sciences at Cloudy College. She helps currently enrolled students explore academic and career interests, monitors student academic progress, and supports student retention by working with at-risk students and recommending appropriate action and resources.
EDA includes various objects that reflect students’ progress. Attendance Events track a student’s absences or tardiness, including the ability to indicate whether the absence was excused as well as the reason for it (like a medical emergency or family event). Valerie was thrilled when Cloudy’s Salesforce admin added Attendance Events as a related list on the Contact and Course Connection record pages prior to the start of the term. She’s ready to create her first report using attendance data. She’ll start by creating a custom report type.
Custom Report Types
Standard report types provide common combinations of objects (for example, Accounts and Contacts, Contacts and Cases), but you may have situations where you need more. Custom report types allow you to combine objects in new and different ways to more accurately report on what you need to know.
Follow these steps to create a custom report type.
- Navigate to Setup.
- In the Quick Find box search for and select Report Types. If this is your first time creating custom report types, you will see an information box explaining what they are and the process of building them. Once you’ve reviewed the information, click Continue.
- Click New Custom Report Type.
- Define the custom report type.
Primary Object
Contacts
Report Type Label
Class Attendance
Report Type Name
Class_Attendance
Description
Track attendance for at-risk students.
Report Type Category
Other Reports
Deployment Status
Deployed
-
Click Next.
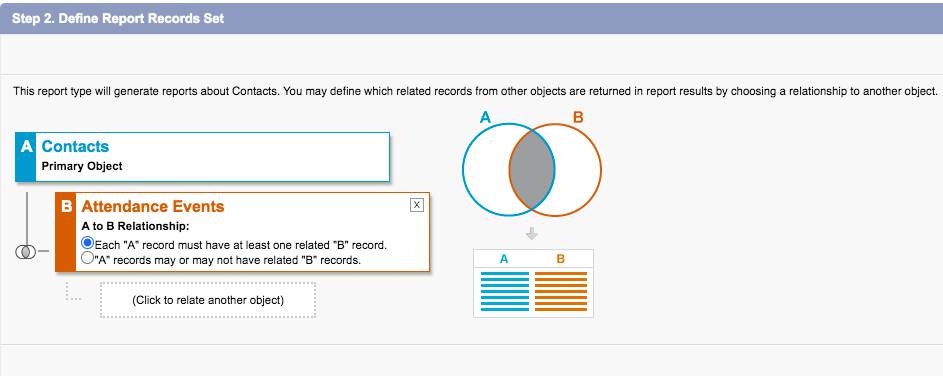
Define the report records set. Each object you add will narrow the options for the next object you select. Contacts is pre-selected as your Primary Object based on the report type information you entered in the previous step.
- Select (Click to relate another object) then search for and select Attendance Events as the Secondary Object.
- Click Save.
Prepare to Build Your Report
If you want to follow along as we create this attendance event report, create some sample data in your EDA org.
First, you'll need to add a custom field for At Risk to the student contact record.
- From Setup, select Object Manager.
- In the Quick Find box, search for Contact, then select Contact from the list.
- From the left-hand panel, click Fields & Relationships.
- Click New.
- Select Checkbox as the Data Type for custom field, then click Next.
- Enter the custom field details.
Field Label
At Risk
Default Value
Unchecked
Field Name
At_Risk
Description
Track and support at risk students
Auto add to custom report type
✔
-
Click Next.
- Click Next again.
- Click Save.
Now that you've added the custom At Risk field to the contact record, you need to create six contact records for current students.
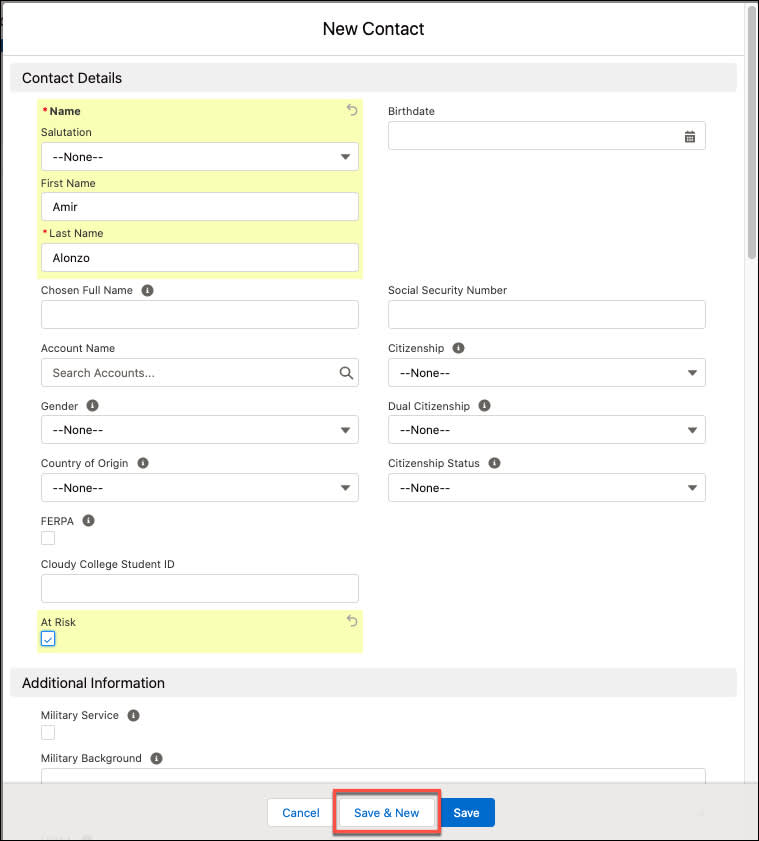
- To create a new contact record, click the Contacts tab, then click New.
- Fill in the following contact record details:
- First Name
- Last Name
- At Risk: ✔
Note: you can mark all or just a random selection of your students as At Risk. Be sure to mark at least a few as At Risk for reporting purposes.
- Click Save & New and repeat step 2 until you have at least six new student contact records.
Great work! Up next, you need to confirm that the Attendance Event Related List is added to your Contact record page.
- Go to Setup, then navigate to Object Manager.
- In the Quick Find box, search for and select the Contact object.
- From the left-hand panel, select Page Layouts.
- Select HEDA Contact Record.
- Scroll to select Related List.
- Locate Attendance Events and drag and drop it onto the page layout canvas.
- Click Save.
Check your work by opening a student contact record in EDA. If you see the Attendance Event related list on the student record, you're good to go.
There's just one more step to prep for building the report. You need to create some attendance events for a few of your students.
- Click the Contacts tab and open a student contact record from the Recently Viewed list view.
- From the Attendance Events related list, click New.
- Fill in the attendance event details.
- For Attendance Type, select Class Absence or Class Tardy.
- Select a Date.
- Click Save & New to create another attendance event record for this student, or just click Save.
- Repeat these steps to create attendance events for a few more of your students.
Whew! Preparation is complete. If you chose to complete these steps, you had the chance to practice some very useful field and record creation skills. Onward to report building!
Build Your Report
Time to check back in with Valerie. She's created her custom report type, and verified that she's got the right data in her org to create this report type. Now she can use it to build the attendance report.
Follow these steps to build this custom report.
- Click the Reports tab. (If you don’t see the Reports tab, go to the App Launcher (
 ) then search for and select Reports.)
- Click New Report.
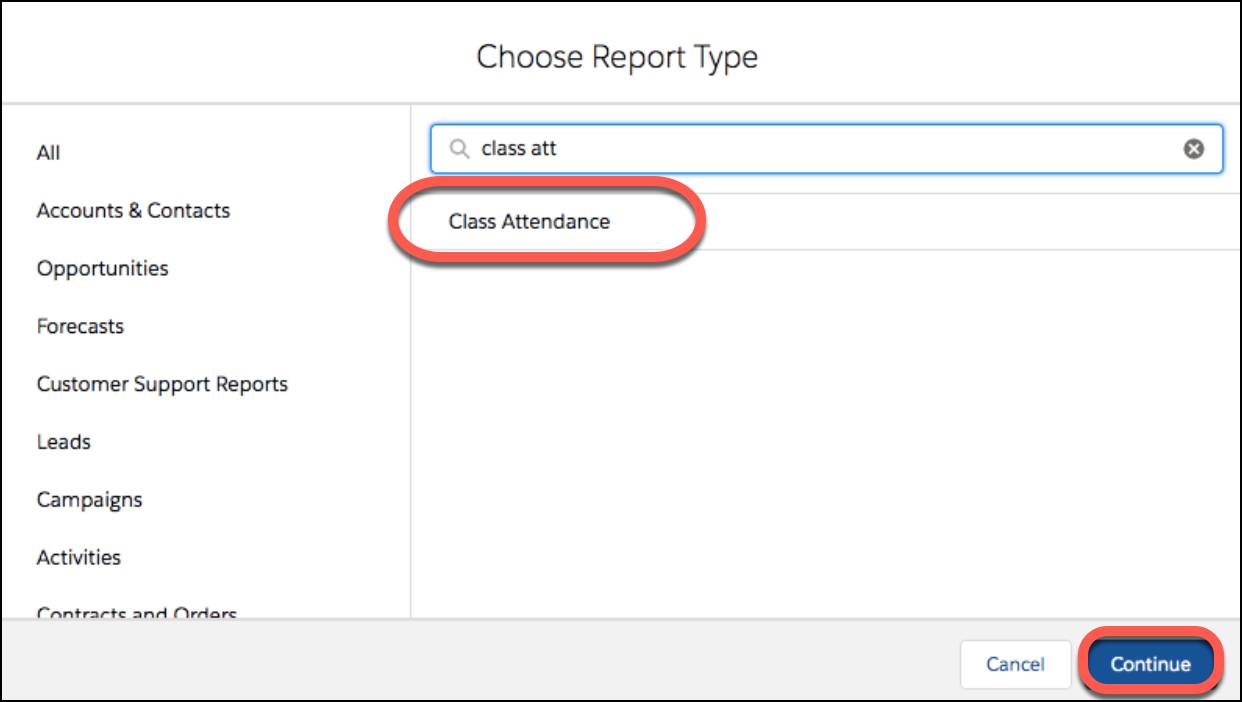
- Search for and select the custom report type, Class Attendance.
- Click Continue.
- Under Columns, search for and select Attendance Type to add it to the report. This datapoint tracks what kind of attendance event that occurred (such as absence or tardiness).
- Under Columns, remove Attendance Event Name. It only shows the record ID and is not particularly helpful.
- Under Group Rows, search for and select Contact so you can see which student is associated with the reported attendance types.

- Navigate to Filters, and add a filter for At Risk equals TRUE so that the report shows only students who are currently marked as At Risk.
- Make sure that the report options under Filters don’t restrict your data. For example, Valerie verifies that the Show Me filter is set to All Contacts, and the date range is set to All Time, so that her report includes all possible results, regardless of who created the records, or when.

- Click Save & Run.
Valerie knows it’s important to save reports with relevant names and descriptions that make it easy to find them later. She names this report "Attendance for At Risk Students".
Valerie is very eager to reach out to the students flagged on the attendance report so she can see what she can do to help them with their attendance issues. She can return to this report over and over again, and it updates automatically with data she adds or edits in her org.
In addition to creating a report that provides great value, Valerie also demonstrated how to create custom report types, which is a skill you can put to work for other custom reports for your institution. Keep sharpening your skills by moving on to the next unit where we use Salesforce relationships and affiliations to build a networking report at a K-12 institution.
Resources
- Salesforce Help: Create a Custom Report Type in the Legacy Custom Report Type Builder
- Article: Build Powerful Reports with Custom Report Types