Use Care Programs
Learning Objectives
After completing this unit, you’ll be able to:
- Enable care program participants to use sites.
- Add the Enroll In Program button to a page layout.
- Enroll a patient in a care program.
Make Your Users Site-Ready
A site is a great place for patients to gather information about their health and be on top of their health goals. They can collaborate with other patients and enrollees, get knowledge articles, and find out about more care programs that can help them.
Harryette wants to help Lisa access care programs from her mobile device through Experience Cloud sites. But before she can do that, Lisa’s user record has to be site-ready. Harryette enables permissions for Lisa’s user record. Follow along by setting the same license, profile, and permission sets for Charles Green (no relation to Lisa).
- Make sure you're in the Health Cloud Lightning Console.
- Go to the navigation menu and click Patients.
- Click Charles Green.
- Click
 and select Enable Customer User. The New User page opens for editing.
- In User License, select Customer Community Plus.
- In Profile, select Community Customer Plus Cloned Version.
- For email, enter
cgreen@bestflooring.com.
- For username, enter
cgreen@bestflooring.com.
- Click Save.
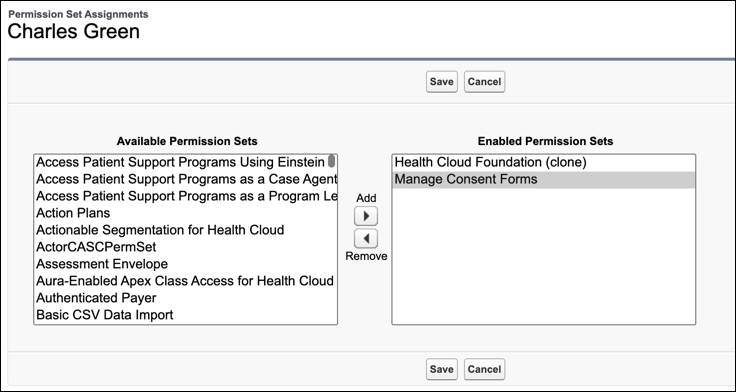
- Click Permission Set Assignments.
- Click Edit Assignments.
- Add Health Cloud Foundation (clone) and Manage Consent Forms to the Enabled Permission Sets list.
- Click Save.
Now that Charles is site-ready, Leif can add Charles to Goodly Healthification’s site.
Add the Enroll Button
Harryette wants to make it easy for Leif to enroll a user in a care program. She decides to add the Enroll in Program button to the person account page layout. This is how she does it.
- In Setup, select Object Manager.
- Click Person Account.
- Click Page Layouts.
- Click Person Account Layout.
- Click Mobile & Lightning Actions.
- Drag the Enroll in Program action from Mobile and Lightning Actions (1) to the Salesforce Mobile and Lightning Experience Actions section (2).

- Click Save.
Use Flow Builder to Customize the Program Enrollment Flow
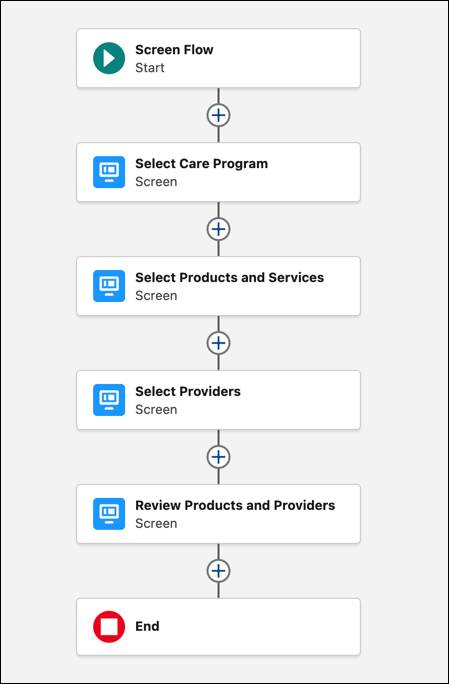
Salesforce delivers an automated process for enrolling patients in care programs. The flow lets the care coordinator select a program, add products, add providers, and finally capture the participant’s consent. Harryette knows that Leif likes to work through the enrollment steps first and then capture the patient’s consent, so she creates a new flow without the consent screen.
Although Harryette removes the consent component for this flow, consent is an important part of enrollment. Harryette ensures that capturing consent is included as a separate flow. For more details, read Configure the Program Enrollment Flow.
- In Setup, in the Quick Find box, enter
Flowsand select Flows.
- In the New Automation screen, in the search box, enter
Program Enrollmentand select Program Enrollment from the Templates section.
- Delete the Enrollment Consent Forms element.
- Click Save.
- In the Save the flow window, define the new flow.
- Flow Label:
Pre-Enroll - Flow API Name:
Pre_Enroll - Description:
Enroll patients in care programs without recording consent.
- Click Save.
- Click Activate.
- Exit Flow Builder.
To add this flow, Harryette has to create a new action.
- In Setup, click Object Manager.
- Click Account.
- Click Buttons, Links, and Actions.
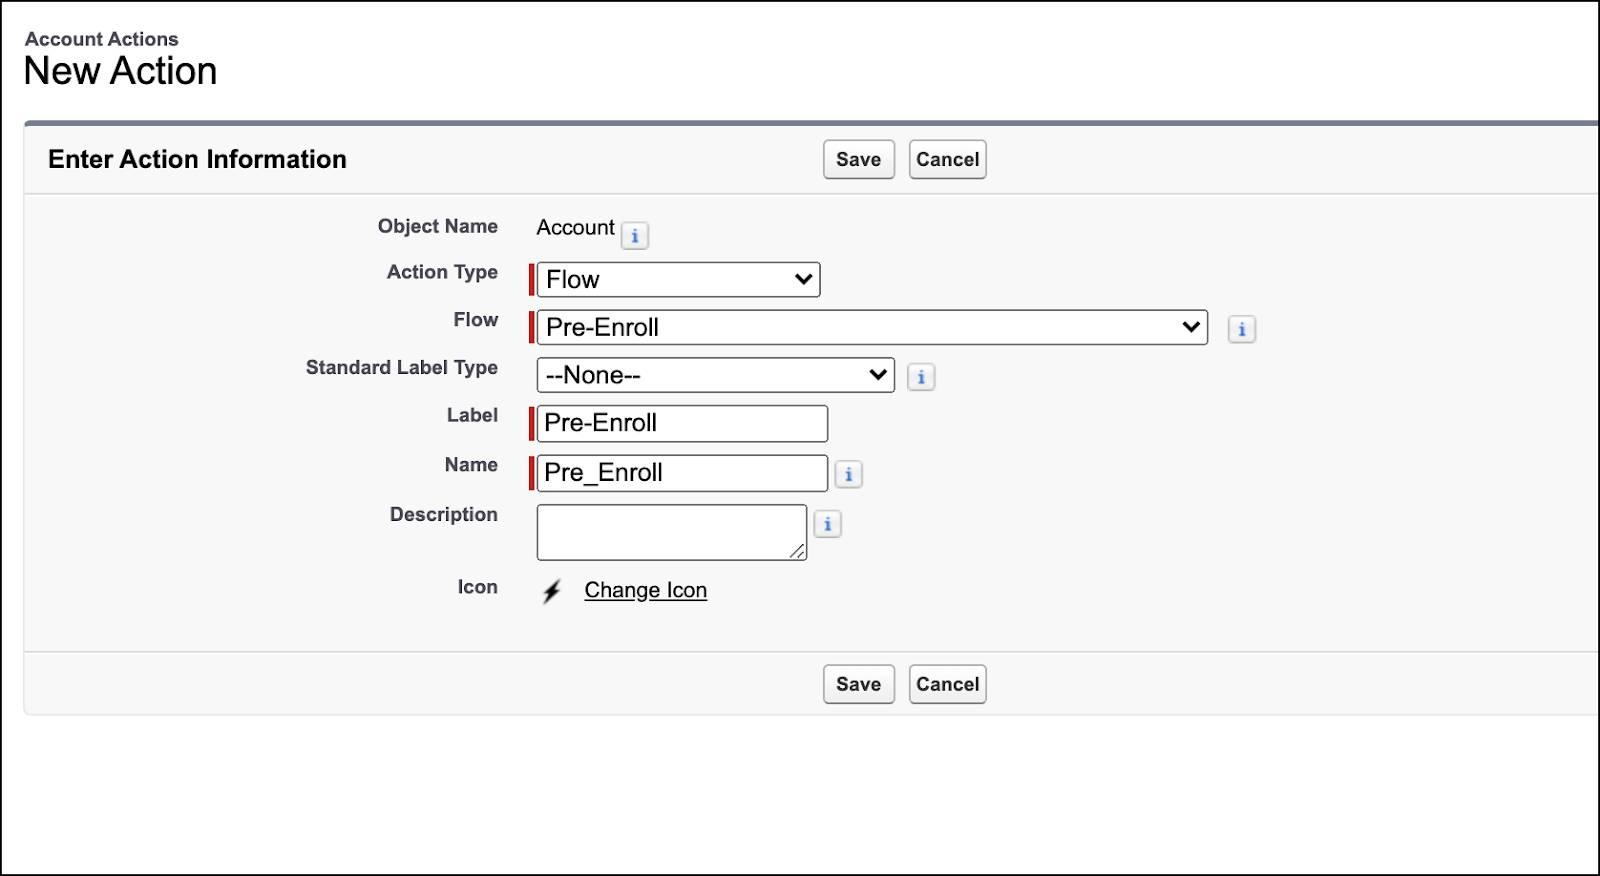
- Click New Action.
- Define a new action:
- Action Type: Flow
- Flow: Pre-Enroll
- Standard Label Type: None
- Label:
Pre-Enroll - Name:
Pre_Enroll
- Click Save.
- Add the new action to the person account page layout, next to the Enroll in Program button.
If you need help, refer to the instructions for adding the Enroll in Program button to the page layout earlier in this unit.
Enroll Members in Care Programs
When Lisa logs in to the Goodly Healthification Pharma site, she sees the care programs that will help her manage her diabetes. As she gets started, she needs some help with her weekly injections. One program that can help her is Goodly Healthification Diabetes Management Care Program, which offers a service called Goodly Healthification Diabetes Type 2 Injection. She reaches out to Leif Hansen, the patient manager at Goodly Healthification Pharma. He’s happy to help.
Leif sets about enrolling Lisa in the care program.
- Return to the Health Cloud Lightning Console.
- Open Lisa Green’s person account record.
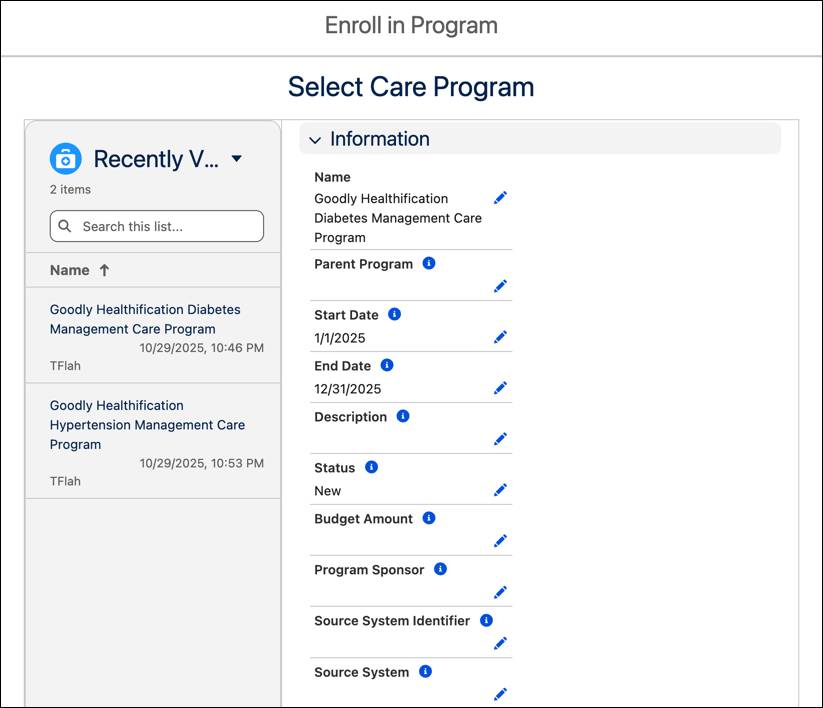
- Click Enroll in Program.
- Select Goodly Healthification Diabetes Management Care Program and then click Next. The Select Products and Services page opens.
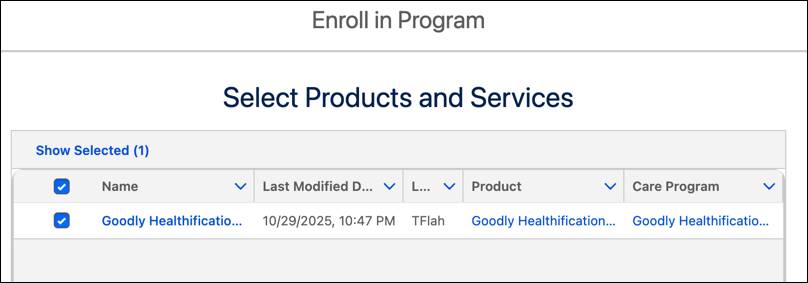
- Select the Goodly Healthification Diabetes Type 2 Injection care program product and then click Next. The Select Providers page opens.
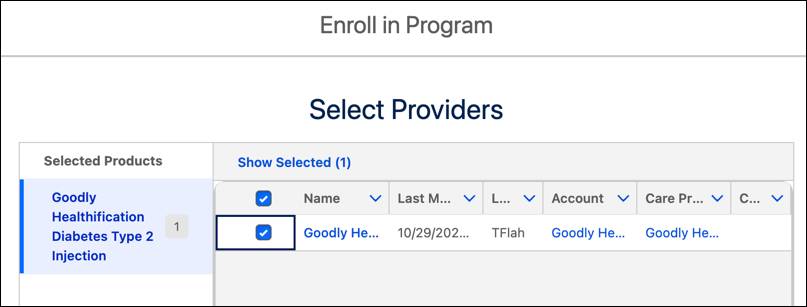
- Select the Goodly Healthification Clinic care program provider and then click Next. The Review Products and Providers page opens.
- Review the products and providers and then click Enroll.
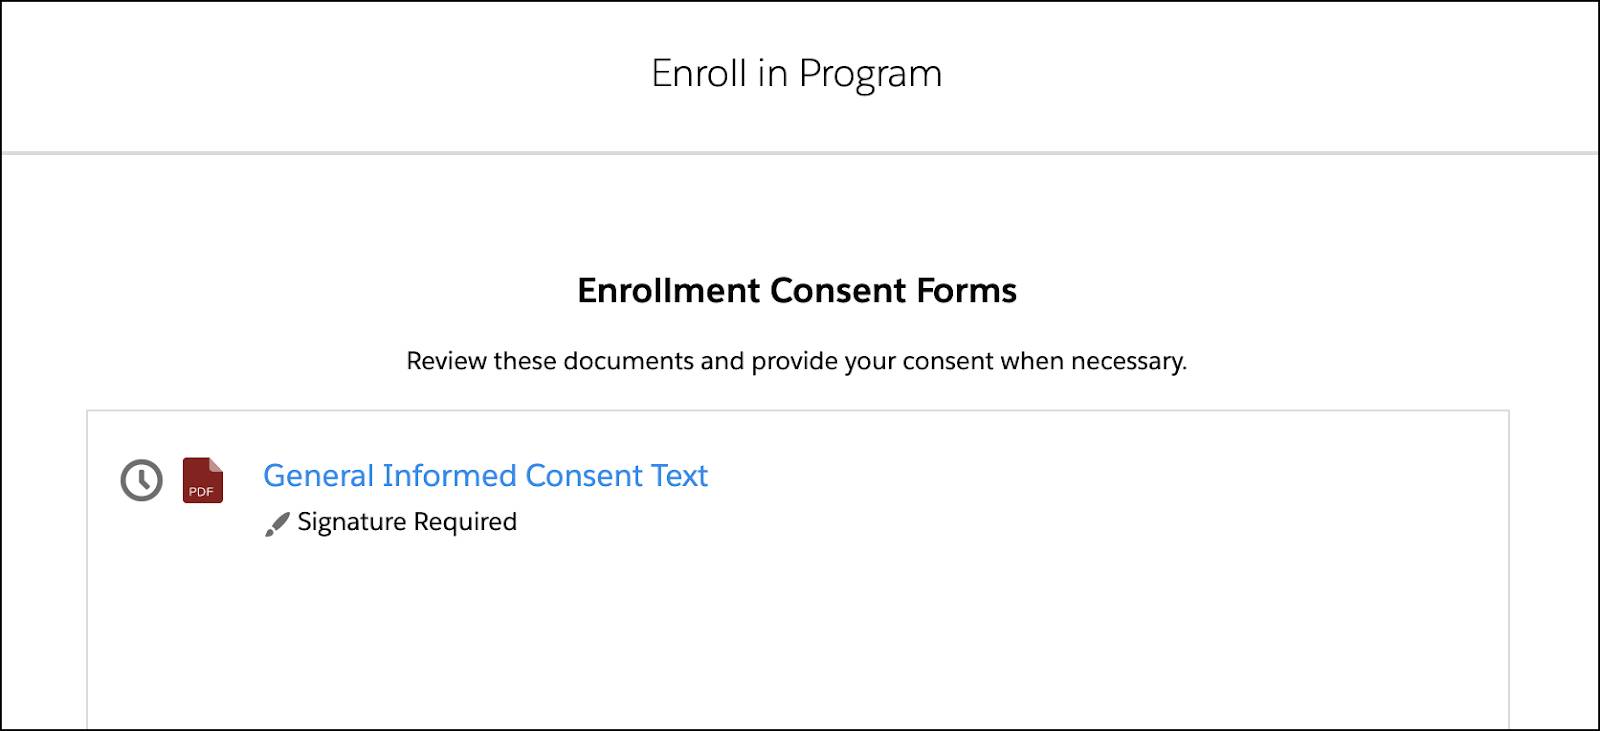
- In Enrollment Consent Forms, select General Informed Consent Text. Users can provide their e-signature from their mobile device.
Note: Steps 9-12 are not required in the hands-on challenge.
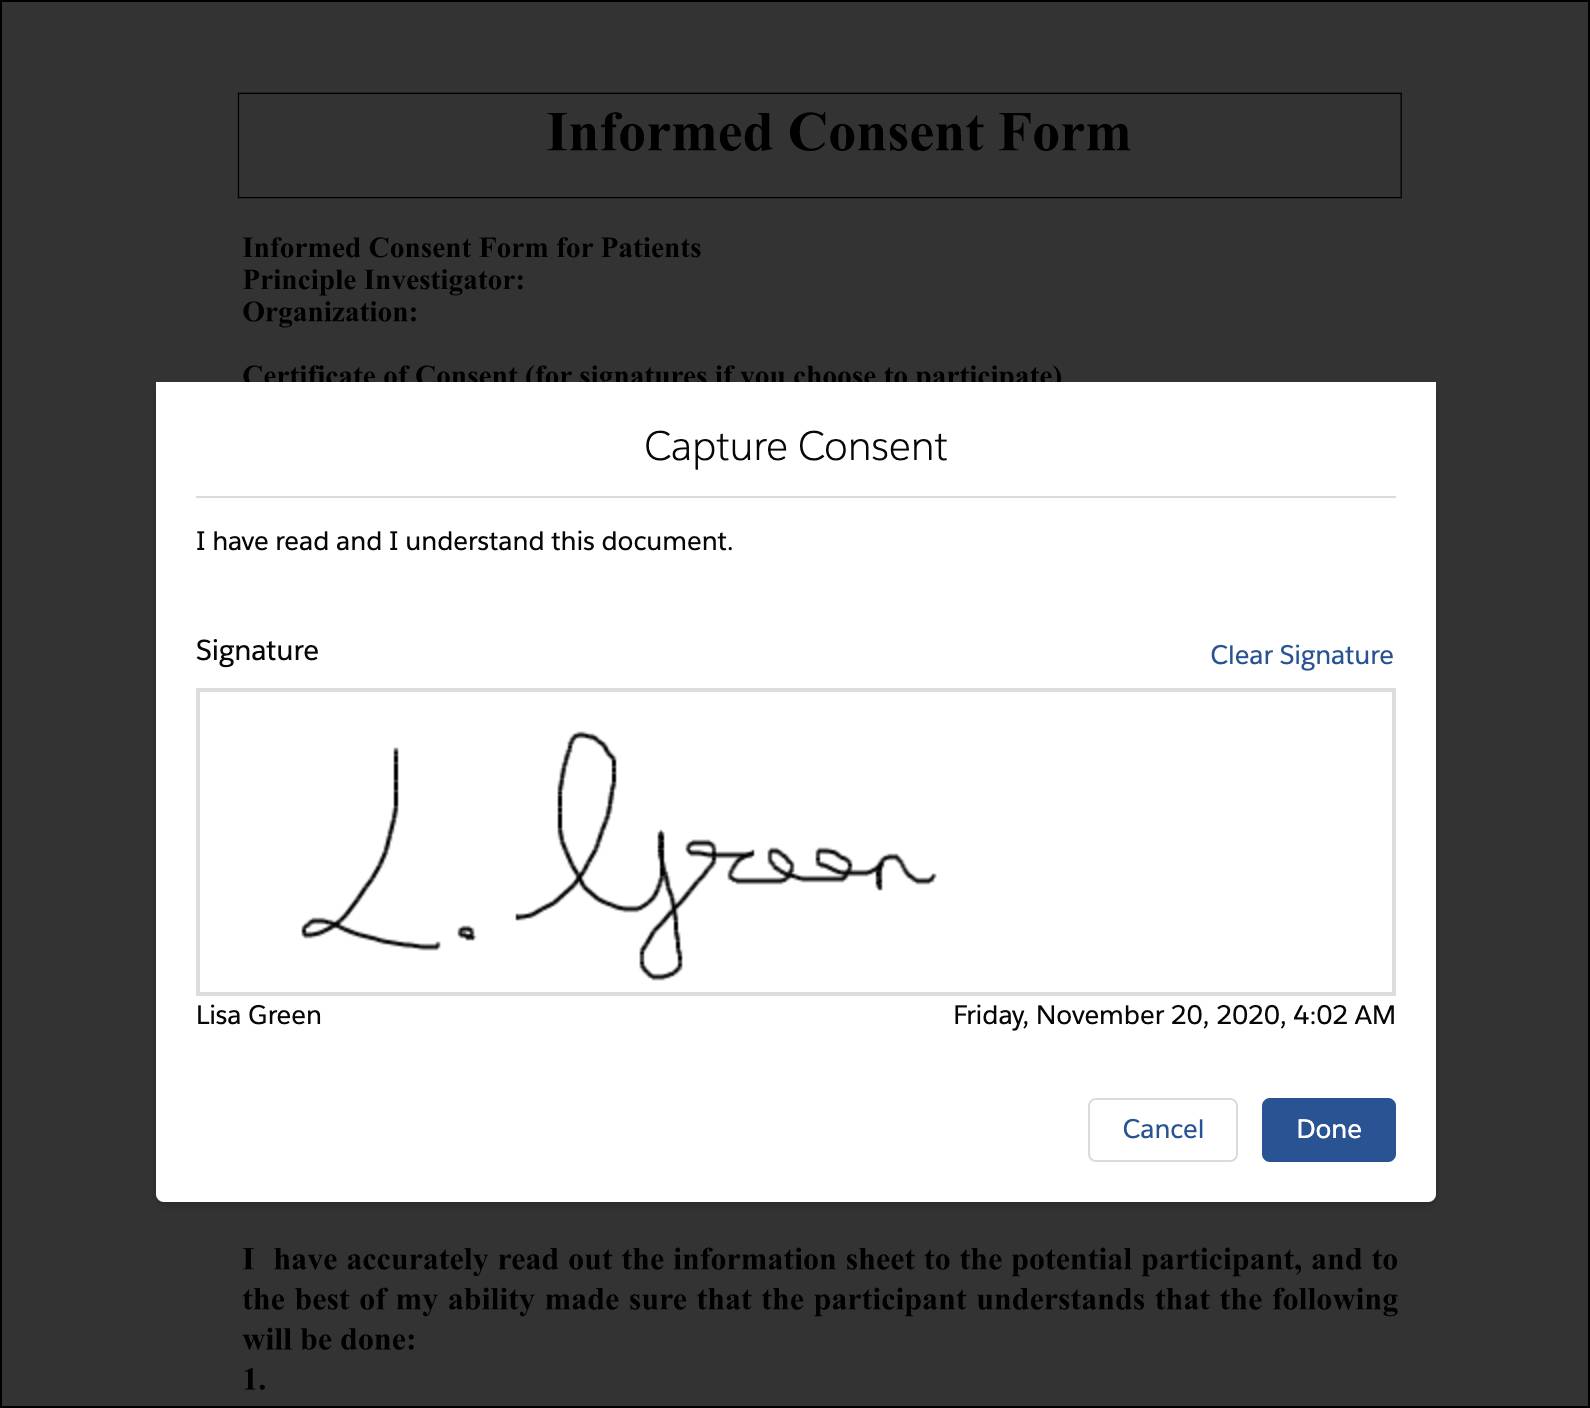
- Click Consent.
- Enter a signature for Lisa Green.
- Click Done.
- Click Finish.
Note: To learn more about capturing the patient’s consent, head to the Consent Management module.
To Sum Up
Lisa is successfully enrolled in a care program that helps her manage her diabetes. Because Goodly Healthification Diabetes Type 2 Injection is offered by Goodly Healthification Clinic, and Goodly Healthification Clinic also provides diabetes assistance, Lisa is assigned a nurse who briefs her on how to effectively take the injection. Goodly Healthification Pharma’s site keeps Lisa updated with the most useful knowledge articles and resources available. For further support, Lisa can also enroll in other care programs like Insulin Therapy, Weight Management, Physical Fitness, and so on. Leif can get Lisa’s caregivers involved for better adherence and support.
Lisa is no longer overwhelmed by having to manage her condition. She is well-supported on her way to controlling her diabetes.
Resources
- Salesforce Help: Enroll a Participant in a Care Program
- Salesforce Help: Configure the Program Enrollment Flow