Customize Care Plans
Learning Objectives
After completing this unit, you’ll be able to:
- Customize fields for problems, goals, and tasks.
- Customize the task view under all care plans.
The most distinguishing feature of care plans and care plan templates is their flexibility. Care coordinators can customize care plan components in various ways to suit the unique needs of their patients. But for this, they need the admin’s help.
Let’s see how Harryette customizes the care plan components for April. Here is an overview of the steps Harryette takes. You don’t need to follow along in your org just yet. You’ll get to set up Care Plans later in the module.
Change the Fields in Problems, Goals, and Tasks
Harryette wants to customize the Problem object. She wants to add the fields Description, Priority, and Sort Order and make them required properties. This is how she does it:
- In Setup, go to Object Manager and enter
Problemin the Quick Find box.
- Go to Page Layouts and select Problem Layout.
-
Description and Priority are in the list of fields on the top. Select Description from area 1 (Fields Area) and drag it to area 2 (Problem Detail Area).
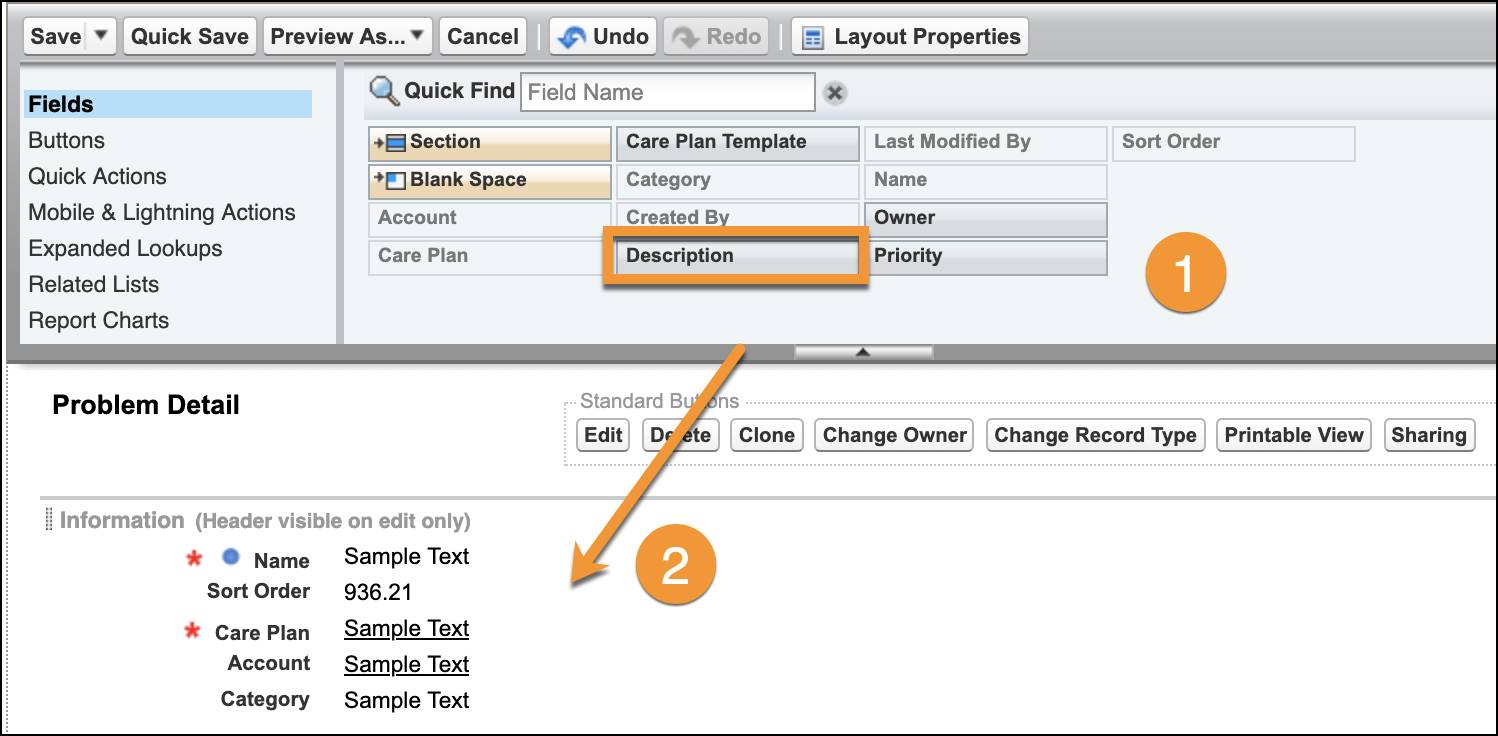
- To make the Description field a required field, double-click the element or click
 next to it and select the Required field.
- Click Save.
- Repeat steps 3 to 5 to add the Priority field.
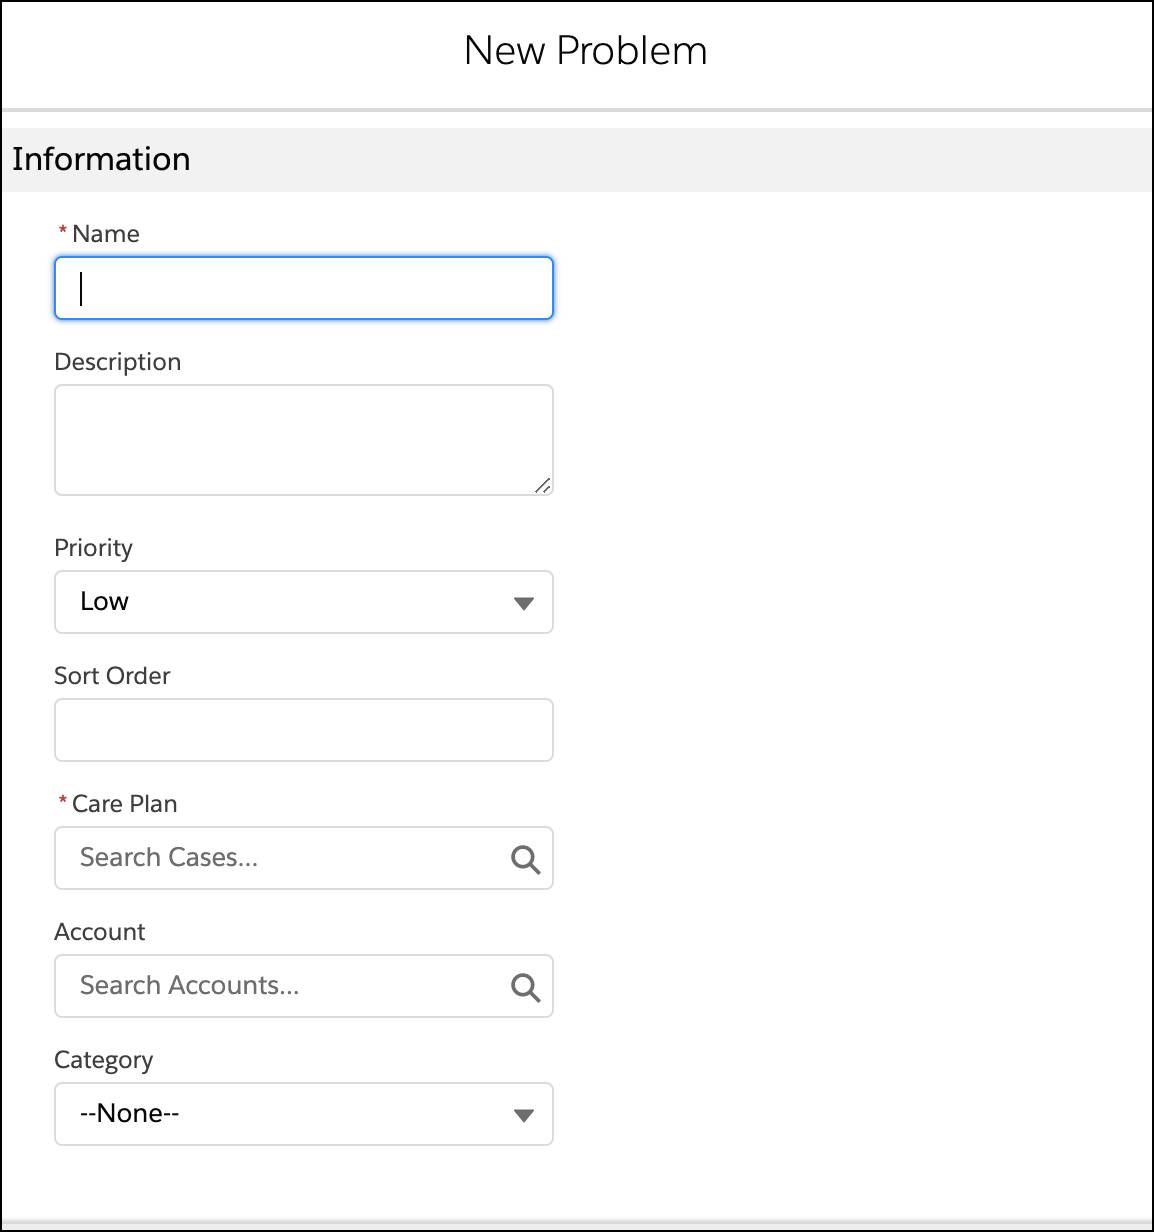
Here's what it looks like when April creates a new problem.
To customize fields related to Tasks and Goals, Harryette follows the same steps.
She goes to Object Manager, then enters the name of the respective component in the Quick Find box (Task or Goal). She then selects the Page Layout and selects HealthTask Layout or Goal Layout to make the changes.
Change the Values for Task Fields
Harryette has added and customized various fields for problems, goals, and tasks. But now she goes further and customizes the field values as well. Harryette wants to add field values that April will most often assign. Let’s follow her as she edits and adds task types, task priority values, and task status values.
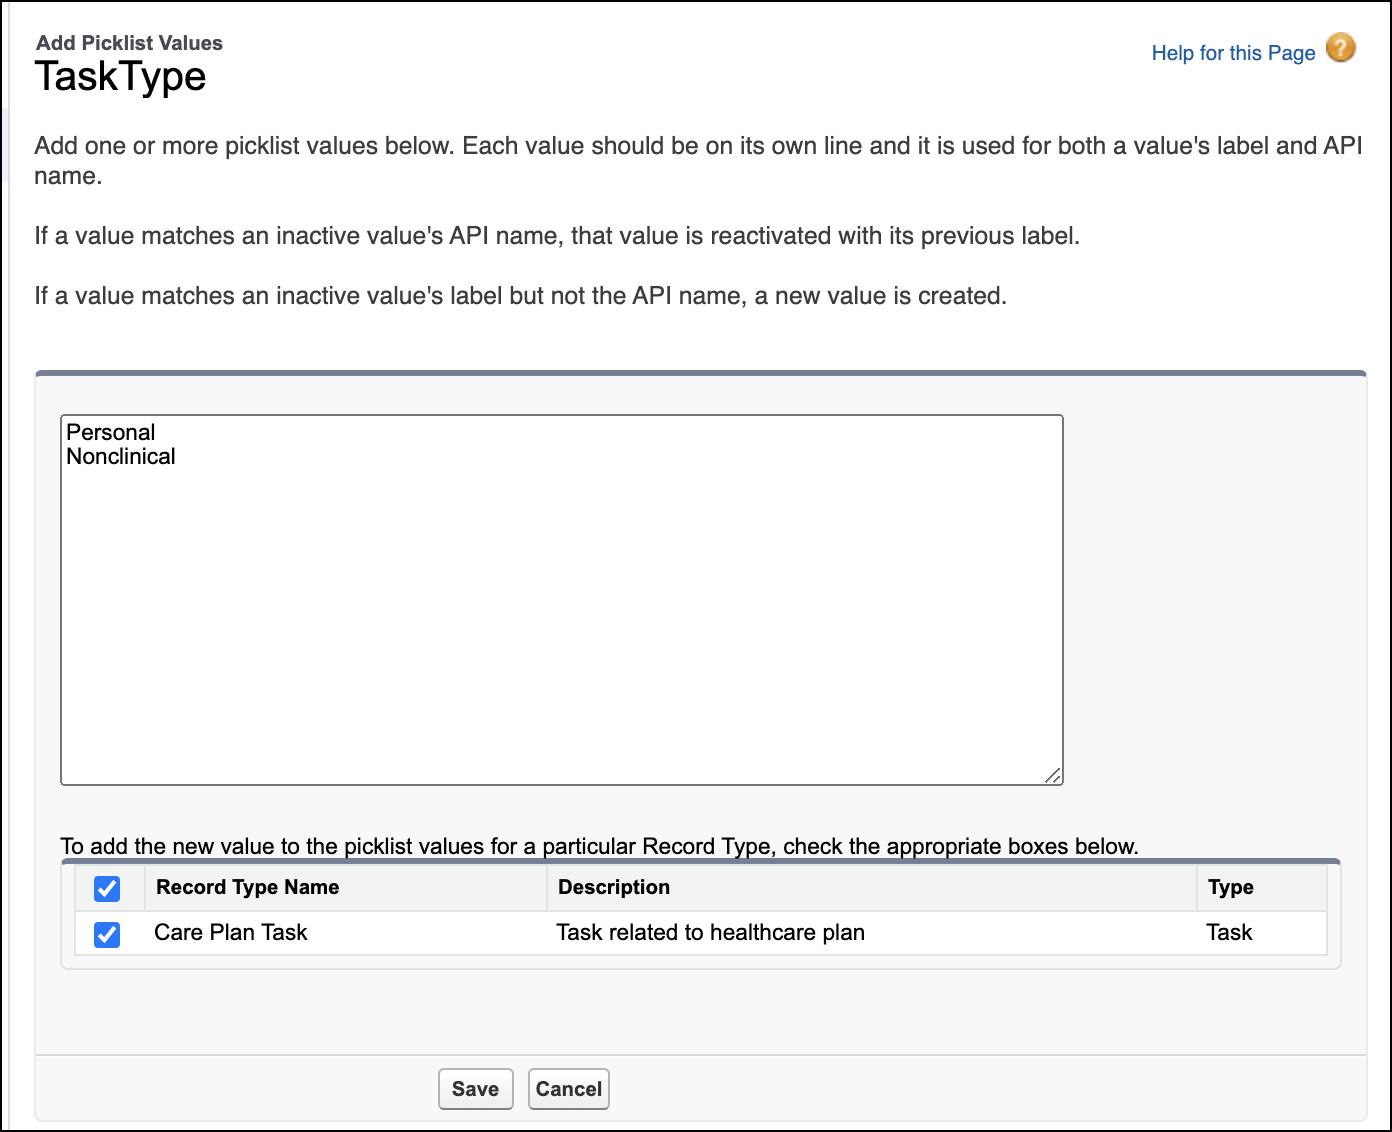
First, Harryette wants to add a custom task type. Task types are tasks that are specific to the type of care that they deliver. For example, Charles might be assigned tasks that are nonclinical or personal. Harryette wants to add the Personal and Nonclinical task types to the list of picklist values that appear when selecting a task type.
To set up a new task type, Harryette does the following:
- In Setup, go to Object Manager and enter
Activityin the Quick Find box.
- Select Activity.
- From Fields & Relationships, select TaskType.
- Under Values, click New.
- Enter the picklist values
PersonalandNonclinical, on separate lines.
- Select the Care Plan Task checkbox so that the new values are associated with the Task Type picklist.
- Click Save.
Now when April creates the new task, she sees the new picklist values Personal and Nonclinical in the dropdown.
Harryette next wants to edit the task priority values and add the value Urgent. April uses this value to denote care plans that need immediate attention.
- In Setup, go to Object Manager and enter
Taskin the Quick Find box.
- Select Task.
- Click Fields & Relationships and select Priority.
- Scroll to the Task Priority Picklist Values table and click New.
- Enter
Urgentas a picklist value in the text box. To add more values, put each value on a separate line.
- Select the Care Plan Task checkbox to associate the new values with the care plan.
- Click Save.
April can now categorize the priority of a care plan as Urgent.
Harryette customizes the picklist values for Status in the same way.
Change the Order of the Group By Fields
There are six categories of groupings for tasks: Problem & Goal, Goal, Problem, Assigned To, Due Date, and None. Sometimes a care coordinator changes the order of the groupings. If they mostly sort the tasks by problems, they could place Problem at the top of the Group By list.
April wants to sort tasks by Due Date. Let’s see how Harryette sets it up.
- Go to Setup and enter
Custom Settingin the Quick Find box.
- Click Manage next to Task Groups.
- Click Edit next to Date.
- Enter
1for Sort Order. Click Save.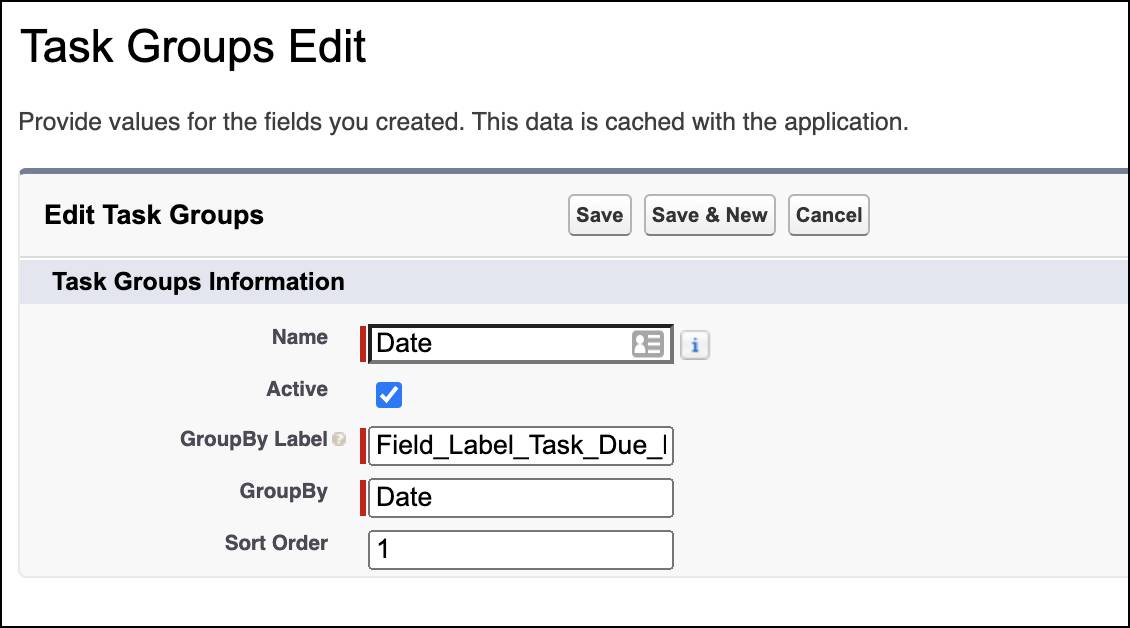
- Click Edit next to Problem & Goal and enter
5for Sort Order.
- Click Save.
Harryette arranges the view in any order that April wants.

Harryette has customized care plans, problems, goals, and tasks and their related fields. Now April can smoothly go about her day as she creates care plans and care plan templates for her patients. Let’s look at what the experience is like for April.
Customize Care Plan Task
When April views a care plan from the All Care Plans tab, she sees the Tasks and its components in one view. Look at a list of Tasks under a care plan for diabetes. They have fields such as Due Date, Priority, Status, Closed, and so on. April wants to change the fields that appear here. She wants to remove Closed from this list and add the Active field. To do this, she asks for Harryette’s help.
- From Setup, go to Object Manager and enter
Taskin the Quick Find box.
- Click Field Sets.
- Select HC Task List.
- Click Closed under In the Field Set.
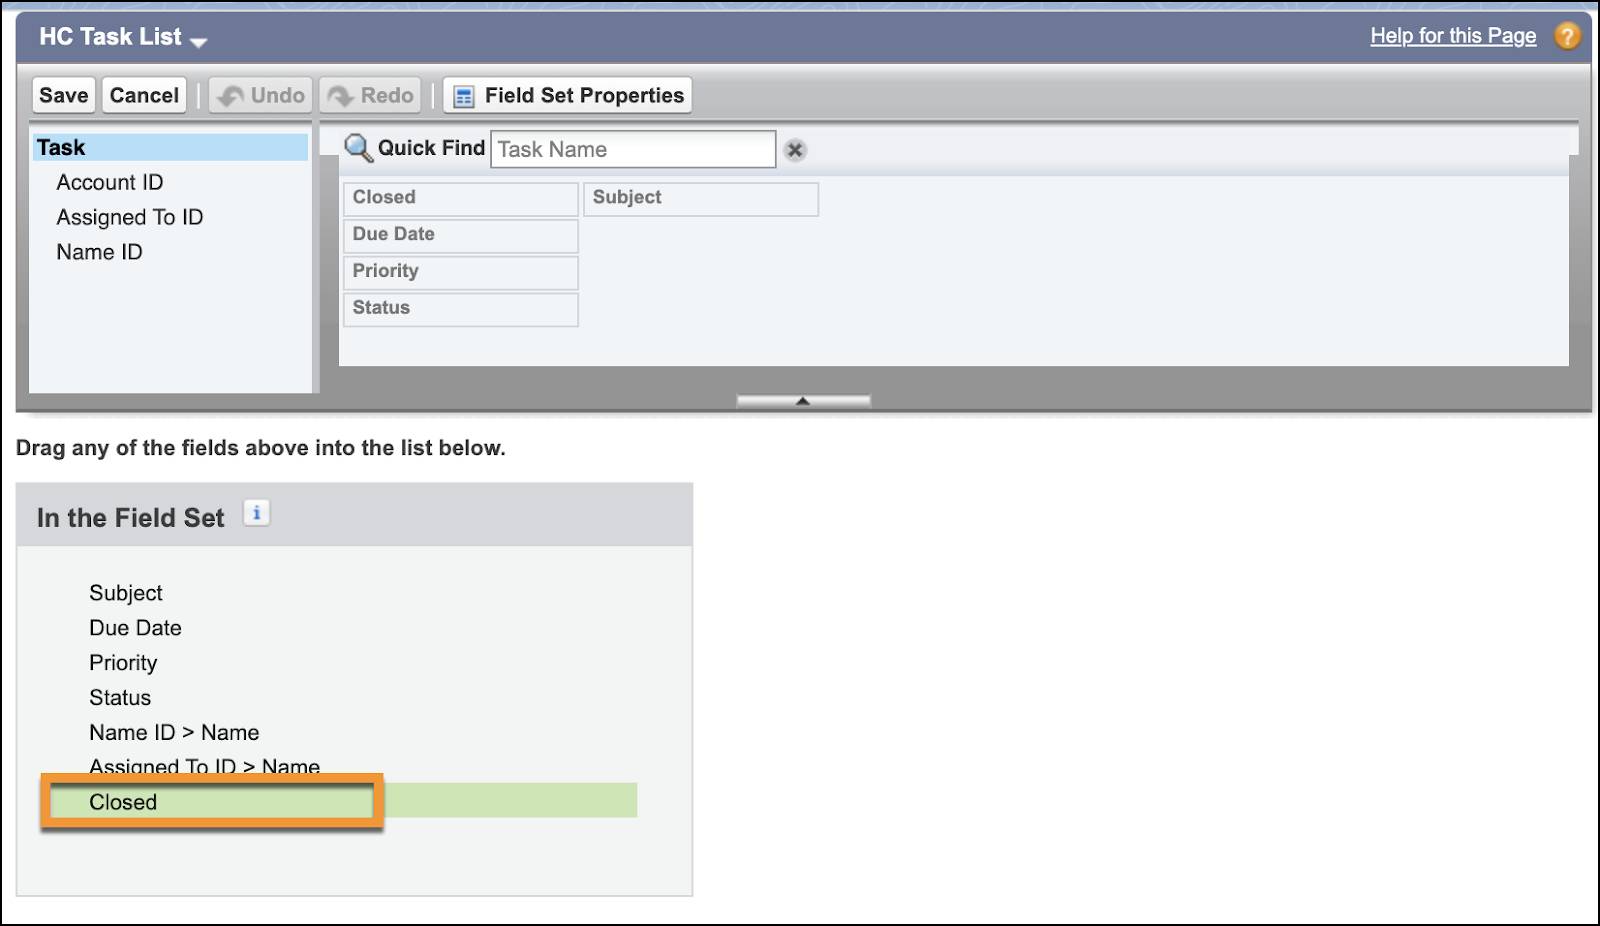
- Click
 next to the element.
- Click Save.
- To add the Active field from Account ID, drag it from area 1 to area 2 under In the Field Set.
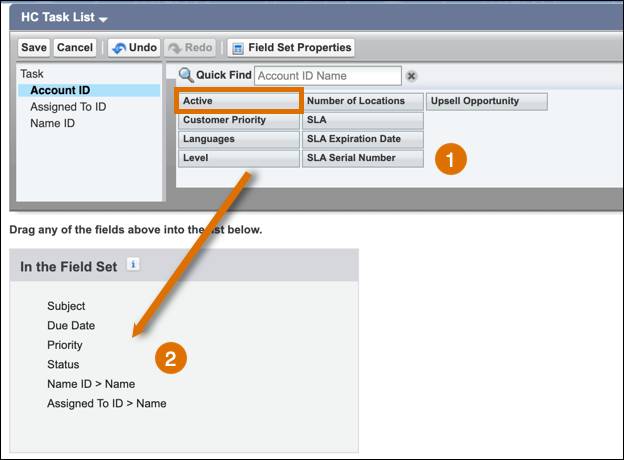
- Click Save.
Now, after removing the Closed field and adding the Active field, April sees the new Task list. Harryette can also change the order in which the fields appear by dragging the fields up or down in the area called In the Field Set.
Customize Care Plan Components View
Care plans can be created with a simple, single flow. But before talking about that, let’s have a look at a few more customizations that can help care coordinators streamline the process.
As part of the standard flow of creating a care plan, April must assign at least one care team member in the Care Team field before she can save the care plan. But if April wants to set up the care plan first and add Care Team members later, this is how Harryette can customize the care plan creation process for April.
Note: The steps below have already been created in your developer org. Read along but don't recreate them.
- From Setup, enter
Custom Metadata Typesin the Quick Find box.
- Click Manage Records next to Health Cloud Setting.
- Click Edit next to ConfigureCareTeamInNewCarePlan.
- The Care Team field is a required field because the Label is active. To remove it from the care plan creation process, deselect the checkbox next to Active.
- Click Save.
The Care Team field is no longer part of the care plan creation flow. April can go on to create the care plan and add the care team later. Only the patient appears as the default member.
Now that you can customize care plans and their components, let's try using them. In the next unit, you'll create care plans and care plan templates and find out ways to manage care plans.
Resources
- Salesforce Help: Add or Edit Task Priority Values
- Salesforce Help: Add Custom Task Types
- Salesforce Help: Customize Care Team Roles