Customize User Settings
Learning Objectives
After completing this unit, you’ll be able to:
- Adjust the calendar view and shift appointments.
- Customize a mobile worker’s push notifications.
- Add a quick action to a mobile worker’s app.
- Set up a flow to speed a mobile worker through a process.
Shift Appointments to Today
Your new Trailhead org contains sample appointments for September 22 to 24, 2021. To use that data in this unit, you must move the appointments forward to today.
First, display all the appointments in the Gantt.
- From the App Launcher
 , find and select Field Service.
- Click the Field Service tab to display the Dispatcher Console.
- In the Gantt, use the calendar to select September 22, 2021.
- In the Gantt, select 3 Days.

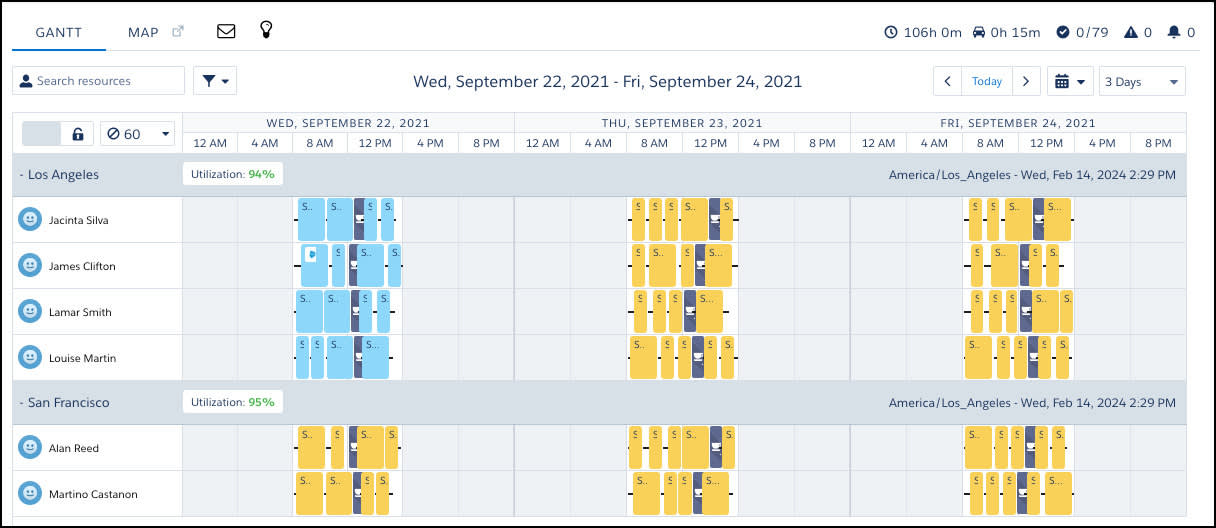
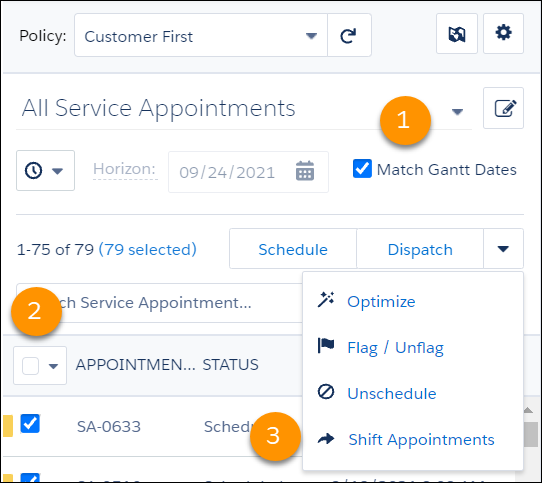
Now, select all the appointments in the appointment list and move them forward.
- In the appointment list, make sure that Match Gantt Dates is selected.
- From the dropdown next to APPOINTMENTS, choose ALL to select all appointments. (You may have to deselect and select again.)
- From the dropdown list next to the word Dispatch, choose Shift Appointments.
- On the Gantt, click Today to see the appointments moved to their new dates. The appointments have moved to yesterday, today (your current date), and tomorrow.
Customize Push Notifications
One way that Field Service communicates with mobile workers is by sending messages called push notifications to their mobile devices. For example, a mobile worker receives a push notification in their app telling them their schedule has changed. Then the worker can check out their new schedule to see their new tasks.
Maria’s team wants to use a push notification to inform mobile workers when a service appointment’s status changes to Dispatched. Then workers know that they have a new job to do and when to get started.
Maria enables push notifications.
- To use push notifications, make sure you downloaded the Field Service Connected app from a previous unit. Maria has already done that.
- From Setup, enter
Field Service Settingsin the Quick Find box, then select Field Service Settings.
- Under Notifications, verify that Enable notifications is selected, and save your changes.
- Under Sharing, select all three sharing settings. (Your screen may look somewhat different from this image.)
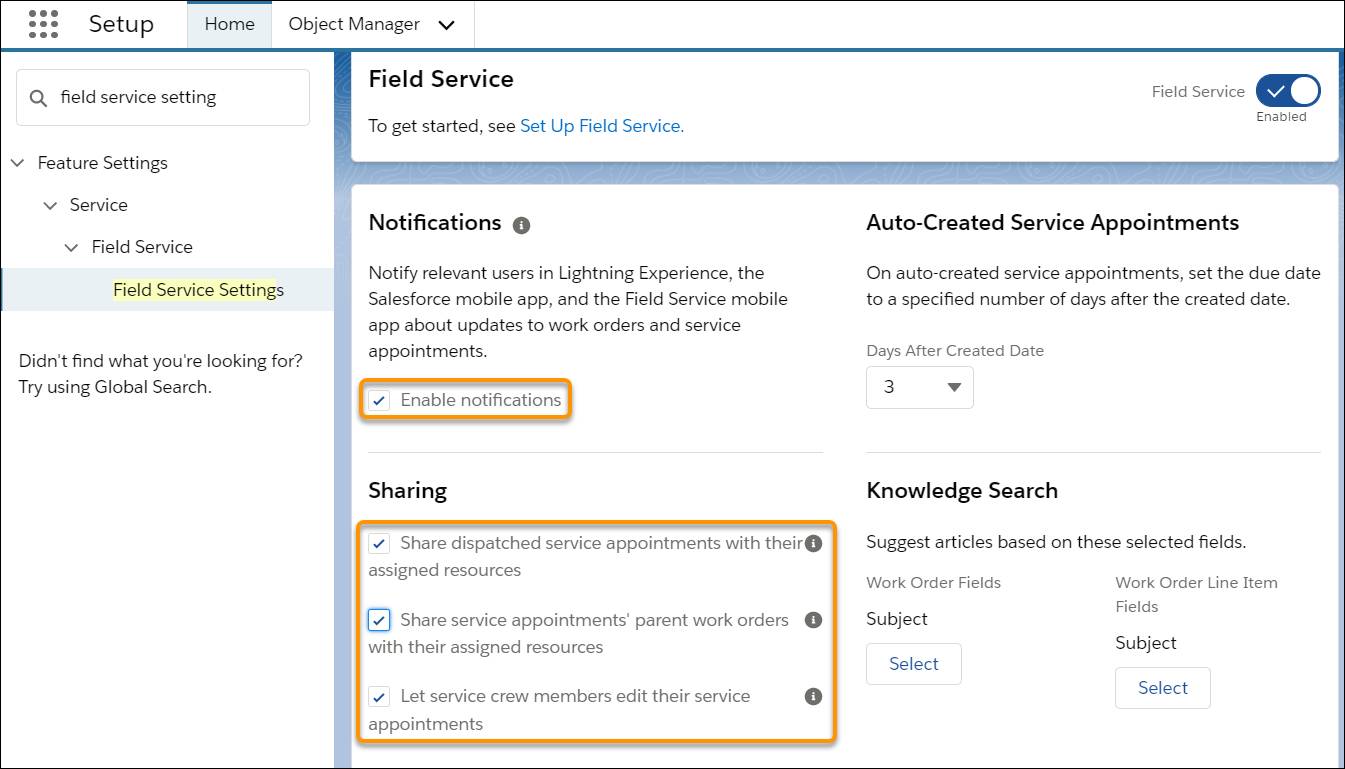
- Save your changes.
Next, Maria sets up mobile push notifications for the Dispatched status.
- From Setup, enter
Field Service Mobile Settingsin the Quick Find box, then select Field Service Mobile Settings.
- In the Field Service Mobile Settings pane, click Field Service Mobile Settings.
- From the dropdown, select Show Details.
- Scroll down to Notification Settings and edit to select Send appointment notifications on dispatch and verify that Send appointment notifications on assignment is also selected.
- Save your changes.
With these settings in place, first, a service appointment with a work order or work order line item parent is dispatched to mobile workers. Then a notification appears in the Field Service mobile app on the workers’ mobile phones. They also see a notification if an assignment is changed or removed. Even if they change the service appointment or are removed from the service appointment after it’s dispatched, they still receive the notification.
Add a Quick Action
Maria has received a request to add a quick action to the mobile app that gives mobile workers a speedy way to update a service record. Because this is something they do often, making it easier saves a lot of time.
First, she checks to see if the action already exists on the Service Appointment object.
- Click
 , then select Setup.
- Click Object Manager and click Service Appointment.
- Click Buttons, Links, and Actions.
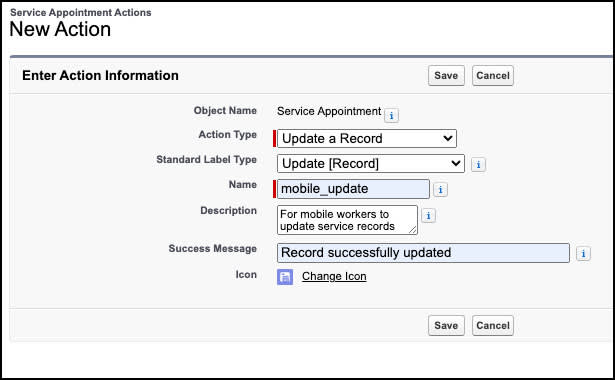
- Check to see if the Update Record action exists. If not, create it. Maria looks through the list of actions and discovers an action called Update Record that does just what she needs.
If you haven’t created an Update Record action, click New Action, fill in the New Action fields, and save your work.
Maria adds the action to the Service Appointment page layout so it shows up on her team’s mobile devices.
- Click
 , then select Setup.
- Click Object Manager and click Service Appointment.
- Click Page Layouts.
- Click the page layout. Maria clicks FSL Service Appointment Layout.
- From the layout editor, select Quick Actions.
- Drag the Update Record action into the Quick Actions in the Salesforce Mobile and Lightning Experience Actions section. (If you're following along in a playground, you may not be able to do this, as the Service Appointment may be managed.)
- Save your changes.
The action appears in the app and on the full Salesforce site for profiles using the Ursa Major Service Appointment Layout for their page layout.
Create a Flow
Ursa Major requires that its mobile workers perform new safety tasks every time they arrive at a work site. To ensure that each task gets completed, the team asks Maria to create a checklist. Maria decides to create the checklist as a flow and allow workers to check off each task as they finish it.
First, Maria creates the flow.
- Click the App Launcher (
 ).
).
- In the Search apps and items box, enter
autoand then select Automation.
- In the Flows panel, click New.
- In the Search automations box, search for and select Field Service Mobile Flow.
Next, Maria adds items to the new flow.
- On the flow canvas, on the path after the Start element, click
 . Select Screen.
- For the label, enter
Safety Checklist.
- Click API Name and
Safety_Checklistis filled in.
- Add items to the screen.
- Drag Checkbox from the list to the screen.
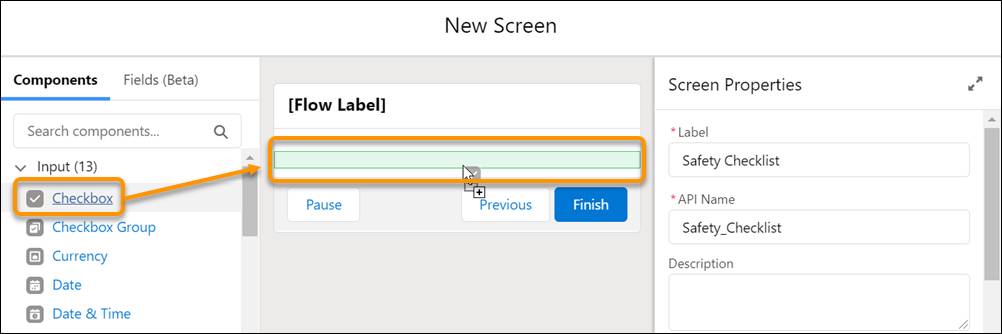
- For the checkbox label, enter
Are you wearing a mask? - Drag a second Checkbox under the first one.
- For the label, enter
Have you sanitized your hands? - Drag a third Checkbox under the second.
- For the label, enter
Have you sanitized your tools?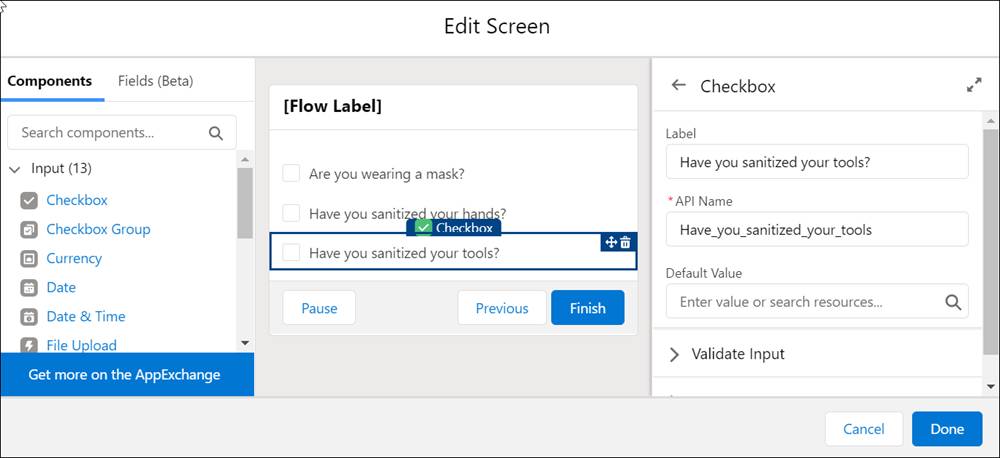
- Click Done.
- Click Save to save the flow.
- For the Flow Label, enter
Safety Checklist Flow.
- Click Flow API Name to see
Safety_Checklist_Flowfilled in automatically.
- Click Save.
- Click Activate.
Finally, Maria connects the flow to her team’s mobile app.
- Click
 , then select Setup.
- In the Quick Find box, enter
field service mobileand click Field Service Mobile Settings.
- From the dropdown, select Show Details.
- Scroll down to App Extensions and click New.
- Fill out the values.
- For Type: Flow
- Launch value: Name of the Flow. Maria enters
Safety_Checklist_Flow - Label:
Safety Checklist - Name:
Safety_Checklist - Scoped to Object Types: Object API Name. Maria enters
ServiceAppointment - Save your changes.
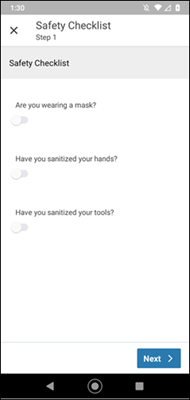
The flow is now part of the team’s mobile app. When James Clifton goes to his next appointment, he clicks a service appointment. He clicks the action menu to find and complete the safety checklist before he starts the job.
Maria customized the mobile app for Ursa Major’s team. She changed the push notifications, added a quick action to make it easier to set an appointment’s status, and added a safety checklist flow.
Resources
- Salesforce Help: Customize Push Notifications for the Field Service Mobile App
- Salesforce Help: Create Quick Actions for the Field Service Mobile App
- Salesforce Help: Add Flows to the Field Service Mobile App
- Salesforce Help: Customize the Field Service Mobile App by User Profile