Send a Single Promotional Email
Learning Objectives
After completing this unit, you’ll be able to:
- Explain the three parts of an email campaign.
- Name two CAN-SPAM requirements.

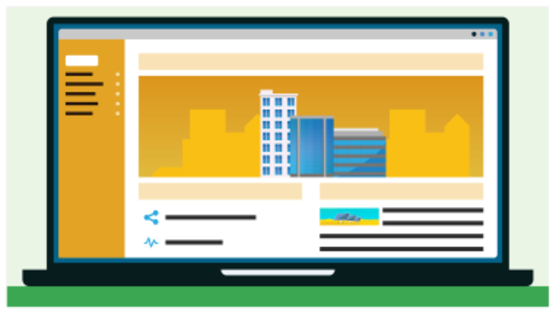
One-Time Email Promotion
As the Alternative Energies Expo approaches, the sales and merchandising teams at Ursa Major Solar, a supplier of solar components and systems, are thinking about how to engage the attendees. In addition to staffing their booth in the marketplace, they’re hosting a mixer event on the first evening. To spread the word, they plan to send a one-time email invitation.
Luckily, Ursa Major Solar has just the right digital marketing tools for success. In this module, you see how the team uses Salesforce email marketing, marketing automation, and marketing analytics to achieve its goals.

Plan an Email
Merchandiser Taylor Givens and sales reps Erin Donaghue and Lance Park come together to think about the message they want to send. Here’s what they need.
- Information about the mixer and a draft of the email text.
- Pictures and descriptions of the night’s door prizes.
- Criteria to segment the recipient list.
- Some target KPIs.
Erin wants to reach new leads and current contacts. The team decides to target new leads from the past 90 days and contacts created during the past few years. They’ll personalize the message and include a link to a landing page with more information. The team wants to see strong opens and click-throughs.
Review Prerequisites
Before starting, Taylor makes sure they’re all set up. Here’s what to consider before you set up your own email.
- To send promotional emails, you need consent from every recipient. Make sure that you import or manually add consent statuses (Opt In or Opt Out) for each lead and contact. If the Consent Status field for anyone in your segment is blank, they can’t receive your email.
Build and Send an Email
Taylor logs in to Salesforce to create the marketing email. On the Campaigns page, he clicks New, names the marketing campaign AEE Event Invitation, and chooses the Single Email campaign option. The campaign record outlines Taylor’s tasks, which make up the three parts of his marketing campaign. He’ll enter a schedule for the email send, target an audience segment as the start trigger, and customize the email content.

Build a Segment
Taylor needs to identify a target audience for the email, which means he needs to build a segment. Let’s dig into how it works.
- From the campaign’s Start Trigger section, click Select Segment | Go to Segment Builder | Use a Visual Builder.
- In the next window, set each field.
- Select the default data space.
- Select a Unified Individual data graph to segment on.
- Name the segment
Recent Leads and Contacts, and provide an optional description.
- Select the default data space.
- Leave the publish type as Standard Publish, and then click Next.
- On the segment canvas, expand the Attribute Library and drag these attributes from the Related Attributes section. Then, set the AND/OR selector.
- Lead | Created Date: Last Number of Days = 90
- Account Contact | Created Date: Is After = January 1, 2023
- Selector: OR

- Save the segment, and then return to the campaign record.
Edit and Personalize Email Content
To add customer information into an email in Marketing Cloud Next, an admin must first configure and select a data graph in Salesforce Setup. After that’s complete, a user can select from primary and related object fields, such as names or preferences, to use as merge fields in an email.
- In the Send Email Message section, click Edit.
- In the Settings panel, set the Message Purpose to Promotional.
- Then, scroll to the Content box, and enter a subject line and preheader for the email.
- To get help from Agentforce, click one of the
 icons.
- To add a merge field for the recipient’s name, click Add Merge Field | Recipient, and then select First Name.
- To get help from Agentforce, click one of the
- Customize the default styles for the entire email or in specific components.
- Scroll to the Color section in the Style panel. Switch the Color Scheme to Custom, and try a different background color. The colors update for all of the components in the email. To revert, go back to Color Scheme and select Inherited Color Scheme.
- On the email canvas, click a component to edit text or replace images or add components as needed.
Watch examples in this video playlist
- To comply with CAN-SPAM and other common privacy regulations, verify that the physical address merge field and Unsubscribe link appear in the footer.
- If your address doesn't appear when you preview the email, make sure that a business address is saved on the Company Information page in Setup.
- If your address doesn't appear when you preview the email, make sure that a business address is saved on the Company Information page in Setup.

Finalize and Schedule an Email
- To review the design or send yourself a test email, click Preview in the editor toolbar.
- To save the message and get it ready for the campaign, click Publish.
Don’t worry, publishing the email doesn’t send it yet!
- Back on the campaign record, click Schedule.
- Enter 8:30 AM on December 1, in US Pacific Time.
- Back on the campaign record, review your work, and then click Activate.
When it’s time for the invites to go out, the segment is refreshed overnight, and emails begin queuing for send at 8:30 AM.
Invitation Outcome
Leading up to the event, Taylor monitors engagement on the AEE Event Invitation marketing campaign by checking reports. Personalizing the subject line may have improved open rates, and the click-throughs are looking good.
During the event, a handful of guests tell Erin and Lance that they had more than one event that night, but chose Ursa Major’s mixer because of the door prizes that were promoted! Taylor meets some walk-ins who aren’t in their database, and asks them to sign up for future promotional emails.
Resources
- Salesforce Help: Promote Your Business with Salesforce Starter
- Salesforce Help: Marketing Cloud Next
- Video: Tour Starter Marketing
- Video Playlist: Customizing Emails