Get Started with Einstein Recommendations
Learning Objectives
After completing this unit, you’ll be able to:
- Prepare and upload your recommendations catalog.
- Install the Collect Tracking Code.
Before You Begin
In this module, we assume you are a Marketing Cloud Engagement user with the proper permissions to access Marketing Cloud Engagement. If you’re not, that’s OK. Read along to learn how you would take the steps in a production org. Don’t try to follow these steps in your Trailhead Playground. Marketing Cloud Engagement isn’t available in the Trailhead Playground.
Get Started with Einstein Recommendations
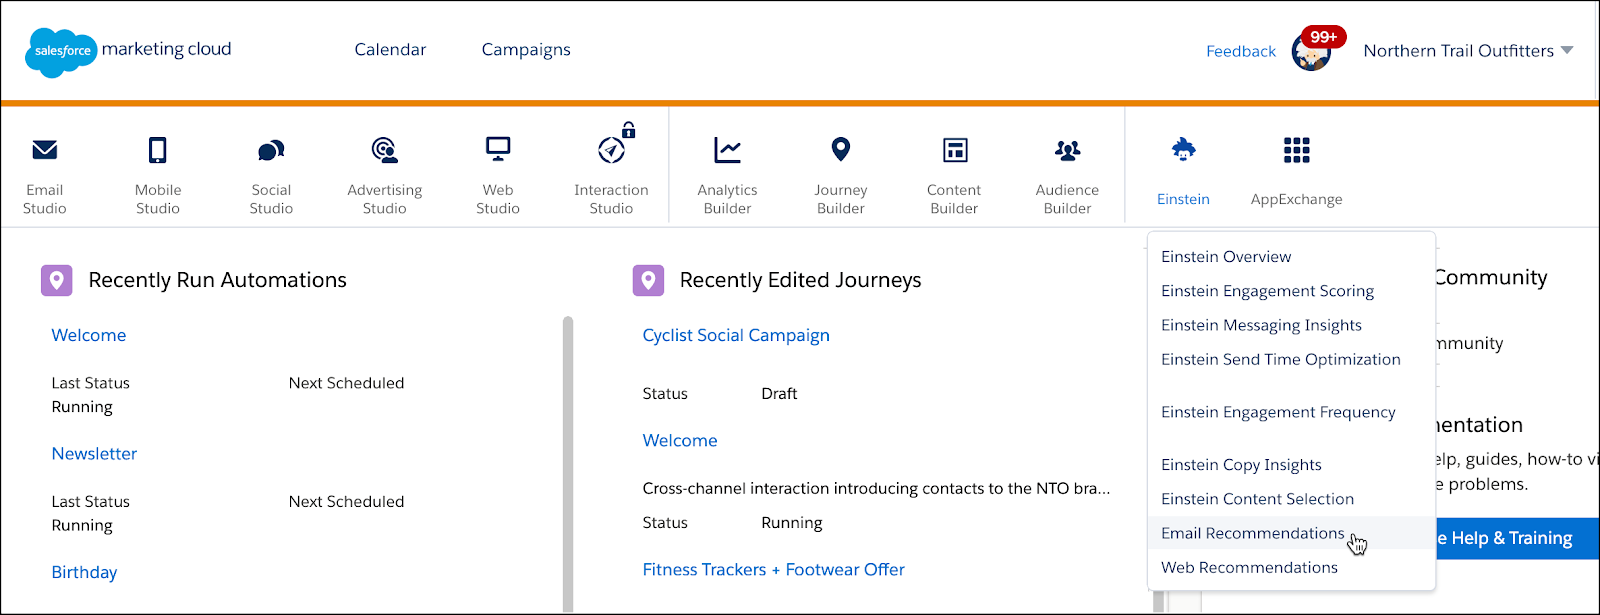
Let’s start creating those magical moments! First navigate to Email Recommendations in the Einstein dropdown menu.

When you get started, the user interface takes you through an onscreen step-by-step process to help you implement Einstein Recommendations. You can also go directly to Catalogs and Implementation under the Admin dropdown.

In this section, we focus on the two most important elements to get right: the catalog and Collect Tracking Code. Let’s take a closer look at each.
All About Catalogs
Einstein Recommendations use catalogs to understand which assets are available (in stock, published, and so forth) to recommend, as well as what defines those assets (color, price, author, date, and so on). The catalog is where all of your digital assets and the attributes that describe those assets live. Let’s review the three catalog types that can be used in Marketing Cloud Engagement.
Catalog Type |
Description |
|---|---|
|
Product
|
A catalog of all of your products available for purchase with images of your products and product information. You may have an existing product catalog already that can be used directly or adjusted. |
|
Content
|
A catalog of articles, blog posts, videos, or other types of content available for view. |
|
Banner
|
A web-specific catalog for image files such as hero graphics, calls to action, or offers. |
Attributes
Attributes in the catalog drive the rules you can create for your recommendations. So if you need a unique scenario for your brand, you need to add a custom attribute. For example, if Northern Trail Outfitters (NTO) wants to recommend a specific type of shoe to a customer based on their search history, NTO needs to add a custom attribute of shoe category (athletic, kids, or sandals) to its catalog.
What custom attributes are needed for your catalog? It’s important to spend time getting your catalog right to make sure you have all the needed tags and rules for your content.
Customer Profiles
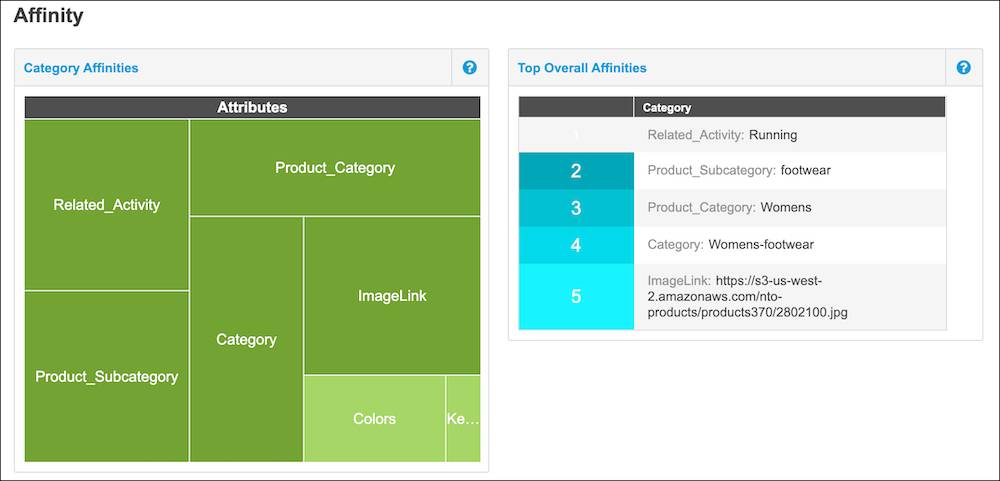
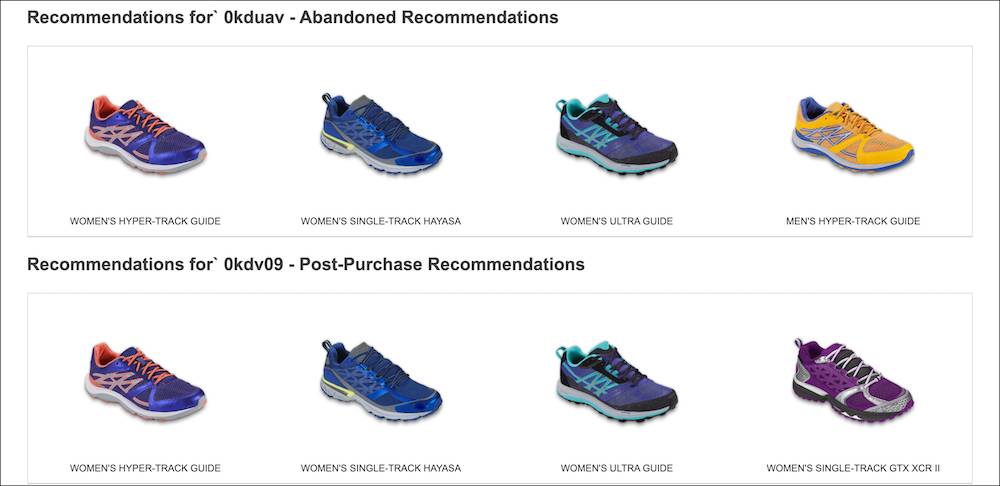
Your catalog attributes also help build a profile of preferences (called affinities) for each of your customers. Over time, a customer’s profile gets smarter as more data is collected, which leads to better recommendations. Here is an example of how a customer’s affinity and recommendations appear under the Reporting tab and Contacts.


Catalog Import
Next, you need to determine how to upload and sync your content moving forward. The two catalog import options are:
-
Daily flat-file upload. The daily flat-file upload is added to an FTP account or publicly accessible web URL and imported into Einstein Recommendations at the same time daily.
-
Streaming updates. This option adds and updates products and content through another snippet of JavaScript.
Once you’ve selected your method of upload, head over to Einstein and then to either Email or Web Recommendations. Hover over Admin and select Implementation from the dropdown menu. Follow the on-screen instructions to set up your import either through upload via streaming updates or through batch upload. Voilà, your catalog is ready to use. But your catalog isn’t the only data Einstein needs, so let’s talk about a tracking code.
Collect Tracking Code
When a visitor lands on your website with the Collect Tracking Code installed, a cookie is dropped with a unique ID and session ID. The cookie tracks the user until it is removed or cleared. Think about how your customers interact with your website. What pages and behaviors would be most helpful for you to track? This data, paired with your catalog, helps build a customer’s profile and affinity—which is why the Collect Tracking Code is so important.
Your company’s collect code can monitor the basics (like browser type, user location, and page URL) and info that might be helpful to you in your marketing efforts (like the category of an article that was read, the brand of a product that was viewed, or if something was left in the cart). Here’s more about these types of data and why you might track them.
Code Types |
What Does It Do? |
Why Track It? |
|---|---|---|
Item Detail Views |
Tracks when users view an item detail page on your website. |
This is the most important data necessary for recommendations as it logs the content a user is interested in enough to view more information about. |
Category Views |
Tracks when users view category and subcategory pages on your website. |
Category views are necessary for optimal category-page recommendations. |
In-site Searches |
Tracks what users are searching for on your website. |
In-site search details are necessary for delivering search-page recommendations. |
Cart Activity |
Tracks when there is an update to an item within a user’s cart. |
This code is sent with all items in the user’s cart, along with the quantity and unit price for each item. It helps build individual profiles and is necessary for any cart-abandonment campaigns. Add this code anywhere there is an action to add to cart. |
Purchase Activity |
Tracks when a product has been purchased from a user’s cart. |
It helps build individual profiles, leads to optimal recommendation quality, and is also necessary for cart-abandonment campaigns. |
There are many options to customize your Collect Tracking Code to fit your needs. And speaking of tracking, now’s the time to track down your web developer and walk through the code options on the implementation page together. You can find this page under Admin and Implementation.

Review the list of activities that you want to track and make sure to add the associated code to your webpage. Meet us back here to wrap up your configuration.
Check for Errors
After your code has been added to your website and your catalog is synced, head to Einstein Recommendations and the Status tab. Here you can find out if your implementation has been successful or if you need to address any errors. Click the link in the Description column to view the error and take steps to fix the issue.

Now that the base configuration is done, you can start the exciting task of creating your customized recommendations. Join us in the next unit to learn more.
Resources
- Salesforce Help: Marketing Cloud Engagement Personalization Builder and Einstein Recommendations Implementation Guide (PDF)
- Salesforce Help: Fix an Implementation Error
- Salesforce Developers: Einstein Recommendations API
- Salesforce Help: Import a Catalog
- Salesforce Help: Einstein Recommendations Catalog Field Definitions
