Configure a Zone and Add Hostnames
Learning Objectives
After completing this unit, you’ll be able to:
- Explain how zone configuration settings are applied.
- Explain why you need to save the verification value.
- List the configuration settings.
- Explain how to configure a new eCDN custom error page.
- Explain the restrictions and parameters of adding a hostname.
Zone Configuration Settings
Now that Linda has created and verified the zone, she’s ready to configure it. Once configured, the settings apply to all hostnames within the zone, regardless of where the hostname was configured (instance or realm). After creating the zone, she finishes by adding the hostnames.
Instead of plunging in, she wants to learn more about the configuration settings, which come in these handy categories.
Crypto–Security and cryptography, such as SSL/TLS and certificates
Verification Value
Save the verification value so you can retrieve it. Not only does it enable communication with the provider after a forced verification, regardless of whether the zones have already been verified; it also enables you to replace the verification record if you happen to delete it.
Security Level
Agentforce Commerce for B2C uses the IP reputation of a visitor to decide whether to present a challenge. The security level setting determines the response. When challenged, a visitor must solve a CAPTCHA before logging in. An internal algorithm calculates the IP reputation.
Here are the security levels.
-
Low: Threat scores greater than 24 are challenged.
-
Medium: Threat scores greater than 14 are challenged.
-
High: Threat scores greater than 0 are challenged.
-
Under Attack: All visitors are challenged with a CAPTCHA before they're allowed to see the storefront. During an attempted DDoS attack, use this mode only as a last resort to stop the attack.
Firewall–The trusted IP list
Trusted IP List
A trusted IP list is a set of IP addresses that the eCDN never blocks. This is helpful when you have an external CDN deployed in front of the eCDN. Adding the IP addresses of your external CDN to the trusted IP list prevents misinterpreting numerous requests from small sets of IP addresses as a denial of service (DoS) attack.
Scope
Scope is how the eCDN applies the trusted IP list.
-
Global: Applied to all zones in the organization.
-
Zone: Applied only to the current zone.
Speed–The speed of your ecommerce site, such as minification and polish (reducing the size of images)
Minification
Minification controls whether the eCDN removes unnecessary characters (for example, extra space or comments) from selected response types. Removing these characters can reduce the amount of transferred data and improve page load time. Linda considers the following.
- Minification works only on eCDN responses. Third-party scripts and code are not minified.
- For cached responses, the cache must expire before settings are reflected. The eCDN does not separately cache minified responses.
- Code is minified only if it is W3C compliant.
- We recommend that you test your site with minification enabled before you enable it for zones with production traffic.
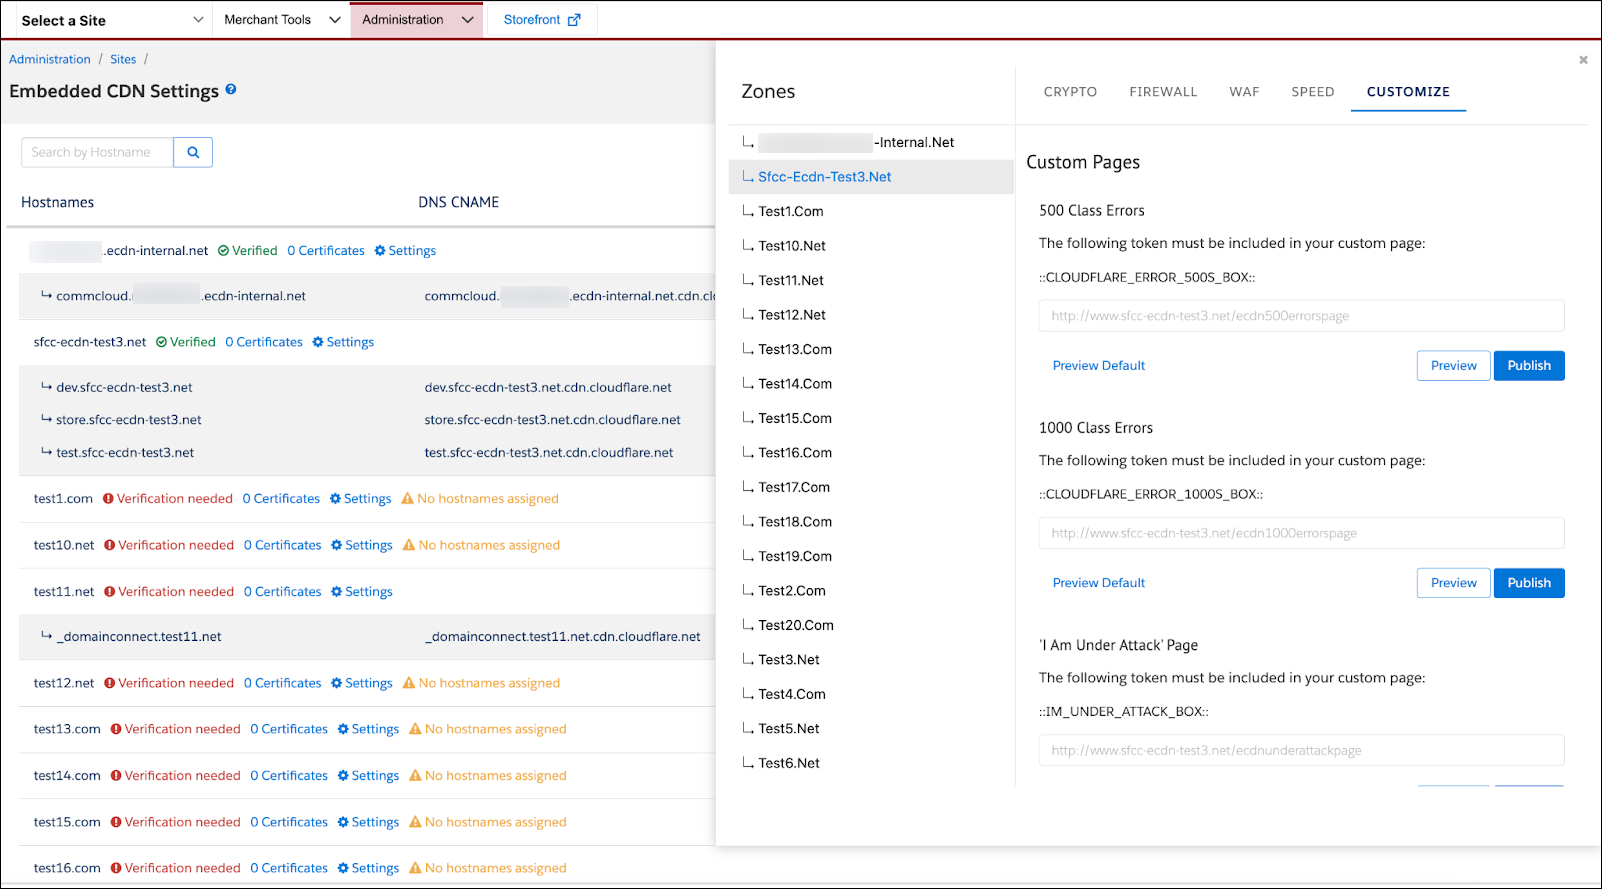
Customize–The creation of custom HTML pages used for errors from the embedded CDN
Polish
The polish setting deals with reducing image files sizes so they display faster. The polish level applies to all images served from hostnames within the zone. You can’t use different polish levels for different images or a device type-specific polish level. We recommend that you test a new polish level with a zone without production traffic before you enable it for a zone with production traffic. Here are the levels.
-
Off: No image modification.
-
Basic: Image file size is reduced without impacting visual quality. Metadata for PNG, GIF, and JPEG files is removed. It also results in lossless compression of PNG and GIF files.
-
Basic+JPEG: This includes basic level plus the file size of JPEG images is reduced using lossy compression, which can reduce visual quality. Large JPEG images are converted to progressive images (shoppers see an increasingly detailed image as the file is downloaded). This is only for images served through the eCDN on Agentforce Commerce for B2C using the Dynamic Imaging Service (DIS). Agentforce Commerce for B2C does not modify images retrieved from third-party sites.
Configure a Zone
Here’s how to configure a zone.
- In Business Manager, click App Launcher, and then select Administration | Sites | Embedded CDN Settings | Add Hostname | Configure Zone.
- If there’s no embedded CDN enabled for your instance, you’ll see this message: The embedded CDN has not been enabled.
- A slider opens from the right side of the page. The slider contains an entry for each zone listed on the page.
- Select a zone.
- In the slider, click Crypto.
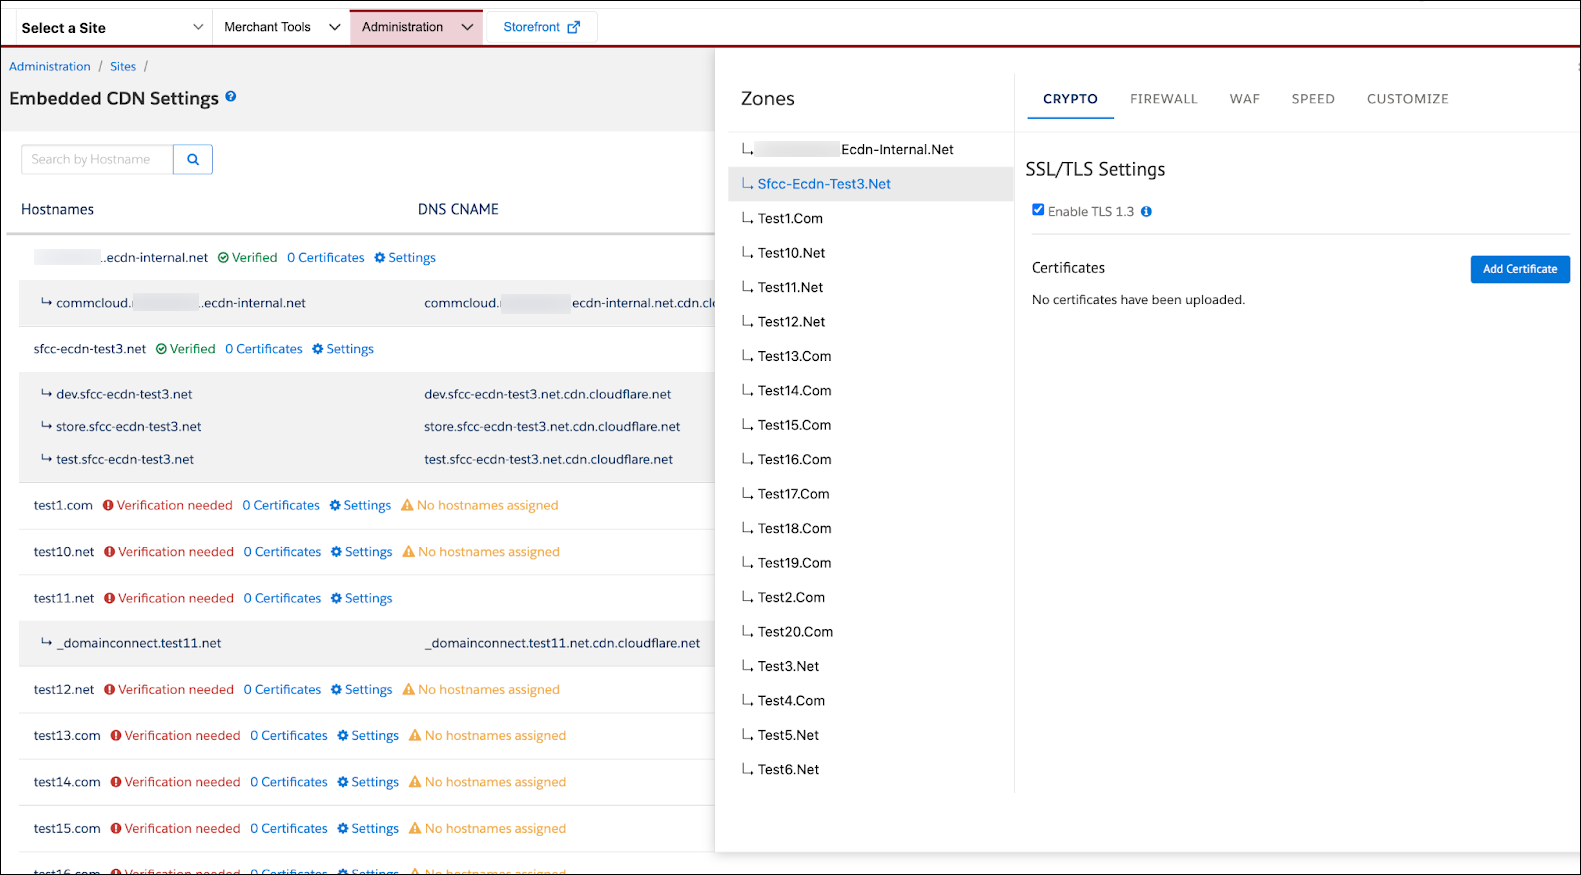
- Add a certificate to a zone or add a certificate to a proxy zone.
- Set an optional transport layer security (TLS) level to enable the TLS 1.3 protocol. If the requesting browser does not support TLS 1.3, it typically falls back to using the TLS 1.2 protocol.
- Configure HSTS (optional). This option appears only after you enable the HSTS feature switch.
- In the slider, click Firewall.
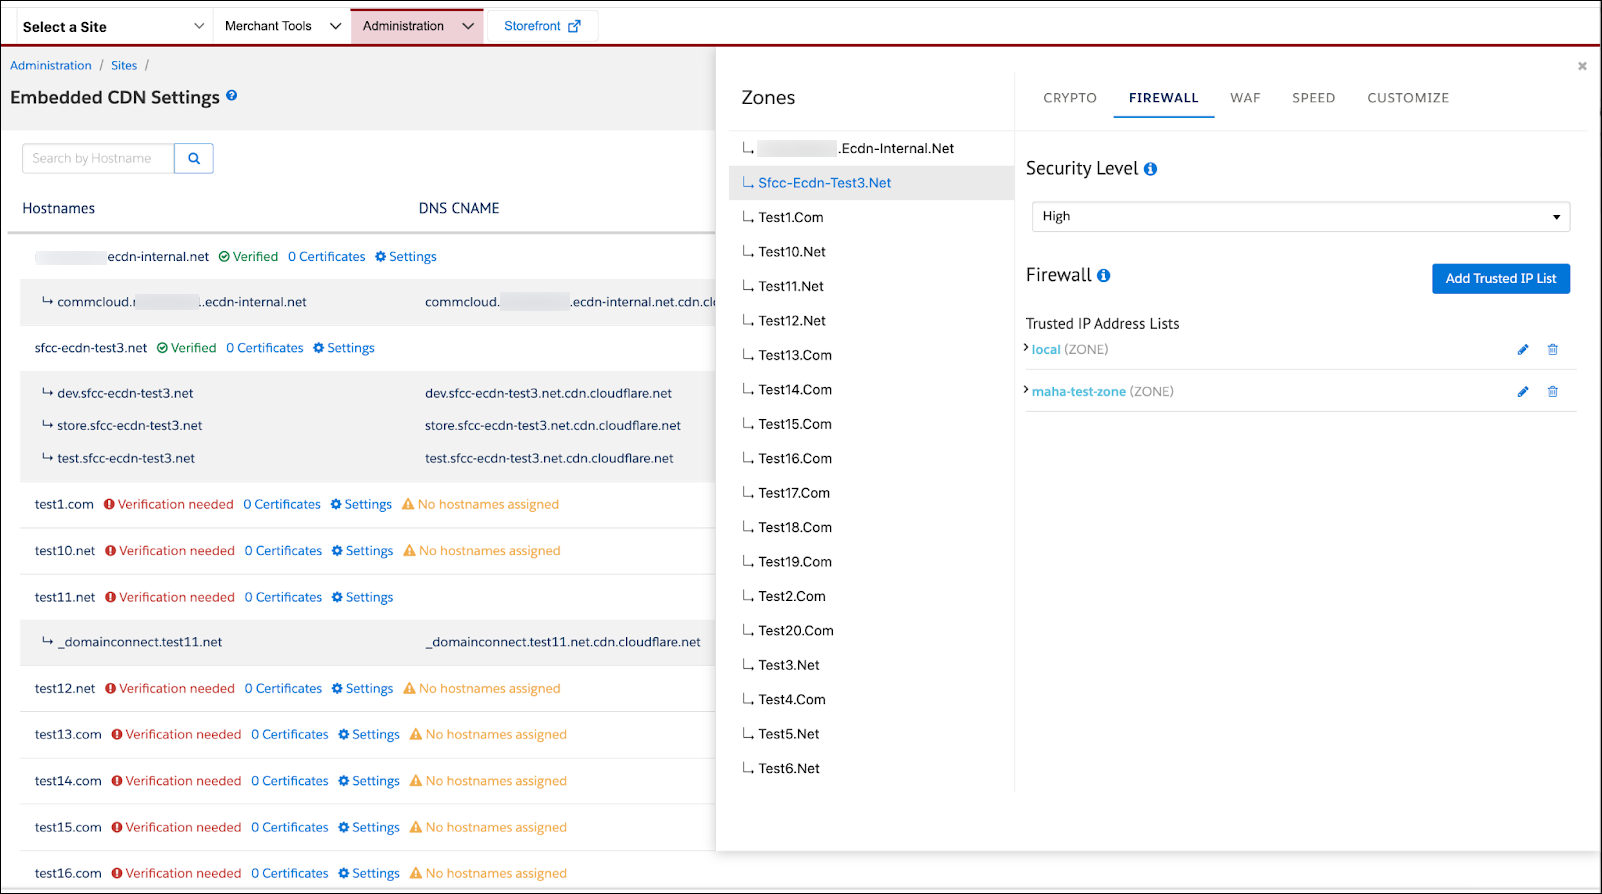
- Specify a security level: High
- In the Firewall section, click Add Group (optional) and define a trusted IP list group.
- Select a value in the Scope field: Zone
- In the Group Name field, enter a name for the trusted IP listing.
- In the Records field, enter one or more IP address records.
Specify one record per line. A record is a single IPv4 address or a range of IPv4 addresses in classless inter-domain routing (CIDR) format. If you use this format, the embedded CDN accepts only /16 and /24 subnets.
- Click Validate to validate and save your trusted IP list group.
- In the slider, click WAF (optional). See the Salesforce B2C Commerce Storefront Security Strategies Trailhead module for eCDN WAF settings.
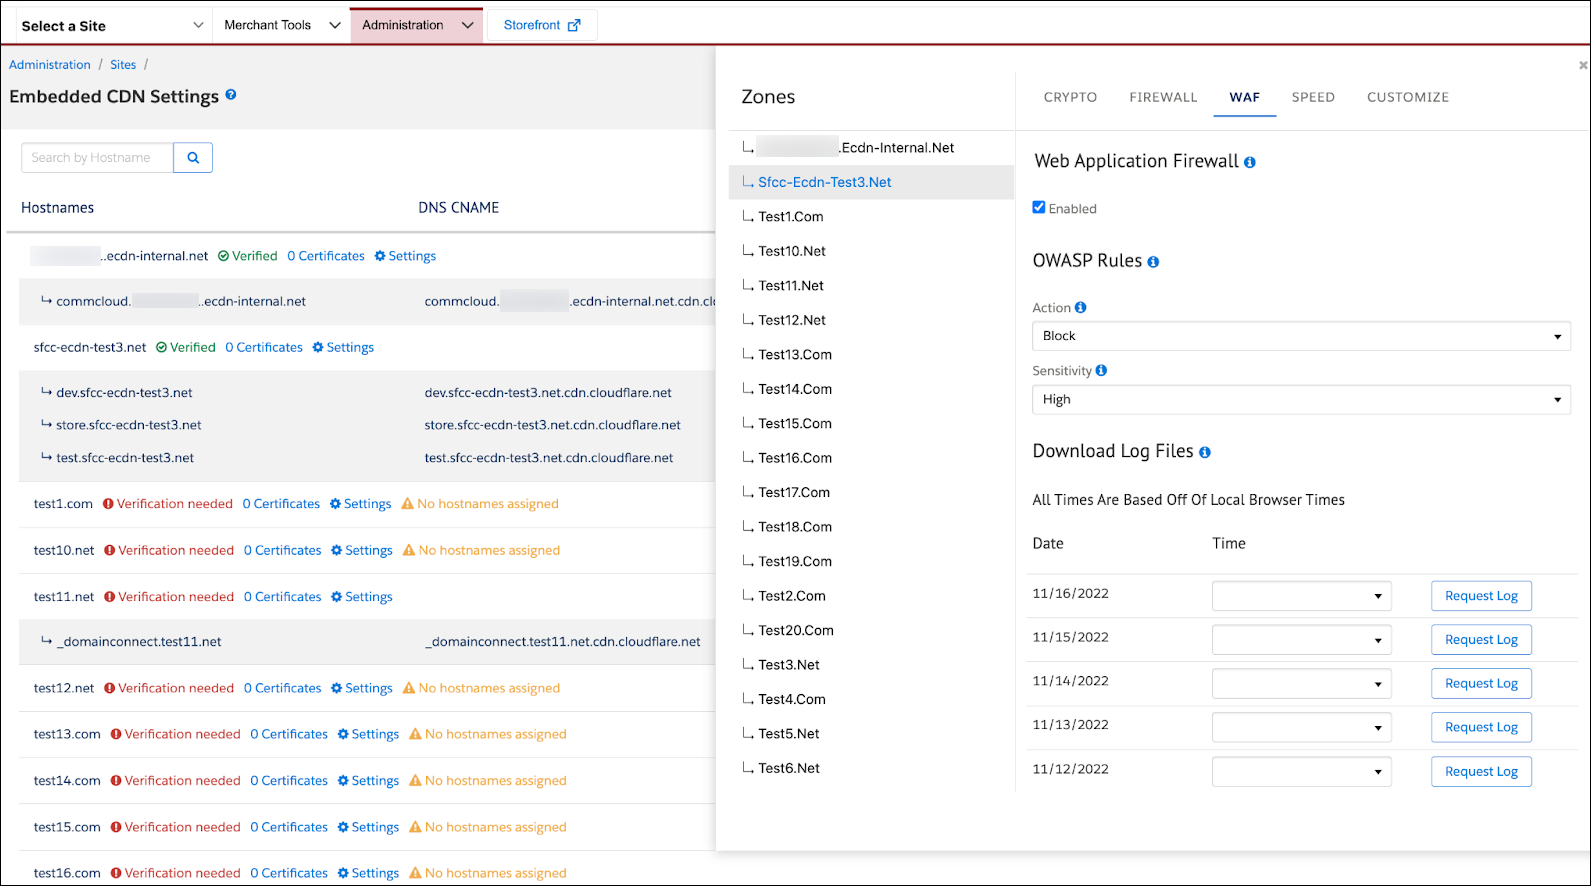
- Specify the action: Block
- Specify the sensitivity: High
- Specify when you want to download log files.
- In the slider, click Speed (optional).
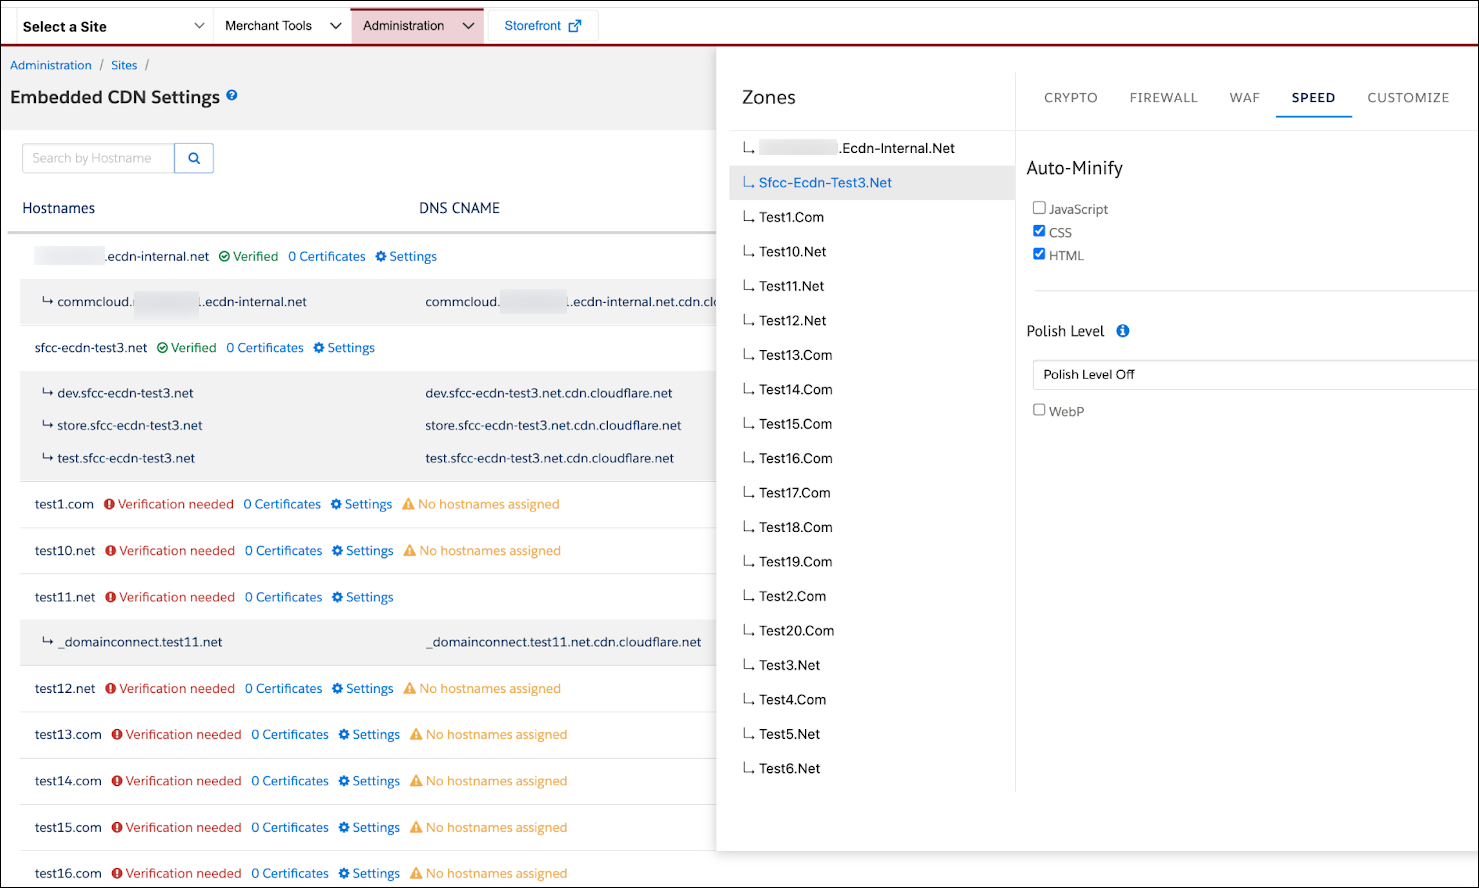
- In the Polish Level section, select Basic.
- Select WebP to enable WebP image support.
The eCDN supports the WebP image format, which can be used with supported clients for added performance benefits.
- In the slider, click Customize and enter the URL for an HTML page you want shown when the embedded CDN generates certain errors.
-
500 class error: Embed the 500 error class token, for example,
<p>::CLOUDFLARE_ERROR_500S_BOX::</p>.
-
1000 class error: Embed the 1000 error class token, for example,
<p>::CLOUDFLARE_ERROR_1000S_BOX::</p>.
- Click Preview to see what an error page looks like on the storefront.
- Click Publish to tell eCDN that this page is ready to be used for all subdomains in the zone. Repeat this step when the template changes.
When you’re configuring a new eCDN custom error page, you can use the instance to make the page template available under a publicly accessible URL. During the publishing step, the eCDN downloads the error page template and stores it in the infrastructure.
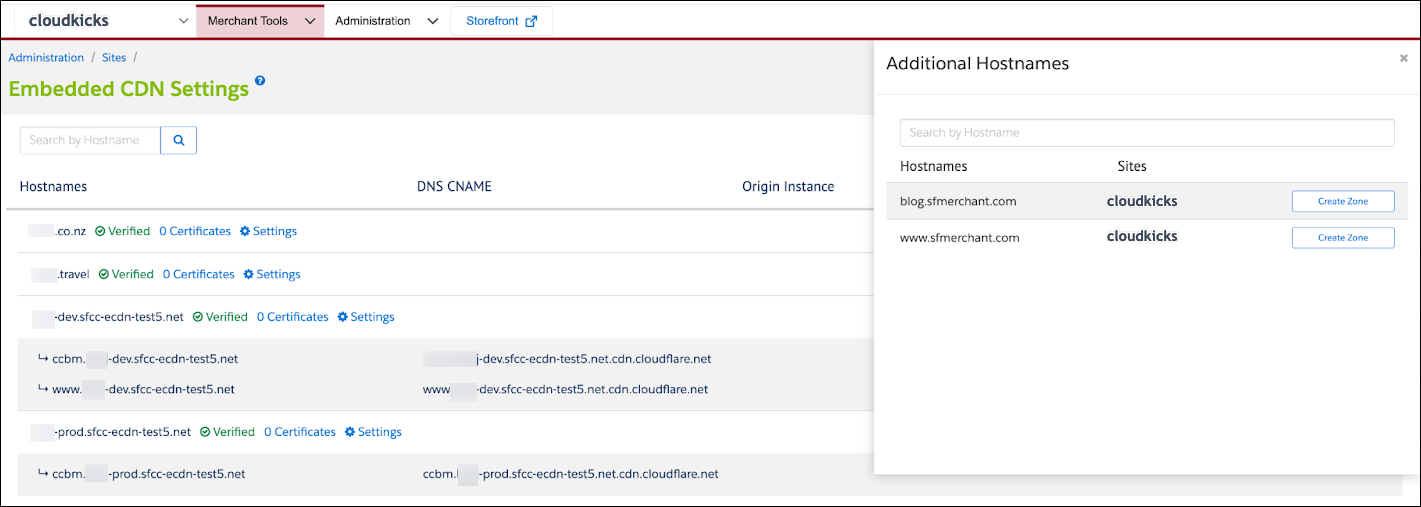
Add Hostnames
Adding a hostname means adding a subdomain. Linda can configure subdomains of the same zone on the same Agentforce Commerce for B2C instance, or on different instances of different realms. For example, she can configure www.cloudkicks.com on the production instance, test.cloudkicks.com on the development instance, and eu.cloudkicks.com on the production instance of the EU realm.
Certain restrictions protect the shopper’s experience on the production instance. Admin users on a non-production instance can’t modify:
- Subdomains configured on other instances.
- Certificates on a zone with at least one production instance as origin.
You can, however, add hostnames to existing zones with production instance origins. Production instance admin users can modify all the eCDN settings, even if another production instance of the same merchant is impacted.
Here's how to add hostnames.
- In Business Manager, click App Launcher, and then select Administration | Sites | Embedded CDN Settings | Add Hostnames.
The slider that opens shows the names of zones and hostnames (subdomains) that you can add.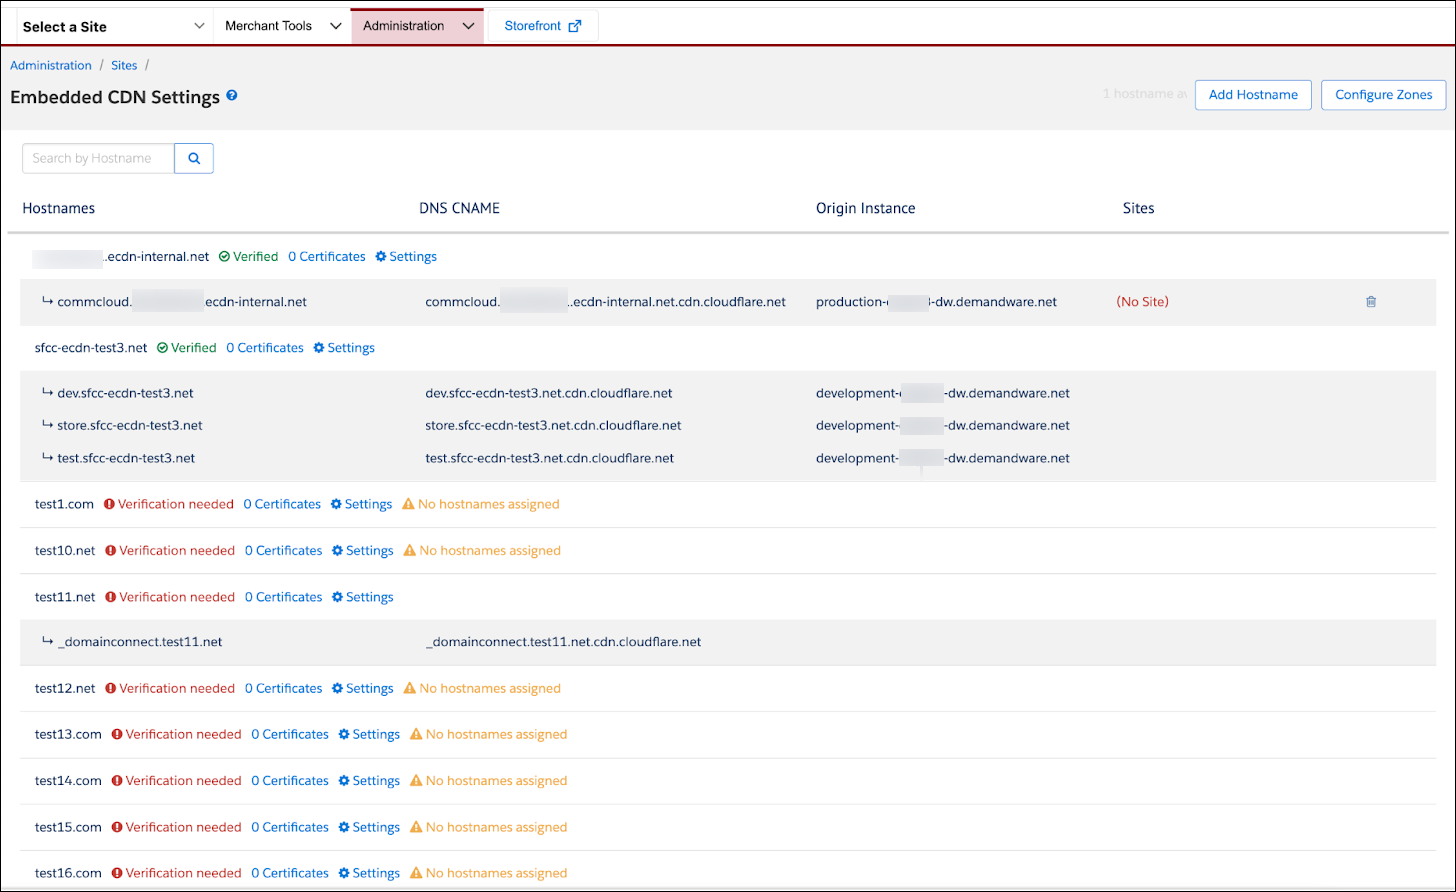
- Select a hostname and click Add Hostname.
Business Manager adds the hostname as a child of its zone.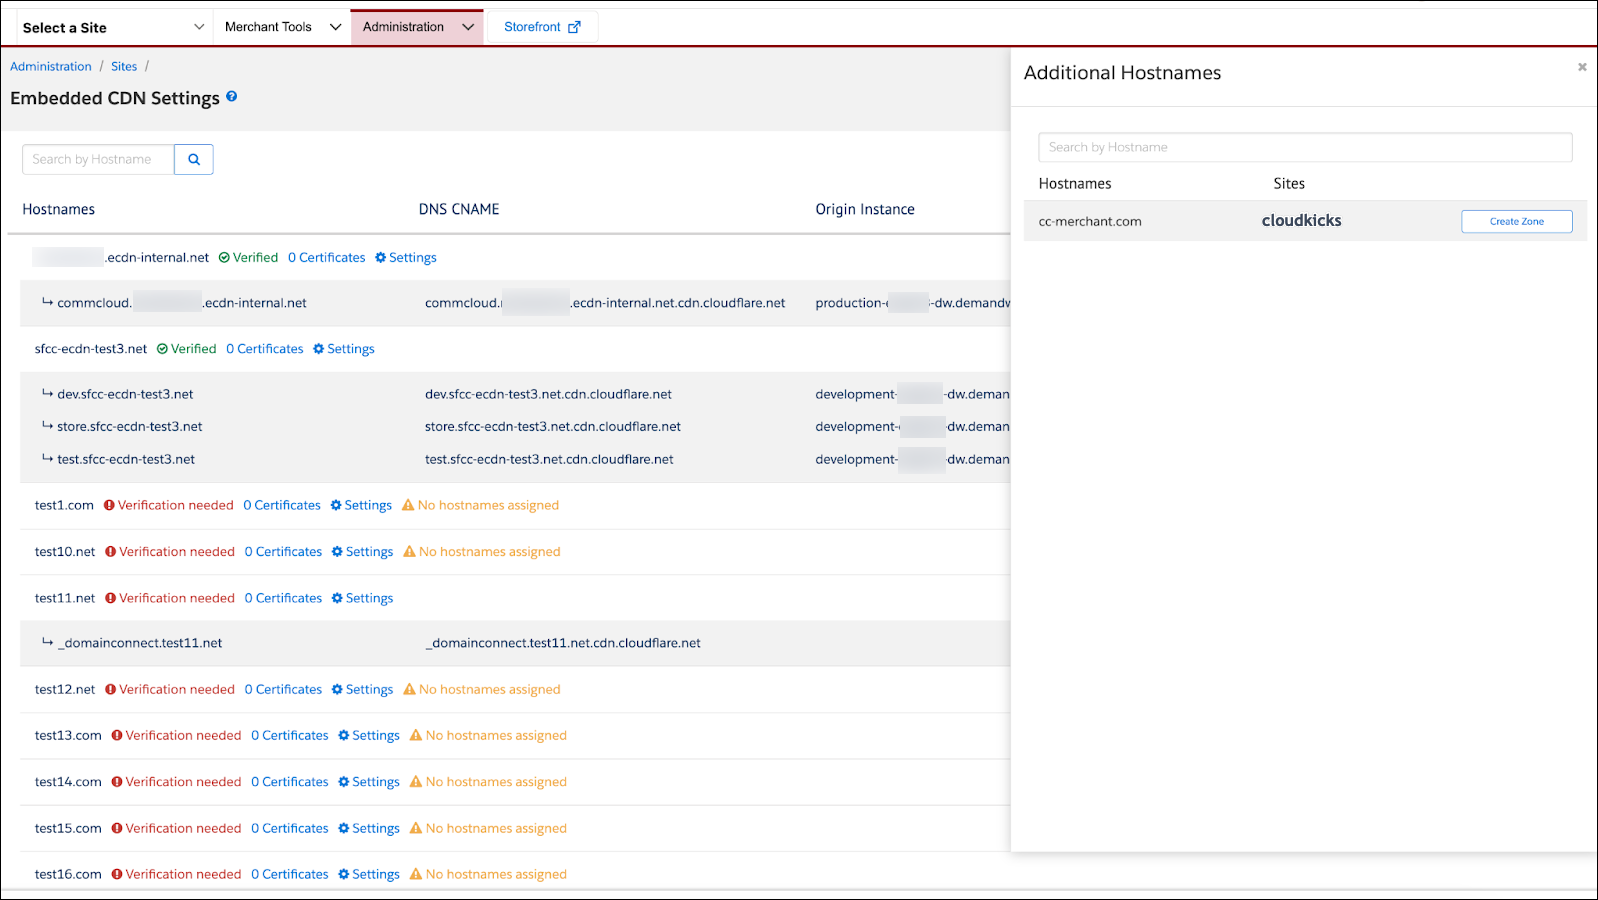
- Test inbound communication through the embedded CDN by resolving your custom hostname to the IP address of the embedded CDN locally (modify/etc/hosts).
The CDN domain name resolves to different IP addresses over time. Don’t use a fixed IP address except unless testing.
- In your domain name system (DNS) server configuration, point the DNS record of your hostname to the embedded CDN.
- Create a CNAME record. The value of the record appears in Business Manager.
Next Steps
In this unit, you learned how to configure a zone with all its configuration details, and how to add a hostname. Next, learn how to clear eCDN cache and configure HSTS.
Resources
- Trailhead: Salesforce B2C Commerce Storefront Security Strategies
- Salesforce Help: Dynamic Imaging Service
- Salesforce Help: eCDN Web Application Firewall
- Salesforce Help: Hostname Aliases
- Trailhead: Salesforce B2C Commerce Hostname Aliases
- External Link: Wikipedia: CNAME Record