Design and Deploy Forms with Discovery Framework
Learning Objectives
After completing this unit, you’ll be able to:
- Create form questions.
- Build a form.
- Create and preview the form layout.
- Activate and deploy the form.
Create Questions
Matt has good news for Ryan. Discovery Framework is set up and ready to use. Ryan is excited to see how Matt creates an account-opening form. Follow along as he explores these capabilities of Discovery Framework.
Questions are the building blocks of forms. Matt starts by creating the questions for the form.
- From the App Launcher, enter Assessment Questions, and then select Assessment Questions.
- Change the list view to All Assessment Questions.
- Click New.
- In the New Assessment Question window, specify these details.

- Name: Mailing Address
- Data Type: Text
- Category: Demographic
- Question Text: Mailing Address
- Select Active.
Note: If you select Active, it makes the question active and archives the previous version of the same question.
- Help Text: Enter explanatory text. The text appears in an info bubble next to the question on the form to help users give an answer.
- Click Save and New.
- Repeat these steps to add the following questions.
Name |
Data Type |
|---|---|
First Name |
Text
|
Last Name |
Text
|
Primary Email |
|
Primary Phone |
Telephone
|
Employment Type |
Text
|
Source of Funds |
Text
|
Thank You message |
Text block
|
For information on supported data types, see the links in the Resources section.
Create a Form
Next, Matt creates the form. Omnistudio gives him an intuitive interface to use branching, rendering, and forking logic.
- From the App Launcher, enter Assessment Questions, and then select Assessment Questions.
- Change the list view to All Assessment Questions.
- Click Select Questions.
- Enter the Omniscript details to give high-level information about your Omniscript. The Type, SubType, and Language values combine to create a unique identifier that becomes the name of a compiled Omniscript's Lightning web component. Specify these values.
- Name:
Account Opening Form
- Type:
FSCSample
- Language: English
- SubType:
AccountOpeningSample
- Name:
- Create the steps, which correspond to the form questions. You can group multiple questions in a single step and create multiple steps in a form.
- To create a step, click Add Step.
- To change the step title, click the edit icon on the step header, enter the step name, and then press Enter. For example, enter Personal Information as the step name.
- Search for questions from the Search Assessment Questions search box.

- Drag each question on to the Omniscript.
- Click Build Omniscript to generate the Omniscript.
Next, use Omniscript Designer to build the layout of the form. To open an existing Omniscript in Omniscript Designer, from the App Launcher, search for and open Omniscripts. Then, click the required Omniscript.
Build the Form Layout
Matt builds the layout of his form by dragging elements into position using the Omniscript Designer. While setting up the form layout, Matt can:
- Preview elements inside steps.
- View property changes in real time.
- Access contextual guidance with in-app help.
- Discover and learn about features without moving away from the script.
To build the form layout:
- From the App Launcher, search for Omniscripts, and then select Omniscripts.
- Change the list view to All Omniscripts.
- Select the Account Opening Omniscript.
The questions that you created are populated in the Omniscript. Now you need to arrange the questions to make the form readable.
- To preview and configure elements, on the canvas, expand the steps.
- Drag the required action, display, function, group, and input elements to build the form layout. You can also embed an existing Omniscript in the form.

- Enhance the form by dragging the required elements from the palette onto the form. In this case, drag a step to add a response message.
- In the Properties tab, enter Confirmation in the Name field.

- Click Edit Form.

- From the Edit Form window, in the Search Assessment Questions search box, search for thank you.
- Drag and drop the response message to the Confirmation step, and click OK.
Preview the Form
Matt is now excited to preview his Omniscript in real time with real data in Omniscript Designer.
- On the designer header, click Preview.
- Click Refresh to preview the form with test data.

Activate and Deploy the Form
Matt is satisfied with the preview and proceeds with activating and deploying the Omniscript.
On the designer header, click Activate Version.
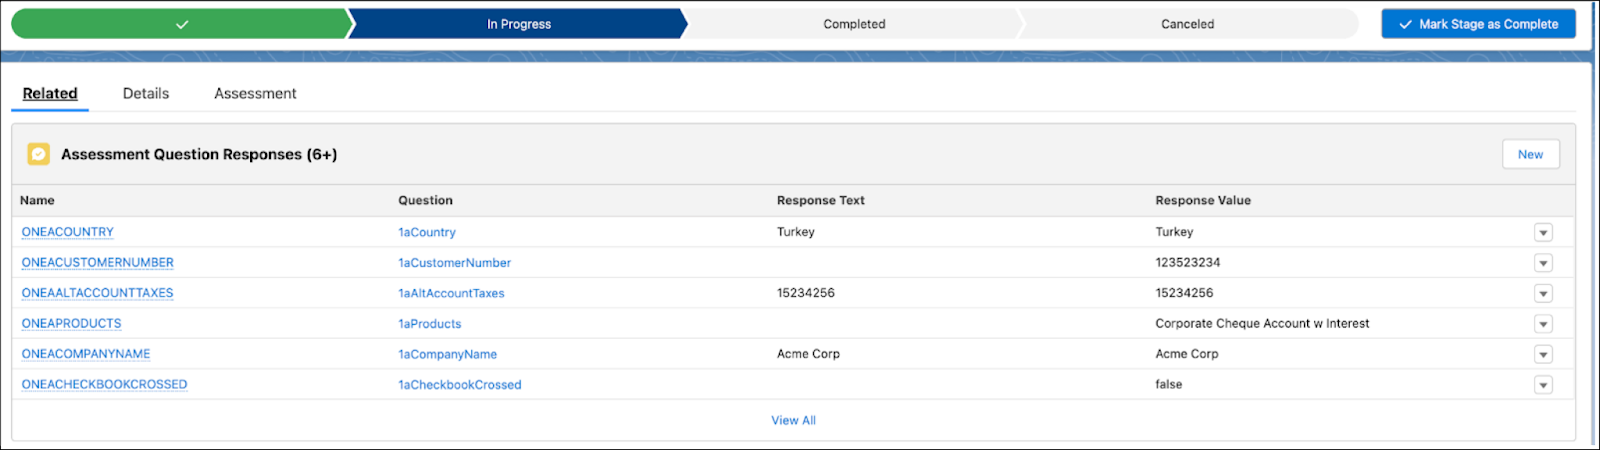
Activating the Omniscript generates a Lightning Web component that you can then publish on either a Lightning page or Experience Cloud site. The responses to an assessment, depending on the data type, are stored in an appropriate data type column on the Assessment Question Response object.
On the assessment record page, click the Related tab and view the responses in the Assessment Question Response related list.
Matt is surprised that he could rebuild the complex account-opening form with questions from a single source of truth. When he starts to review the collected form data, he’s thrilled to see all the prompt and accurate responses from customers. He’s now ready to take on the next Cumulus Bank questionnaire to make it compliant and user friendly.
Resources
- Salesforce Help: Discovery Framework Assessment Questions
- Salesforce Help: Supported Data Types for Assessment Questions